This post about the Bernzomatic torch kit is sponsored by The Home Depot. Look around your house and get a gander at the door hinges. If you live in an older home there’s a good chance you have some painted hinges. While it’s a minor detail, it’s basically the equivalent of painting your jewelry to match your skin and that just can’t be right. So let’s tackle those unsightly hinges (and lots of other projects) and remove the paint using a Bernzomatic torch kit.

A tool review of the Bernzomatic premium torch kit. Using the torch kit to remove paint from hinges plus its various other uses around the home.
I get it, people paint the hinges because it’s easier than masking off the hardware. But good golly look at that crusty paint covered hinge on the closet door below! Yikes!

Never fear we are going to remove that paint quickly and easily and you will have beautiful hardware once again. Of course you could run out and purchase new hinges to replace the painted hinges but there’s a bit of risk involved:
- Will the store have the same size hinge as your original hinge?
- Does the thickness of the new hinge match the old?
- Will the screw holes be in the same spot?
- Will you have to chisel out the door or jamb to make the new hinge fit?
There’s so many things that could be potential hiccups in replacing the hardware. So the better option is to remove the paint from the original hardware. It will probably take less time, less headache and you know for certain it will fit and the door will operate smoothly. You know what they say, “If it ain’t broke don’t fix it.” We’re just making it pretty again.

Step 1: Remove the hinges from the door.

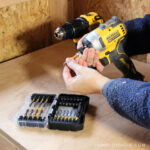
For this project I am using the Bernzomatic premium torch kit. The kit package includes the TS8000 torch head and one 14.1 oz. MAP-Pro full cylinder. It’s basically plug and go and you are ready to burn. The torch head is compatible with most MAP-Pro and propane fuels.
Bernzomatic Premium Torch Kit:
- (1) TS8000 torch head
- (1) 14.1 oz. MAP-pro full cylinder

Be sure to prepare yourself and your workspace before lighting the torch. I used a piece of bluestone and ceramic tiles to protect my wood workbench. Also you want to work in a well ventilated space and consider lung protection from the melted paint fumes.
Step 2: Prepare the work surface with a stone or tile to protect your workbench. Remove the black cap on the cylinder and screw the torch head onto the cylinder.

Step 3: Rotate the yellow locking knob towards the unlock symbol. This torch is fitted with an instant on /off ignition operated by the yellow button. Simply depress the yellow knob and light the torch.

Step 4: Apply the flame to the painted surface on the hinge. Immediately you will see the paint bubble and scorch.
Also you will notice the flame is running without me touching or holding down the ignitor knob. The Bernzomatic torch kit is fitted with a continuous flame lock button for user convenience.

The flame is fully adjustable for precision work and control. Also the torch head has an internal pressure regulator which allows for inverted use.
Applications:
- brazing
- metalworking
- soldering
- woodworking
- cooking
- paint removal

Step 5: Once the paint is bubbly and loose use a paint scraper to remove the loose paint chips. It should slide right off and flake away.

Repeat Step 4 as you work to remove all the paint from the hinge and screw heads.

Step 6: To complete the process use steel wool and rub aggressively to remove the tarnish and remaining paint bits.

This project was made possible with the Bernzomatic premium torch kit. I’ll be working my way around my home removing paint from all the painted hinges. It’s just one of those little chores that shows how much you care for your home. Hardware and hinges are the jewelry of a home and as such we should take care to let them shine.
The Bernzomatic torch kit is available at The Home Depot here.

* I acknowledge that The Home Depot is partnering with me to participate in the promotional program THD Prospective. As a part of this program I am receiving compensation in the form of products and services for the purpose of promoting The Home Depot. All expressed opinions and experiences are my own words. My post complies with the Word Of Mouth Marketing Association (WOMMA) Ethics Code and applicable Trade Commission guidelines.


Love your blog. Your my kind of girl. I recently used a high powered heat gun to strip paint off of some antique trim pieces which I repurposed into shelves for my dining room. . I have two, one on each side of china. The first one I used stripper which took two days to remove all the layers of paint, one at a time. The second I remembered that I had bought a heat gun at a yard sale still in it’s box for $5. The best $5 I ever spent. Took a couple hours instead of couple days. A similar product. I also have a torch. May try that next time. Thanks.
Thanks Vicky, nice to hear from fellow DIY lovers. Thank you for sharing about the heat gun, that is definitely a good option. Good luck with all your projects!