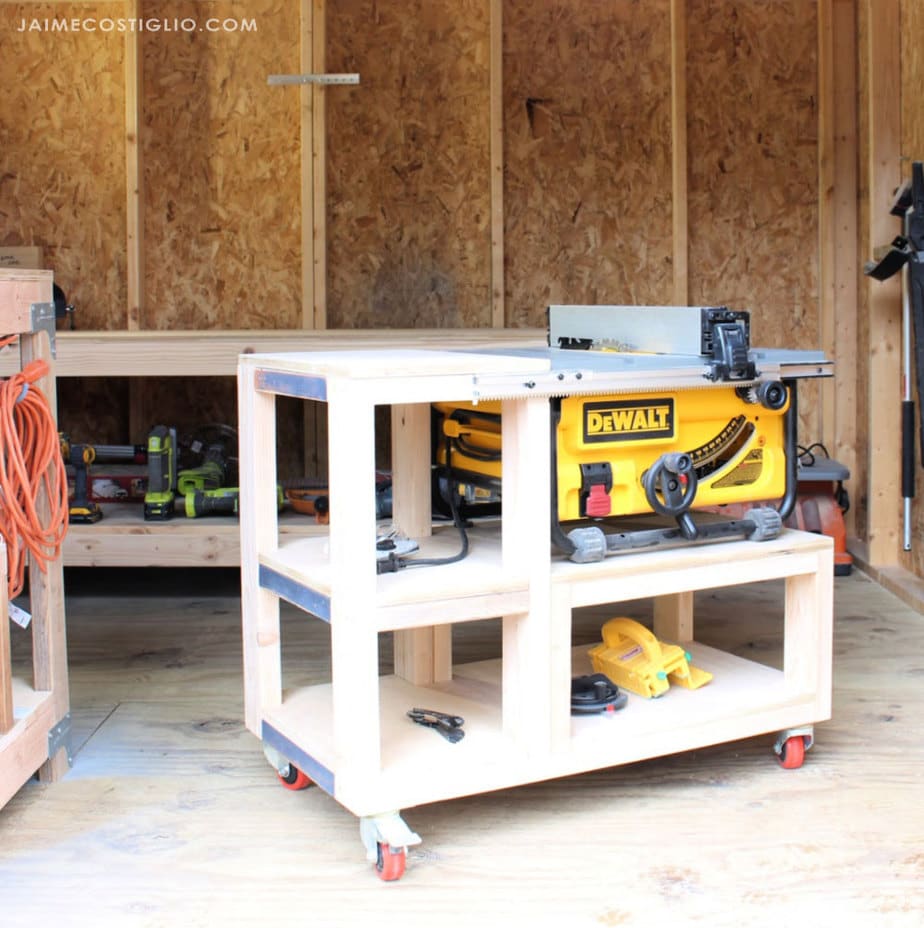
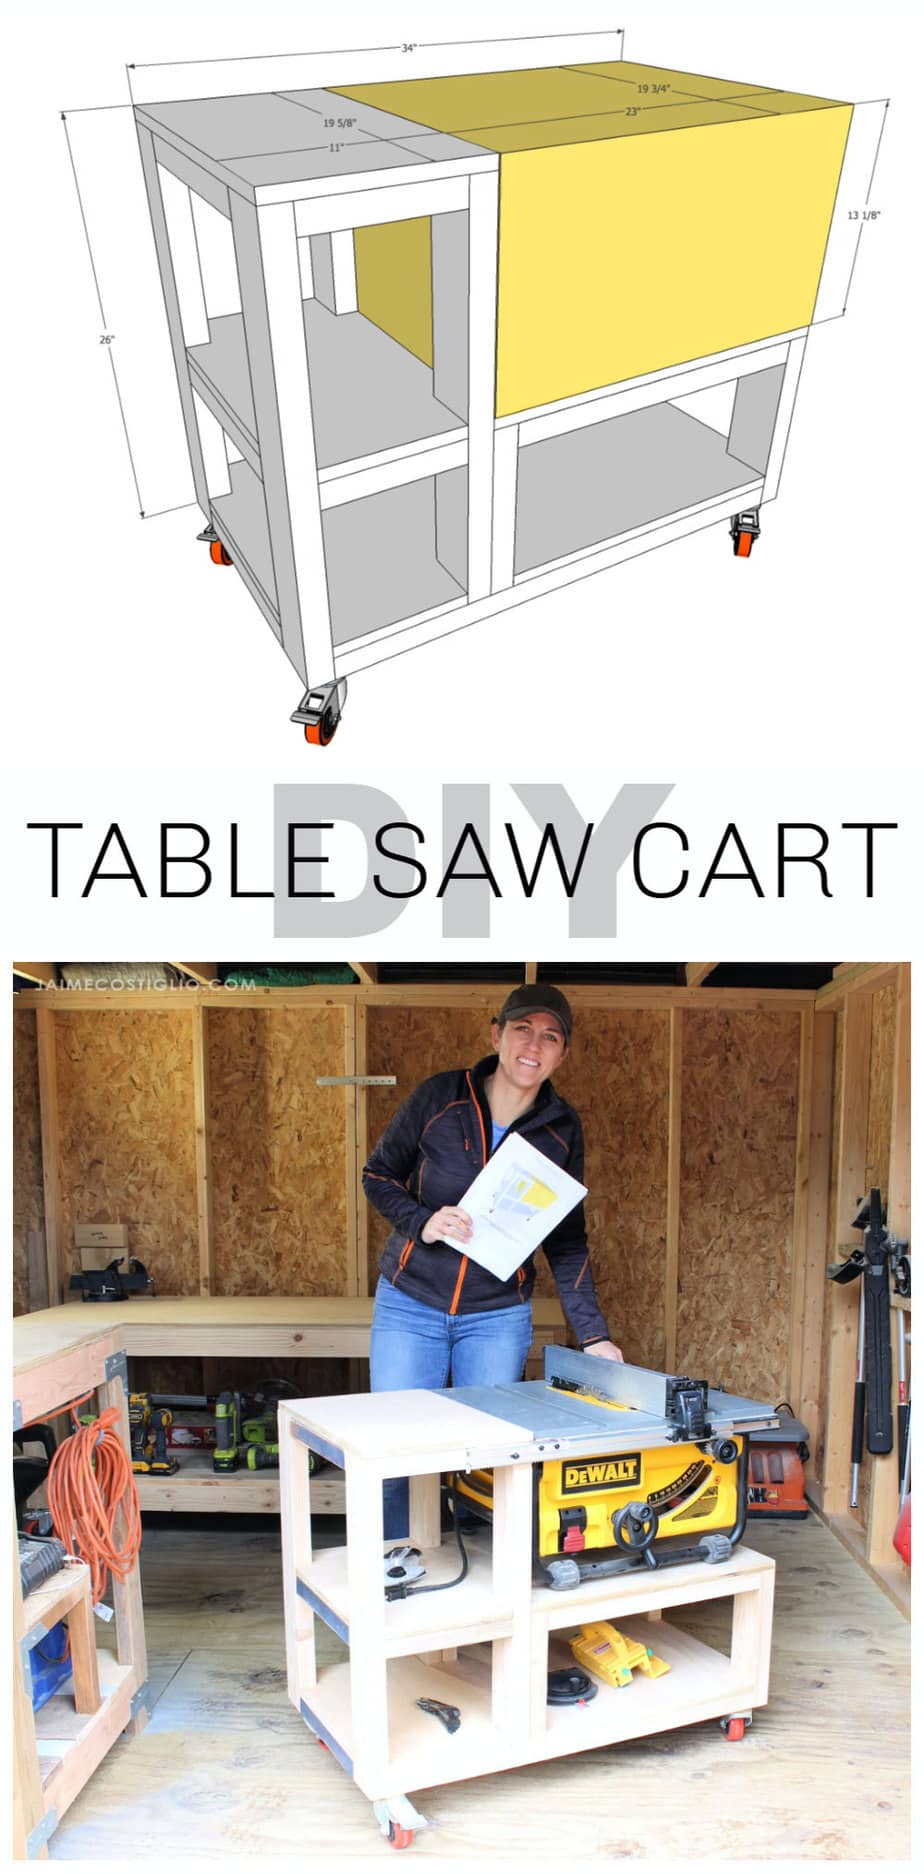
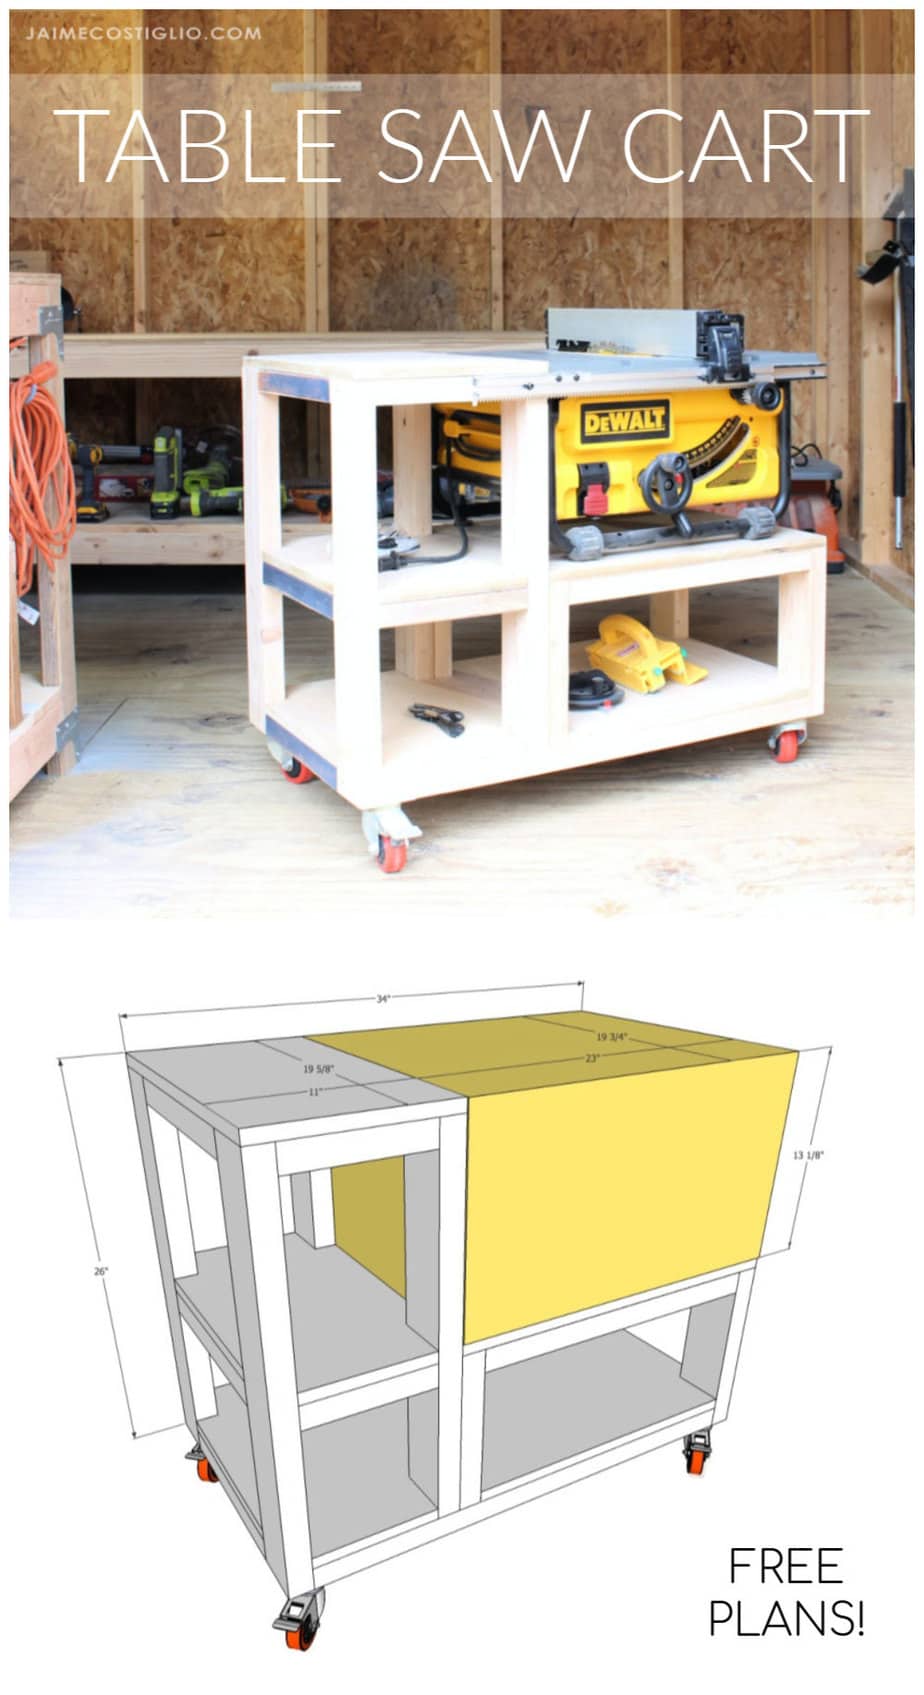
Still working on my shed shop space and finding a functional home for all the tools. Today I’m sharing this very simple table saw cart I built for my compact table saw.
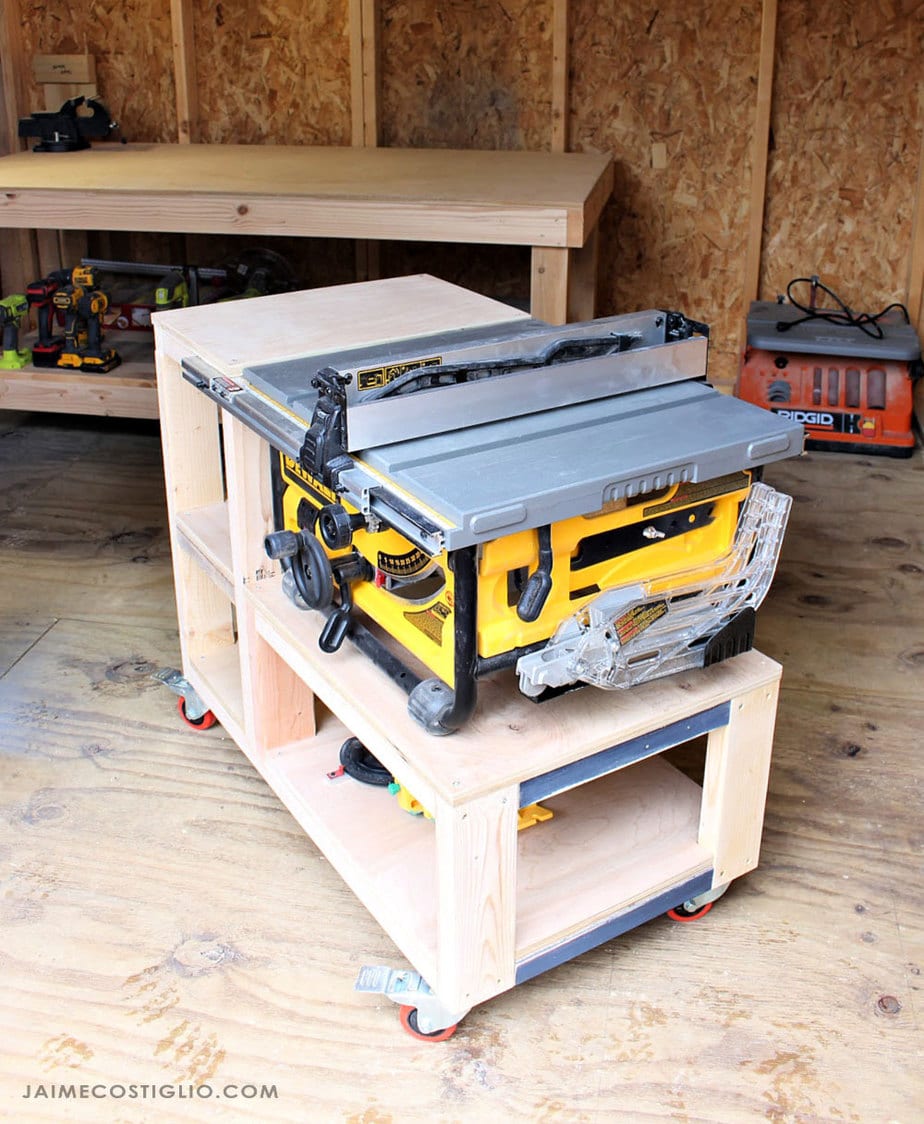
A DIY tutorial to build a table saw cart. Make a mobile home for a 10″ compact table saw complete with two storage shelves and additional work surface.
If you’ve ever used a table saw on the floor then you know exactly how amazing it feels to finally have proper cart. It’s life changing and so much easier on my knees! Depending on your workspace situation you may be able to accommodate a larger station but for my little shed shop this cart works great.
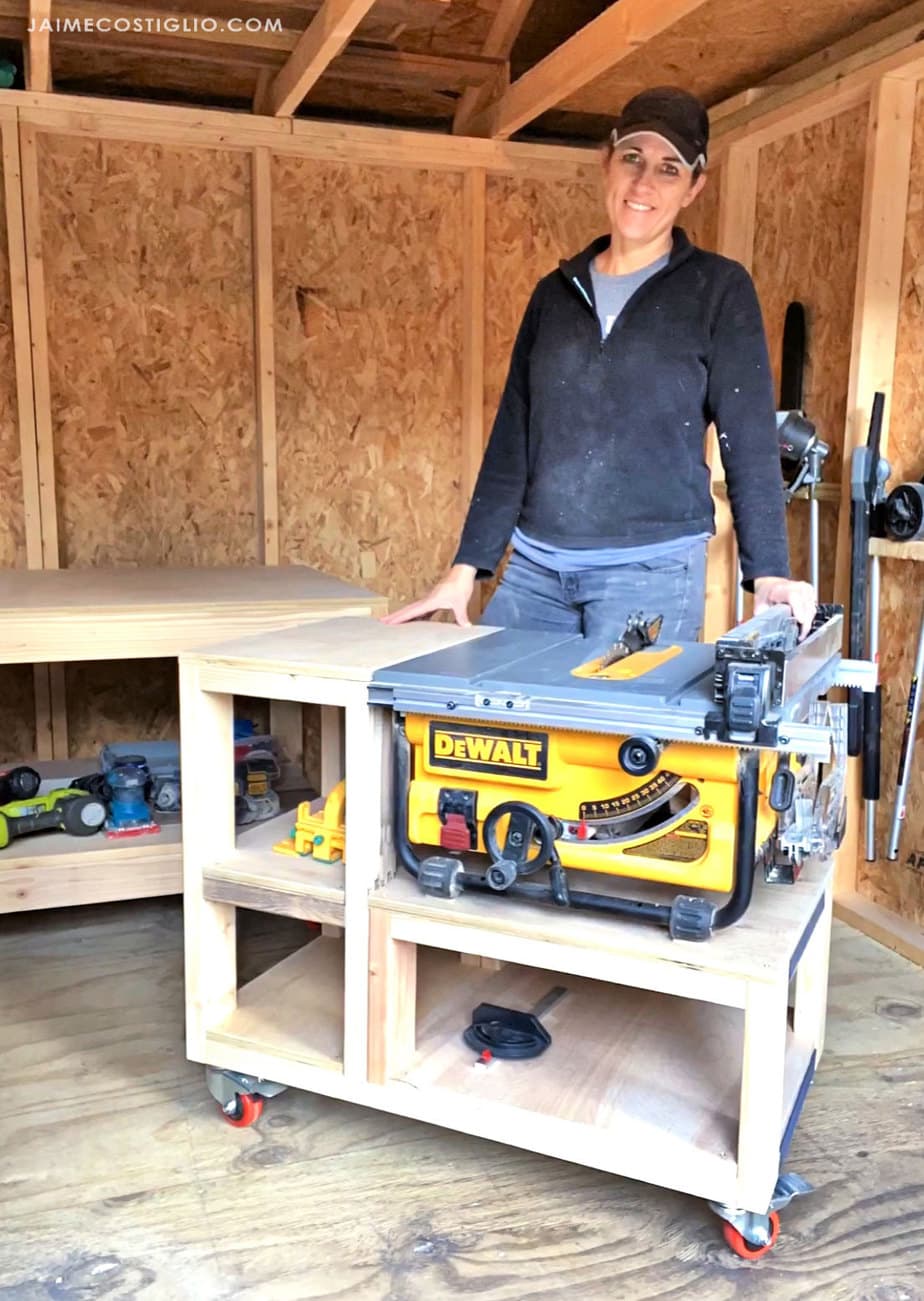
Table Saw Cart:
- mobile with locking wheels
- storage space for accessories
- additional counter surface
- height matches my workbench when cutting large / long pieces
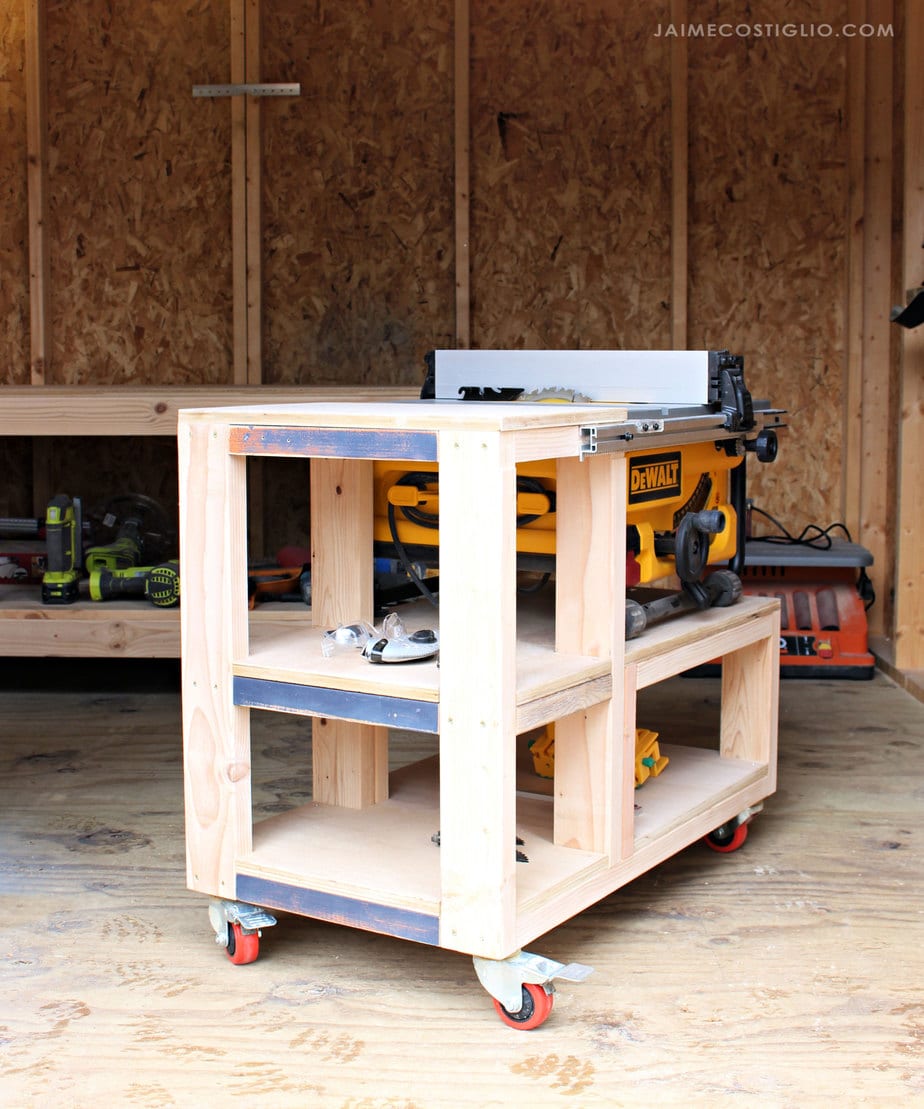
I built this table saw cart specifically for the Dewalt 10″ compact table saw but you could easily modify to fit your table saw.
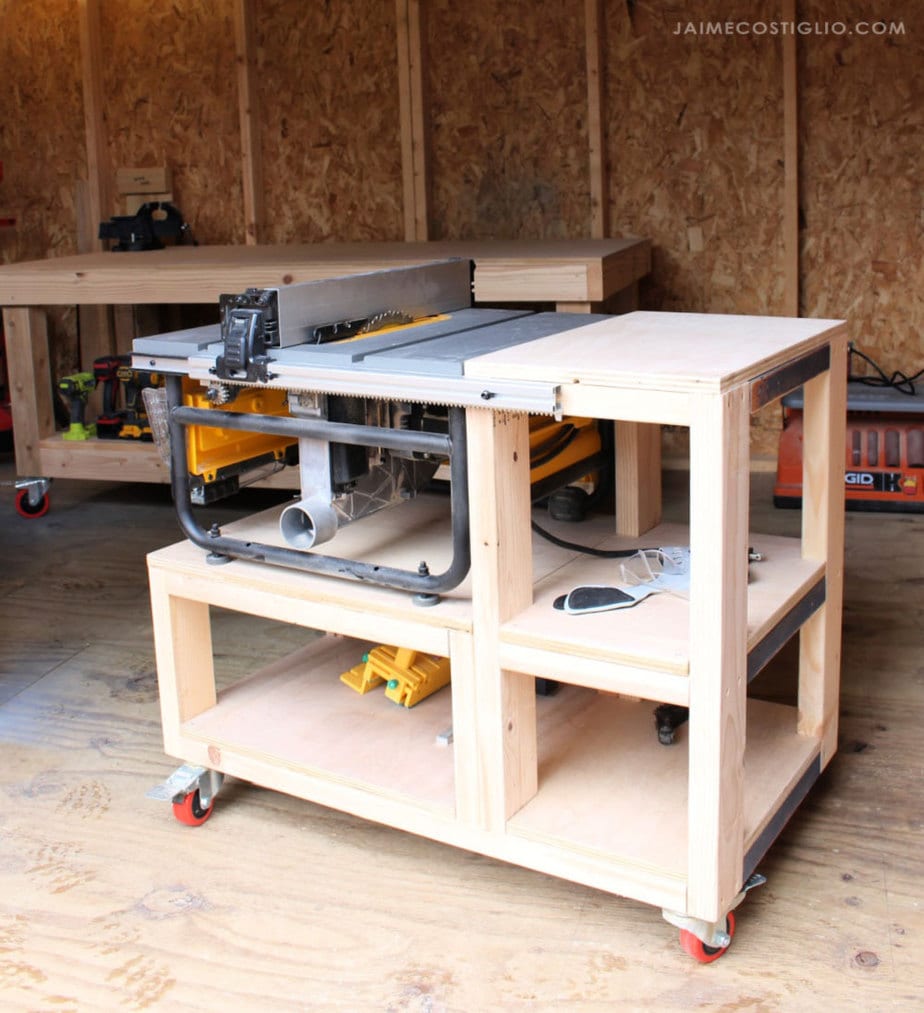
Click here for a free printable version of the table saw cart plans.
Supplies:
- 3 – 2x4x8
- 2 – 2x2x8
- 1 – full sheet ¾” plywood
- wood glue
- 2 ½” pocket hole screws
- 3″ spax wood screws
- 1 ¼” spax wood screws
- 4 – 4” locking wheels
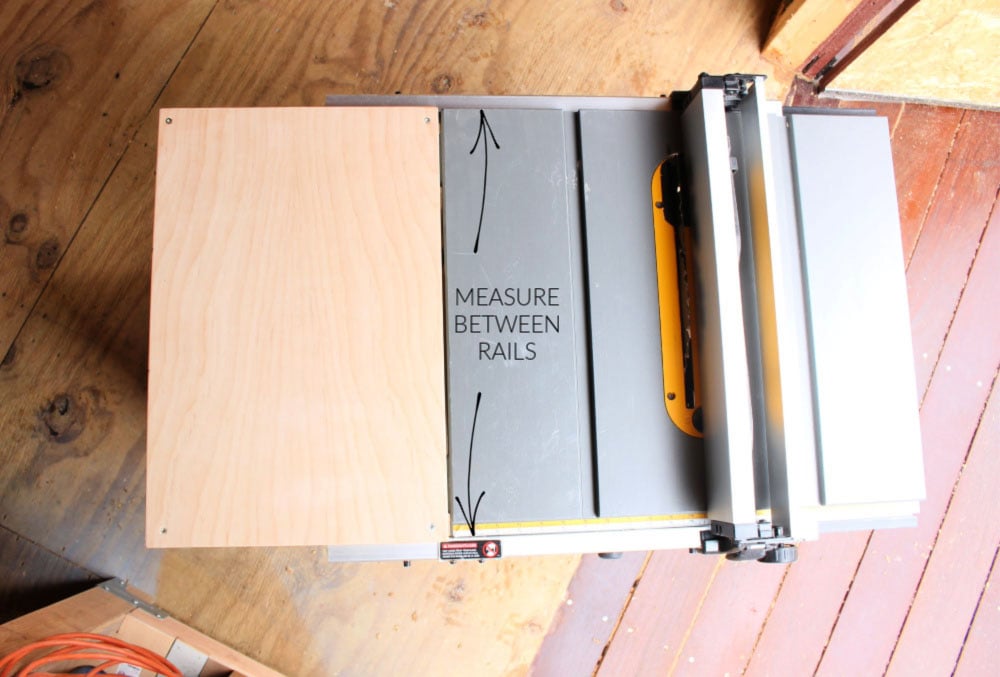
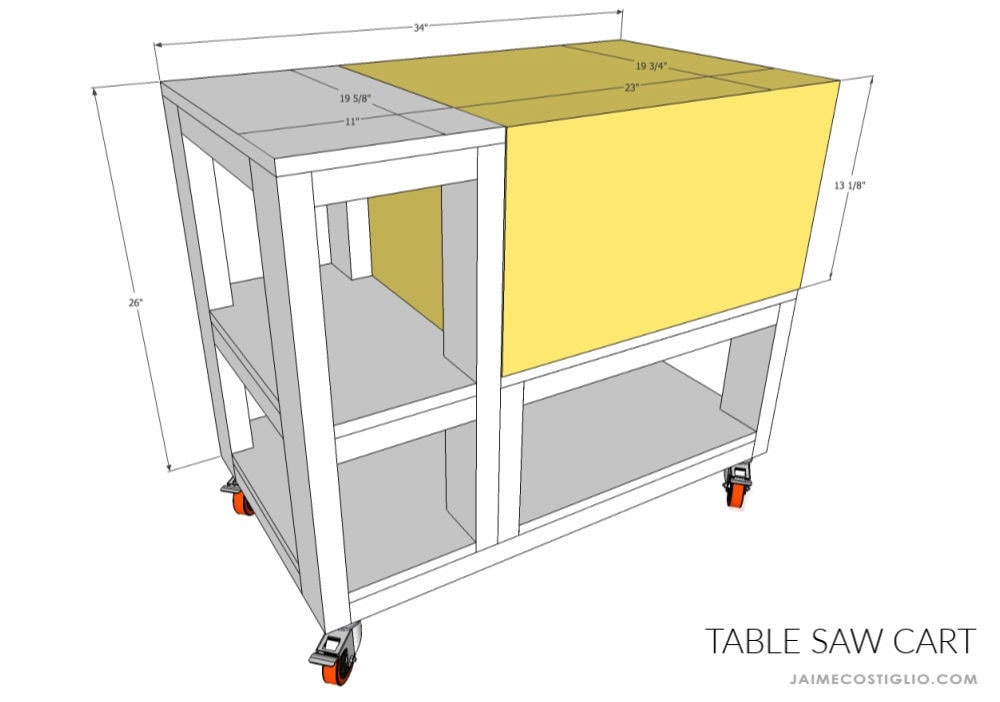
The plans for this cart were made to accommodate my Dewalt table saw. If you are using another brand please double check the size. Specifically you need to measure the space between the rails and be certain the table will fit. As the rails move back and forth to adjust the fence you need to make sure there is enough clearance so you don’t slam into the table. My table saw measures 19 3/4″ between the rails so the table is 19 5/8″ wide.
Thanks for joining me for this workshop project. Please leave any questions in the comments below and be sure to follow me on social media for sneak peeks, tools and project inspiration:
Instagram / Pinterest / Facebook / Youtube / Twitter
SHOP THIS PROJECT:



I need a plan for my compound miter saw!!! Any chance?
Hi Tania, plans are up for my miter saw station here: https://jaimecostiglio.com/diy-miter-saw-station-free-plans/
Good luck!
Hi Jamie,
I’m a retired manufacturing engineer with over 20 years.
You have done a wonderful job on the table saw cart and a lot of designs. I’m just getting in to wood working and will use a lot of your ideals.
Thanks
James
Thanks James, always great to have another woodworker on board. Happy Building!
I’m curious why there isnt any type of an out feed table? I thought that was one of the main purposes.
Hi Scott, this cart is for mobility. My workbench is the same height as this cart so it serves as an outfeed table when / if I need one. You could orient the table saw the other direction which would give some outfeed table (or make the table portion bigger). Lots of options to make it work best for your situation.
There a many Outfeed table designs on Pinterest that can be modified to fit any table, attached or unattached.
I am going to use this design for my new Ridgid 4518
Hi.
Please could you send me the plans for this table saw cart.
Much appreciated
Glad I found your site. The table saw cart is perfect for my saw and shop space. Quick question….what is the material on the edges of the table tops? I haven’t downloaded the plans yet but I was curious.
Thanks for the idea and happy building.
Howard McLean
IG name = @tigerwoodwrks
Hi Howard, The table tops are straight 3/4″ plywood, nothing on the edge. Are you asking about the supports? Some of them are blue only because I was repurposing some scrap 2×2 I had on hand. Hope that helps.
Your builds are great!!! But why are they so low? I wouldn’t want to be bending over so much.. My back would be screaming at me!!
Thanks Cathy, feel free to adjust the leg height to what suits you best. My shed shop has low ceilings so I prefer a lower workbench. My table saw cart lines up with my workbench as an outfeed table hence the reason they are the same height. I don’t spend long hours at either so no issues here.
Yes it helps. i thought I was missing something. Thanks
Thanks for the plans. Spent my afternoon putting this together as I have a similar Dewalt saw. The height allows me to use a folding table as an outfeed table. Really awesome plans.
Thanks Gary, so glad you found them helpful! Cheers
What kind of saw fence is that? Seems like you modified from the original rack and pinion one.
Hi David, The fence came with the saw. I purchase this saw about 14 months ago so it’s possible the newer model has a different fence.
I’m sorry totally had missed the section where you specified that exactly. Thank you! Will be building this today!
Hi Jaime, I have the 745 Dewalt saw, and the size of your cart is perfect for my garage. Thanks for sharing the plans! The mitre fence that comes with it is not the best. I see in the pictures you may have upgraded yours.
Can you recommend a better option than the one supplied?
Hi Cathy, the fence you see in my photos is the fence that came with my saw.
Hi! This is great and I plan on building something very similar!! I was wondering something… I’ll need to make some mods (height, width etc) and I was wondering if you used Sketchup to design this and if so, if we could have access to the sketchup plan? If not, I totally understand of course… but thank you for this build, it is really exactly what I’m looking to do as a project!!!
Hi Alex, yes I use SketchUp to create my digital plans but I don’t share the SKP file. Making mods should be fairly simple, I typically print out the PDF and sketch on top of it so I can see every cut that may need adjusting. Good luck with your cart!
I used your great plan to build this cart for my Dewalt saw. I used up all of the scrap wood in my garage – didn’t want to run to Home Depot while our stay-at-home order is in effect in Chicago. While mine isn’t as pretty as yours given the found-object aspects of my materials, the sucker is sturdy and ready to work. I made my first cut on my new mobile table saw — cut down the piece of plywood I used for the additional work surface — and WOW: it’s a new day. My cart is a little shorter than your plan as I had shorter 2x4s to use for the length of the cart. I do love the additional work surface concept and so just put a wider piece of plywood on to max out the available area there. Love it. Thanks so much for sharing this. Onwards!
Thanks LB, so happy to hear from readers who’ve built the cart. It’s such a big convenience having it up off the floor and portable but not big and cumbersome. So glad you were able to build it using what you had on hand – those are the best kind of projects! Cheers to building all the things!
I like the design and my wife and I just made this ourselves. But, I would caution those that intend to build this that it is about 4″ shorter than a standard table saw height (34″). We did not take this into account prior to building. Fortunately, we were planning to use the Rockler Drop down workbench casters so we added 4″ to the overall height to begin with. We are just going to use traditional casters to raise it up to a more standard height. Also, not sure why but our final height ended up 1/4″ too tall to be flush with the height of the saw (Dewalt DWE7480 also 13 1/8″ tall) We’re using 1/2″ plywood for the top level work surface. The only other modification we made was to increase the total width to 48″.
I will be mounting my router table on the side opposite the Table saw. It will be a folding design that will allow us to keep it out of the way and easy setup when we need to use it.
Overall, the design is simple and a great project for beginners and intermediate woodworking hobbyists.
Jaime,
I plan to make both this cart and the workbench. The idea of being able to roll this out to the driveway and work in open air is attractive. It will also make cleaning the garage floor a breeze. Quick question; you state that the saw table and the workbench are the same height, but in looking at both plans one is 26″ from top of 4″ locking wheels while the other is 30″ from top of 5″ locking wheels. Seems like a 5″ difference (or am I reading the plans wrong?). Ideally I want them flush so I can use as an outfeed.
Hi Adrian, both of the work surfaces are definitely flush. Thanks for catching the error on the supply list for the workbench plans, it should read 5 – 4″ locking wheels. If you’re looking at the digital sketch of the table saw cart the measurement is taken from the bottom of the leg to the top surface which is 26″. On the digital sketch of the workbench plans the measurement is from the bottom of the wheel to the top surface which is 30″. I will update the workbench plans supply list.
Great plan, just what I need for my small area. Reading comments I might also try to incorporate my router into the top surface. Thanks for you design idea
Hi Jaime:
I was wondering what was on the top edge of the table where your fence is attached to.
I wasn’t able to make it out on the photo.
Please advise!!!
Thanks
Hi Dave, the fence is attached to the saw and this is the fence that came with my saw (I’ve seen other versions). The table top is just raw plywood. I hope that helps.
I was not able to find and download the plans for the table saw, can you supply a link?
Hi Richard, the plans are linked above in the post but I will leave it here as well: https://drive.google.com/file/d/1mzKChGlJUaGo9HBlxEGJB5xx_kjxg3vu/view?usp=sharing
Very simple but effective design. I just bought a used Dewalt table saw and I plan on building this to keep it mobile and allow my workbench to be used as an outfeed table. Thanks!
super helpful. Thank you.
Thanks for these plans, a wonderful base to start from, just some minor modifications for my 190cm body , 6′ 3″. How I wish the whole world would use metric , but nevertheless a big thank you.
Thank you Jan, great to hear you were able to modify for your height. I apologize I’m not in metric (darn forefathers) but alas so glad you were able to find the plans useful.
Yahoo! Just finished your / mine / our cart! 🙂
A couple of questions…
1. Above on your Aug 11 reply you say “it should read 5 – 4″ locking wheels” Shouldn’t it be 4 – 4″ locking wheels”?
2. On your plans, Step 4, it calls for a couple of 8″ 2×2 with pocket holes to be attached. How in the heck did you get them attached in that small space with the pocket holes facing up? The driver bit I got with my Kreg kit is way to long to fit in the tiny space. I ended up spinning the 2×2 so the pockets face the outside.
Other than that, it was a pretty straight forward build thanks to your great plans. As a relative newbie, it was nice to find something I could make that didn’t require a lot of specialty tools.
Thanks!
Great news, thanks Patrick for sharing your notes. In response to your questions:
1. That reply is in reference to the workbench table plans which I used 5 wheels (one in the center to help with any sag).
2. For short pocket hole areas I use a right angle drill. You can also use a drill bit attachment that acts as a right angle.
Glad you found the plans helpful.
Thanks for the suggestion on that right angle bit.
Jaime,
First of all, thank you for putting the plans together. I wanted to tell you about a few modifications I made.
First, I made the total length an even 48 inches. I don’t have a truck, so buying 2 x 4 precut sheets of plywood at Lowe’s made it easier. It also gave me 22 inches of surface on the left side, providing additional storage underneath, and additional support on the top for wider sheets.
I moved the shelf on the left hand side up to about 5″ from the top, to provide more storage below. I will use the 5″ shelf at the top for extra saw blades and miscellaneous wrenches
I covered the space to the left of the saw that separates storage from the table saw shelf with 1/2 plywood, to keep a lot of sawdust from covering my tools stored on the left.
The only flaw that I saw was with the casters. Your design leaves no way to compensate for uneven floors. Most commercial floor levelers only provide 1 1/2″ to 1 3/4″ of leveling height. The casters are 3 1/2 ” tall, and they do not make a floor leveler with that much latitude. I removed the casters, and added 2 1/2 ” to the bottom of each frame end
(to maintain the required height). I then moved the casters about 2″ towards the center and mounted them to the original frame (making sure that the casters have a full range of motion, of course!)This way the casters are recessed, with only one inch of caster extending from the base. I can now add a commercial floor leveler, and adjust for my uneven garage floor. Thanks again for making the plans available!
Hi Dave, Love hearing about your mods – all great additions. Thanks for sharing with readers.
Jamie love your plans router table and this Dewalt 10″ saw table! Did you attach the job site saw to the base of this mobile table? If so what size screws etc did you use? regards David from Houston
Hi David, No the table saw is not attached to the cart.
Finally! A plan for my table saw that doesn’t require building a 14 foot long behemoth! Thank you so much!
Hi Paul, Glad I could help. I agree having the saw portable and compact is priceless. And when I need outfeed I just use my workbench or set up my sawhorses.
Thanks for sharing this design. Just curious- why not rotate the saw so that the outfeed goes over the tabletop area? Was your primary aim to expand the table width for crosscuts?
Hi Ilan, Yes you could definitely modify this design to make the tabletop area for outfeed. I use my table saw equally for rips and cross cuts and typically set up a sawhorse to catch long rips. Whatever works for you!
Thanks for your reply. Another question I had while reviewing the plans: I was wondering about the location of the pocket holes on the second page. It appears that they are made from the top but I thought they would be stronger from the underside as indicated in this video: https://www.youtube.com/watch?v=mvO6zaIUO18 (go to minute 6:45 ).
Thanks!
Hi Jamie, thank you for sharing these plans, I’ve used your plans to build myself a table saw cart already, which I love. The mitre saw build will be next on my list. Again thanks for sharing. Roy
Hi Jaimie!
Thank you so much for these plans. I really wanted to get the same table saw, but it’s been discontinued. Dewalt only manufactures the 8 1/4” compact job site table saw now. Will this still work for that? 🙂
Maggie
Hi Maggie, Thanks for letting me know the 10″ is discontinued (and bummer 🙁 ). I’m not sure of the dimensions on the 8 1/4″ but you could easily modify this cart to fit if you have the new saw dimensions. Good luck!
Hello Jamie.
Thank you so much for sharing this plan.
I was inspired and been lurking around for a decent table plan for my Ridgid R4518. I made some modifications the plywood on the bottom is 2′ x 4′. The top counter top is 2′ x 2′.
The Height with the stable legs is 30 inches, while ‘with the caster’ it’s 26 inches.
I’m curious if you used different casters than the ones for your workbench in order to have both the workbench and table saw cart end up at identical heights?
Comparing the two plans, the workbench’s 4×4 legs are cut at 24-1/4″, whereas the table saw cart legs are cut at 25-1/4″.
Adding the same 3/4″ plywood on top to both still leaves a 1 inch difference, with the workbench ending at 25″ and table saw cart ending at 26″ without casters. Unless I’m missing something here?
Hi Nick, yes I believe the casters on the workbench are 5″ and the ones on the table saw cart are 4″.
Jamie,
Thank you for sharing the plans! I just picked up a new Dewalt compact table saw with the 8.25 inch blade and will adapt your plan to my measurements.
I have the compact dewalt job saw and the fit is nearly perfect. I made some very minor adjustments. I love this cart. The best part about it is that it fits through my sliding glass door as it is narrow enough that it saves space. I used casters that fold up to lock out movement of the cart. I am considering adding a quick deploying outfeed shelf. Only a few 2x4s and some scrap and this has added a lot of capability and convenience to my table saw.
Thanks Alex, love hearing these reviews from folks who’ve built and use the cart. I agree the size and mobility is priceless for those of us who don’t have a huge shop space set up. Good look on the outfeed shelf, I’d love to see it once you add it.
Thank you very much for posting these plans! I was looking for a smart and simple cart and this hit the spot.
Great plans!
However, you did not specify the screws on the outside of the cart. On the page 2 only pocket 2 1/2 screws are mentioned, but it’s clearly seen on your photo near the cart that there are bunch of screws on each side.
Hello dear lady
I have a dewalt model 7485 table saw machine, how can i get this plan from you?
Thank you for your kindness
Mohammad ali Izadi
Jamie,
I have a DeWalt model 7485 table saw and would love to get this plan from you.
Thank you,
Pattie
Hi Patty, the plans are here: https://drive.google.com/file/d/1mzKChGlJUaGo9HBlxEGJB5xx_kjxg3vu/view
Would like the plans for this but when I click on the link provided above, I get a blank page.
Hi James, the plans are here. https://drive.google.com/file/d/1mzKChGlJUaGo9HBlxEGJB5xx_kjxg3vu/view
Hi Jaime!
I’m a newb wood worker and just discovered your site. I really like this cart build and would like to make something similar. Is it too late to have a copy of the plans sent?
I look forward to exploring more of your work !
All the best,
Peter Wawryk