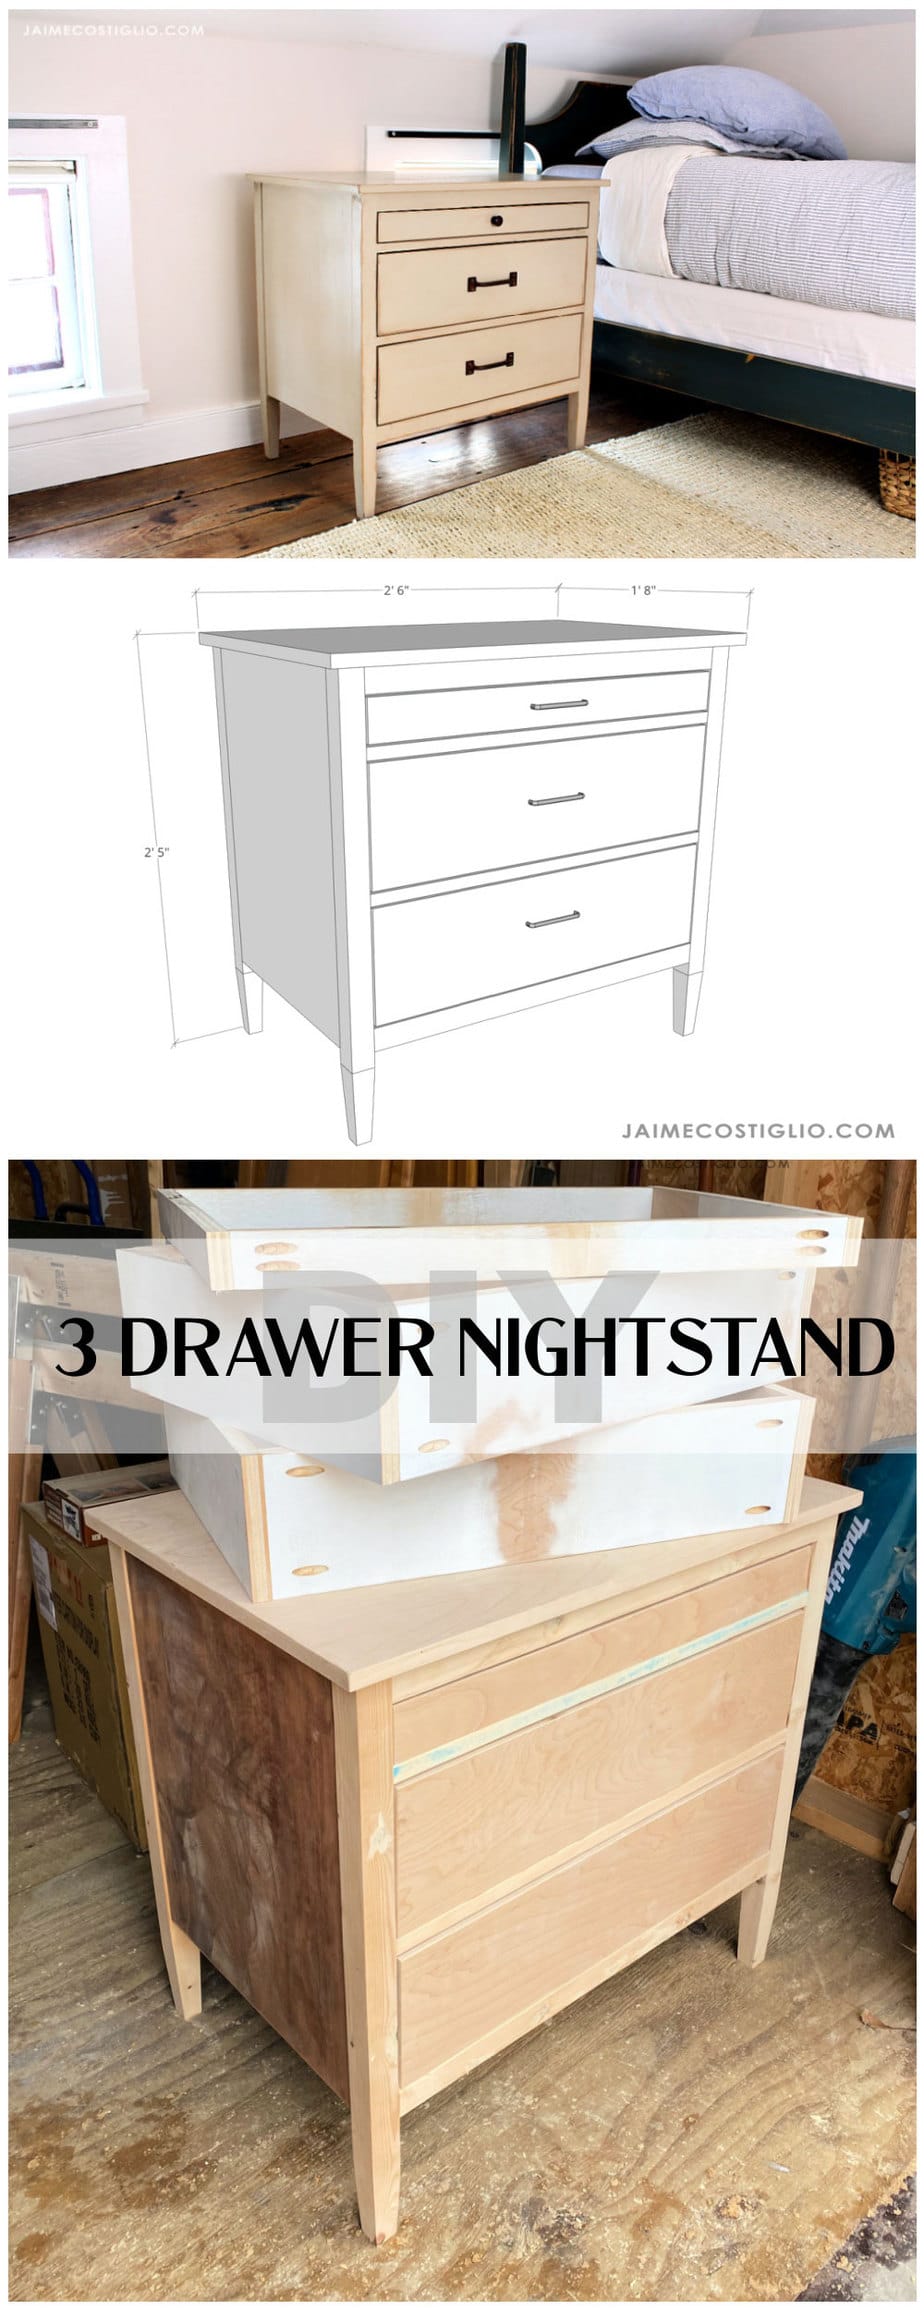
The post about a 3 drawer nightstand is sponsored by Kreg Tool. When you want the perfect size nightstand with 3 perfect drawers you build it yourself. I’m sharing the details on how to make this 3 drawer nightstand complete with plans so you can build one too!

A DIY tutorial to build a 3 drawer nightstand. Make this nightstand for your bedroom perfect with 3 roomy drawers for storage.
I had envisioned this nightstand in my head for a good long while. This bedroom space has taken so many twists and turns with two teenage girls so keeping up with their changes is hard to do! But with the help of my new Kreg 720PRO pocket hole jig I finally made my vision a reality.

Kreg Tool Projects & Plans
Did you know Kreg Tool has hundreds of projects and plans available for almost any type of furniture? You can find nearly everything you could ever want to build on their site here.
- search plans by category, keyword or difficulty level
- plans include tools & materials, cut list & parts, directions
- print or download plans for easy viewing in the shop

Custom Nightstand
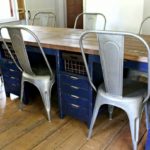
I made the plans for this 3 drawer nightstand using standard off the shelf lumber available at most home improvement stores. For a more custom look you can modify the plans to fit your space needs.

Tapered Legs
You’ll notice I opted to taper the bottom 5″ of the legs. Tapering the legs gives a more professional look and takes out a bit of the chunkiness. But you definitely don’t need to add the taper, this nightstand will still be pretty and functional with standard square legs.

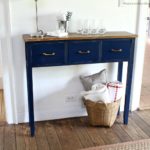
Drawer Storage
Like most teenagers my daughter seems to have lots of little things that need to be stored away. I had previously built a more primitive style nightstand with a door but she quickly decided drawers would be better for organizing rather than a shelf. So when designing this 3 drawer nightstand I made sure to include two larger, deeper drawers and one narrow, small drawer up top for writing tools, papers, etc.


Down below you’ll find my notes on building this 3 drawer nightstand. I highly suggest a scroll through before you begin construction. Then for the complete step by step plans please visit Kreg Tool here.
Supplies:
- Miter saw
- Table Saw (or Circular Saw)
- Drill / Driver
- Kreg 720PRO
- Kreg Multi-Mark
- Tape Measure
- Sander
- Kreg Drawer Glide Jig
- (2) Kreg Wood Project Clamps
- Hardware & Supplies:

Nightstand Legs
To make the taper at the base of the legs I recommend using a tapering jig. I made this jig awhile back and I use it all the time (you can see the details here) so it’s worth it if you build a bit of furniture. Above you can see the leg is clamped to the jig at an angle to create the taper at the bottom. I have already run the leg through on 3 sides and now it’s ready for the last side to be cut off or tapered.

All four legs have been tapered. See how removing just a 1/4″ gives the legs a bit of fine tuning.

Side Panels
Next up attach the legs to the side panels.

Pocket Hole Jig
Throughout this nightstand build I used the Kreg 720PRO Pocket Hole jig. This is their newest model complete with lots of updated bells and whistles, most notably is the self adjusting clamp. If you toggle between lumber thicknesses quite often like myself then this self adjusting jig is a life saver!

Cross Supports
When attaching the cross supports I recommend cutting piece of scrap wood to the length of your drawer opening. This provides a much more accurate build, saves you time from having to measure and gives you a nice board to push up against while securing the pocket hole screws.


Nightstand Body
Now the body is complete and we are ready to build the drawers. I highly recommend measuring the drawer openings before moving onto the drawer boxes just to be sure everything will fit.

Drawer Boxes & Fronts
Construct the drawer boxes and cut the drawer fronts.

Then use the Kreg Drawer Glide Jig to install the drawers. Drawer glide installations can be a real headache but if you use the jig properly I promise you’ll end up with perfect drawers every time.
Now is a great time to apply your finish. I choose to paint the nightstand a mushroom taupe color (a mix of some leftover paint) followed by a little Special Walnut stain then clear wipe on satin poly.

Drawer Fronts
Lastly secure the drawer fronts to the drawer boxes. I like to use playing cards as spacers. You can stack equal number of cards on opposing sides. Then if you mark where the hardware will go you can brad nail the drawer front onto the box. This provides a temporary hold then you will slide the drawer open and secure from the interior using 1 1/4″ countersunk wood screws.

Thanks for joining me for this 3 drawer nightstand build. For the complete step by step plans, cut list and supplies visit Kreg Tool here. Please leave any questions in the comments below and be sure to follow me on social media for sneak peeks, tools and project inspiration:


Love it!
Thanks Debra, my daughter loves it too! Simple but so functional.
Very nice. Looks really good with the stain highlighting the drawer edges.
What did you use on the top edges? Doesn’t look like the plywood is showing.
Iron on edge banding
I’m also on the lookout for a new nightstand, it’s hard to reach for things in the middle of the night when your table nearby is a few inches taller than your bed. Thanks for this, I’ll definitely bookmark this for future reference.
I love the nightstands, wanted to know the brand and color stain used
thanks
Hu Wyanet, I choose to paint the nightstand a mushroom taupe color (a mix of some leftover paint) followed by a little Special Walnut stain then clear wipe on satin poly.
Hi There,
Very nice! Thanks for sharing your plans! I’m looking to make something very similar to go between 2 recliners. I wanted to include a charging stone on each side to double as a coaster for drinks. I have a floor outlet, and would like to conceal the cords as much as possible. Is there room between the sides and the drawers, where I could run the cords?
Again, thanks for being generous with your time and effort!