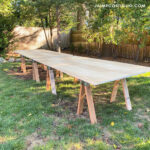
This post about shed lights is sponsored by The Home Depot. It’s been a solid year working in my little shed shop and I’m ever so happy to have a designated workshop space. But (there’s always a but) the basic little bare lightbulbs up in the eaves just aren’t cutting it!

Swap out boring basic bulbs in your shed for some bright lights and you won’t regret it. Upgrade those shed lights today!
I can barely see anything on a good day. Anyone else have a shed or basement space that is wired with a lonely, dim, bare bulb? In this case I am the one to blame because when I had the electrician come to wire the shed I simply said ‘just two boxes will be fine’ and they installed the basic bare bulb fixture.
The time has come to upgrade the shed lights. Let’s use The Home Depot mobile app to source some new strip lights for my shed!
- Search for any product right in the palm of your hand
- Search by typing product, voice, barcode or image
- Calculate materials you need
- Read product reviews

Open the mobile app and use the search bar to find what you need. I searched for strip lights and it auto-populates similar products:

Click on the product you desire, in this case I know I want LED strip lights. Scroll down to select your desired product.

Look at that – the mobile app not only gives me lots of product options but for each product it clearly states the stock at my local store!

Purchasing Options:
For my shed light upgrade I selected the 4’ LED strip light. Once on the product page you have many options for purchase:
- In store stock quantity and location
- Flexible delivery options
- Free delivery on over a million items
- Expanded return window
My shed is 16’ long so I opted for two 4’ strip lights to be sure the space was clearly lit. I popped in to my local store and was able to quickly locate the lights using the location given on the app.

Can you hear the angels singing? It’s glorious and bright and well lit and it was so easy I’m kicking myself for not upgrading my lights sooner.

My entire workbench is so bright I honestly feel like a movie star. Upgrading the shed lights was simply a matter of removing the old and installing the new. Why I waited a whole year to do this is beyond me but I will say it’s a very simple project. I can guarantee you’ll appreciate your shed like never before once you have the proper strip lights in place.

One more before and after because the change is drastic!


Want to change out your basic shed light fixture for something a bit brighter? Below I’m sharing the step by step tutorial to upgrade those shed lights. Be sure to read through entirely before beginning and note that your situation may be slightly different.
Supplies:
- (2) 4’ LED strip lights
- (2) 4” circular white junction box cover
- wire strippers
- philips screwdriver
- flat head screwdriver
- drill & drill bits

Instructions:
** Disclaimer: I am not an electrician. If you are at all unsure about changing out the fixtures then consult an electrician.

Step 1: Shut off the power. Go to your breaker box and be sure the switches for the lights are shut off. Go back into the shed and check the lights to be sure they are off.

Step 2: Remove the old fixture. Simply unscrew the fixture, pull down a bit to get the wires out of the junction box, then unscrew the wire nut connectors (save them!) and gently untwist wires from the fixture away from the box.

In my case one junction box had double wires already twisted together. This is fine and you can continue.

Step 3: This strip light comes ready with pop in clips perfect for a single wire connection however, in my case I’ll be connecting 2 wires to the one wire from the fixture so I clipped off the clips using my wire stripper / cutter.

Step 4: Once the clip is removed then strip away about 1” of the plastic sheath using the wire strippers. Now that the wires are exposed we are ready to install.

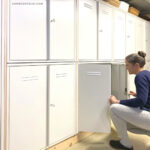
Step 5: Determine the placement of the strip light. In this case I had to install two wood boards to act as cleats in between the roof joists in order to have somewhere to mount the fixture housing.

Step 6: Hold the strip light in position and mark with a pencil where the two screw holes are located. Then predrill into the cleat.

Step 7: First slip the junction box cover down over the wires coming from the fixture. Next twist together the wires: white to white, black to black and green to ground (usually copper). Secure the twisted wires using a wire nut connector.

Step 8: Gently but firmly shove the wires up into the junction box and then secure the white junction box cover to the blue junction box using the screws that are provided with the cover.

Step 9: Now secure the fixture housing to the cleat using the provided screws up into the predrilled holes.

Last but not least Step 10: Attach the light portion of the fixture to the housing using the black clips then snap the light into the housing.
Now flip the breaker back on and marvel at the beautiful upgraded shed lights!

Thanks for joining me for this shed light upgrade project. Please leave any questions in the comments below and be sure to follow me on social media for sneak peeks, tools and project inspiration:
Instagram / Pinterest / Facebook / Youtube / Twitter


Leave a Reply