• Home
  • Blog
  • About
  • Contact
    • Disclosure
    • Privacy Policy
  • SHOP
  • Widget area for main menu

    • Email
    • Facebook
    • Instagram
    • Pinterest
    • Twitter
    • YouTube
  • Skip to primary navigation
  • Skip to main content
  • Skip to primary sidebar

Jaime Costiglio

build - paint - sew

  • BUILD
    • BEDS
    • BENCHES
    • DESKS
    • DRESSERS
    • GAMES & TOYS
    • SCRAP WOOD
    • SHELVES
    • STORAGE
    • TABLES
  • TOOLS
  • PAINT
    • CRAFTS
    • FURNITURE
    • HOME DECOR
  • SEW
    • GIFTS
    • HOME DECOR
    • POUCHES
  • HANDBUILT HOLIDAY
    • 2021
    • 2019
    • 2018
    • 2017
    • 2016
    • 2015
    • 2014
    • 2013
  • GIFTS
    • BABIES
    • KIDS
    • FOR HER
    • FOR HIM
    • TEACHERS
    • WEDDINGS
  • SEASONAL
    • 4TH OF JULY
    • FALL
    • HALLOWEEN
    • CHRISTMAS
    • SUMMER
    • SPRING
    • ST. PATRICK’S DAY
    • THANKSGIVING
    • VALENTINE’S DAY
    • WINTER
  • SALTBOX PROJECT
    • BATHROOMS
    • DINING ROOM
    • EXTERIOR
    • FAMILY ROOM
    • FOYER / MUDROOM
    • KIDS BEDROOMS
    • KITCHEN
    • LIVING ROOM
    • MASTER BEDROOM
    • PLAYROOM
  • SCROLL SAW

“S” is for Signs

January 16, 2011

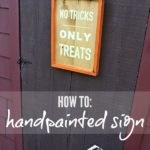
Simple wood sign art.

It’s everywhere, sign art and lettering is all over the place.
Here’s a great post over at Houzz.com on that very topic.

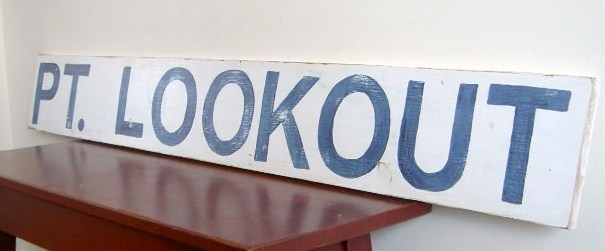
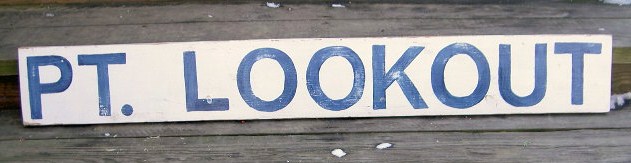
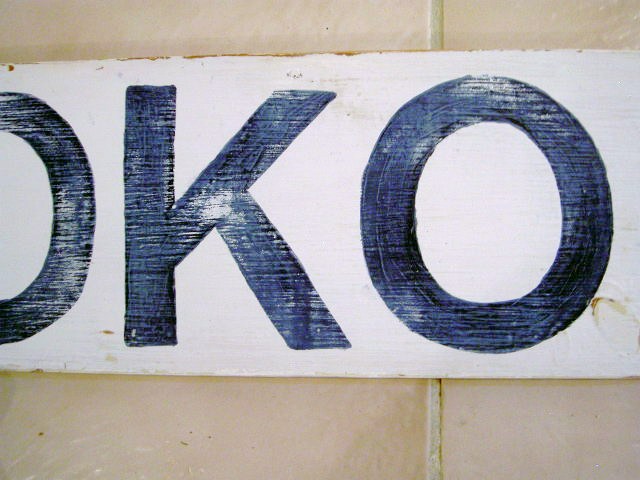
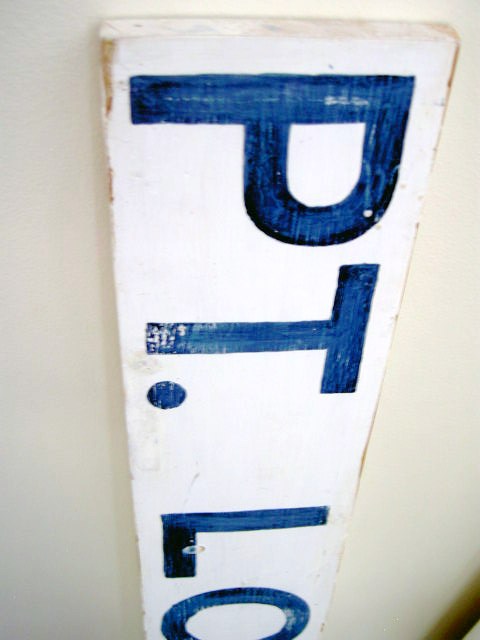
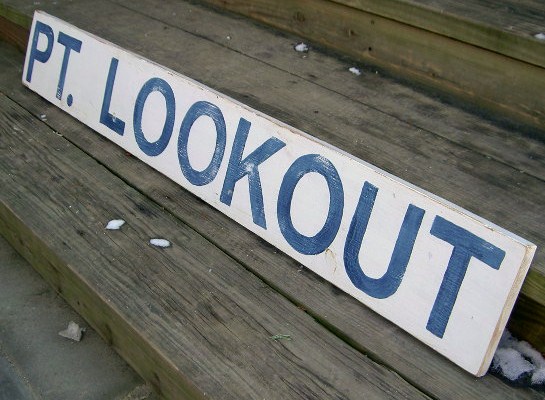
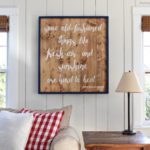
I made this one for Grandma and Grandpa’s beach house.
It’s the name of a teeny, tiny town on Long Island where my husband spent his summers growing up.

I also found inspiration from this post at frugal farmhouse design.

Here’s how I did it:
1. Find a piece of wood and print out your letters to size (mine are Ariel 500 pt):
(this wood measures 48″ x 6.5″)
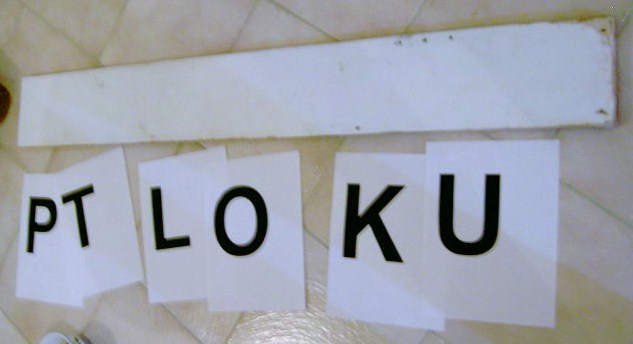
2. Layout your letters for spacing and trace the letter applying tons of pressure to make an imprint on the wood.  Then paint in the leftover imprint.
3.  I went over the original lighter blue paint with a darker blue (using a sloppy, imperfect approach) so when you go to sand everything you get that depth of color:
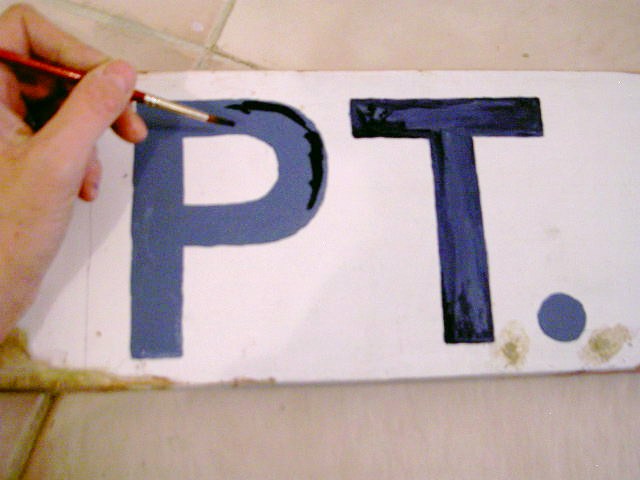
4. Sanded using 220 grit.  See how the lettering has more ‘age’ to it because I layered up the two blues.
5. One quick coat of satin poly to seal it up.  Added sawtooth hangers on the back but eyehooks would be great coming out of the top too:
How about a close up shot:

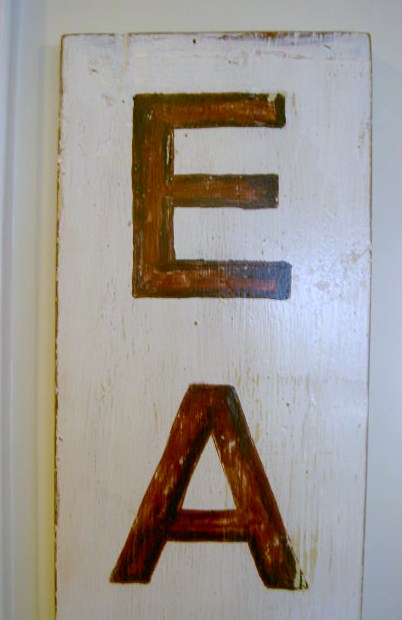
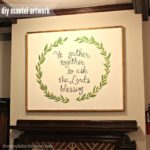
Then I made this one for our kitchen.

I used the exact same process as above only on the vertical.

Another simple project made with items I already had on hand, that’s the best way to go.

I’m linking up to:

You may also like...

  • DIY Handpainted SignDIY Handpainted Sign
  • No Tricks Only Treats Handpainted SignNo Tricks Only Treats Handpainted Sign
  • “C” is for Chore Chart“C” is for Chore Chart
  • “M” is for Mantel Artwork“M” is for Mantel Artwork
Share this post:

Filed Under: CRAFTS, DIY, HOME DECOR, HOME DECOR, PAINT13 Comments

Reader Interactions

Comments

  1. Mel says

    January 16, 2011 at 11:50 AM

    They really do look old and weathered. Great tutorial, thanks for sharing it.

    Reply
  2. Here On Crow Creek says

    January 18, 2011 at 12:14 AM

    I love your sign. It really turned out looking really like you paid a lot of money for it. I bet that takes a steady hand huh? Looks amazing.

    Reply
  3. Robin says

    January 27, 2011 at 3:32 AM

    Great job. I really like the weathered look of it.

    Reply
  4. Holly says

    February 3, 2011 at 2:36 PM

    Very cool! I've had in mind to make something similar, but hadn't figured it all out in my head yet. Thanks for the tip about layering the paint.

    Reply
  5. stephjacobson says

    February 3, 2011 at 5:12 PM

    Thank for you sharing–I'd like to make some of these for my home. I'm not a great painter, but I'm going to give it a try!

    Reply
  6. Becca says

    February 4, 2011 at 9:32 PM

    I'm definitely going to make use of this. Thanks for the tutorial.

    Reply
  7. Heaven's Walk - says

    February 6, 2011 at 4:42 AM

    Hi Jaime! I adore your blog! I found it through JunkFest. I loved your tutorial about making your own signs. I think that's something I could actually do! lol! Now I just have to find a pallet somewhere… 🙂

    I'm your newest follower and looking forward to more great projects from you!

    xoxo laurie

    Reply
  8. Miranda says

    February 8, 2011 at 9:26 AM

    Yay! This is great! Thanks for the informative tutorial. Putting the letters on the wood has been the most mystifying part for me. Your signs look fantastic…

    Reply
  9. ANNE says

    June 6, 2011 at 11:32 PM

    I love making signs as a hobby, and the dark/light paint tip is great, thanks!

    Reply
  10. Leasa says

    July 8, 2011 at 5:28 PM

    Love these signs and its a great way to do the letters if you don't want to use vinyl or if you don't have any fancy machines

    Reply
  11. Rita May says

    March 30, 2013 at 5:06 PM

    I've always loves your signs. I am finally making one today. I used the outline setting for the letters (uses less ink and prints faster) and I also used carbon paper to trace the letters. Thanks of the font name. It's simple and classic. I also like the double paint technique on some of them. I see more signs in my future,

    Reply
  12. BettyAnne says

    March 19, 2019 at 7:27 PM

    What font did you use?

    Reply
    • Jaime says

      March 20, 2019 at 6:04 AM

      Ariel 500 point

      Reply

Leave a Reply Cancel reply

Your email address will not be published. Required fields are marked *

Primary Sidebar

Hi! I’m Jaime

Jaime Costiglio

Hello!

Thank you for stopping by.
Join me for lots of DIY.

Read more

Get new posts via email

Handbuilt Holiday: Gift Project Plans

handbuilt holiday gift project plans

Collection of DIY gift project plans to build.

The Home Depot Tool Prospective

THD Prospective

Tools to consider for the DIYer.

Archives

The Home Depot Logo
Copyright © 2023 Jaime Costiglio · Custom site by Moonsteam Design

Privacy Policy