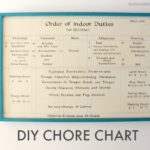
There’s something about making things by hand that feels so real. This DIY handpainted sign project adds that touch of humanity to our family room space and I’ll show you how I made it without a fancy vinyl cutting machine.

A DIY tutorial to make a handpainted sign without using a vinyl cutting machine. Paint your favorite quote or saying by hand with just a printer.
A few weeks back I posted this wall art I had made on Instagram and many folks had asked if I would share a tutorial. Below are the steps to make this handpainted sign. It is comprised of planked wood with handpainted lettering. If you can color in the lines then I promise you can make this sign.
I choose this quote because:
- 1. I recently saw it in the March 2015 issue of Country Living magazine
- 2. I’m a long time Little House on the Prairie fan
- 3. We needed some wall art in that spot after the tree shelf from Christmas came down.

Growing up I wanted to be Laura Ingalls, life on the prairie was so basic and simple and I loved everything about her rustic family lifestyle. That might explain a little bit of why I choose to buy a 1740 saltbox farmhouse, living out my inner Laura every day (except with indoor plumbing ;)).

At any rate back to the sign. You can make it any size to fit your space. I joined a couple scrap 1×6 and 1×8 boards to get the width I wanted and cut them all to the same length.
The first step is to find a quote or inspirational saying that you love. Then determine the size you need and go from there.

Handpainted Sign How-to:
Below are the step by step instructions to make a planked wood handpainted sign.

Sign Backer
Step 1:
Attach planks using wood glue and pocket holes. My sign measures 29″w x 32″h (without the frame). If you don’t have a pocket hole jig you could attach two horizontal boards across all the vertical planks and screw the boards to the planks.

Step 2:
Set up a word document with your quote in the font you like. There are hundreds of free fonts online. I used Laser Metal font from here at 350 point. I recommend setting your margins to .10 on all sides of the word document to get the most use out of your space and print in outline to save ink. You can see the document will print on multiple pages and you have to line up the words by taping the pages together.
Step 3:
Using a ballpoint pen trace the outline of each letter with heavy pressure. This will leave an indent in the wood where you will paint. I suggest working one row at a time.

Painting Letters
Step 4:
Using a small paint brush and white high gloss acrylic paint slowly paint on and inside the indent left behind by the pen.

Step 5:
Once the lettering is dry then apply Minwax early american stain. The gloss finish on the lettering will not accept the stain. Go back over the sign and wipe off excess stain and clean up lettering.

Step 6:
Attach 1×2 frame. (I suggest painting the frame pieces before attaching unlike I did here.) Keep a 1/2″ inset at front and use wood glue and 1 1/4″ finish nails.
For something lightweight like this I use 2 screws into the upper third at each side on the back then attach a wire in between the screws. Super easy and fast for hanging.

Hope you enjoyed this handpainted sign tutorial. I’ve made many, many signs and have lots of different versions floating around this blog. Click here for many more.


this turned out SO good! love love love! i am wanting to create large lyric art in my living room, but it scares me!
Love it! The font is perfect! 😉
Love love it! Cool font!
Where .can I get that font.? You made a masterpiece!
Thanks Mallory. The font sourced is linked above but I will leave it here as well: https://www.dafont.com/lasermetal.font
What is the best type of paper to use for this project? Thanks
Hi Karen, I just use regular copy paper in my printer.
I love this so much, Jaime. It looks incredible! I also love the way you did the frame – really nice way to finish it. I feel like this is what some of my signs know.
Looks Good!
something else you could add for less-artistic people:) is if you rub the back paper of the computer printed paper with chalk or pencil or even charcoal, then trace with the ball point pen it will leave a transfer of the script.
Don't be afraid!! For the most part, you can sand it off and try again, if you think it's messed up. This looks great! My daughter found some scrap wood in the garage last spring and made a couple of pieces to hang on the wall of the house she bought last summer. turned out really cute
Such a great quote and a wonderful tutorial! Thanks so much for sharing!
xx Annie
http://www.somethingswellblog.com/
I love it! By the way, where did you get your end table and coffee table? that is exactly what I am looking for!
What type of paper did you use when you printed out your saying ?
Hi Donna, I use regular printer paper – 20 lb. copy paper. Nothing fancy.
I want to try this for signs for our church bazaar – only 2 weeks away and I have so many more ideas than time! – but have a question: Your tutorial has you painting the quote before applying the Minwax stain. Does the stain not mess up the lettering?
Hi Edie, Yes I prefer to paint before stain. If you use an acrylic or gloss paint the stain won’t adhere to the paint. It does get in the little grooves of the paint and I like how it adds a bit of character to the bright paint but you could definitely stain first and then paint. Good luck with the bazaar!
By putting the stain on last, won’t it color the white painted wording?
Hi Joy, I used white high gloss acrylic paint here. The stain won’t stick to gloss paint. You could put the stain on first and paint over it but that requires more coats.
Thank you SO much for this tutorial!! I just painted my own “let’s eat” sign, and your font and word and outline tips were EXACTLY what I needed! My sign turned out GREAT, looks so professional. I can’t thank you enough!! — Jen
Hi Jen, Great news, I love hearing from readers who’ve made their own projects. Happy to share my steps and techniques along the way. 🙂
Hi Jamie! Thanks so much for your detailed instructions! I make a lot of signs but I always have trouble with the white lettering “seeping in” and not looking so white anymore ☹️ But that might be because I do it after I stain the wood! I’m anxious to try this method I usually use a “paint pen”… do you think this method would still work with that?
Thanks!
-Anita!
Hi Anita, I highly recommend using enamel paint which dries hard like nail polish. Then I do the staining after the paint is dry and the enamel won’t take the stain so the white remains crisp. You could definitely use a paint pen as long as it’s oil based and completely dry before applying the stain. Good luck!
Jamie, thanks so much for the response!! I’m really looking forward to trying it. If I remember, I’ll let you know how it goes with the paint pen (they are oil based)
Hi, your sign looks amazing, can you recommend a good white paint?, I have tried several and they all seem to need several coats, with every coat there is room for error. Thank you
Hi Dorinda, the best (and most opaque with one coat) gloss white I use is DecoArt Americana Gloss enamels.