When you want something that doesn’t quite exist then you make it right? Today I bring you my DIY pipe and wood slats bed. Yes it’s a bit unconventional but my son is digging it and that’s really all that matters.

A DIY tutorial to build a pipe and wood slats bed. Make a unique bed using pipes and wood slat accents.
Ana White and I are up to our old tricks again except this time we’ve entered new territory by combining wood boards with galvanized steel pipes to make this twin bed. It’s a match made in heaven with the cool, hard steel against the warm wood.


Metal and Wood Bed
- beautiful texture combination
- easily adjust size to fit your mattress
- very basic tools needed
This bed was inspired by both the Pottery Barn Owen bed and RH Baby’s industrial steel pipe bed. We married the two designs to create our own DIY version of a pipe and wood bed.


The galvanized steel pipes give a hard, clean look to the bed frame. I probably need a rug for this room but all good things in time!
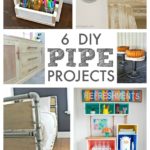
More Pipe Projects:

This is definitely a different type of build requiring very little tools except your hands to screw the pipes together. And just like all of Ana’s other building plans we designed this plan using off-the-shelf, readily available supplies that can be found at any big building supply store.
Cost Breakdown:
- galvanized steel pipe $466
- lumber $54
So this bed will cost just over $500 to build but that’s still cheaper than retail price and combines both retail looks for a truly unique build. And if you’re looking for another version of this bed in full size with a more streamlined look check out my friend Lindsay’s post here.

A huge thank you to Ana White for working with me on this project. Her willingness to work with a new medium gave me the support I needed to pull this build together.

And now on to the how-to portion. Let’s build this pipe bed!
Pipe Bed Notes:
- No glue was used on any pipes or pipe-to-wood connections.
- Hand tighten pipe connections until you are confident of pipe placement, this allows you to unscrew if necessary – that’s the beauty of working with pipe.
- The most difficult portion will be connecting the side rails to the footboard / headboard since the pipe screws together in the same direction on both ends (if you’re screwing in one end essentially you are unscrewing the other end simultaneously). Take your time and eventually it will come together.
- Follow the step by step instructions carefully.
1. Follow Ana’s plans for supplies.
All the pieces are off-the-shelf available except the (2) siderails at 75″ and (4) top horizontal portions at 18″. You will need to have these pieces cut and threaded at the store.

Supplies: All the pipe pieces are off-the-shelf available except the (2) siderails at 75″ and (4) top horizontal portions at 18″. You will need to have these pieces cut and threaded at the store.


Start with with one footboard leg in the combination pictured above.

Then begin the other leg, foot portion only and connect the siderails.
Headboard
- Repeat the same process for the headboard except opposite. Attach one completed headboard leg to the siderail with footboard foot portion only leg. Then the other completed footboard leg attaches to the siderail with headboard foot portion only. This allows you to screw siderail completely into tees by swinging the foot portions around and around.

Once the basic framing (4 legs and siderails) is set then begin connecting the horizontal pipe support section using 1″ close nipple.
Wood Slats
- To prepare the wood slats I stained my boards using Minwax weathered oak.
- Attach two split ring clamp hangers on the cut ends.

Then place the wood slat in position in footboard frame and screw in the 1″ x 8″ nipple.


Next add the horizontal pipe and tee section. Then keep repeating the process until you have the three wood slats in position.

To secure the clamps onto the vertical nipples center the board in position and tighten the screws with a drill.

One last challenging part is the center top horizontal portion. Again it’s a twisting game until you get it just right but it will eventually come together. Have patience.
Mattress Support

Build the mattress support to fit the frame. The 1×3 boards will rest on the siderails providing a platform for your box spring / mattress.
Pipe Bed Plans:
- For the complete plans visit Ana’s site here.
- Working with pipe is different that building with wood, take your time. If you love DIY then this bed is for you.


Utterly, truly awesome, Jaime!
Really cool. Definitely expensive though – I would suggest checking out Craigslist for used 1" pipe and fittings though. You can get a huge savings that way.
That is such a cool project! Great job as always, Jaime!
This is so awesome! Awesome! Now if I could just justify why I would need such a bed in our house. 🙂 So cool.
Very cool bed! I also love the wall color. Do you mind sharing what it is?
this is amazing! you are amazing! in case you couldn't tell, i am totally amazed!
This bed is unbelievable. I have a question for you–are you woman or a woman/robot mix? I can't believe how many projects you do. You have to be one of the hardest working DIY bloggers out there. If you are indeed part robot, it all makes sense. If you are not, please share your secrets, you're amazing!
Popping over from Ana's site. Love this. LOVE! 🙂
Love this bed!We are just finishing up building a house in Puerto Rico&I want to build some unique pieces to furnish it.This bed would look great in our son's/Guest BR.Do u think it could be made as a full size by just adjusting the lengths of pipe?I found u from Ana's site.Can't wait to check out your other projects!Thanks!!!
Beyond awesome!!! Love this bed!
We love this bed and would like to adapt your plans to make a bunkbed, similar to the pipe bunk bed sold by Restoration Hardware. Do you have any advice or thoughts for us before we take it on? Thanks so much for posting the instructions and thanks to Ana too.
Love this! A winner for share! From a fellow entrant!
An amazing DIY, such a cool bed! Good luck with CWTS!
Jamie, you knocked it out of the park, yet again! This is SO creative! Best of luck in the CWTS competition. I'd love to see you as a contestant. I know you'd create such stellar projects.
Warmly,
Lauren
The Thinking Closet
Fantastic!
Amazing project! Saw you on the CWTS link up–best wishes! You'd be an awesome contestant.
What about a full size version??
Yes! Check out Lindsay’s @frillanddrills https://www.instagram.com/p/CD2YMV0AYqh/
I'd like to build a KING sized version. Are center supports needed? I'm assuming they are. This project is EXACTLY what I've been looking for!!! Great job.
Yes definitely need center supports for a king size.
I would love to re-create this for my boys. How exactly did you attach the mattress support to the metal?
Hi Emily, the wood mattress support only rests on the siderails. It is not attached or screwed on at all.
I love the bed….do you have dimension and pet list for a queen been.
Thanks Hector. Unfortunately I don’t have a cut list for the queen size.
To cut down on cost, I wondered if this would work: instead of buying bushings to convert the 1″ opening of the tee to 3/4″, could you just buy a tee that reduces down to 3/4″ in the middle?
Great idea and yes that would probably work perfect. Thanks for sharing.
I am right in the middle of working on this bed. At some point you end up screwing in one end and unscrewing the other somewhere. I am following your directions. I’ve got the 2 siderail sections and I’m trying to attached a horizontal rail to connect the two sections so they stay upright. How do you compensate for the screwing in and unscrewing issue?
I’m stuck and feel like I need to take this completely apart, but may still end up with the same problem.
I can really use some guidance. My 6yo boy is being extremely patient and I try to assemble his new big boy bed.
Thanks
Hi Kirsten, it’s been awhile since I built that bed but if I remember correctly I screwed in one side all the way and then unscrewed enough to catch the other side. It’s a back and forth dance until you get it solid and I used the bushings to aid in the screwing / unscrewing.
The way to avoid the screwing / unscrewing situation would be to use a union at some point along the length of pipe. Unions will be available along with the other fittings used.
Amazing project and I’m planning something similar but the use of unions would help no end!
Keep up the good work.
Thank you Rory, great advice. So wonderful to have readers like you helping with tips, I truly appreciate it!