• Home
  • Blog
  • About
  • Contact
    • Disclosure
    • Privacy Policy
  • SHOP
  • Widget area for main menu

    • Email
    • Facebook
    • Instagram
    • Pinterest
    • Twitter
    • YouTube
  • Skip to primary navigation
  • Skip to main content
  • Skip to primary sidebar

Jaime Costiglio

build - paint - sew

  • BUILD
    • BEDS
    • BENCHES
    • DESKS
    • DRESSERS
    • GAMES & TOYS
    • SCRAP WOOD
    • SHELVES
    • STORAGE
    • TABLES
  • TOOLS
  • PAINT
    • CRAFTS
    • FURNITURE
    • HOME DECOR
  • SEW
    • GIFTS
    • HOME DECOR
    • POUCHES
  • HANDBUILT HOLIDAY
    • 2021
    • 2019
    • 2018
    • 2017
    • 2016
    • 2015
    • 2014
    • 2013
  • GIFTS
    • BABIES
    • KIDS
    • FOR HER
    • FOR HIM
    • TEACHERS
    • WEDDINGS
  • SEASONAL
    • 4TH OF JULY
    • FALL
    • HALLOWEEN
    • CHRISTMAS
    • SUMMER
    • SPRING
    • ST. PATRICK’S DAY
    • THANKSGIVING
    • VALENTINE’S DAY
    • WINTER
  • SALTBOX PROJECT
    • BATHROOMS
    • DINING ROOM
    • EXTERIOR
    • FAMILY ROOM
    • FOYER / MUDROOM
    • KIDS BEDROOMS
    • KITCHEN
    • LIVING ROOM
    • MASTER BEDROOM
    • PLAYROOM
  • SCROLL SAW

DIY Growth Chart

October 2, 2013

diy growth chart

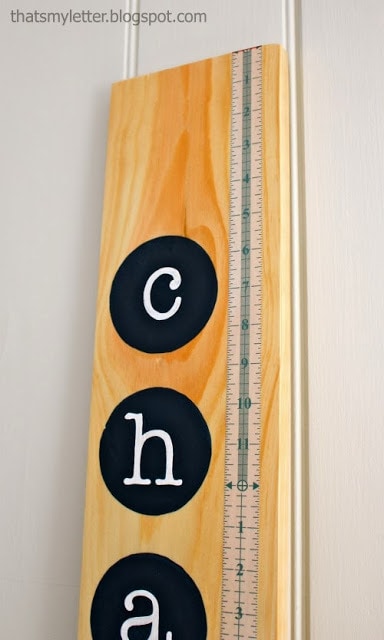
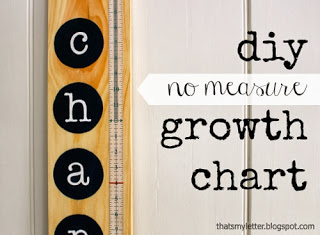
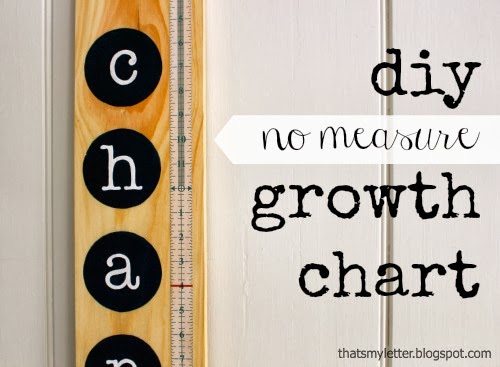
Make this diy growth chart using Measure-It! self adhesive measuring tape.I made it super simple by actually using the tape in place of making measurement marks, it’s a no measure DIY growth chart!

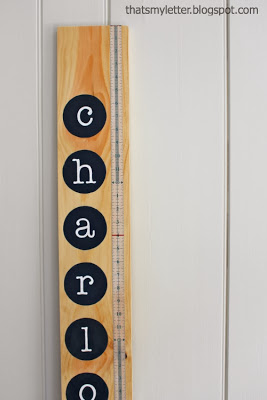
diy personalized growth chart
You would hang the growth chart on the wall, at least 12″ or 24″ from the floor:

diy personalized growth chart details

And you can write directly on the tape!

marking height on tape


The tape is accurate and clearly indicates inches and feet in 12-inch repeating intervals.
Use it for all kinds of projects: hanging artwork, mapping out furniture placement, precision cutting and drilling.
measure it marking tape
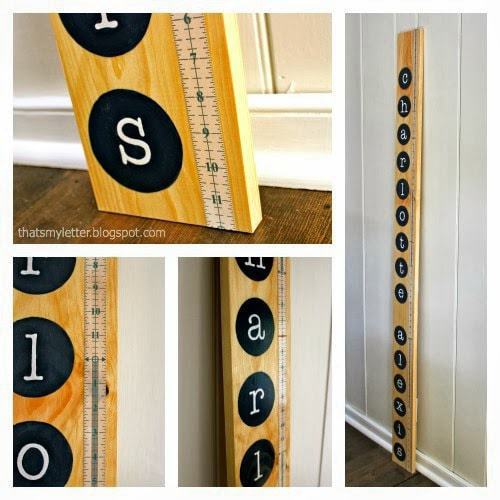
Or use it to make a personalized growth chart:


single wood board growth chart


personalized single wood board growth chart


How to make a personalized growth chart:

 
1. Use a 1 x 6 x 6 pine board and Measure-It! measuring tape:
how to make a wood growth chart
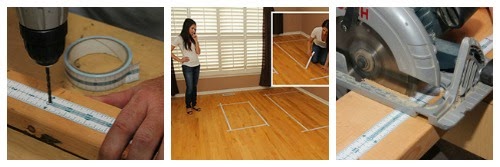
2. Adhere tape to pine board down one side, be sure to start with a 12″ (foot marker) at top of pine board.  Run the tape all the way down (you may need to trim your board to exactly 6′, my board was about 1/2″ too long):
measure it tape on wood board measure it tape on wood board


3. To add handpainted lettering start with a 3 1/4″ circle template:
cardstock circle template


4. Mark center of template at top edge and use a shorter piece of Measure-It! tape to determine the center of wood:
using circle template on board


5. Trace around circle template.
tracing circle template on board
6. Remove the horizontal shorter piece of tape and use the thickness of the tape as a spacing guide and simply repeat for the next circle until you have enough for the child’s name:
centering circles on boardspacing circles on board


7. Print out the name using lowercase American Typewriter font at 200 point:
letters printed for personalization


8. Place letter in center of circle (I fold the letter to find the center) and using a ballpoint pen trace around letter.  The pressure of the pen leaves an indent in the wood:
tracing letters onto boardindent from ballpoint pen


9. Paint navy blue inside the circle but NOT on the letter portion:
painting circles on board


10. Paint white gloss inside the letter:
handpainting letters on growth chart


11. Stain with Minwax Ipswich pine, the tape will take the stain and blend a bit more with the wood:

apply stain to wood board


12. To make your Measure-It! tape permanent seal the project with clear satin polyurethane.
seal growth chart with poly


diy growth chart board
Disclaimer: I was not compensated in any way for writing this post.  I was provided with product to review and all thoughts and opinions are my own.
You may also like...

  • DIY Sports Themed Growth ChartDIY Sports Themed Growth Chart
  • DIY Wood Cut Out Name PlaqueDIY Wood Cut Out Name Plaque
  • DIY Giant Wood BuntingDIY Giant Wood Bunting
  • DIY Simple Personalized PillowsDIY Simple Personalized Pillows
Share this post:

Filed Under: BABIES, CRAFTS, DIY, GIFTS, HOME DECOR, HOME DECOR, KIDS, PAINT3 Comments

Reader Interactions

Comments

  1. Kim @ NewlyWoodwards says

    October 2, 2013 at 6:33 PM

    This growth chart is too cool! I love the look of it with the exact measurements, too!

    Reply
  2. Our Pinteresting Family says

    October 2, 2013 at 7:06 PM

    That tape is awesome. I love your lettering on the growth chart, Jaime. 🙂

    Reply
  3. DaiseyJayne.com says

    October 6, 2013 at 11:31 PM

    Love this growth chart!!! Thanks for the chance to win the giveaway!!

    Reply

Leave a Reply Cancel reply

Your email address will not be published. Required fields are marked *

Primary Sidebar

Hi! I’m Jaime

Jaime Costiglio

Hello!

Thank you for stopping by.
Join me for lots of DIY.

Read more

Get new posts via email

Handbuilt Holiday: Gift Project Plans

handbuilt holiday gift project plans

Collection of DIY gift project plans to build.

The Home Depot Tool Prospective

THD Prospective

Tools to consider for the DIYer.

Archives

The Home Depot Logo
Copyright © 2023 Jaime Costiglio · Custom site by Moonsteam Design

Privacy Policy