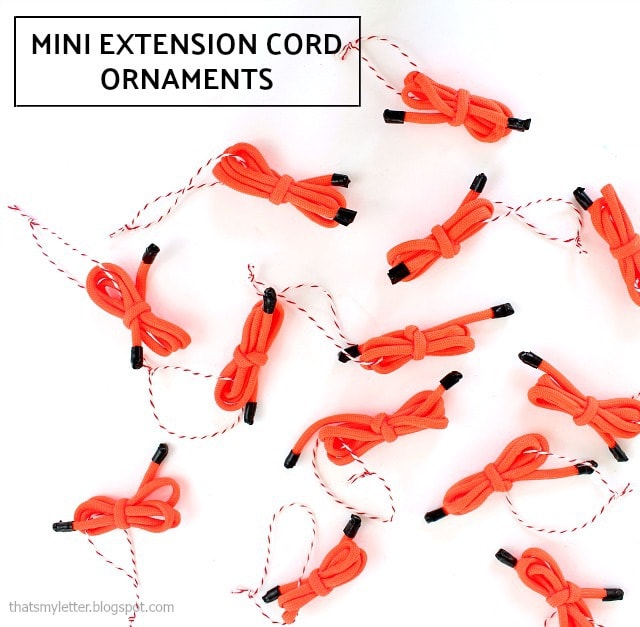
Another miniature tool ornament tutorial and today it’s the mini extension cord.
If you’re just joining in we are celebrating Christmas in July with all the tutorials for the mini tool tree ornaments.

I hope to share the how-to for each of the mini tools below:
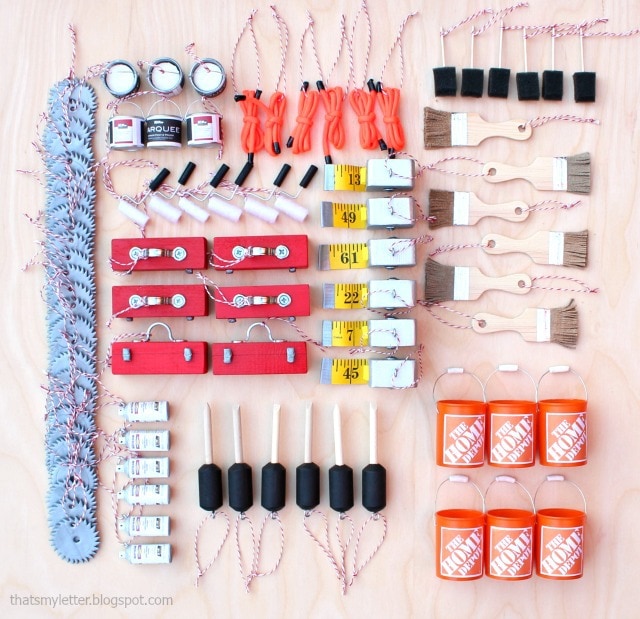
So far we have the mini saw blade and mini paint brush tutorials.
Below are the step by step instructions to make the mini extension cord ornaments.
*This post contains affiliate links below.
Supplies:
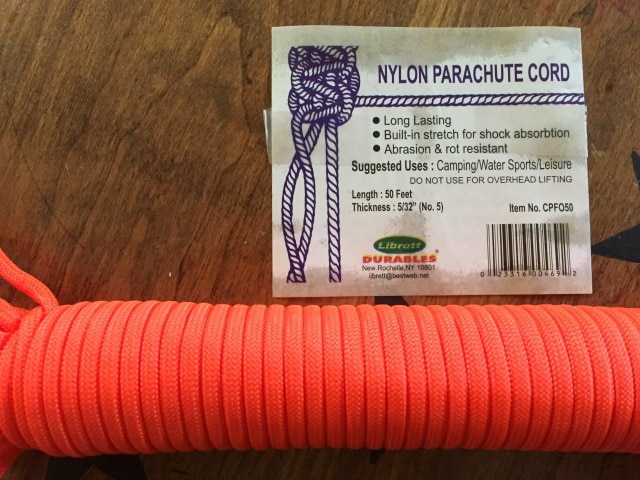
I used this orange nylon parachute cord to make the min extension cords.
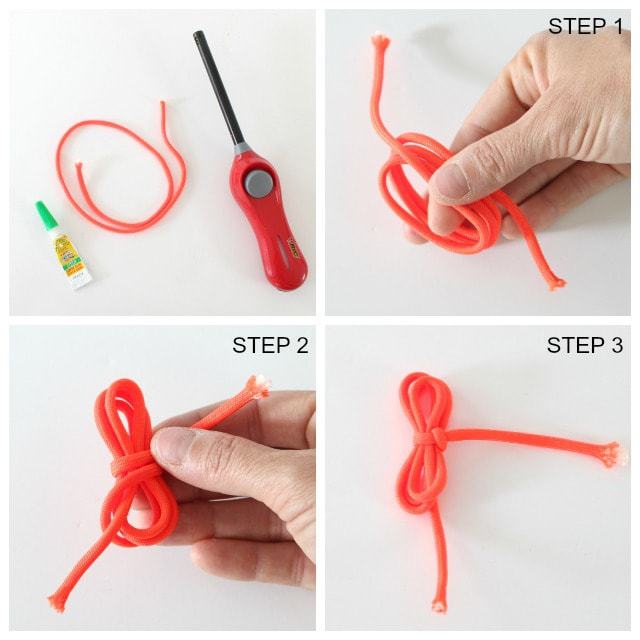
Step 1: Cut a 22″ piece of orange paracord. Fold into three loops (see photo above).
Step 2: Wrap loose end around loops.
Step 3: Tuck loose end under wrap and pull knot snug.
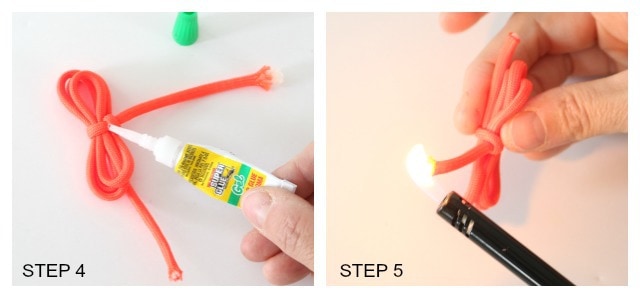
Step 4: Apply super glue gel at knot to ensure it stays put.
Step 5: Trim excess from loose ends and burn frayed edges to melt ends.
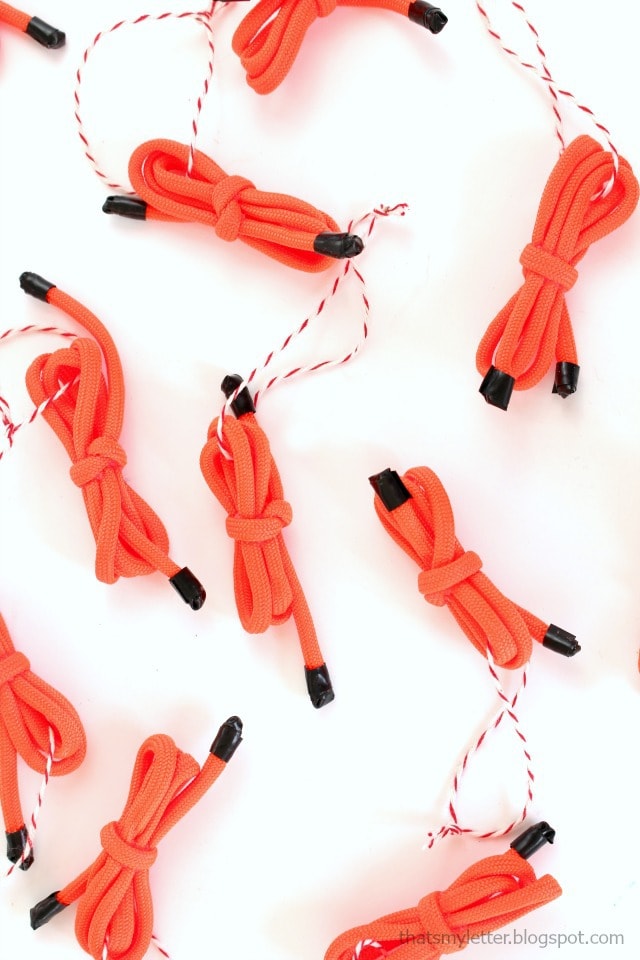
Step 6: Cut black electrical tape into small strips and wrap around cut ends. Thread twine hanger through loops.
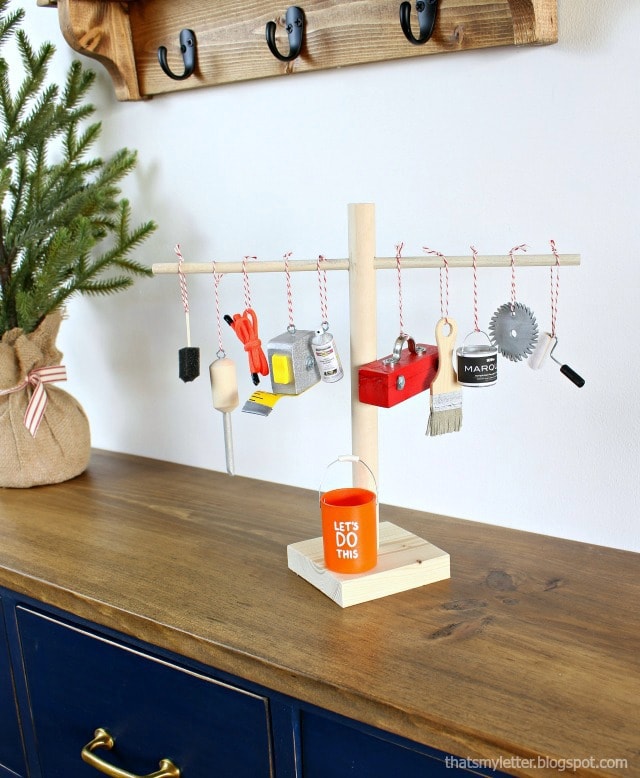
I hope you enjoyed this mini tool tutorial. Stay tuned because there are more ornaments to come!
SHOP THIS PROJECT:

 mini saw blade |
 mini paint brush |
 mini spray paint |
 mini tape measure |
 mini toolbox |


I love Christmas in July. This simple way is going to help win my team in completing our task of decorating the tree this year. Thanks