I definitely didn’t invent the wheel here but I did make free plans so you can build your own Lego minifigures shelf! There are lots of minifigure shelf ideas out there. Some are quite sophisticated with little ledges for each minifigure but I went simple. I didn’t even add the baseplates which would be a great option if you like complete uniformity and to be able to secure the figures.

A DIY tutorial to build a Lego mini figures shelf. Make this storage shelf for your whole Lego minifigures collection.

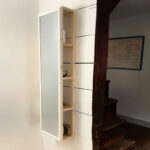
Lego Minifigure Storage
This version of the minifigure display shelf allows you the freedom to place as many figurines as you choose on each ledge.

If you follow me over on Instagram then you got a sneak peek of this shelf when I surprised my son after school one day.

Lego Shelf Build
It took under an hour to whip together this storage shelf. It’s a relatively simple build that serves a great purpose by keeping all those minifigures safe and visible. What a great gift idea for any Lego fan young or old!

I hung the shelf just high enough for my son to have easy access and directly above his nightstand. We keep all the Lego instruction books in this nightstand (not that we’ve ever referred back to them once the build is complete, I don’t know why I’m keeping them?).

Below are step by step instructions to build the Lego minifigurine shelf. Be sure to follow all safety precautions when operating power tools.

Supplies:
- 1 – 1x3x6 pine board
- 6’ – 1 5/8” x 3/8” flat moulding
- ¼” plywood @ 18” x 15 ½”
- 1 ¼” finish nails
- ¾” finish nails
- wood glue
Cut List:
- 2 – 1×3 @ 18” pine board (long sides)
- 2 – 1×3 @ 14” pine board (short sides)
- 4 –1 5/8” x 3/8” flat moulding @ 16 ½” (shelves)
- 1 –¼” plywood @ 18” x 15 ½” (backing)

Step 1: Attach long sides to short sides using wood glue and 1 ¼” finish nails.

Step 2: Attach shelves to short sides using wood glue and 1 ¼” finish nails. Consider using a scrap 1×3 as your spacer.

Step 3: Attach backing using wood glue and ¾” finish nails. Consider a few nails into shelves to keep back secure.
Fill nail holes with wood putty and sand well. Prime and paint with white semi-gloss.

Want more Lego related projects to build and make? I’ve done a few.

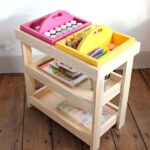
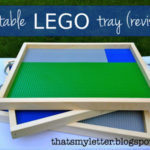
The portable Lego tray is an all-time favorite and super easy.

If you have the space why not make an entire play table devoted to Lego? Details on this Lego play table here.

And I can’t forget the loft bed with Lego storage and workspace. Truth be told I made another figurine shelf in natural wood to hang just above the table space between the towers. Jen at House of Wood did the plans for me for this bed.
It 's a good idea!
Such a cute idea! I love lego ideas… my kids are really getting into them. 🙂
Thanks for the great plans! We love our shelf. You could add one thing to your instructions….the shelves are so thin that we had a lot of trouble nailing them until my husband realized we should drill a hole with a tiny drill bit first. Then it was easy!