• Home
  • Blog
  • About
  • Contact
    • Disclosure
    • Privacy Policy
  • SHOP
  • Widget area for main menu

    • Email
    • Facebook
    • Instagram
    • Pinterest
    • Twitter
    • YouTube
  • Skip to primary navigation
  • Skip to main content
  • Skip to primary sidebar

Jaime Costiglio

build - paint - sew

  • BUILD
    • BEDS
    • BENCHES
    • DESKS
    • DRESSERS
    • GAMES & TOYS
    • SCRAP WOOD
    • SHELVES
    • STORAGE
    • TABLES
  • TOOLS
  • PAINT
    • CRAFTS
    • FURNITURE
    • HOME DECOR
  • SEW
    • GIFTS
    • HOME DECOR
    • POUCHES
  • HANDBUILT HOLIDAY
    • 2021
    • 2019
    • 2018
    • 2017
    • 2016
    • 2015
    • 2014
    • 2013
  • GIFTS
    • BABIES
    • KIDS
    • FOR HER
    • FOR HIM
    • TEACHERS
    • WEDDINGS
  • SEASONAL
    • 4TH OF JULY
    • FALL
    • HALLOWEEN
    • CHRISTMAS
    • SUMMER
    • SPRING
    • ST. PATRICK’S DAY
    • THANKSGIVING
    • VALENTINE’S DAY
    • WINTER
  • SALTBOX PROJECT
    • BATHROOMS
    • DINING ROOM
    • EXTERIOR
    • FAMILY ROOM
    • FOYER / MUDROOM
    • KIDS BEDROOMS
    • KITCHEN
    • LIVING ROOM
    • MASTER BEDROOM
    • PLAYROOM
  • SCROLL SAW

“B” is for Believe

December 10, 2011

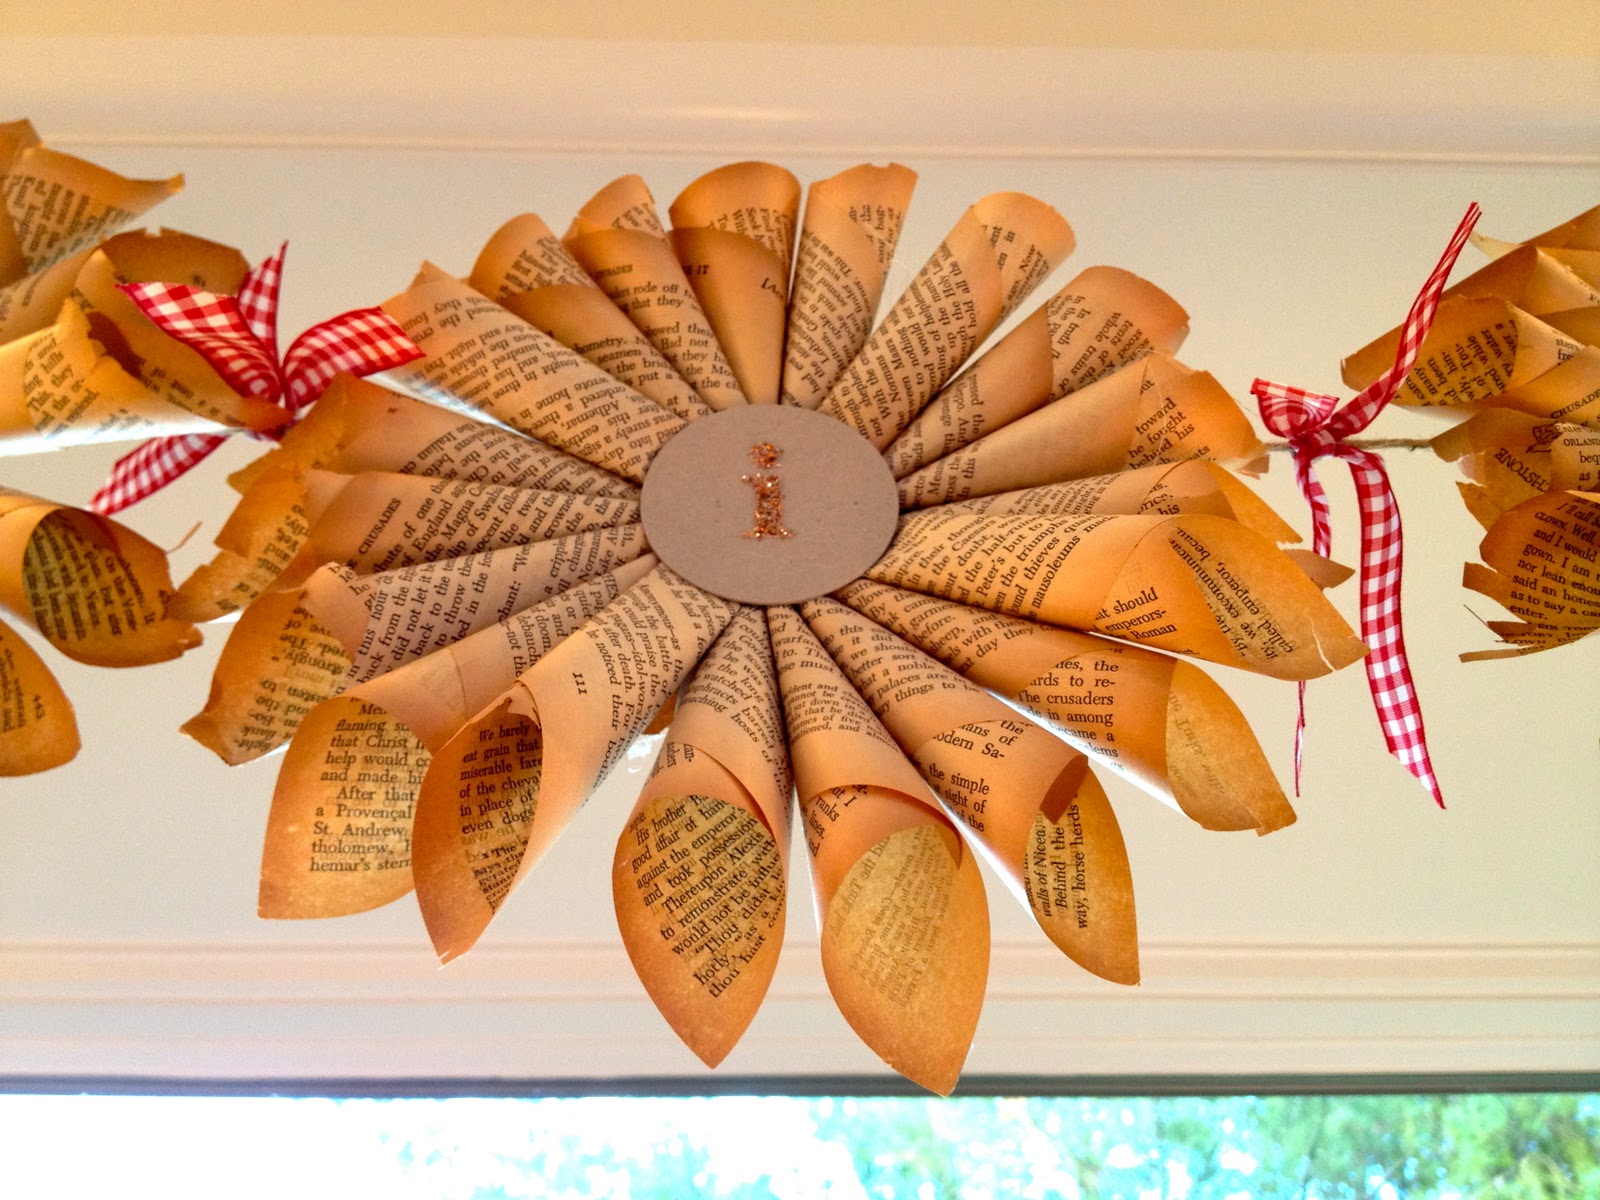
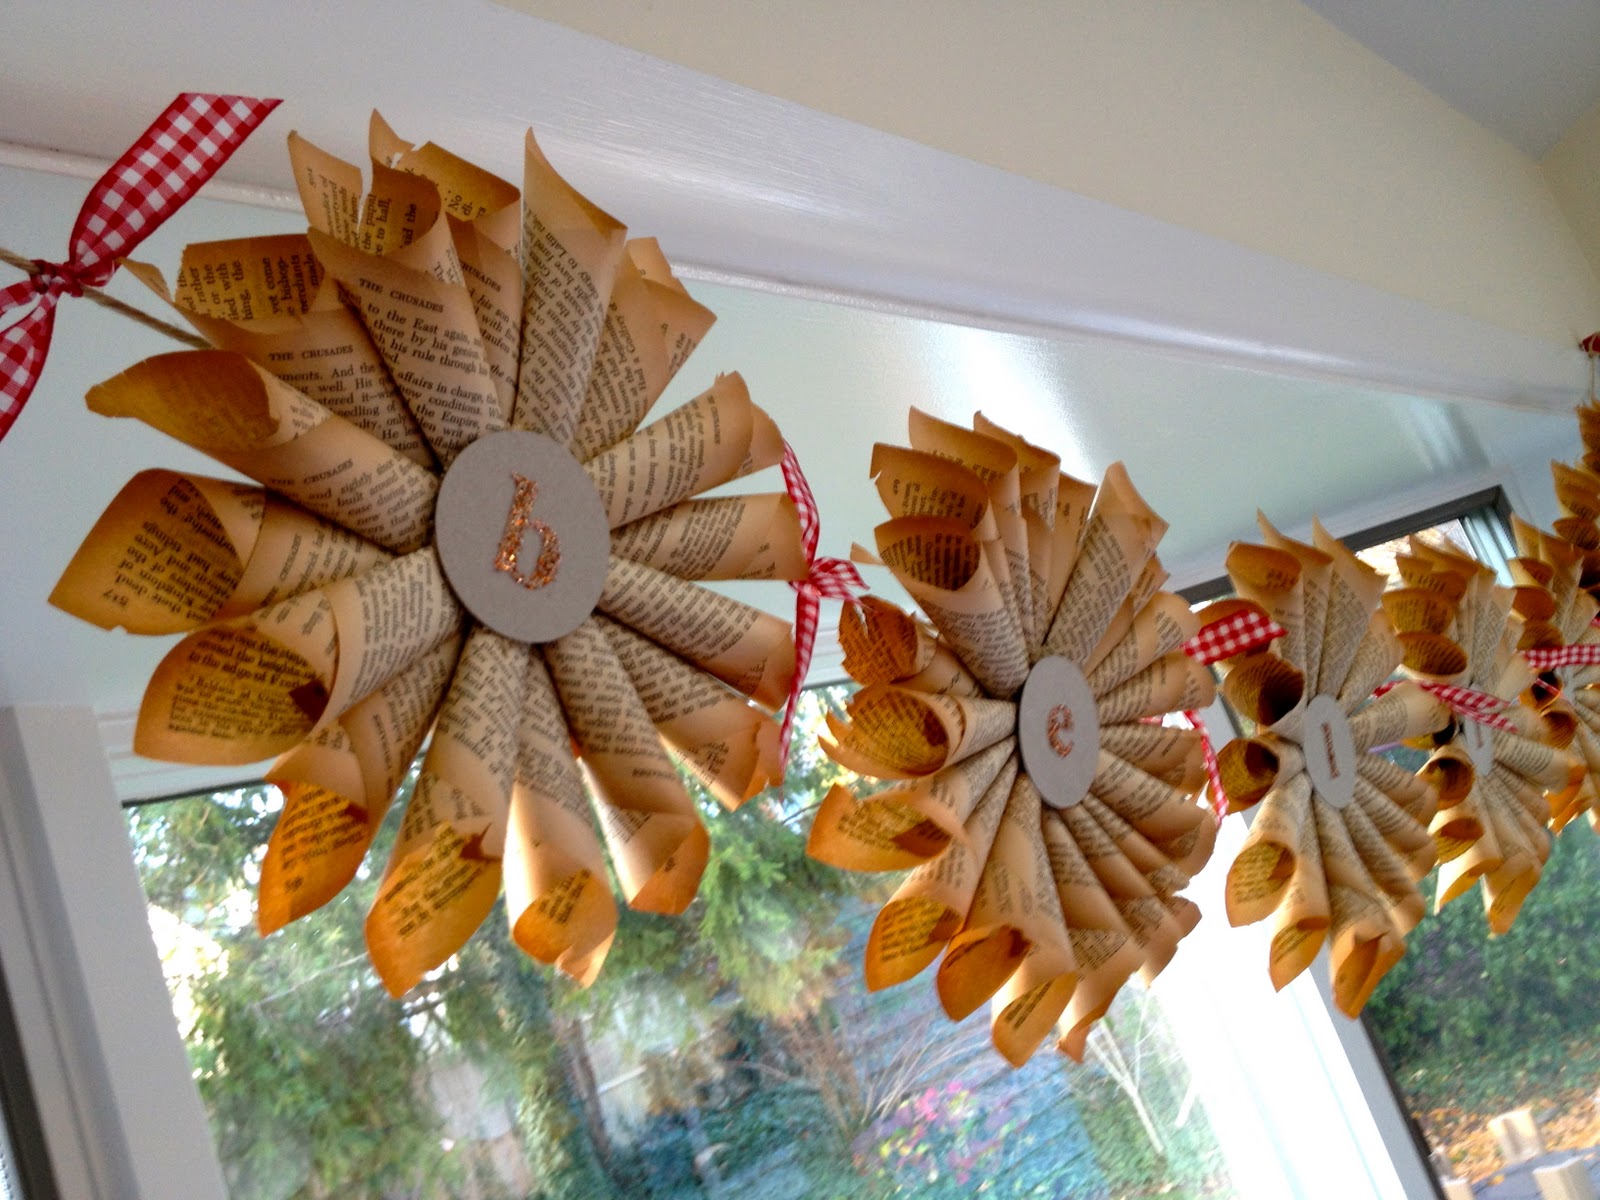
Paper starburst believe garland banner:
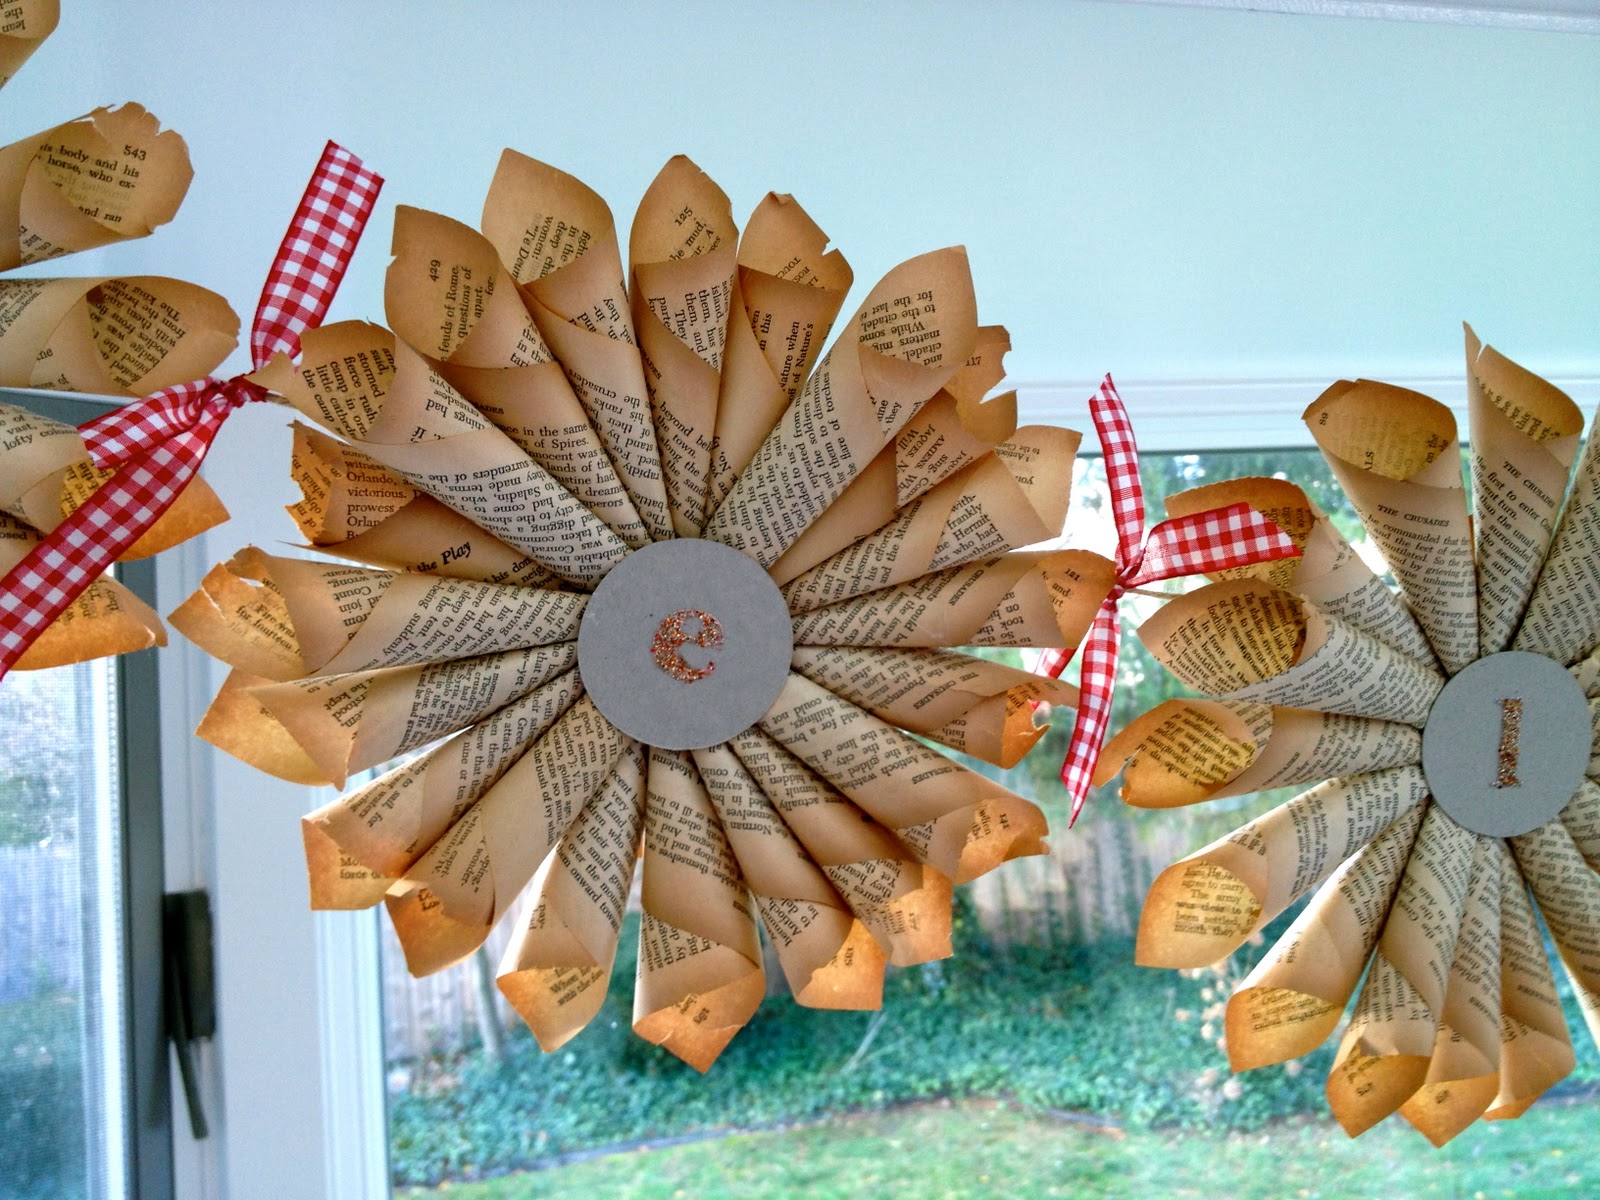
Made from old paperback book pages.
Naturally aged to perfection.
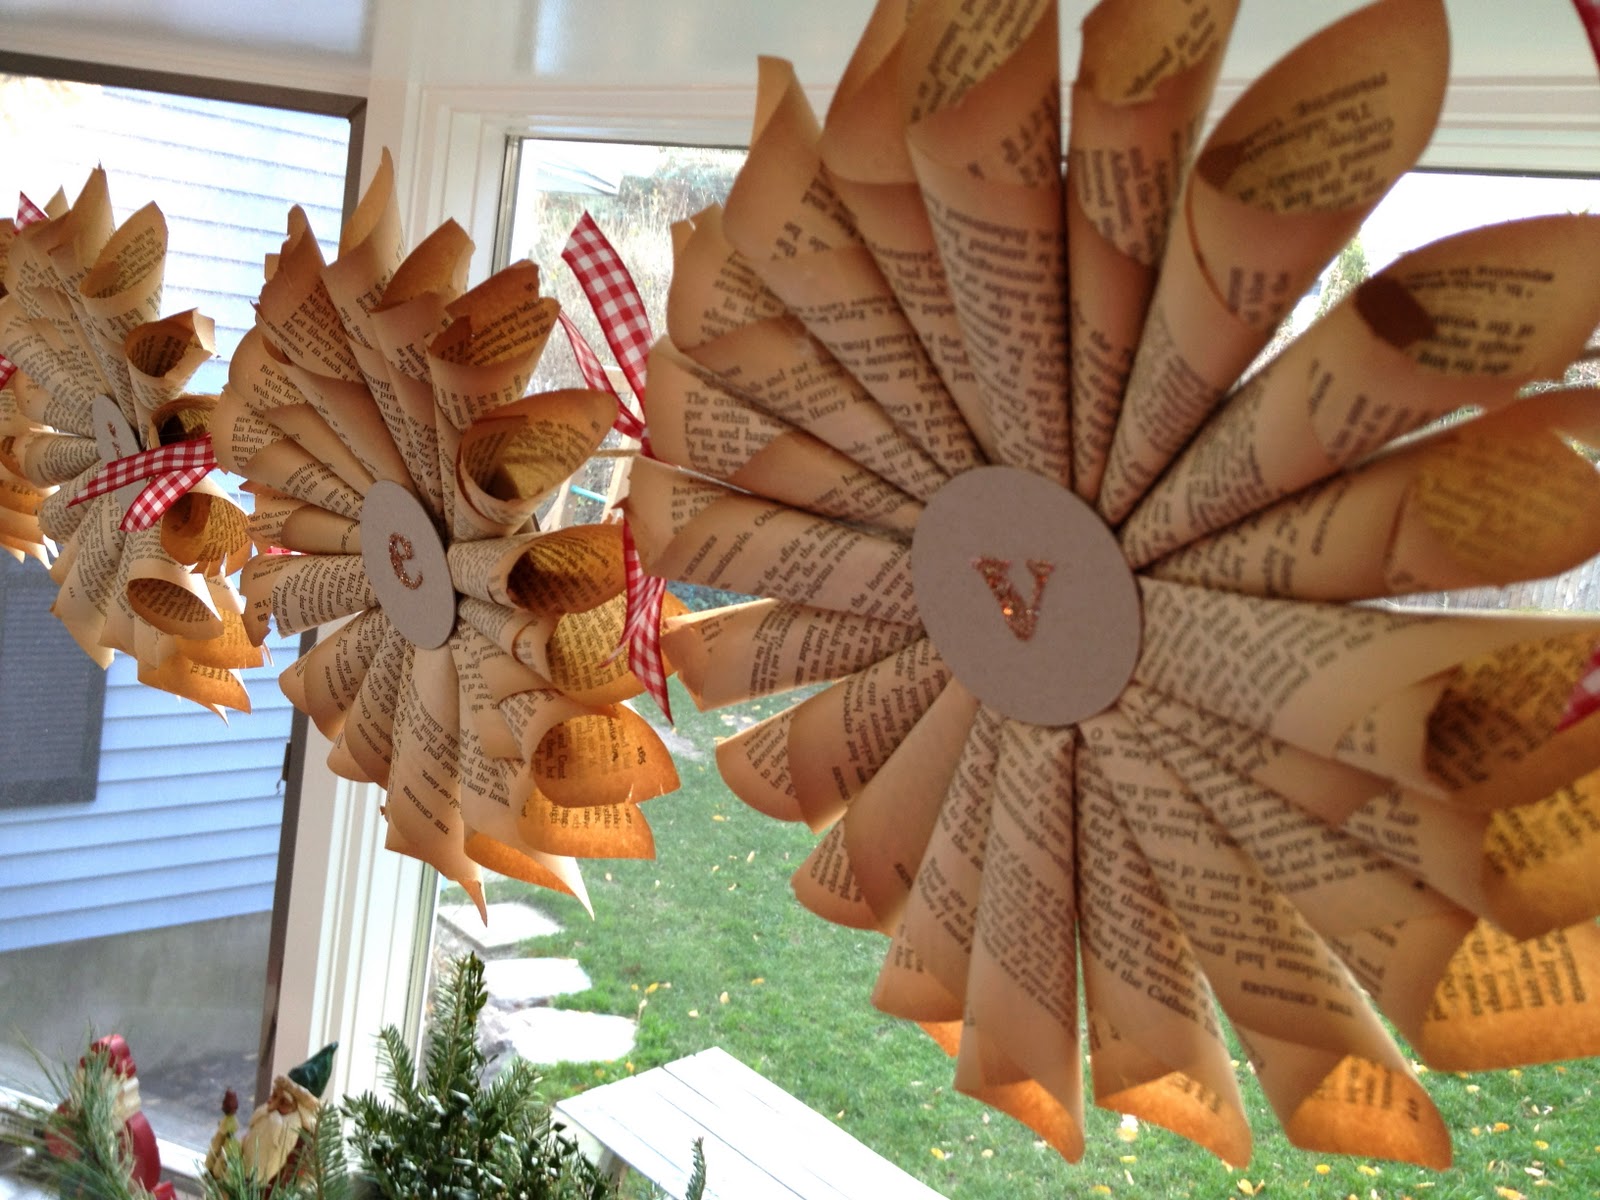
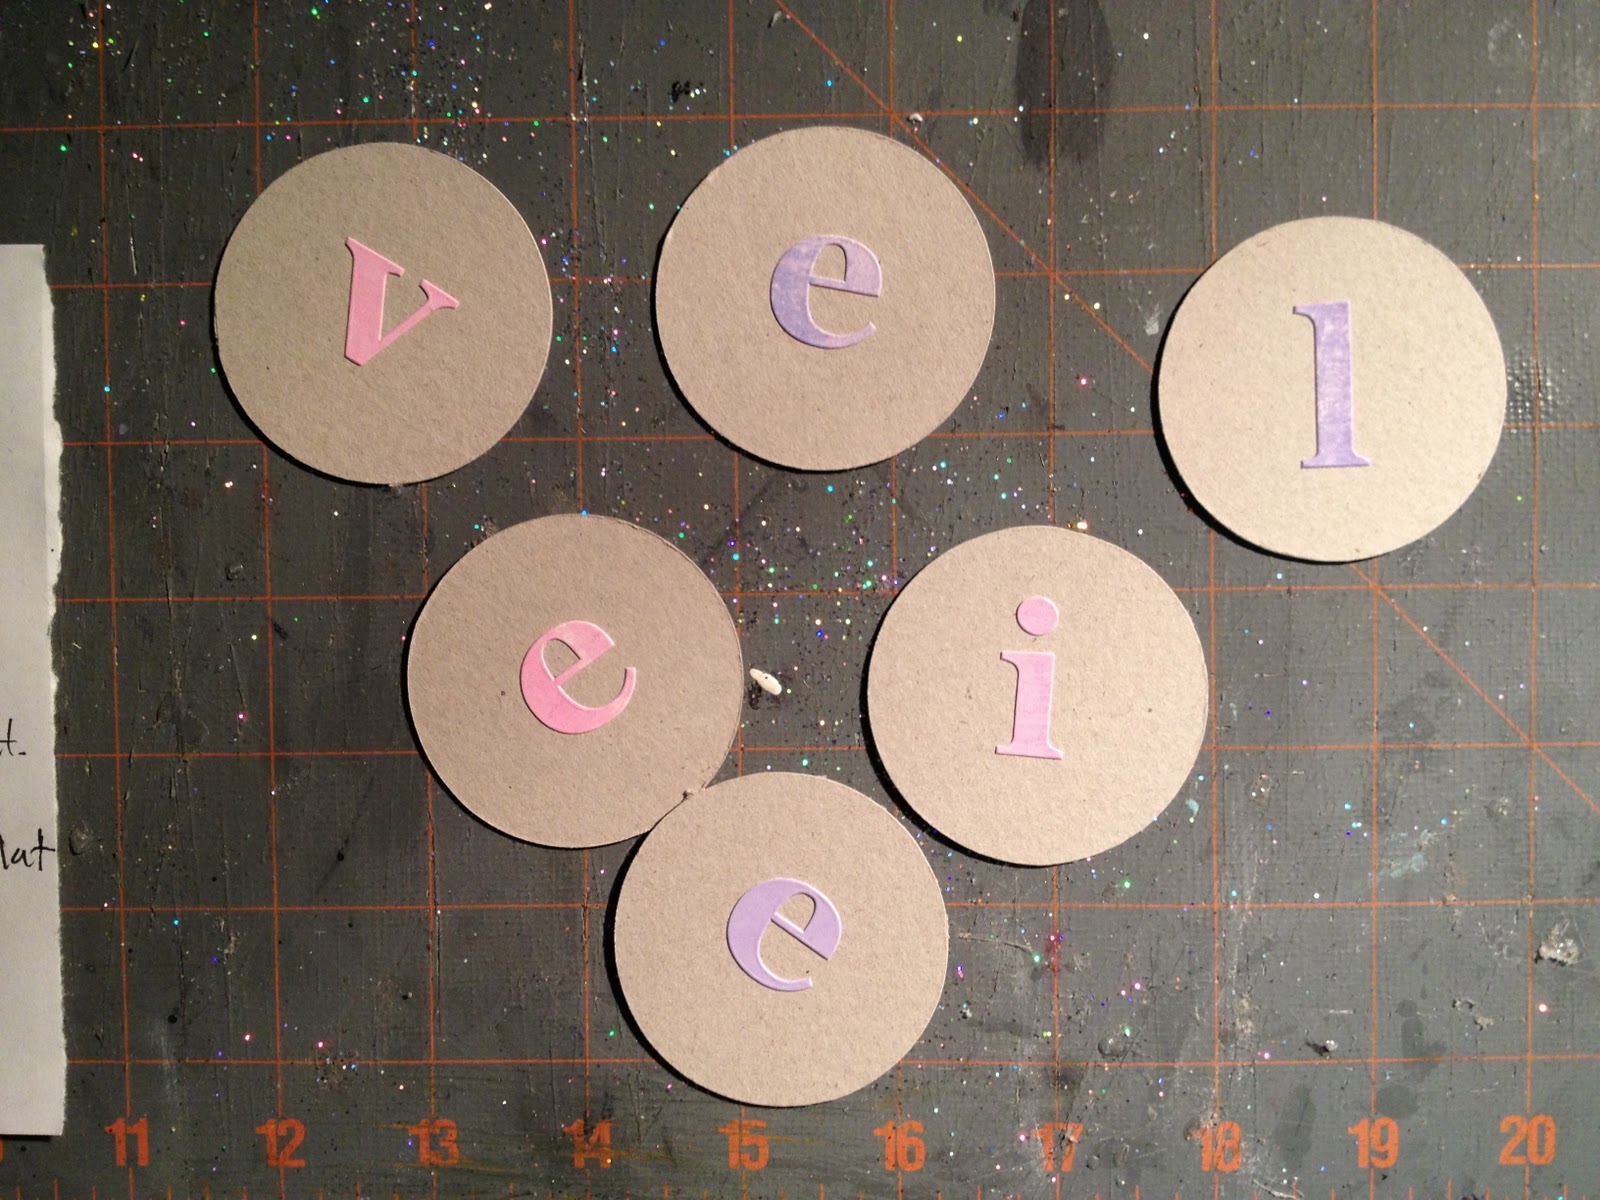
With a glittered letter in the center that spells out believe.
Here’s how I made the garland:

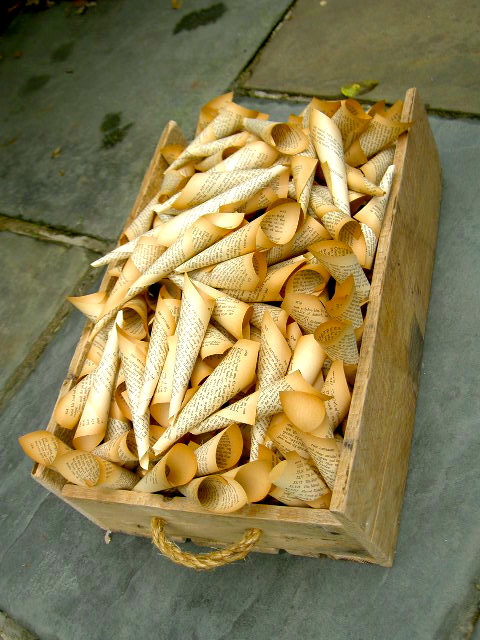
1. Prepare the paper rolls.
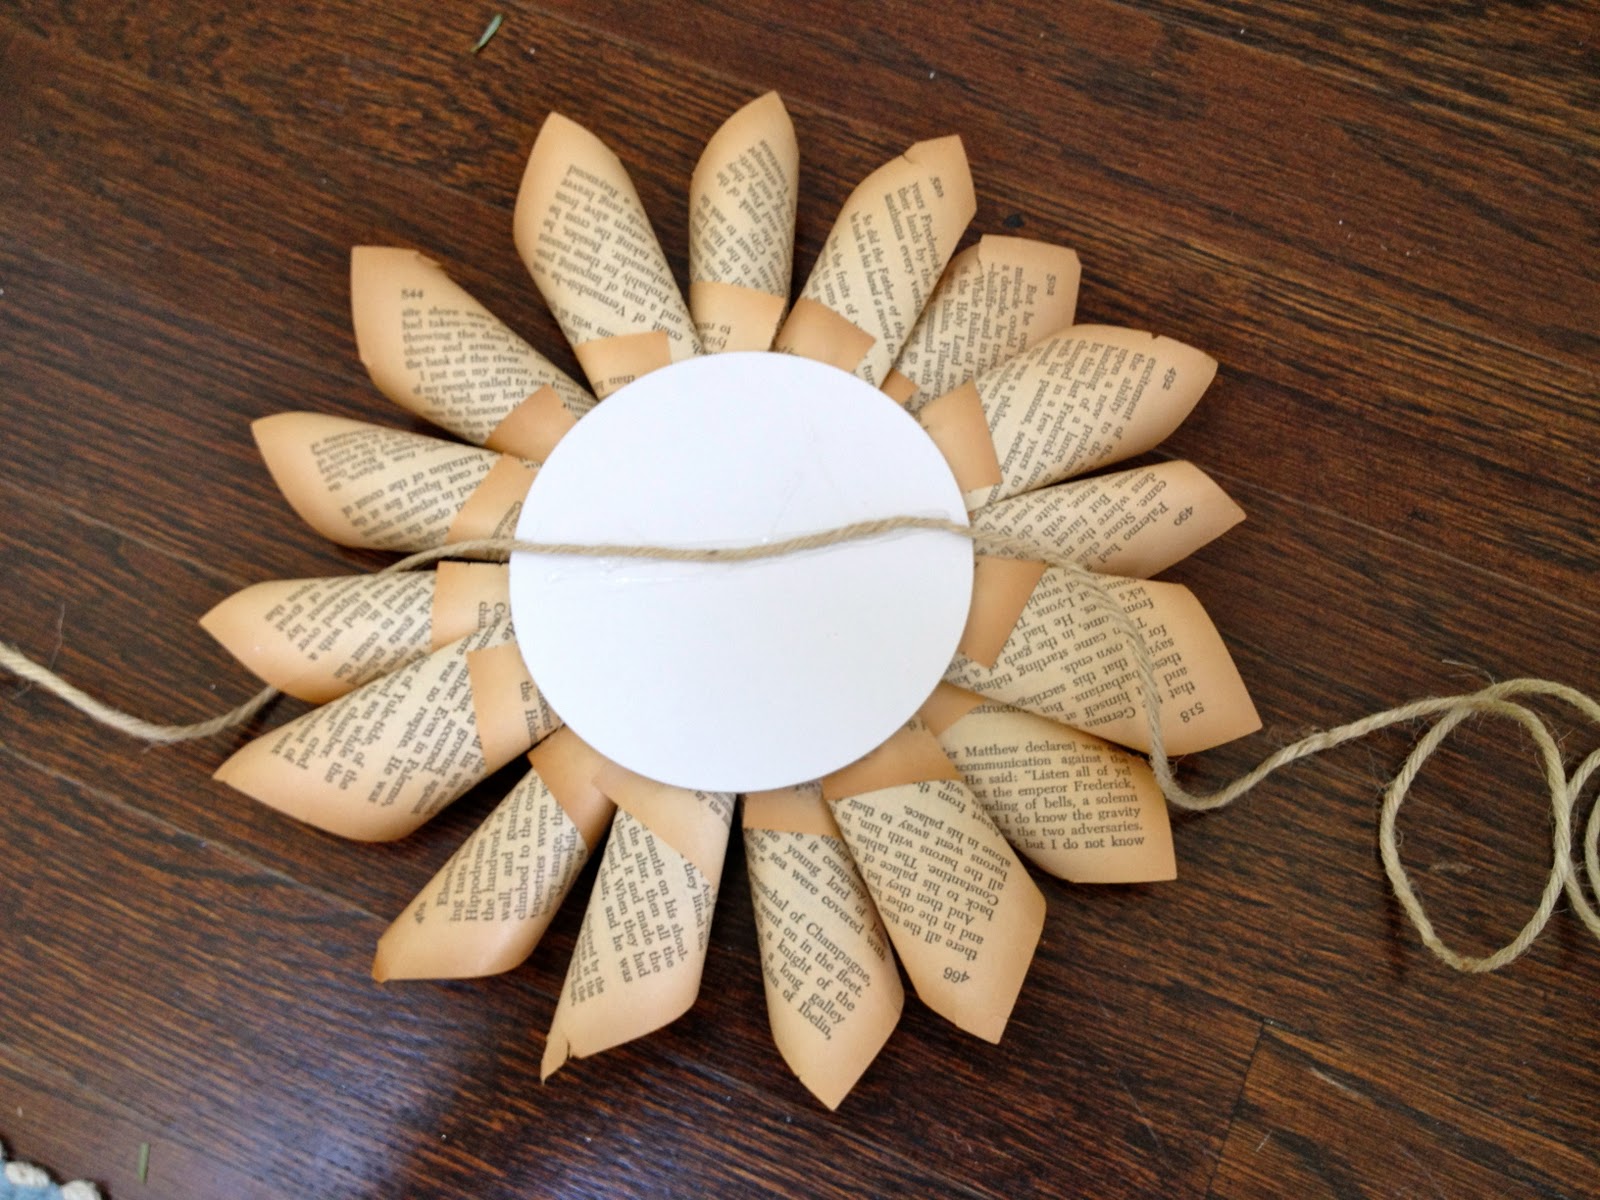
Tear out old paperback book pages and roll into a cone shape securing with hot glue:

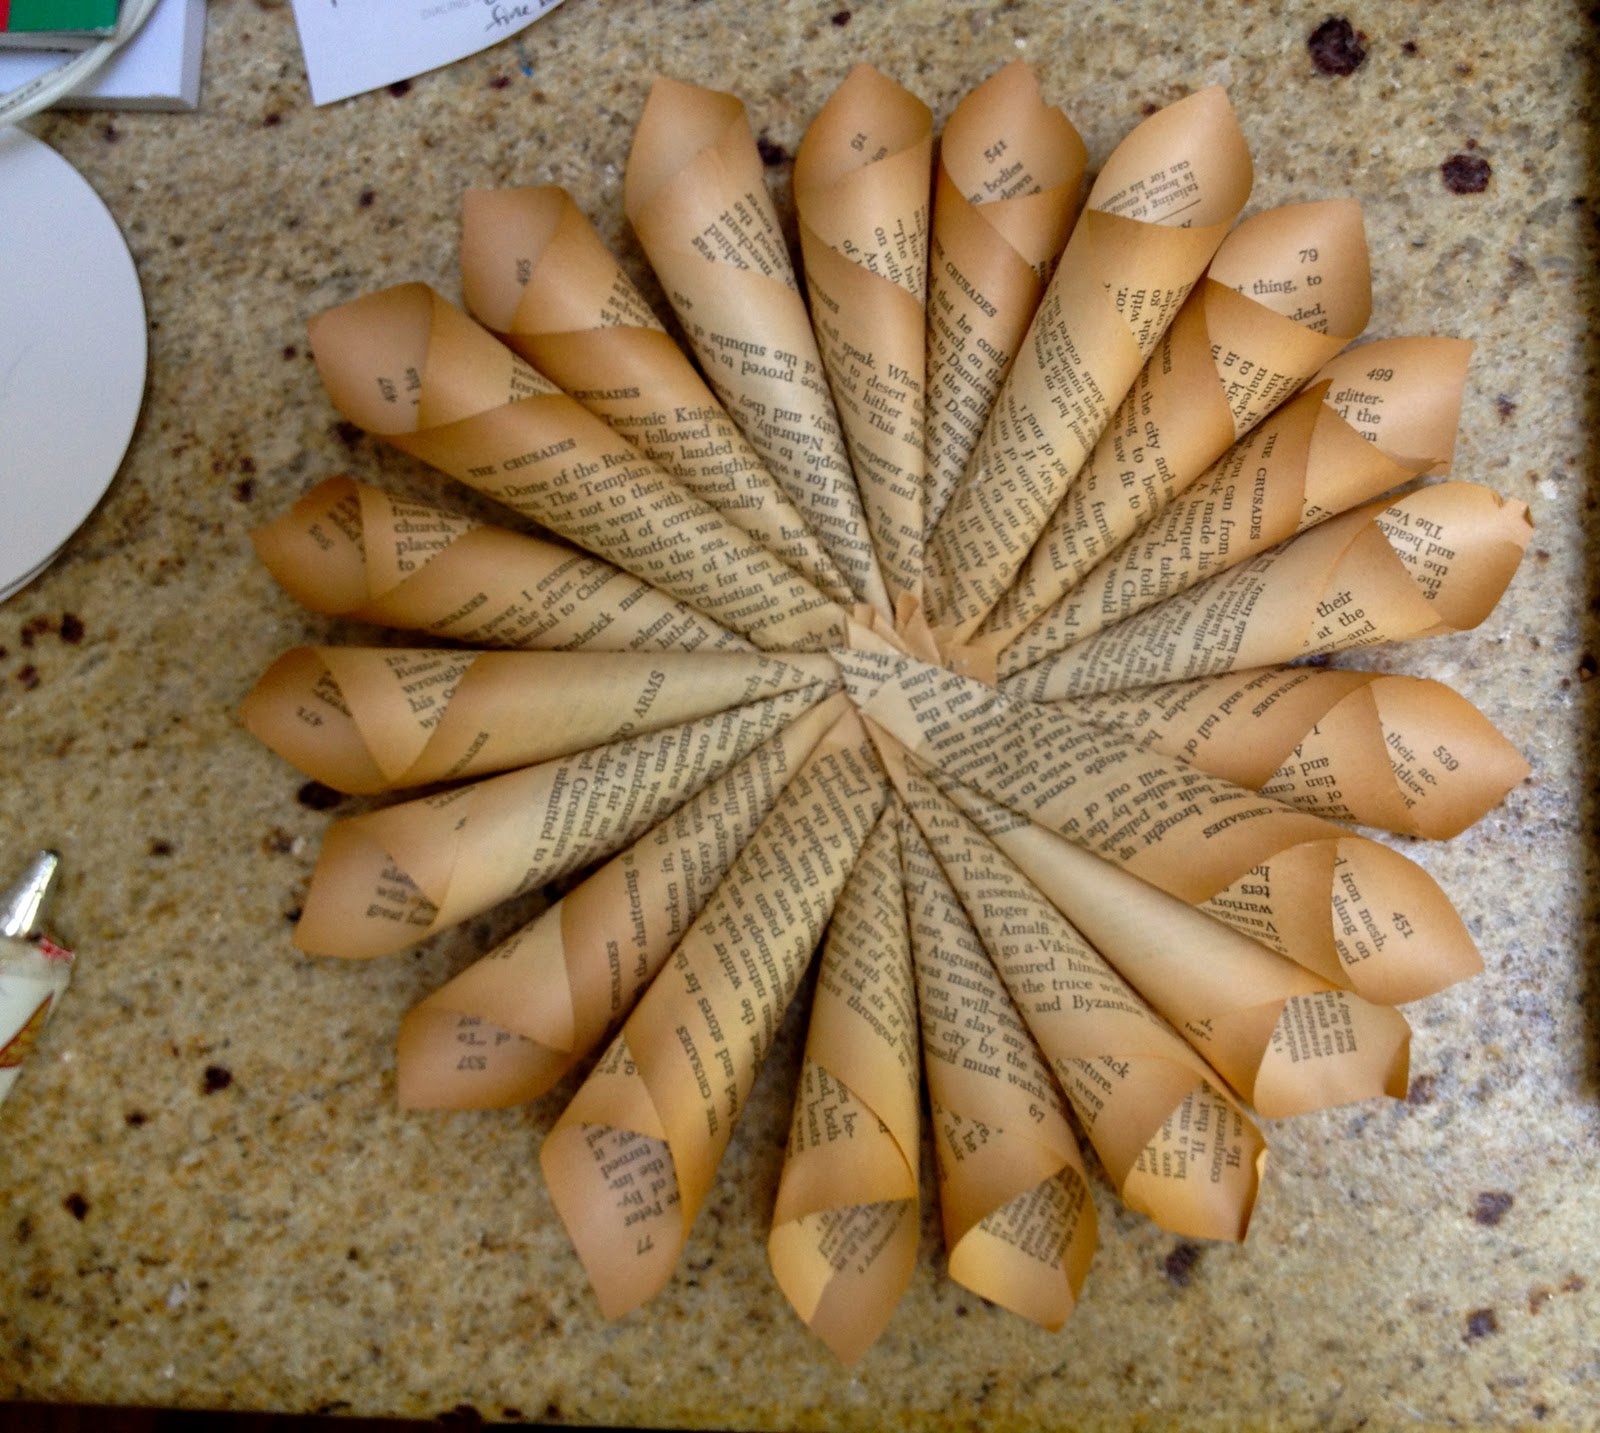
2. Using chipboard coasters (or any 4″ cardboard circle) begin adding paper rolls:
3. Then fill in gaps until complete:
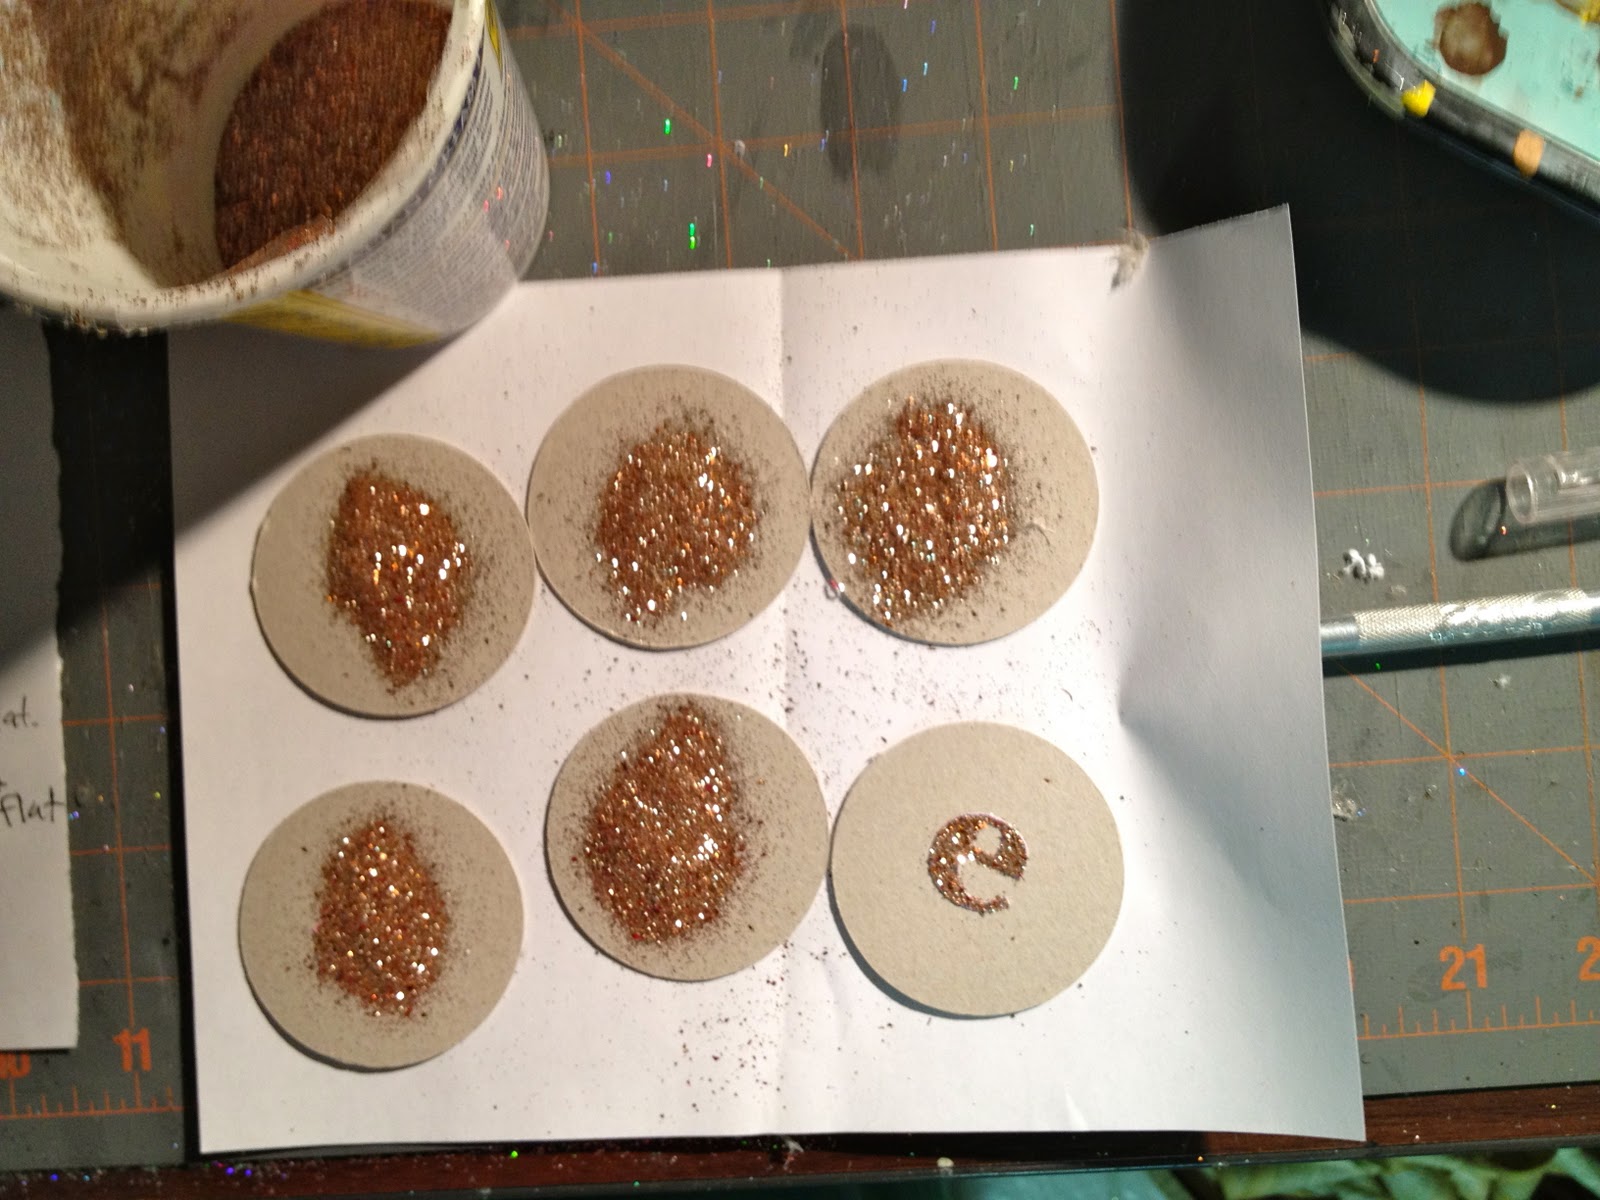
4. For the glittered letters use a 1 1/2″ circle cut out of cardstock and stick on adhesive letters:
5. Paint white glue onto the surface of each letter then sprinkle with glitter:
** Wait to add letter to starburst until they are strung on garland.
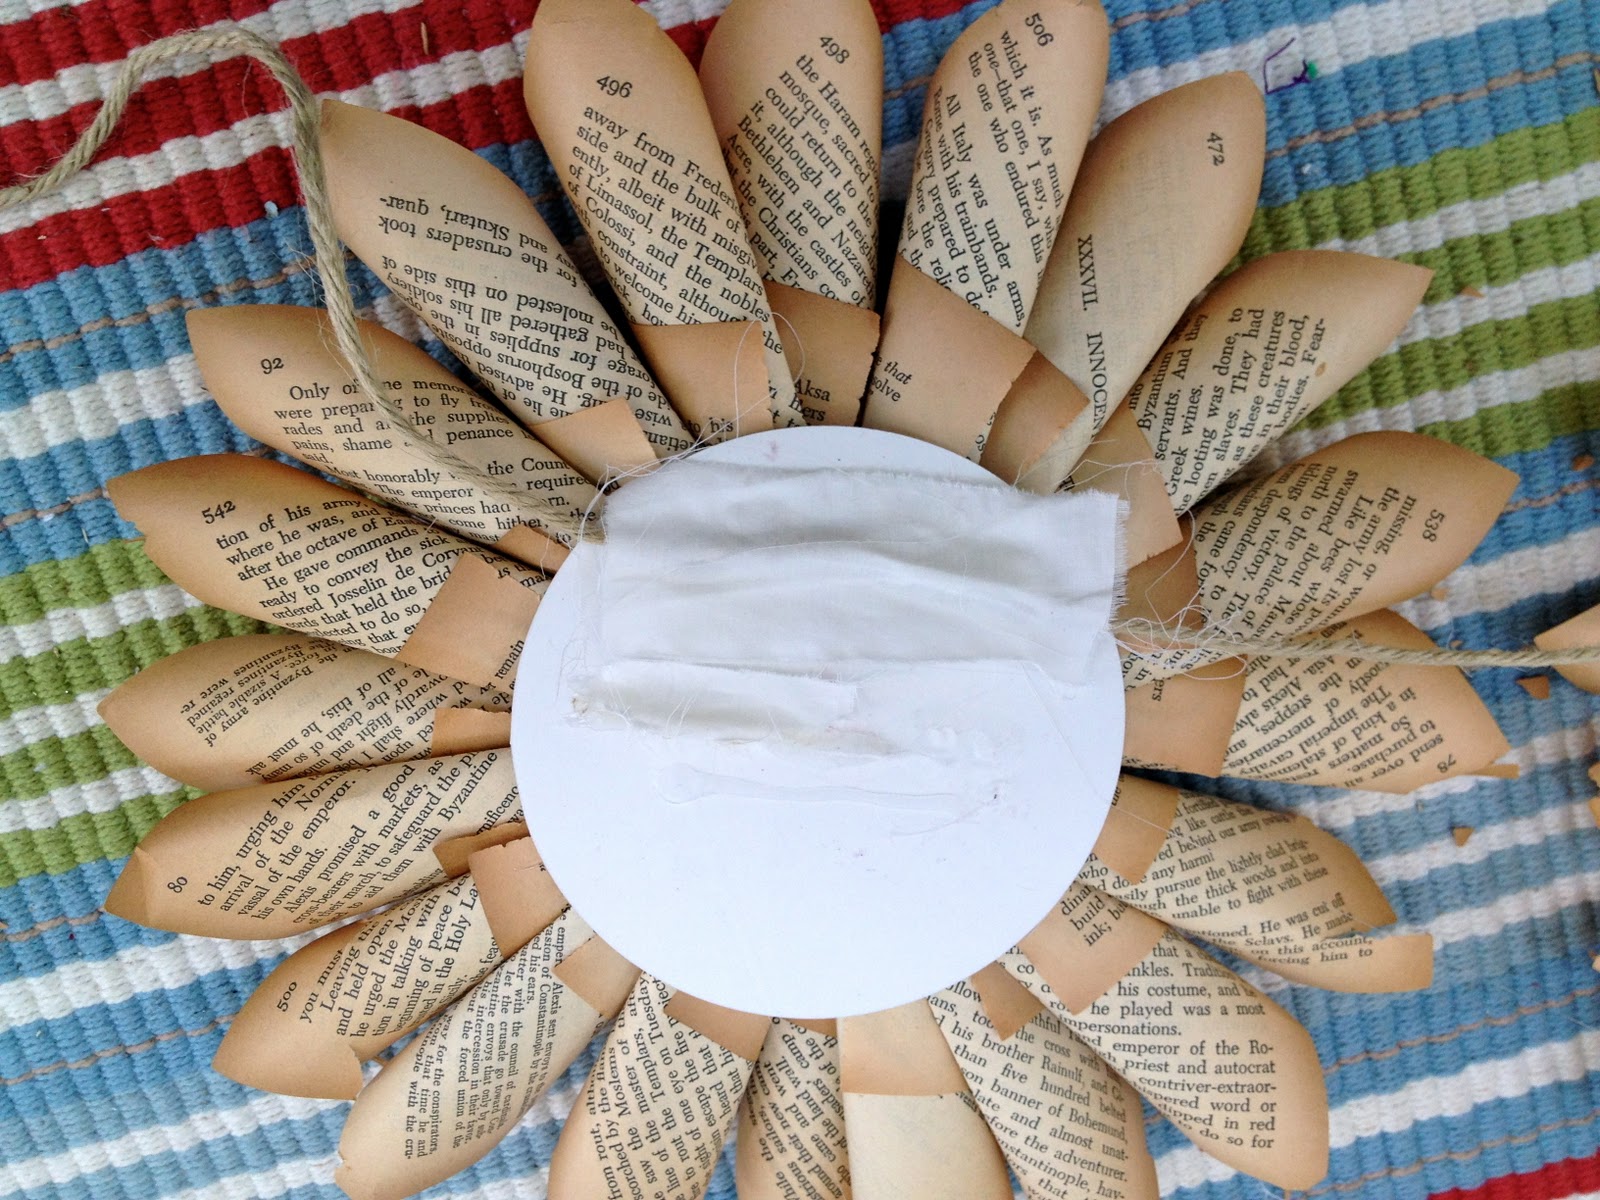
6.  To make the garland hot glue string onto back of each coaster:
** Place string in top third of coaster.
7. Cover the string with scrap fabric to secure.
8. Once all starbursts are attach then add the glittered letters:
Hang and enjoy:
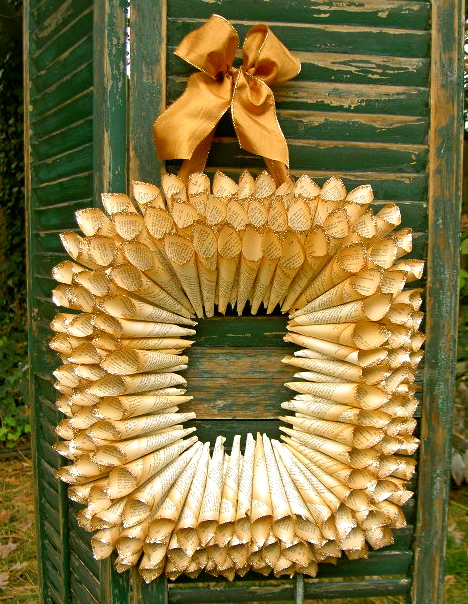
A variation on these previous paper roll projects:
rectangular wreath
star ornaments

star wreath

And now the garland:
I’m linking up to:
Whatcha Got Weekend @ Lolly Jane
SAS @ Funky Junk
Weekend Wrap Up @ Tatertots & Jello
Sundae Scoop @ I Heart Naptime
Sister Sunday @ Sisters of the Wild West
Sunday Showcase Party @ Under the Table & Dreaming
Just Something I Whipped Up @ The Girl Creative
DIY Fall Festival @ The DIY Showoff
Made by You Mondays @ Skip to My Lou
Making the World Cuter @ Making the World Cuter
Nifty Thrifty @ Coastal Charm
Tuesday Treasures @ My Uncommon Slice of Suburbia
Tutorials & Tips Tuesday @ Home Stories A to Z
Good Life @ A Beach Cottage
Delightfully Inspiring @ Delightful Order
Transformation Thursday @ The Shabby Creek Cottage
Strut Your Stuff @ Somewhat Simple
Share Awesomeness Thur @ The 36th Avenue
Flaunt it Friday @ Chic on a Shoestring
Tickled Pink @ 504 Main
Frugal Friday @ The Shabby Nest
SAS @ Just a Girl
Feathered Nest @ French Country Cottage
Remodelaholics Anonymous @ Remodelaholic
inspiration board @ Carolyns Homework
Tuesday Timeout @ Reasons to Skip the Housework


You may also like...

  • DIY Handpainted SignDIY Handpainted Sign
  • No Tricks Only Treats Handpainted SignNo Tricks Only Treats Handpainted Sign
  • “C” is for Chore Chart“C” is for Chore Chart
  • “M” is for Mantel Artwork“M” is for Mantel Artwork
Share this post:

Filed Under: CHRISTMAS, CRAFTS, DIY, HOME DECOR, HOME DECOR, PAINT, SEASONAL16 Comments

Reader Interactions

Comments

  1. Korrie@RedHenHome says

    December 10, 2011 at 2:45 PM

    Another winner! Oh, this is gorgeous!

    Reply
  2. Erin says

    December 10, 2011 at 4:57 PM

    Love!

    Reply
  3. Vickie @ Ranger 911 says

    December 10, 2011 at 8:50 PM

    It looks so warm and inviting hanging across your window.

    Reply
  4. hilary@oldhousetruelove says

    December 10, 2011 at 11:31 PM

    you are good! its all in the details. i love it!

    Reply
  5. Mitralee says

    December 11, 2011 at 1:15 AM

    Wow! I love these so much!

    Reply
  6. Tiff says

    December 11, 2011 at 7:24 AM

    Your wreath garland is beautiful! I am inspired to make one myself! Thanks! X

    Reply
  7. Haven says

    December 12, 2011 at 12:39 AM

    I already loved your book page ornament, but now I love your garland! Great job!

    Reply
  8. Katherines Corner says

    December 13, 2011 at 2:02 PM

    so pretty, I love them all! HugsP.S> Have you added your lovely blog to my new blog list page? Don;t forget to enter my Tis The Season giveaway too, time is running out.

    Reply
  9. Gwen @ The Bold Abode says

    December 15, 2011 at 3:15 PM

    Oh, that is very pretty… A fine use for vintage, brown and crumbly books, I must say!

    Reply
  10. Jenna says

    December 15, 2011 at 7:05 PM

    wow this is awesome!!!! love this! i hope I get some time to make some!

    itsjustcalledspicy.blogspot.com

    Reply
  11. Linda@Coastal Charm says

    December 16, 2011 at 4:33 AM

    So very cute and I love the ribbon that you used.

    Blessings,
    Linda

    Reply
  12. Karen says

    December 17, 2011 at 3:15 AM

    Beautiful, love this and all of the other variations. They are gorgeous!

    Reply
  13. imsteelefullofscrap says

    December 17, 2011 at 12:54 PM

    Beautiful I wanted to make one for Christmas but time has ran out on my end I especially love the square wreath you made!

    Reply
  14. Amy Jo says

    December 20, 2011 at 1:46 PM

    wow… I love that garland!! Good job, it's really stunning!

    Reply
  15. Amy Jo says

    December 20, 2011 at 1:47 PM

    wow… I love that garland!! Good job, it's really stunning!

    Reply

Leave a Reply Cancel reply

Your email address will not be published. Required fields are marked *

Primary Sidebar

Hi! I’m Jaime

Jaime Costiglio

Hello!

Thank you for stopping by.
Join me for lots of DIY.

Read more

Get new posts via email

Handbuilt Holiday: Gift Project Plans

handbuilt holiday gift project plans

Collection of DIY gift project plans to build.

The Home Depot Tool Prospective

THD Prospective

Tools to consider for the DIYer.

Archives

The Home Depot Logo
Copyright © 2026 Jaime Costiglio · Custom site by Moonsteam Design

Privacy Policy