• Home
  • Blog
  • About
  • Contact
    • Disclosure
    • Privacy Policy
  • SHOP
  • Widget area for main menu

    • Email
    • Facebook
    • Instagram
    • Pinterest
    • Twitter
    • YouTube
  • Skip to primary navigation
  • Skip to main content
  • Skip to primary sidebar

Jaime Costiglio

build - paint - sew

  • BUILD
    • BEDS
    • BENCHES
    • DESKS
    • DRESSERS
    • GAMES & TOYS
    • SCRAP WOOD
    • SHELVES
    • STORAGE
    • TABLES
  • TOOLS
  • PAINT
    • CRAFTS
    • FURNITURE
    • HOME DECOR
  • SEW
    • GIFTS
    • HOME DECOR
    • POUCHES
  • HANDBUILT HOLIDAY
    • 2021
    • 2019
    • 2018
    • 2017
    • 2016
    • 2015
    • 2014
    • 2013
  • GIFTS
    • BABIES
    • KIDS
    • FOR HER
    • FOR HIM
    • TEACHERS
    • WEDDINGS
  • SEASONAL
    • 4TH OF JULY
    • FALL
    • HALLOWEEN
    • CHRISTMAS
    • SUMMER
    • SPRING
    • ST. PATRICK’S DAY
    • THANKSGIVING
    • VALENTINE’S DAY
    • WINTER
  • SALTBOX PROJECT
    • BATHROOMS
    • DINING ROOM
    • EXTERIOR
    • FAMILY ROOM
    • FOYER / MUDROOM
    • KIDS BEDROOMS
    • KITCHEN
    • LIVING ROOM
    • MASTER BEDROOM
    • PLAYROOM
  • SCROLL SAW

“W” is for Wreath

January 17, 2011

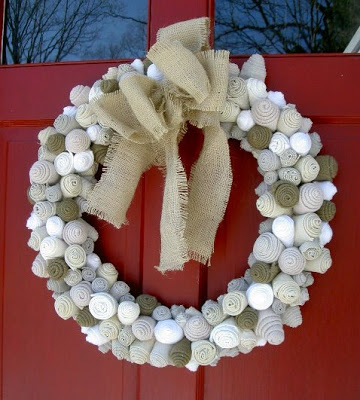
A winter wreath made from old sweaters and fabric scraps.

My inspiration came from Stephenie at Decorating Addition, her tutorial can be found here, it’s a slightly different version than mine below.

Here’s how I made the wreath:

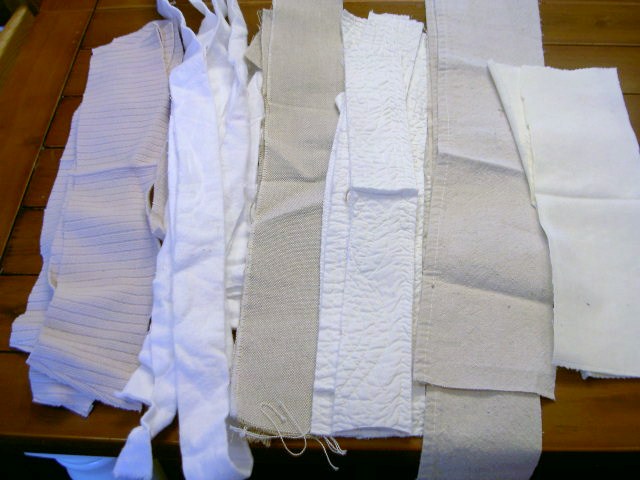
I scoured my fabric stash for any neutrals with texture.
I found two sweaters plus lots of scraps (and yes there are pieces of drop cloth in there).
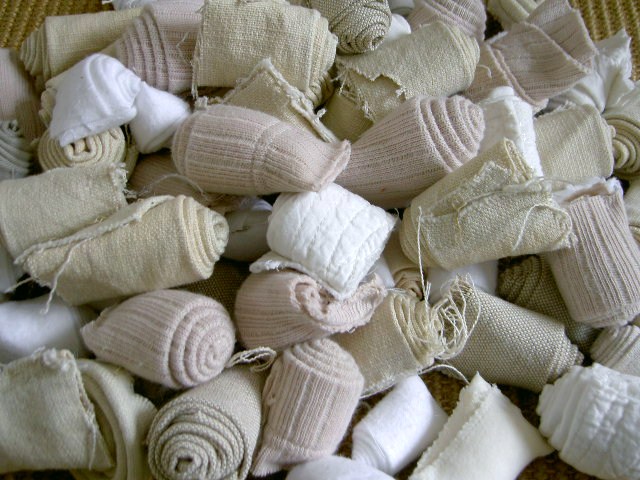
I cut everything into roughly 2″ strips.

I rolled each strip into a spiral and hot glued the end.

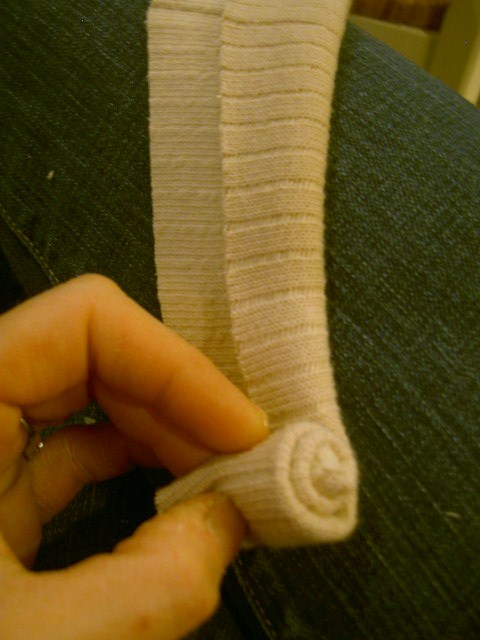
I probably made about 150 rolls:
I used a wire wreath form, cardboard cut to fit the back, and twist ties:
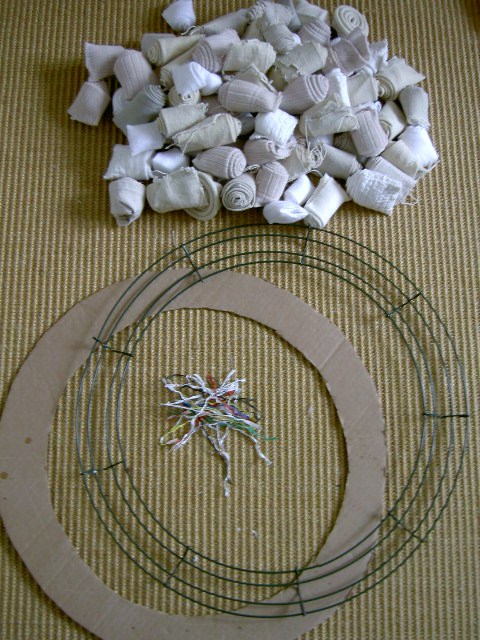
Make small holes in the cardboard and secure the cardboard onto the wire frame with the twist ties:
Start gluing the fabric rolls onto the frame and cardboard, swishing them in between the wire slots:
Fill it up tight and use the smaller rolls for the inner and outer edges to cover any wire:


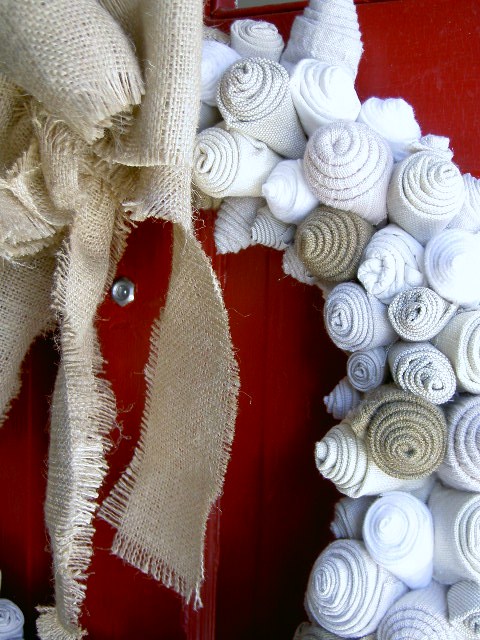
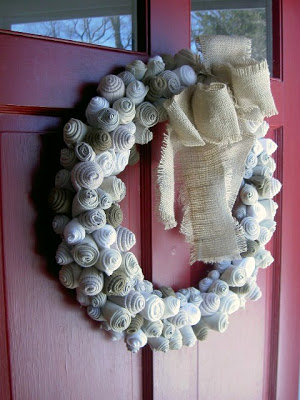
A few close up shots:

The burlap ribbon gives a nice contrast to the soft fabric rolls:
Using items I had on hand I was able to make a cozy winter wreath for our front door.
Thanks Stephenie for the inspiration.
I’m linking up to:
Show and tell Green

You may also like...

  • “W” is for Winter Wreath“W” is for Winter Wreath
  • DIY Fabric Wrapped WreathDIY Fabric Wrapped Wreath
  • DIY Twisted Fabric WreathDIY Twisted Fabric Wreath
  • Painted Wood Leaves Fall WreathPainted Wood Leaves Fall Wreath
Share this post:

Filed Under: CRAFTS, DIY, HOME DECOR, SEASONAL, WINTER9 Comments

Reader Interactions

Comments

  1. Rene says

    January 17, 2011 at 12:24 PM

    Your wreath is beautiful Jaime! How long did it take?

    -Rene

    Reply
  2. Trisha @ The Sweet Survival says

    January 17, 2011 at 1:40 PM

    Love the neutral colors of the wreath!

    Reply
  3. Karen says

    January 17, 2011 at 1:55 PM

    Jaime, you are an inspiration. I must figure out some way to create today! I mean, other that the 2 book reports that are due!

    Reply
  4. Stephenie from Decorating Addiction says

    January 17, 2011 at 2:22 PM

    Jamie – It turned out great! I love the burlap bow and I LOVE that you used a drop cloth in there!!!!

    Reply
  5. JunqueMagnet says

    January 17, 2011 at 4:17 PM

    Wow.That looks stunning.Warm AND fuzzy.Thanks for sharing.

    Reply
  6. Marty says

    January 18, 2011 at 12:11 AM

    This is totally cute! Love it=))Might have to try one of these myself, I'm always cleaning out closets and getting rid of clothes=))

    Reply
  7. cindy @ cottage instincts says

    January 18, 2011 at 11:30 PM

    I love this! It looks soft and cozy, just like a winter wreath should 🙂 Great tutorial too!

    Glad you could Mi4M!

    Reply
  8. Claire says

    January 21, 2011 at 2:34 AM

    This is so amazing-I love this adorable wreath-Found you through a blog hop and I'm your newest follower-come by to visit-Claire

    Reply
  9. Comeca Jones says

    February 8, 2011 at 9:36 AM

    Sweet!looks easier than the other tutorials I have seen.

    Reply

Leave a Reply Cancel reply

Your email address will not be published. Required fields are marked *

Primary Sidebar

Hi! I’m Jaime

Jaime Costiglio

Hello!

Thank you for stopping by.
Join me for lots of DIY.

Read more

Get new posts via email

Handbuilt Holiday: Gift Project Plans

handbuilt holiday gift project plans

Collection of DIY gift project plans to build.

The Home Depot Tool Prospective

THD Prospective

Tools to consider for the DIYer.

Archives

The Home Depot Logo
Copyright © 2022 Jaime Costiglio · Custom site by Moonsteam Design

Privacy Policy