• Home
  • Blog
  • About
  • Contact
    • Disclosure
    • Privacy Policy
  • SHOP
  • Widget area for main menu

    • Email
    • Facebook
    • Instagram
    • Pinterest
    • Twitter
    • YouTube
  • Skip to primary navigation
  • Skip to main content
  • Skip to primary sidebar

Jaime Costiglio

build - paint - sew

  • BUILD
    • BEDS
    • BENCHES
    • DESKS
    • DRESSERS
    • GAMES & TOYS
    • SCRAP WOOD
    • SHELVES
    • STORAGE
    • TABLES
  • TOOLS
  • PAINT
    • CRAFTS
    • FURNITURE
    • HOME DECOR
  • SEW
    • GIFTS
    • HOME DECOR
    • POUCHES
  • HANDBUILT HOLIDAY
    • 2021
    • 2019
    • 2018
    • 2017
    • 2016
    • 2015
    • 2014
    • 2013
  • GIFTS
    • BABIES
    • KIDS
    • FOR HER
    • FOR HIM
    • TEACHERS
    • WEDDINGS
  • SEASONAL
    • 4TH OF JULY
    • FALL
    • HALLOWEEN
    • CHRISTMAS
    • SUMMER
    • SPRING
    • ST. PATRICK’S DAY
    • THANKSGIVING
    • VALENTINE’S DAY
    • WINTER
  • SALTBOX PROJECT
    • BATHROOMS
    • DINING ROOM
    • EXTERIOR
    • FAMILY ROOM
    • FOYER / MUDROOM
    • KIDS BEDROOMS
    • KITCHEN
    • LIVING ROOM
    • MASTER BEDROOM
    • PLAYROOM
  • SCROLL SAW

DIY Fabric Wrapped Wreath

December 1, 2011

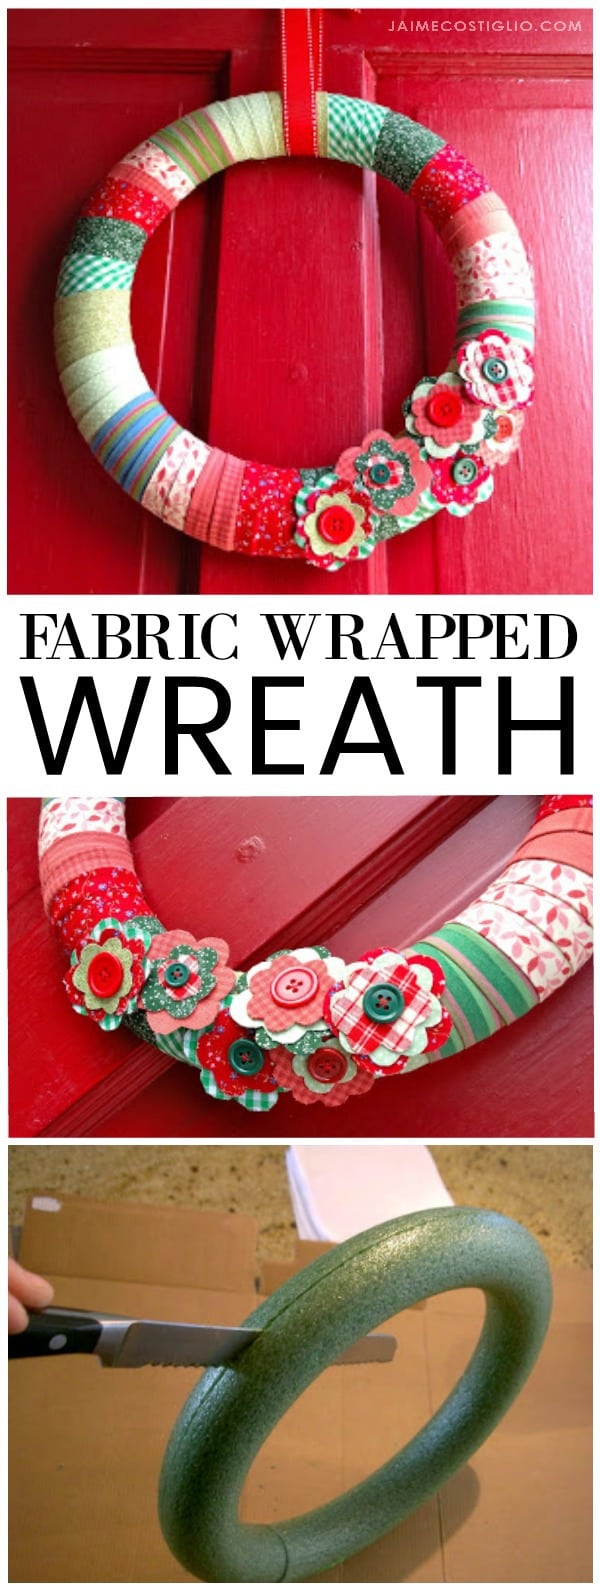
Let’s make a project using fabric that doesn’t actually need a sewing machine.  Today I’m sharing this DIY fabric wrapped wreath to fulfill a special request from my sister.  We’ll take fabric strips a wrap them around a styrofoam wreath form for a pretty Christmas themed wreath.

fabric wrapped wreath

A DIY tutorial to make a fabric wrapped wreath using a styrofoam form and fabric strips. You get two wreaths from one form and use up some fabric scraps!

Ever walk past a door with a wreath and get totally poked in the shoulder with things sticking out?  Then the wreath grabs onto your sweater and you’re now pulling the wreath off the door.  Don’t get me wrong I love those full and luscious wreaths with all the things just not on a door with high traffic.  This fabric wrapped wreath is a great alternative option for a busy door.

fabric strips wrapped around styrofoam form
And this wreath idea works for any season or holiday, not just Christmas.  The fabrics you select will determine the overall style.  This version trends more towards Christmas with all the red and green but you could make it any colorway to match your theme.
fabric flowers with button centers

Embellishments

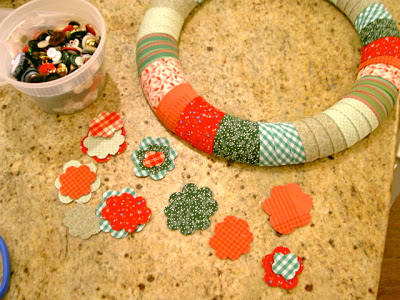
I opted to embellish the lower quarter with cut out fabric flowers and buttons.  You could also add a few silk flowers or other themed embellishments to fancy up the wreath.  But I do like it plain as well.
My sister had found this wreath on Pinterest which we used as inspiration.
fabric wrapped wreath inspiration
And she asked if I could make something similar for her to use for Christmas decor.  My inner craft loving heart was happy to oblige so I came up with this fabric wrapped version.
fabric wrapped wreath

Inspiration

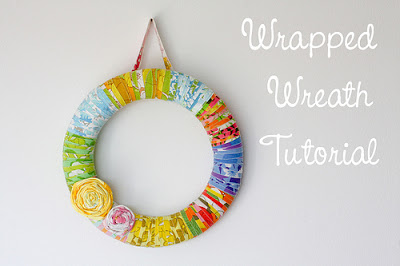
I did search for more inspiration on Pinterest and found this beauty from Jeni at In Color Order!  Jeni has a beautiful site with all things sewing and fabric, definitely worth a visit.
In Color Order fabric wrapped wreath
holiday fabric wrapped wreath
Below are the steps to create a fabric wrapped wreath.  I highly suggest using up scraps from your fabric stash if possible.

Supplies:

  • 12″ styrofoam wreath form
  • serrated knife
  • cotton fabrics
  • rotary cutter
  • self healing mat
  • quilting ruler
  • iron
  • hot glue gun & glue sticks
  • white felt 12″ x 12″
  • double sided iron-on fusible webbing
  • buttons
  • grosgrain ribbon

Wreath Form

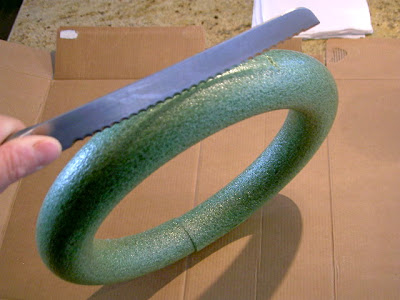
foam wreath form doesn't lay flat
Step 1: 1. Use a 12″ styrofoam wreath form.
foam wreath shape and serrated knife

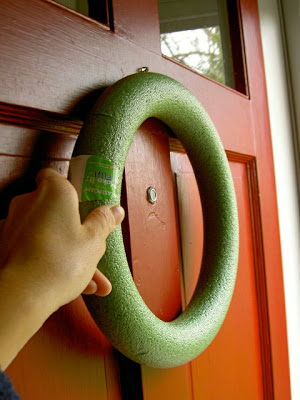
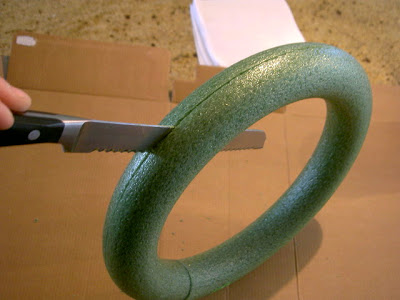
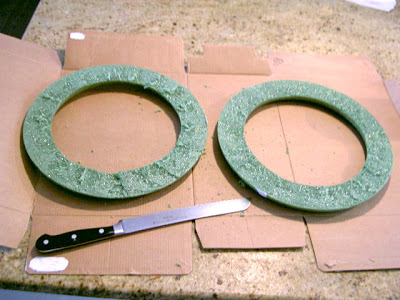
Step 2: We are going to slice the foam form in half.  This allows the wreath to lay flat against the door and bonus – now you can make 2 wreaths!

using a serrated knife to cut foam
Step 3: Using a serrated knife gently work through the foam all the way around.  Be sure to protect your work surface.
cut foam wreath in half
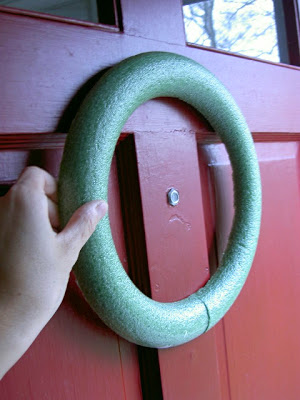
styrofoam wreath flat on door
Now the wreath will rest flat against the door.

Preparing Fabric

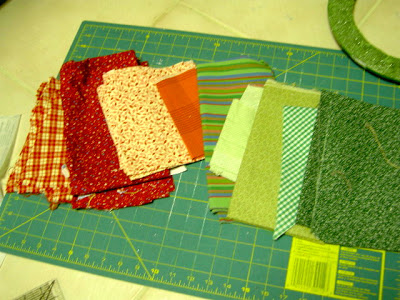
scrap fabric selections
Step 1: Select fabrics.  I used red and green cotton fabrics for Christmas.
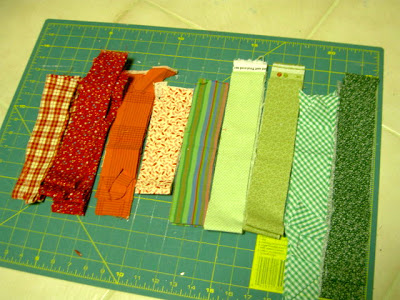
2" wide strips of fabric
Step 2: Using a rotary cutter and quilting ruler make 2″ strips.
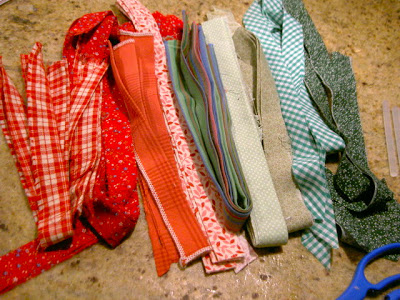
2" wide fabric strips folded in half and ironed
Step 3: Fold each strip in half and press for a finished edge.
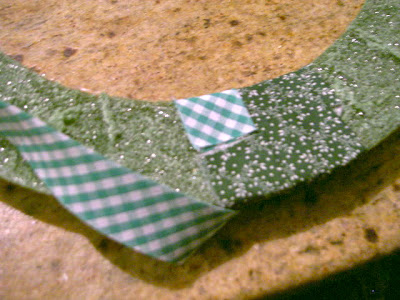
start fabric strip on backside and wrap around foam

Wrapping Wreath

Step 1: To start wrapping strips use a dab of hot glue to hold the end piece in place on the back, flat side of wreath form.  Keep wrapping and tuck the final end piece under beginning piece.
felt on back of wreath to protect door
Step 2: To finish the back of the wreath cut a piece of white felt to hide all the rough bits.  Hot glue the felt to the back.
layered fabric flowers
Step 3: To make the flowers cut out petal shapes in various sizes.  Use double sided iron-on fusible interfacing in between two pieces of fabric then cut the shape.  Layer petals of various sizes and sew a button at the center.
red and green fabrics
Step 4: Hot glue flowers into place.
fabric flowers with button centers

Hanger

Make a hanger using grosgrain ribbon.  Wrap the ribbon around the wreath and tie a bow.
simple wreath on door
The flat back keeps the wreath from being knocked by visitors coming through the door.
wreath lays flat on door
diy fabric wreath

Thanks for joining me for this fabric wrapped wreath project.  Please leave any questions in the comments below and be sure to follow me on social media for sneak peeks, tools and project inspiration:

Instagram / Pinterest / Facebook / Youtube / Twitter

SHOP THIS PROJECT:
fabric wrapped wreath tutorial

You may also like...

  • How to Make a Sugar Skull WreathHow to Make a Sugar Skull Wreath
  • DIY Heather WreathDIY Heather Wreath
  • Plastic Egg & Scrap Wood WreathPlastic Egg & Scrap Wood Wreath
  • “W” is for Winter Wreath“W” is for Winter Wreath
Share this post:

Filed Under: CHRISTMAS, CRAFTS, DIY, HOME DECOR, SEASONAL22 Comments

Reader Interactions

Comments

  1. Cassie @ Primitive & Proper says

    December 1, 2011 at 6:03 PM

    ADORABLE!!!!!! oh i love love love it, jaime! i said love three times just to emphasize! 😉

    Reply
  2. Megan says

    December 1, 2011 at 6:12 PM

    I love my wreath! Can't wait to hang it on my door! Thanks!

    Reply
  3. Lesley says

    December 1, 2011 at 6:39 PM

    Super cute!!! Love the color combination…so cheery! 🙂

    Great tip on cutting the styrofoam base in half!!! I have one of those ready to go and will probably do that!! Thanks!

    Reply
  4. Kara @ June & Bear says

    December 1, 2011 at 8:19 PM

    LOVE this. Great fabric choices and great tips. I think I will try one of these.

    Reply
  5. Bronwyn says

    December 2, 2011 at 1:02 AM

    This is great! I love your choice of fabrics. The calico flowers are just the cutest. I pinned this so that i can make one in ther spring for Easter in pastel colours.

    Reply
  6. BeingBrook says

    December 2, 2011 at 1:35 AM

    Adorable Jaime! Great idea to slice it in half. My boys are always knocking the wreaths off the door. Turned out way cute.

    Reply
  7. [email protected] Road says

    December 2, 2011 at 2:13 AM

    That's cute! I love the half wreath tip~thanks!

    Reply
  8. Becky says

    December 4, 2011 at 12:47 AM

    This is so adorable, thanks for the tip about cutting the wreath in half!

    Reply
  9. Crafty Mischief says

    December 4, 2011 at 4:39 AM

    Your wreath is gorgeous! Thanks for sharing!

    Reply
  10. Cori says

    December 4, 2011 at 1:14 PM

    SO pretty. Thanks for sharing! I love following your blog and I hope you will follow me back over at http://www.createdbycori.blogspot.com

    Reply
  11. marissa says

    December 5, 2011 at 4:26 AM

    This is darling I'd love you to add this to my party over at http://raegunwear.blogspot.com/search/label/WWWMW

    Reply
  12. [email protected] says

    December 5, 2011 at 11:02 PM

    This is adorable! I would never have thought to cut the base in half…what a great tip!

    Reply
  13. Jennifer Dawn says

    December 6, 2011 at 10:33 AM

    Cute! Thanks for sharing!

    Reply
  14. Angie says

    December 13, 2011 at 12:35 AM

    brilliant!!!

    Reply
  15. Amy says

    December 13, 2011 at 10:27 PM

    Love this! The fabrics you used are gorgeous.

    I made a few fabric covered wreaths last month. The kids loved helping too.

    Reply
  16. Jerri says

    December 16, 2011 at 9:29 PM

    I love your wreath! Cute fabrics!

    I'd love for you to stop by today and link up at my Friday Favorites party! Today is a special Christmas edition with a giveaway!

    Reply
  17. {northern cottage} says

    December 17, 2011 at 11:41 PM

    pretty stinking cute – I love the mix of fabrics you chose to use! well done girlie!

    http://www.northerncottage.blogspot.com

    Reply
  18. LULIRAJ says

    October 18, 2013 at 9:19 PM

    I really like that 🙂 Have to do one for myself. TC

    Reply
  19. Blossom9283 says

    September 25, 2016 at 11:51 AM

    Do you think cutting in half would work for a tulle wreath?

    Reply
  20. Nicola says

    January 4, 2021 at 1:17 AM

    Looks like a project a new crafter (me) can easily do. You mention 2″ strips of fabric, but don’t mention how long they should be to get around the wreath the 3 times as shown in the example. Thanks!

    Reply
  21. Mavis Dare says

    February 3, 2021 at 10:07 AM

    What a unique idea!! Thank you so much for sharing.

    Reply
  22. Wendy MacLellan says

    November 21, 2021 at 9:14 AM

    Hi
    I am a retired nurse.
    I always wore pretty uniforms and my patients loved them.
    I am going to make one of these for my home with the uniforms.
    Wendy

    Reply

Leave a Reply Cancel reply

Your email address will not be published. Required fields are marked *

Primary Sidebar

Hi! I’m Jaime

Jaime Costiglio

Hello!

Thank you for stopping by.
Join me for lots of DIY.

Read more

Get new posts via email

Handbuilt Holiday: Gift Project Plans

handbuilt holiday gift project plans

Collection of DIY gift project plans to build.

The Home Depot Tool Prospective

THD Prospective

Tools to consider for the DIYer.

Archives

The Home Depot Logo
Copyright © 2023 Jaime Costiglio · Custom site by Moonsteam Design

Privacy Policy