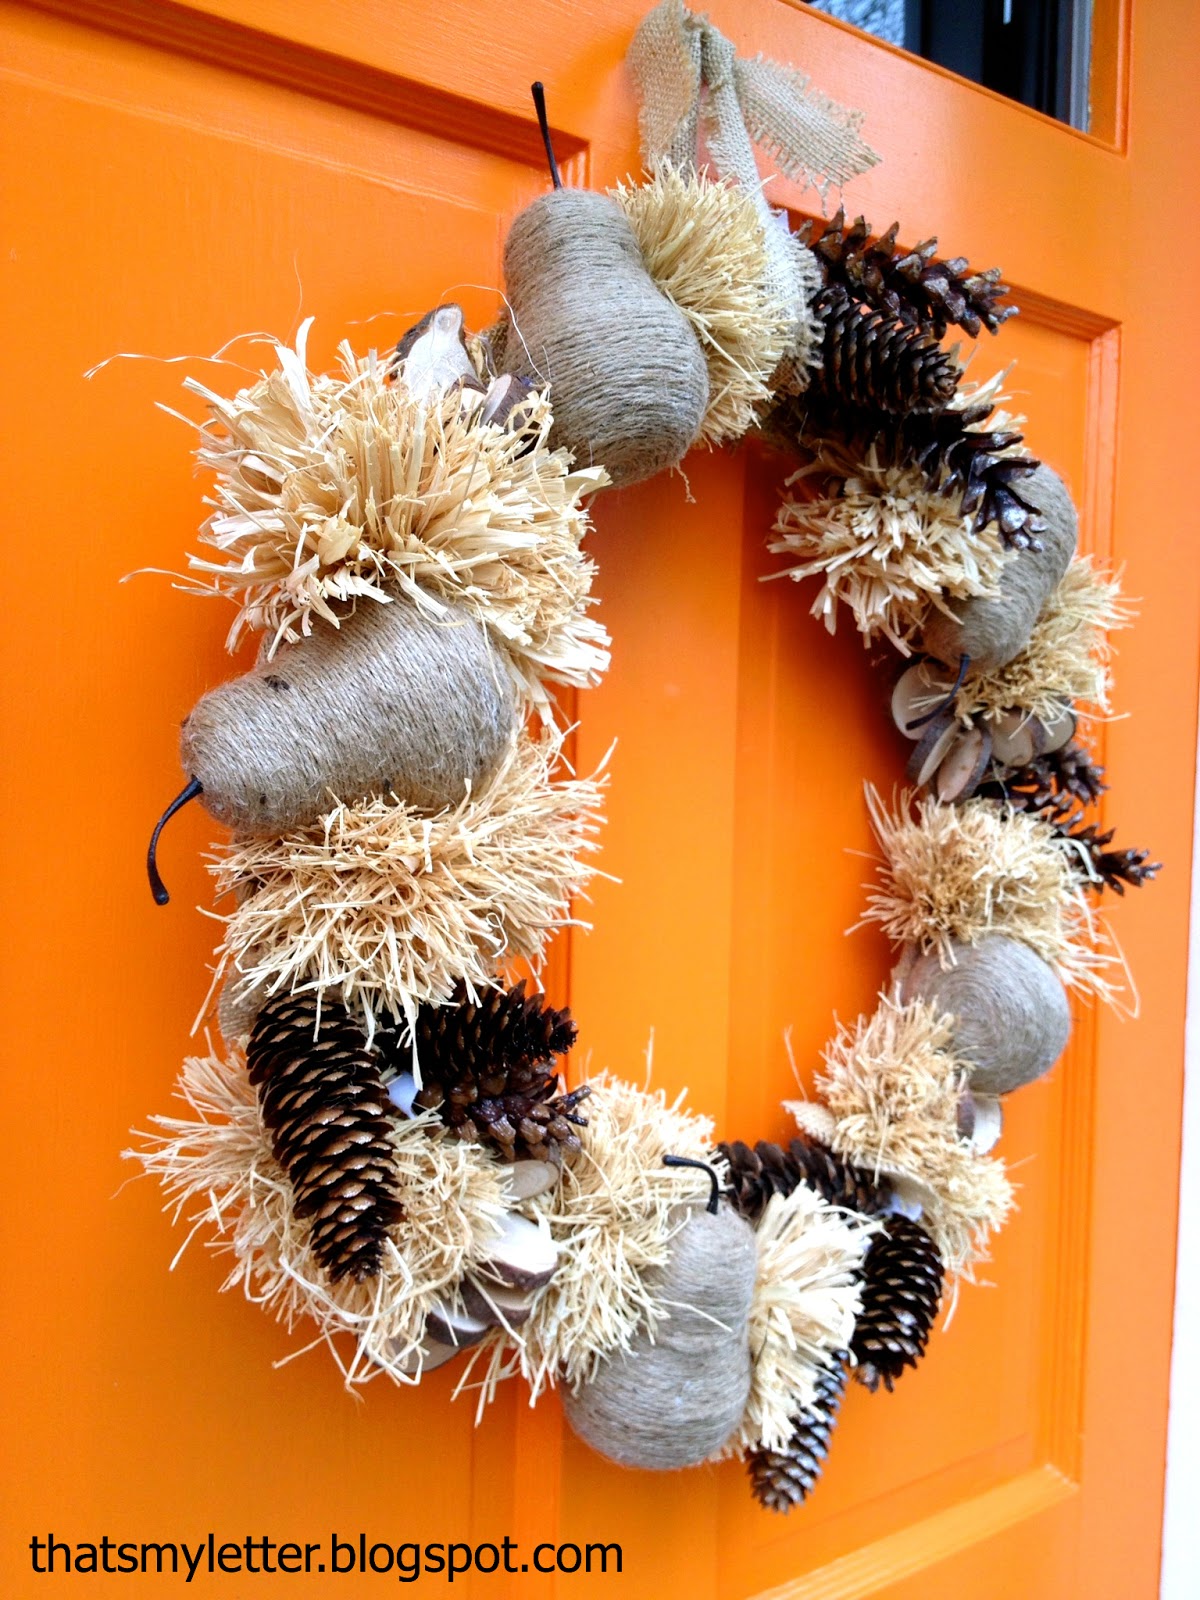
Craft: winter wreath

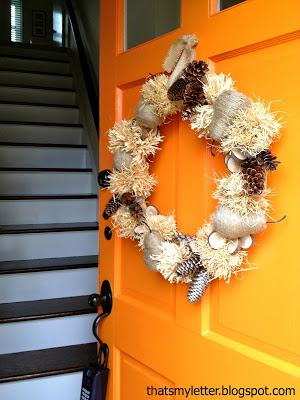
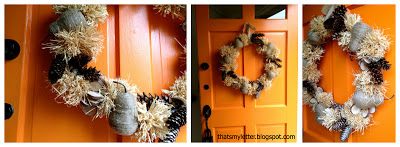

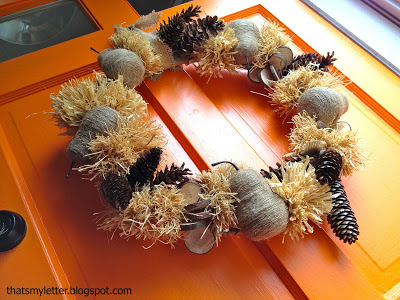


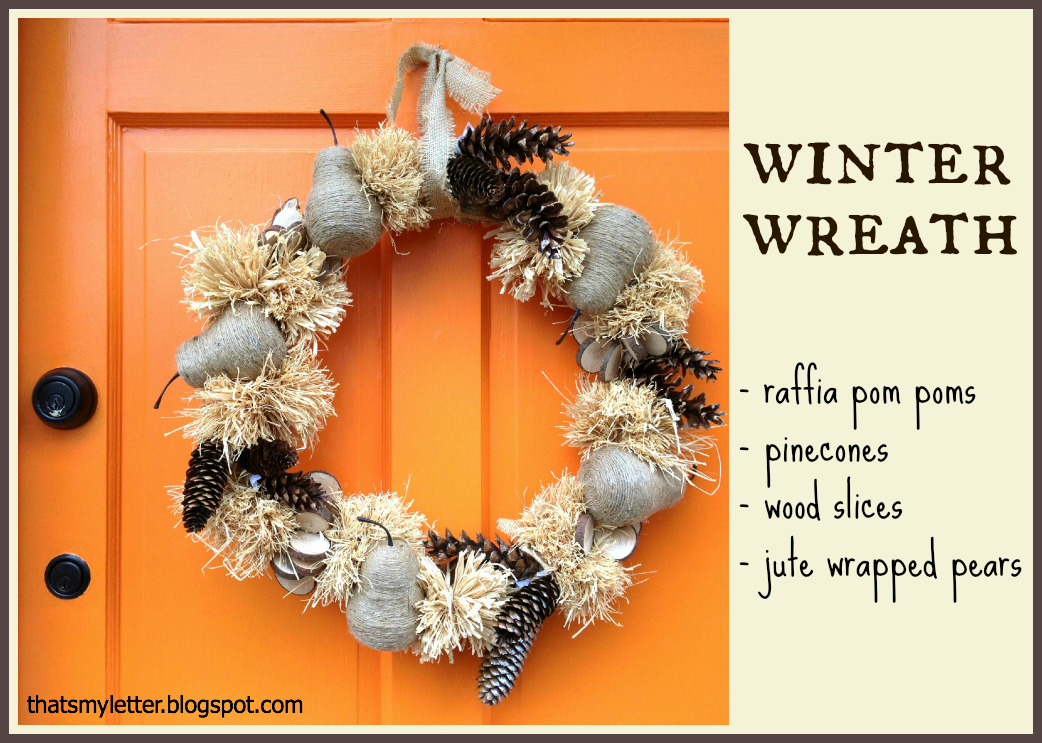
Make a winter wreath from raffia pom poms, pinecones, wood slices and jute wrapped pears.


I gathered lots of natural supplies I already had on hand:
-raffia
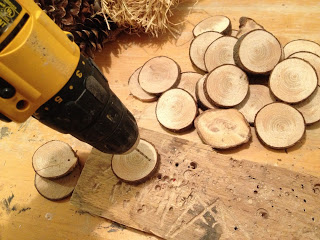
– wood slices (from here)
– jute wrapped pears (from here)
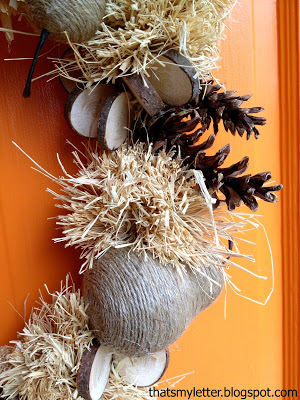
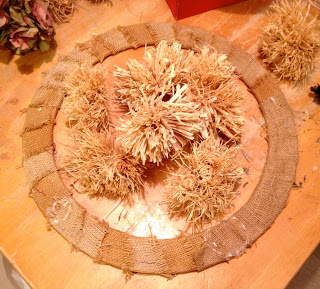
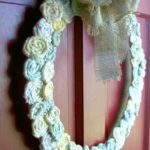
Made lots of pom poms from the raffia (tutorial below) and combined all the pieces:

The current orange colored front door poses a tiny decorating challenge, neutrals seem to be the solution:

Here’s how to make the winter wreath:
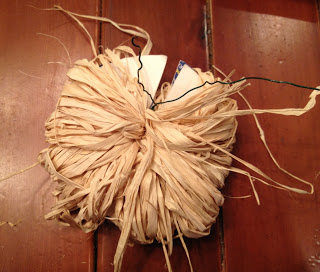
1. Make raffia pom poms.
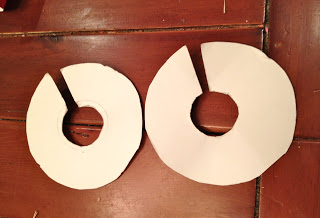
Cut cardboard circles as pictured below, about 4″ diameter:

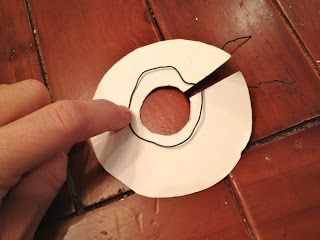
2. Place wire in circle shape with ends bent around opening:
(Wire will go in between cardboard pieces.)

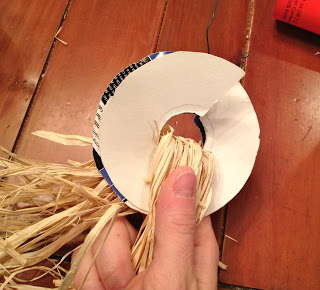
3. Line up raffia – multiple long pieces – find middle and begin wrapping around cardboard shape:

4. Wrap one side until end of raffia and bend wire down to hold raffia in place:

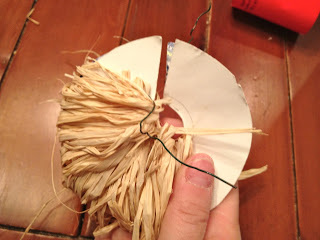
5. Repeat with other side and twist wire ends together snug:

6. Cut loops along edge of cardboard shape:
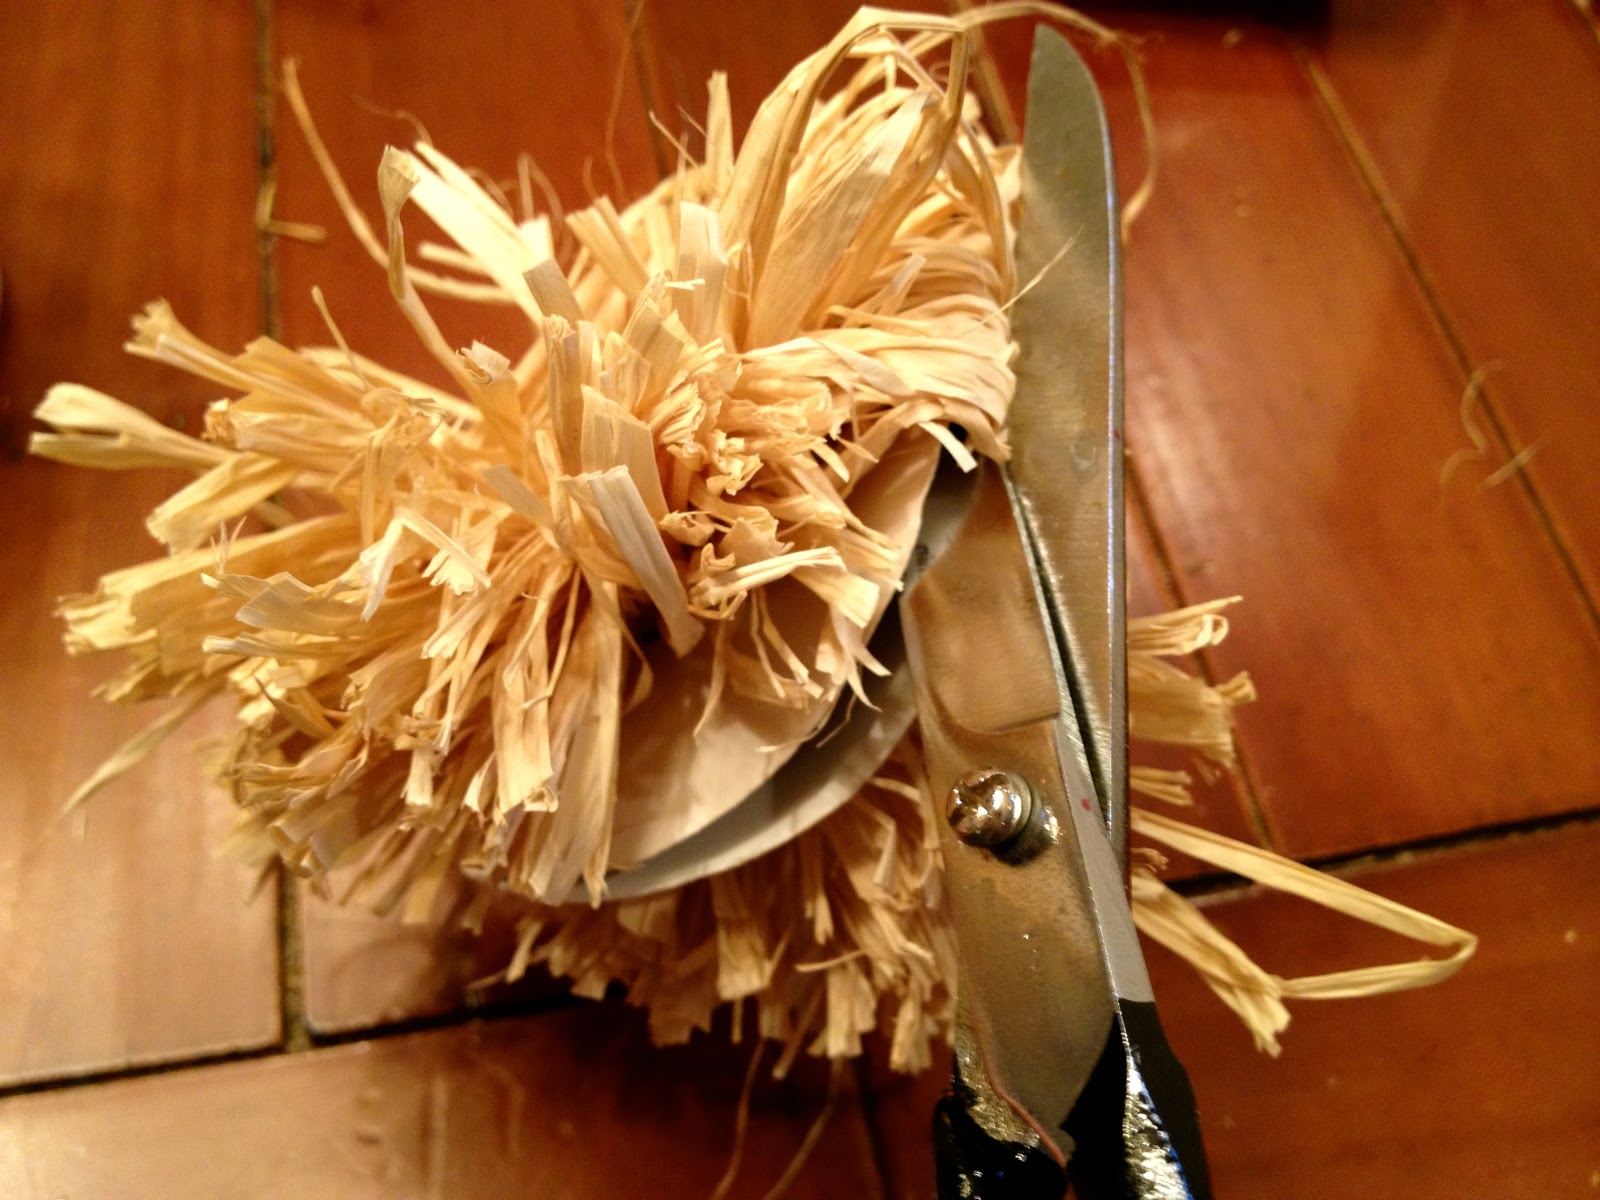
7. Remove cardboard and check to be sure wire is tight and secure.
8. Use a flat wreath form:
(mine happened to already be wrapped in burlap but it’s not necessary)

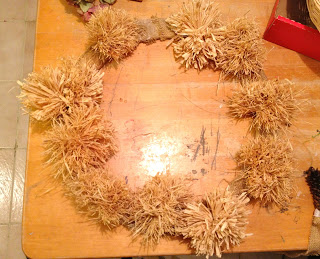
9. Secure raffia pom poms to wreath form by wrapping wire around form:

10. Add pinecones, wire together and wrap around form:

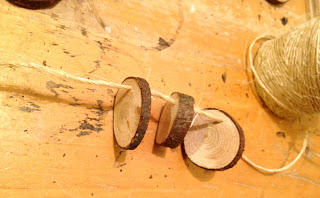
11. Make holes in wood slices:

12. String onto twine and wrap twine around wreath form:

13. Hot glue jute wrapped pears in place.
I’m linking up to:
SAS @ Funky Junk
Nifty Thrifty Sunday @ Nifty Thrifty Things
DIY Project Parade @ The DIY Showoff
Tutorials & Tips Tuesday @ Home Stories A to Z
Strut Your Stuff @ Somewhat Simple
Share Awesomeness Thur @ The 36th Avenue
Pretty Things Thursday @ Scissors & Spatulas
Flaunt it Friday @ Chic on a Shoestring
Frugal Friday @ The Shabby Nest
SAS @ Just a Girl
Remodelaholics Anonymous @ Remodelaholic
inspiration board @ Carolyns Homework
Sunday Showcase Party @ Under the Table & Dreaming
Weekend Bloggy Reading @ Serenity Now


That is such a beautiful wreath!
That is TOO dang cute!! Love the pom poms!
That is one cute wreath and a half!
My favorite pat is the pears… Wow! How did you think those up….?
hugs x
Crystelle
http://www.crystelleboutique.com
Such a pretty Wreath! Love that you made the pom-poms with rafia – so unique! Great job!
Suzanne
Cute wreath! I really love the pears!
T'onna @ Submarine Sunday
http://navywifeypeters.blogspot.com/2013/01/submarine-sunday-15.html
love your winter wreath so very pretty thanks for sharing
come see what I shared at http://shopannies.blogspot.com
That's such a pretty wreath! Great job!
Missy Inspired
http://missyinspired.blogspot.com
It’s a new Linky Party to create more buzz for your blog and connect with others! If you haven’t joined Creative Crafts Thursday yet, please share your projects at http://www.creativecraftsthursday.blogspot.com each and every week and check out what other creative divas are up to.
Adorei a dica dos pompons! Seguindo suas ideias por aqui, adorei conhecer seu material!