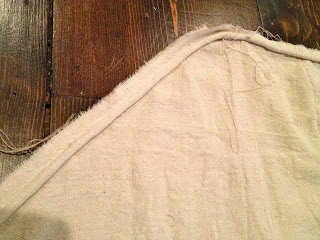
• Home
  • Blog
  • About
  • Contact
    • Disclosure
    • Privacy Policy
  • SHOP
  • Widget area for main menu

    • Email
    • Facebook
    • Instagram
    • Pinterest
    • Twitter
    • YouTube
  • Skip to primary navigation
  • Skip to main content
  • Skip to primary sidebar

Jaime Costiglio

build - paint - sew

  • BUILD
    • BEDS
    • BENCHES
    • DESKS
    • DRESSERS
    • GAMES & TOYS
    • SCRAP WOOD
    • SHELVES
    • STORAGE
    • TABLES
  • TOOLS
  • PAINT
    • CRAFTS
    • FURNITURE
    • HOME DECOR
  • SEW
    • GIFTS
    • HOME DECOR
    • POUCHES
  • HANDBUILT HOLIDAY
    • 2021
    • 2019
    • 2018
    • 2017
    • 2016
    • 2015
    • 2014
    • 2013
  • GIFTS
    • BABIES
    • KIDS
    • FOR HER
    • FOR HIM
    • TEACHERS
    • WEDDINGS
  • SEASONAL
    • 4TH OF JULY
    • FALL
    • HALLOWEEN
    • CHRISTMAS
    • SUMMER
    • SPRING
    • ST. PATRICK’S DAY
    • THANKSGIVING
    • VALENTINE’S DAY
    • WINTER
  • SALTBOX PROJECT
    • BATHROOMS
    • DINING ROOM
    • EXTERIOR
    • FAMILY ROOM
    • FOYER / MUDROOM
    • KIDS BEDROOMS
    • KITCHEN
    • LIVING ROOM
    • MASTER BEDROOM
    • PLAYROOM
  • SCROLL SAW

DIY Windowseat Cushion Cover

September 27, 2013

windowseat makeover

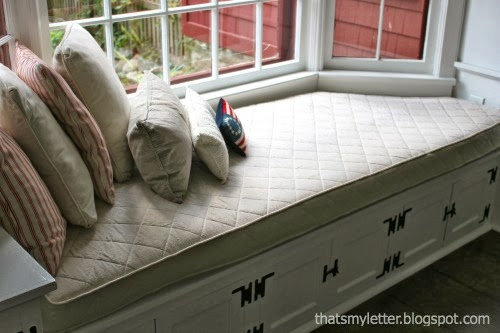
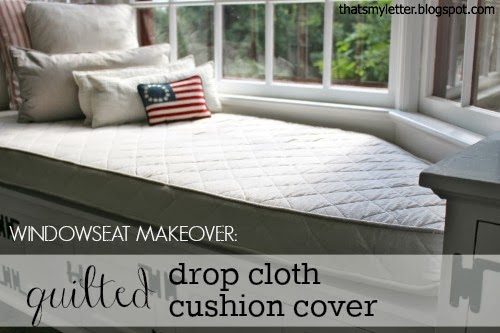
A windowseat makeover that is basically how to sew a quilted drop cloth cushion cover.

diy quilted drop cloth cushion cover
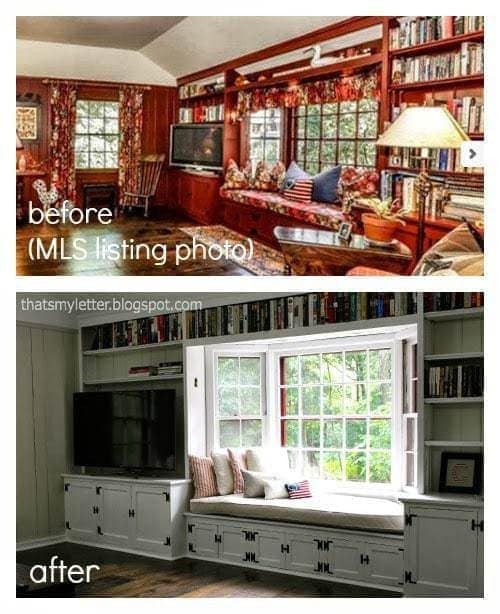
A windowseat makeover in the family room of our new home.windowseat before and after
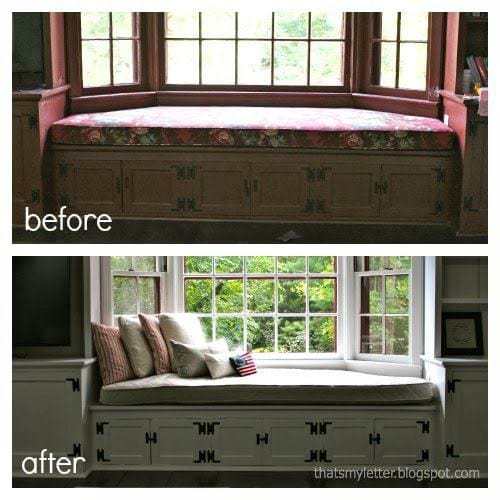
I’ve been slowly progressing in the family room: painting all the red paneling, windows and trim is no small task (to see how check the pool room).
And I finally got around to sewing a new windowseat cushion cover using drop cloth that I first quilted:
windowseat quilted cushion cover
As you can see below the original fabric was a dark red large floral print which matched the valances and drapes.  All of the window treatments are now gone, I painted all the windows, trim and built-ins semi-gloss white and the paneled walls are Benjamin Moore seapearl:
windowseat in family room before and after
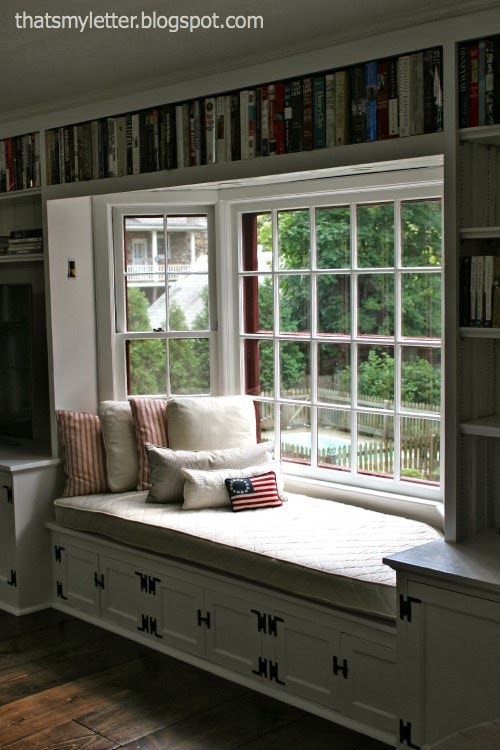
I still need to find replacement sconces (see that tiny black open electrical box to the left of the window).  And finish up the remaining furniture pieces and wall art too but for now this side is looking swell.

windowseat cushion with quilted drop cloth cover
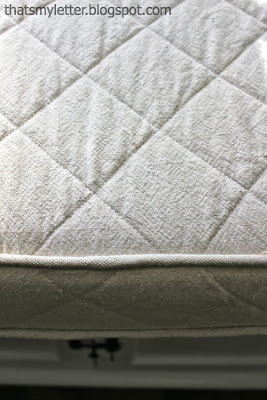
piping and quilted cushion cover
windowseat makeover using drop cloth
windowseat makeover using drop cloth before and after
Here’s how to sew a quilted drop cloth cushion cover:

1. If possible use the existing fabric cover as your template and rip out all seams:
(** Take pictures of the construction before doing this step, especially around the zipper.)
existing fabric cover template
2. Layer the original fabric, quilt batting, drop cloth:

cut batting and drop cloth using pattern
3. Pin and trim to fit the shape of your cushion:
(** I only quilted the top and side pieces.)

drop cloth pinned to quilt
4. Mark your quilting lines using a washable pencil.  I choose 3″ on the diagonal:
mark the quilting lines
5. Once you’ve quilted the pieces, wash and dry them.
Be careful about shrinkage!!

pieces quilted and washed
6. Cover the zipper portion with drop cloth:
(I just sewed drop cloth right over the original fabric.)
drop cloth with zipper gusset
7. Cover your cording:
(Again I just sewed drop cloth right over the existing fabric.)

piping from drop cloth
8. Now reassemble.
I started with the back (underside) large piece and added the cording:
piping to edge of panels
9. Then the side panel and zipper portion.
The other cording and finally the top piece.
You may also like...

  • DIY Vintage Quilt MakeoverDIY Vintage Quilt Makeover
  • DIY Self Lined Roman ShadesDIY Self Lined Roman Shades
  • Old Window Repurposed as a FrameOld Window Repurposed as a Frame
  • Sliding Glass Door MakeoverSliding Glass Door Makeover
Share this post:

Filed Under: DIY, FAMILY ROOM, HOME DECOR, HOME DECOR, SALTBOX PROJECT, SEW, SEWING2 Comments

Reader Interactions

Comments

  1. Debbie - Painted Therapy says

    September 28, 2013 at 7:08 PM

    You are amazing. It looks beautiful and you do mighty fine work!

    Reply
  2. MJ @ 517 Creations says

    October 3, 2013 at 8:36 PM

    Oh my goodness…I didn't think that a drop cloth could look any better – and then you QUILTED it! It looks FANTASTIC! I have a bench that I slipcovered with a drop cloth and am definitely thinking of quilting it, now. Thanks for showing the steps!

    Reply

Leave a Reply Cancel reply

Your email address will not be published. Required fields are marked *

Primary Sidebar

Hi! I’m Jaime

Jaime Costiglio

Hello!

Thank you for stopping by.
Join me for lots of DIY.

Read more

Get new posts via email

Handbuilt Holiday: Gift Project Plans

handbuilt holiday gift project plans

Collection of DIY gift project plans to build.

The Home Depot Tool Prospective

THD Prospective

Tools to consider for the DIYer.

Archives

The Home Depot Logo
Copyright © 2023 Jaime Costiglio · Custom site by Moonsteam Design

Privacy Policy