• Home
  • Blog
  • About
  • Contact
    • Disclosure
    • Privacy Policy
  • SHOP
  • Widget area for main menu

    • Email
    • Facebook
    • Instagram
    • Pinterest
    • Twitter
    • YouTube
  • Skip to primary navigation
  • Skip to main content
  • Skip to primary sidebar

Jaime Costiglio

build - paint - sew

  • BUILD
    • BEDS
    • BENCHES
    • DESKS
    • DRESSERS
    • GAMES & TOYS
    • SCRAP WOOD
    • SHELVES
    • STORAGE
    • TABLES
  • TOOLS
  • PAINT
    • CRAFTS
    • FURNITURE
    • HOME DECOR
  • SEW
    • GIFTS
    • HOME DECOR
    • POUCHES
  • HANDBUILT HOLIDAY
    • 2021
    • 2019
    • 2018
    • 2017
    • 2016
    • 2015
    • 2014
    • 2013
  • GIFTS
    • BABIES
    • KIDS
    • FOR HER
    • FOR HIM
    • TEACHERS
    • WEDDINGS
  • SEASONAL
    • 4TH OF JULY
    • FALL
    • HALLOWEEN
    • CHRISTMAS
    • SUMMER
    • SPRING
    • ST. PATRICK’S DAY
    • THANKSGIVING
    • VALENTINE’S DAY
    • WINTER
  • SALTBOX PROJECT
    • BATHROOMS
    • DINING ROOM
    • EXTERIOR
    • FAMILY ROOM
    • FOYER / MUDROOM
    • KIDS BEDROOMS
    • KITCHEN
    • LIVING ROOM
    • MASTER BEDROOM
    • PLAYROOM
  • SCROLL SAW

DIY Wall Shelves

February 18, 2013

Build: knock off wall shelves
Build your own beautiful wall shelves to fit your space.

I teamed up with Ana White again to come up with plans these shelves.
 Ana drew up easy to follow building plans customizable for any length to fit your wall space.

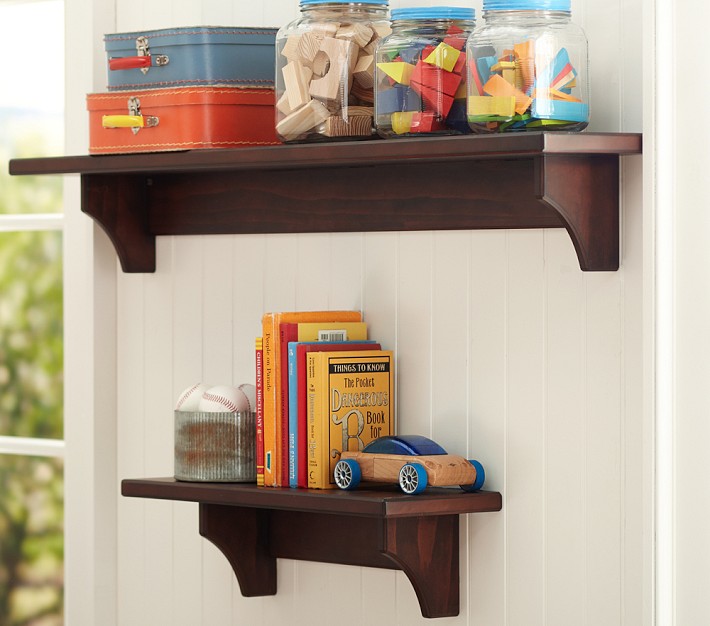
 A friend had asked I could build shelves similar to the Pottery Barn Hayden shelves in espresso:
With a little help from Ana, we made it happen.
The Pottery Barn version are MDF, I used pine boards.
And the Pottery Barn version only come in 2′ and 4′ lengths, I made these shelves 3′ each for about $22 total in lumber.

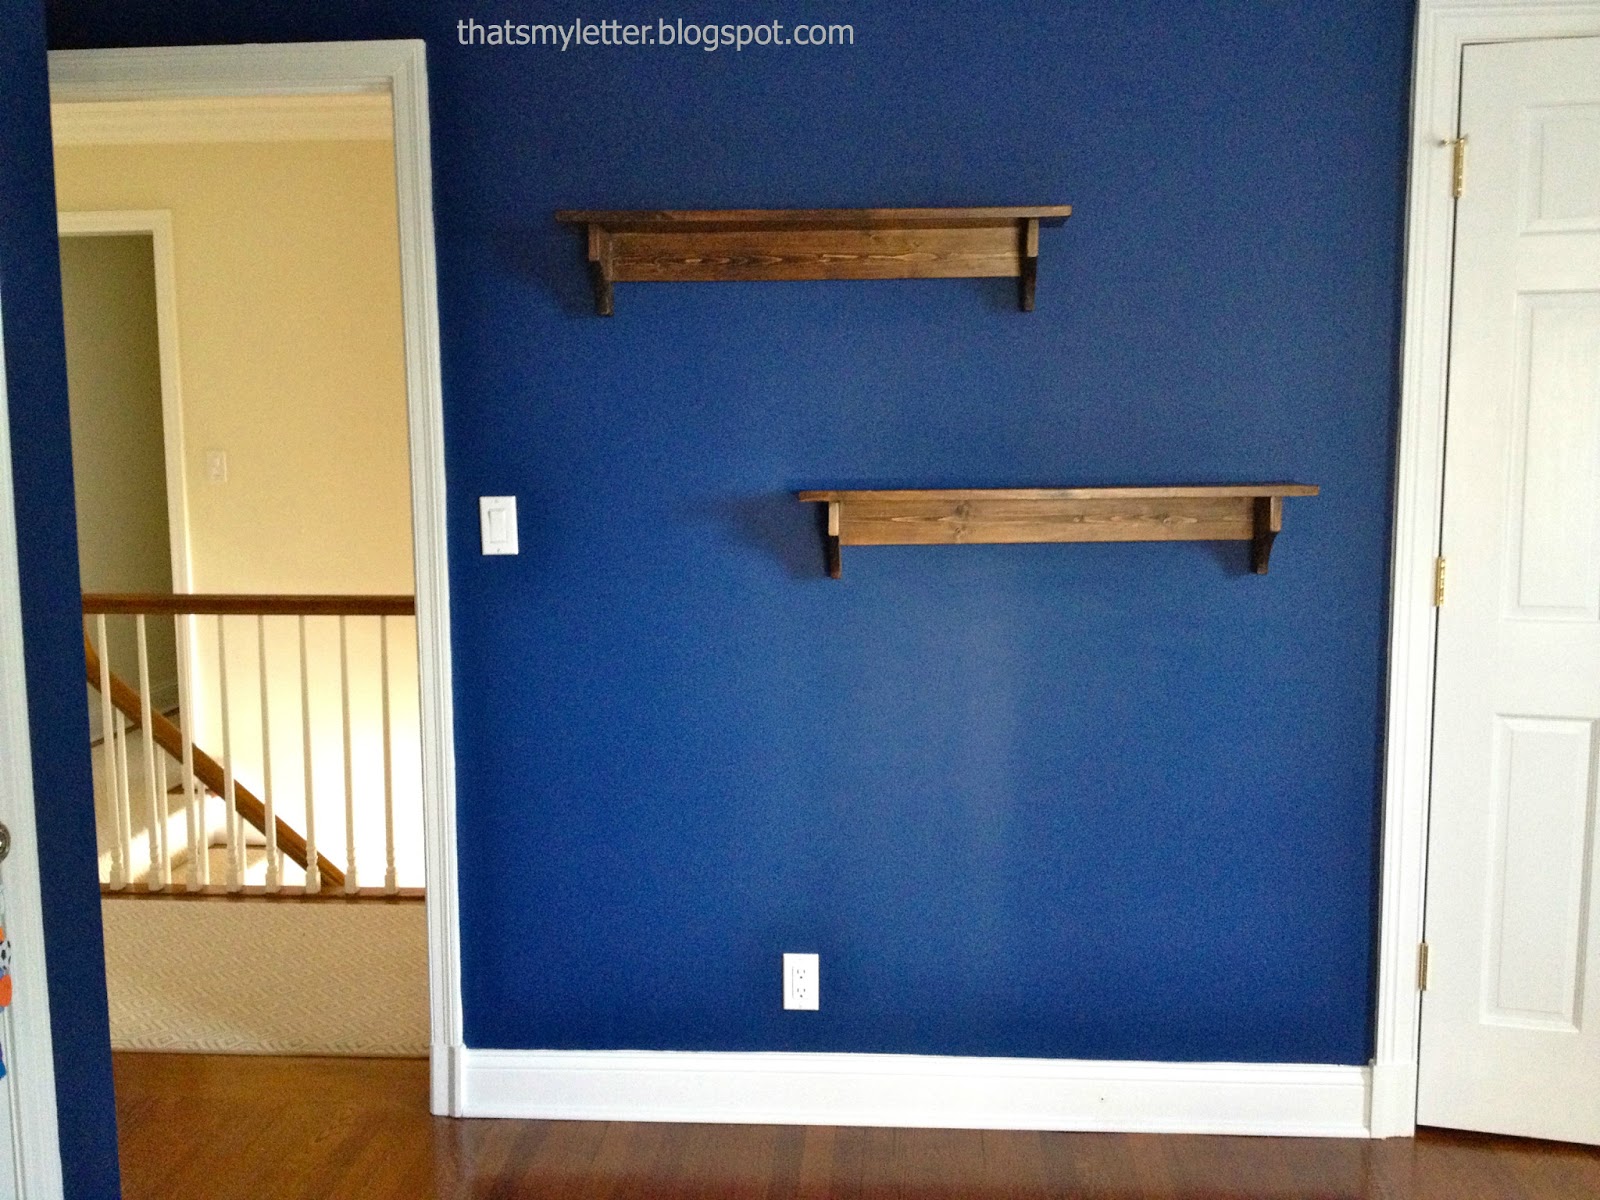
The perfect spot for the boys trophies and Skylanders: 

We did have a closet door on the right side to contend with, to keep it from opening all the way and smacking into the corner of the lower shelf we added a hinge stopper.
Here’s how to build the wall shelves:
1. Follow Ana’s plans and make wood cuts.
* The shelves pictured are 36″ long and the cuts are:
1 – 1×8 @ 36″
2 – 1×6 @ 6″
1 – 1×4 @ 30 1/2″
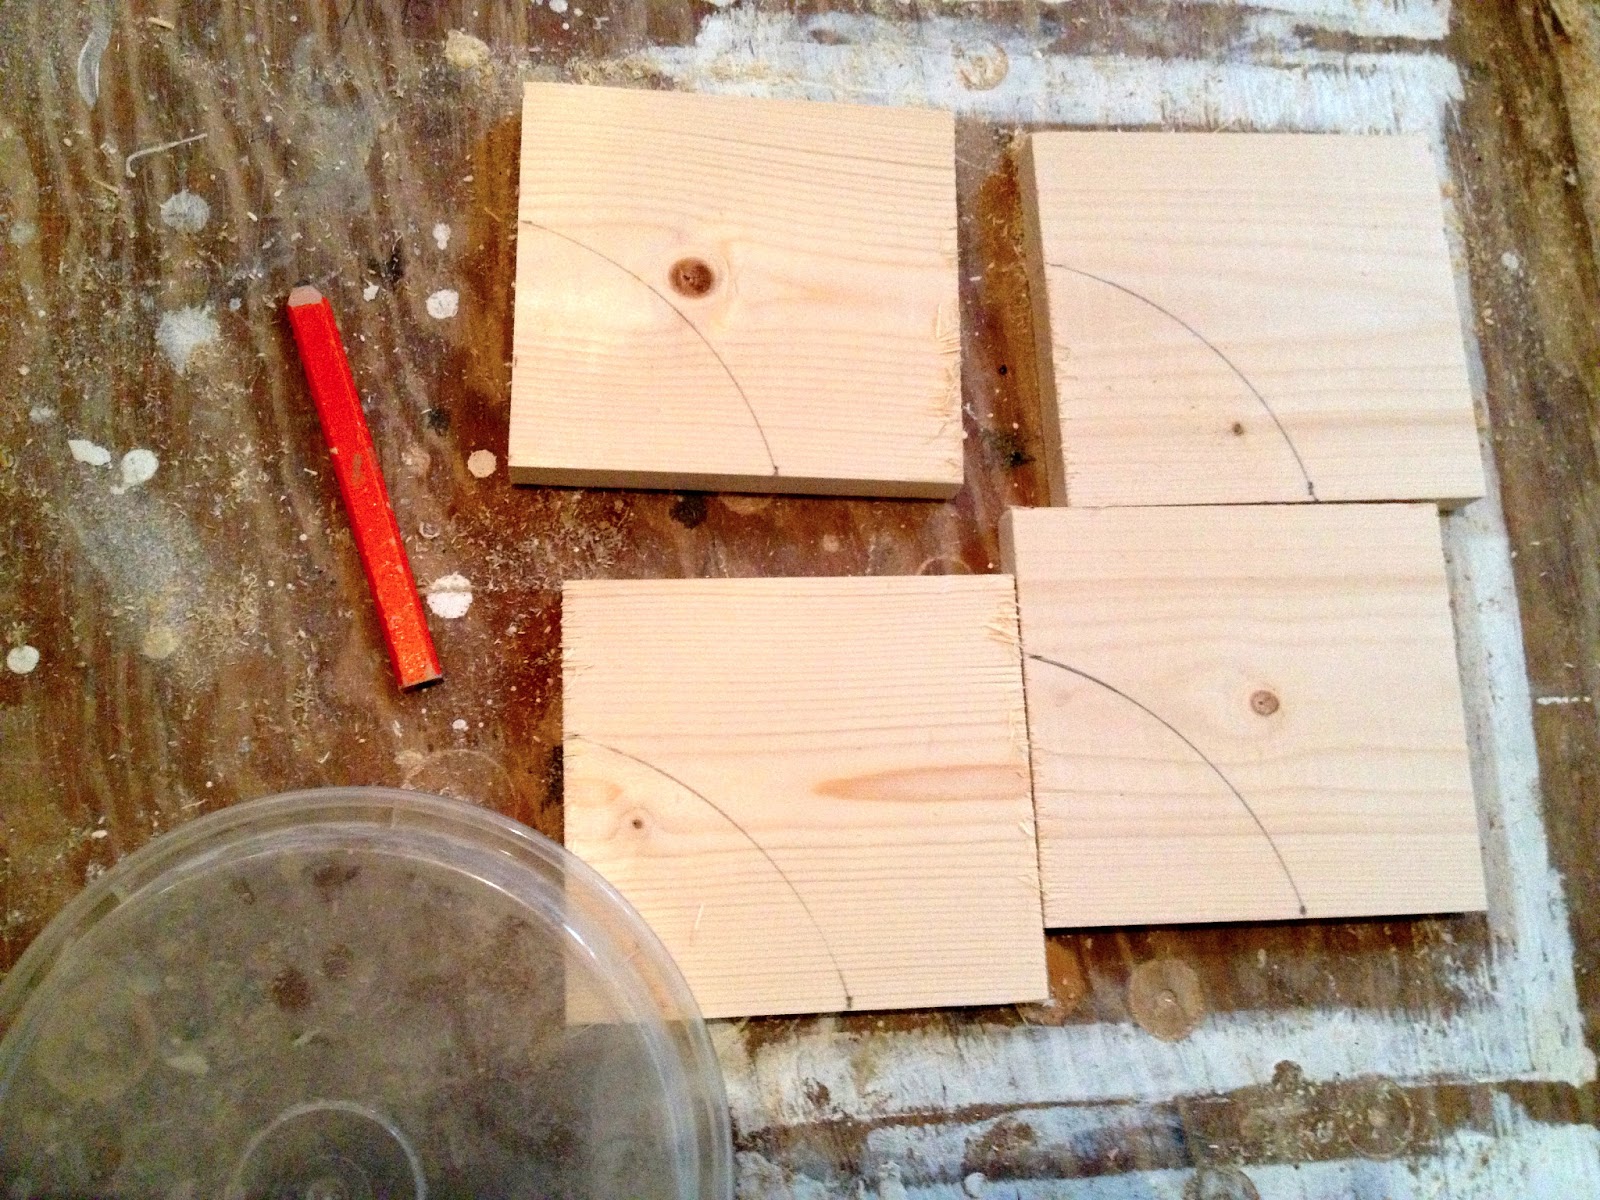
For shelf supports use a template to mark curves:
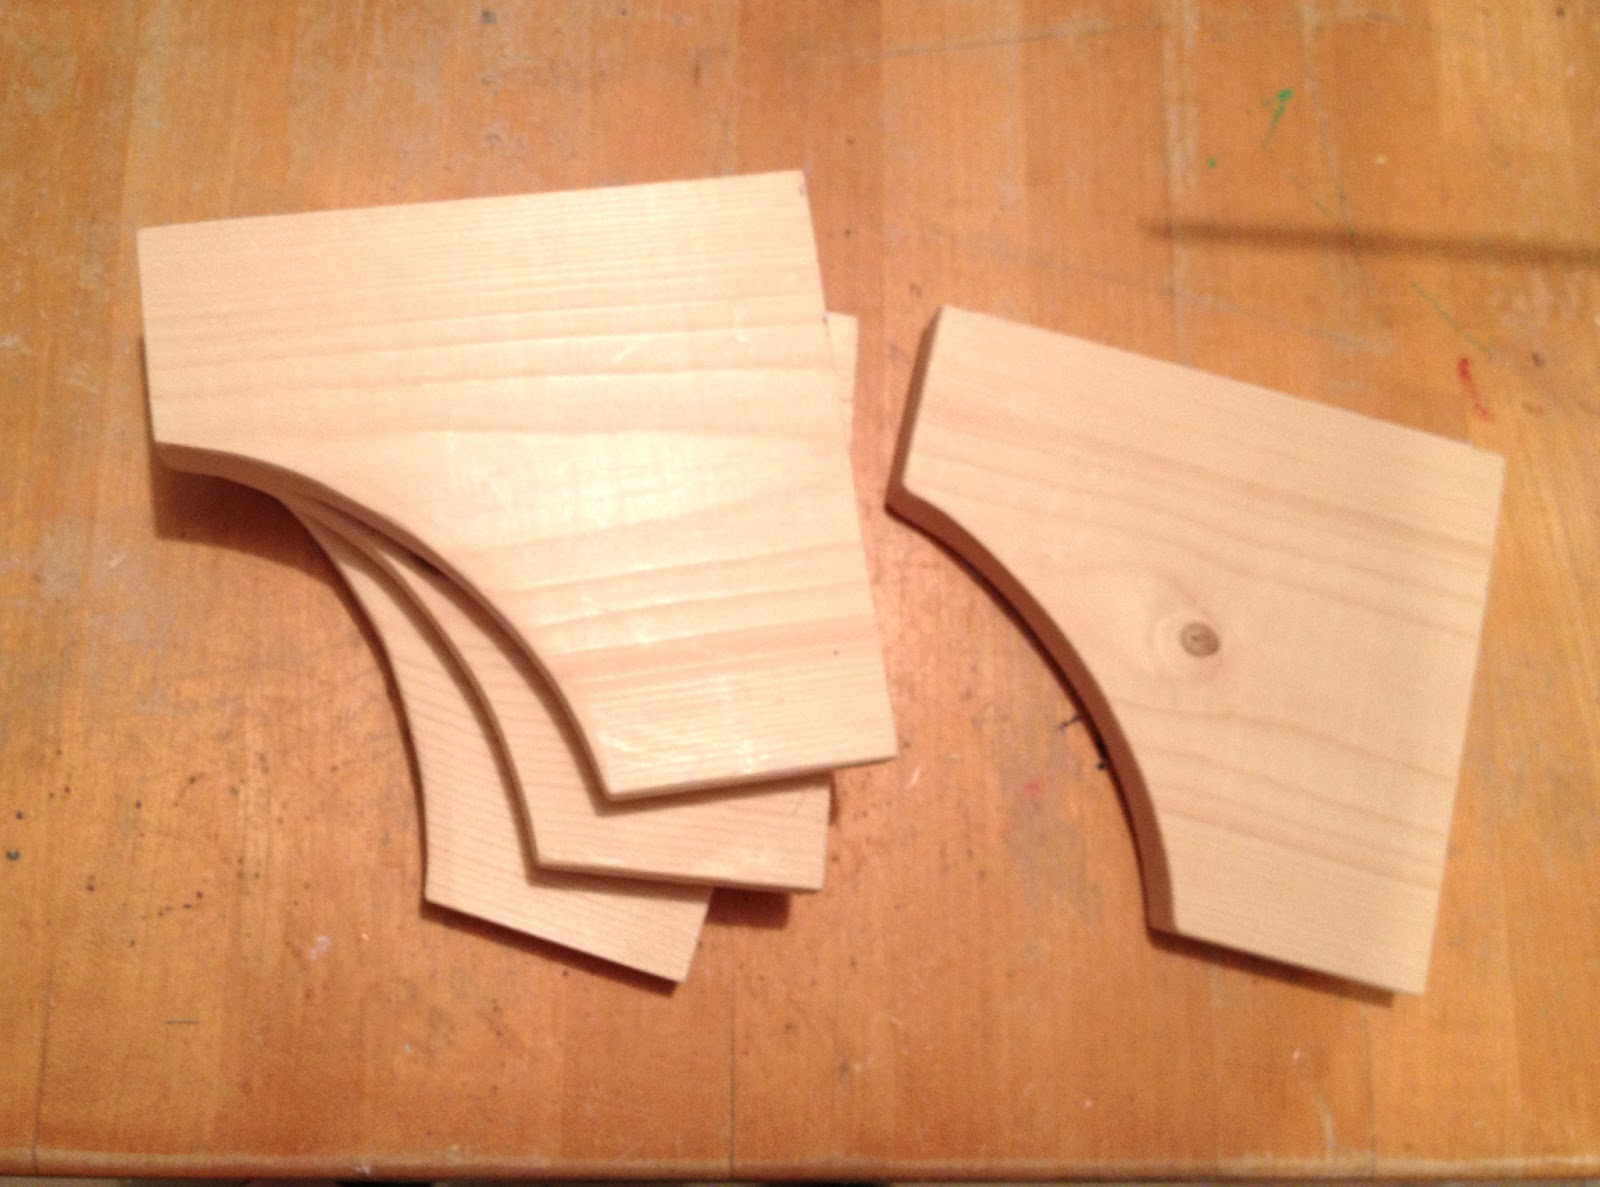
Cut curves with a jigsaw:
2. Before construction, if desired, add keyhole mounts to back top:
Mark wood and set up fence guides then drill keyhole with router:

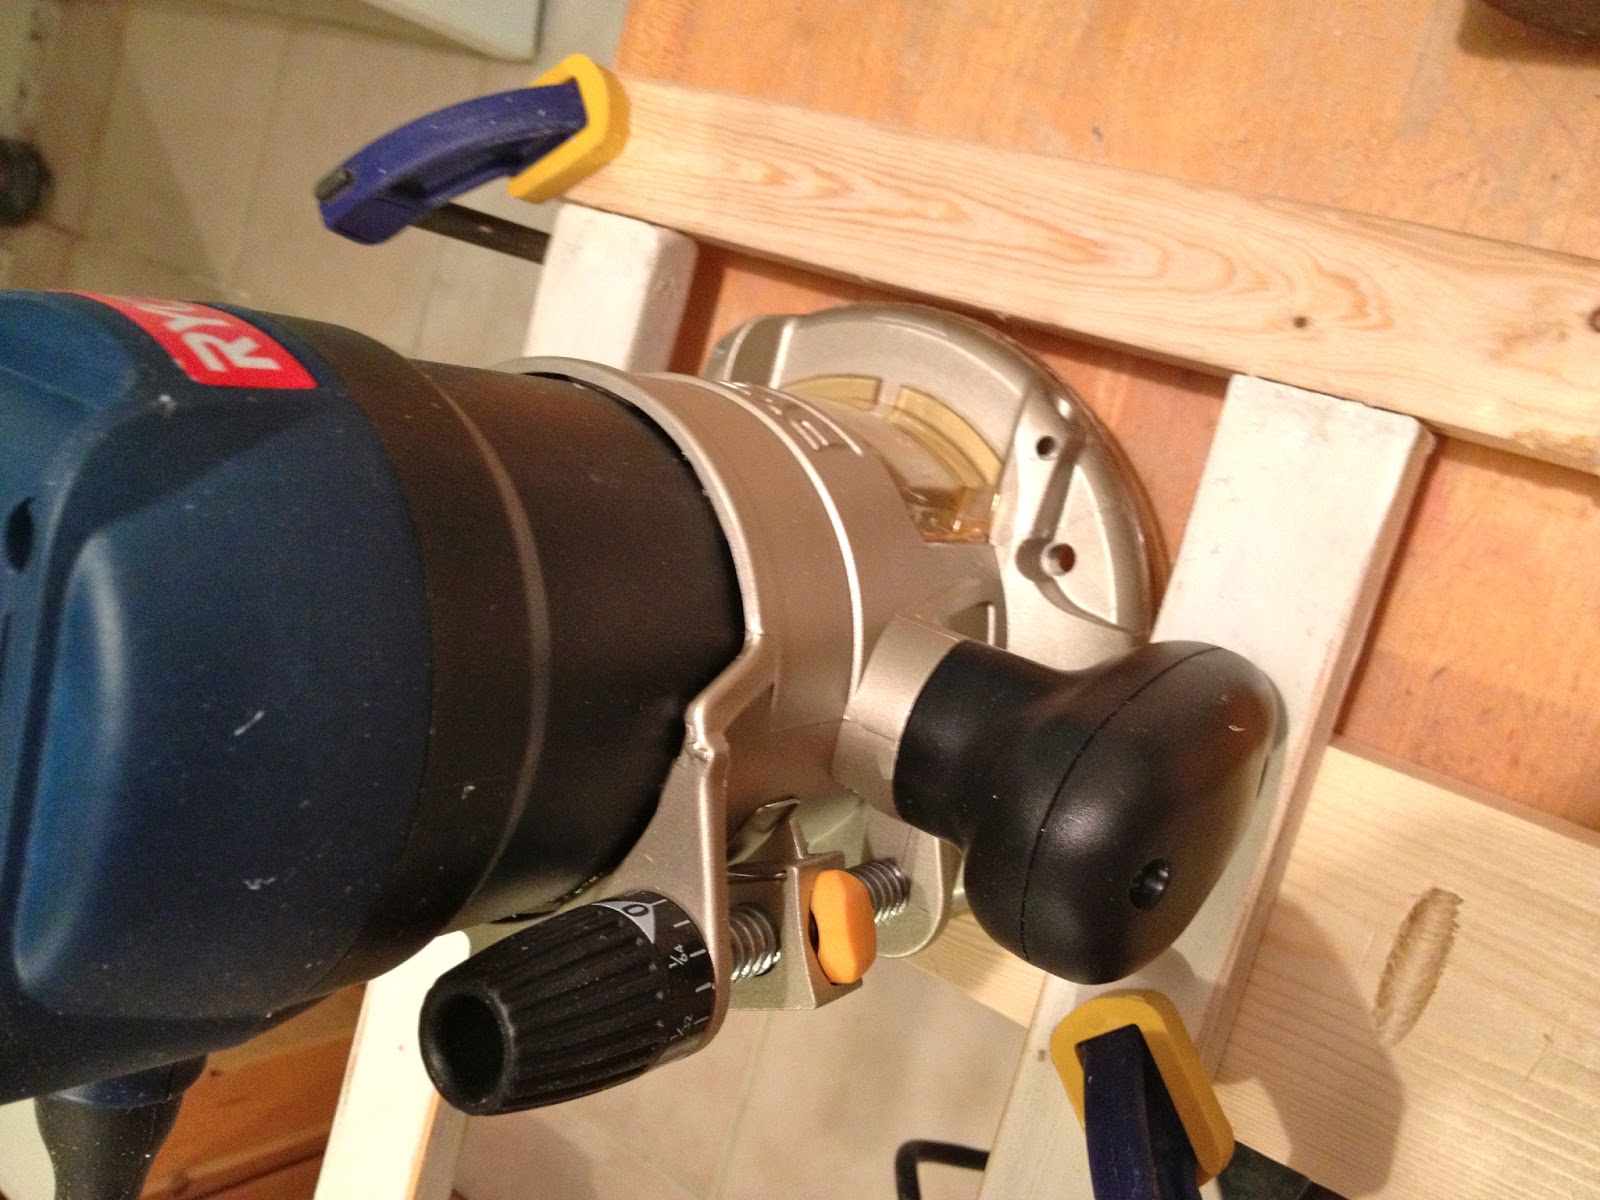
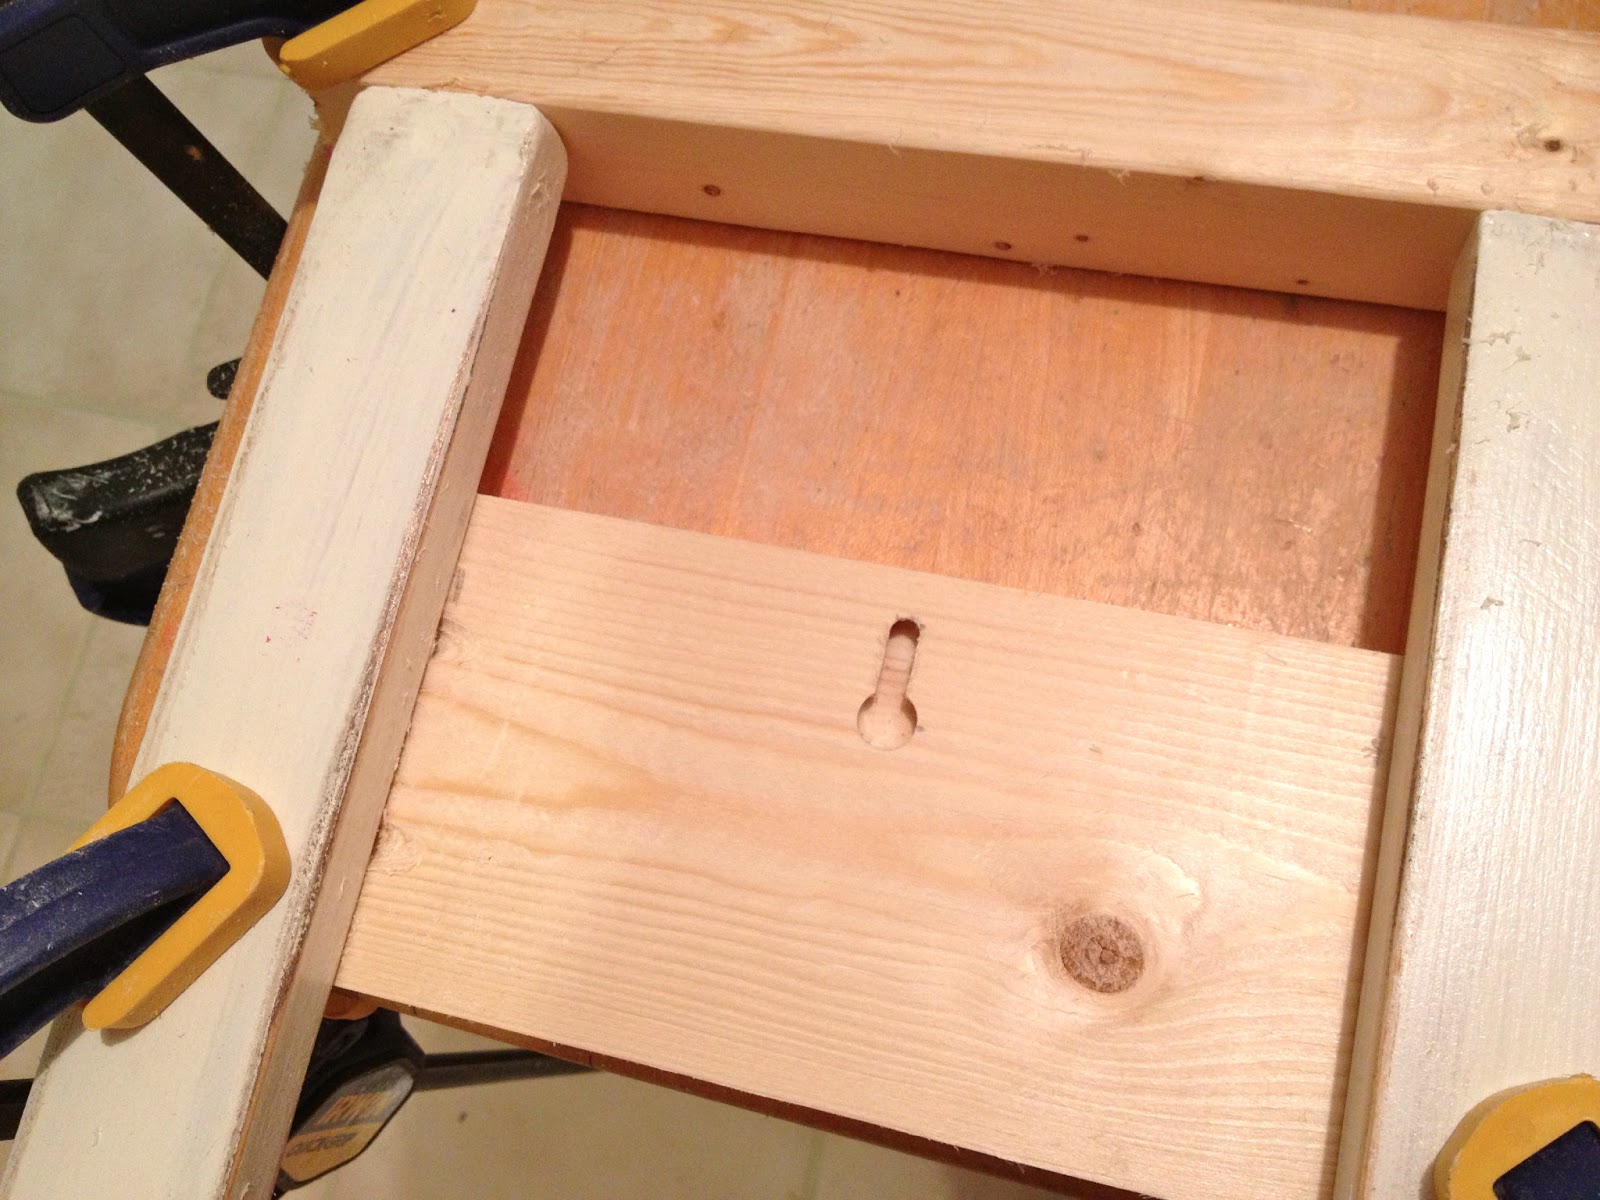
Make two equal holes for each shelf. 
Finish construction with pocket holes and finish nails:
(back view)

 
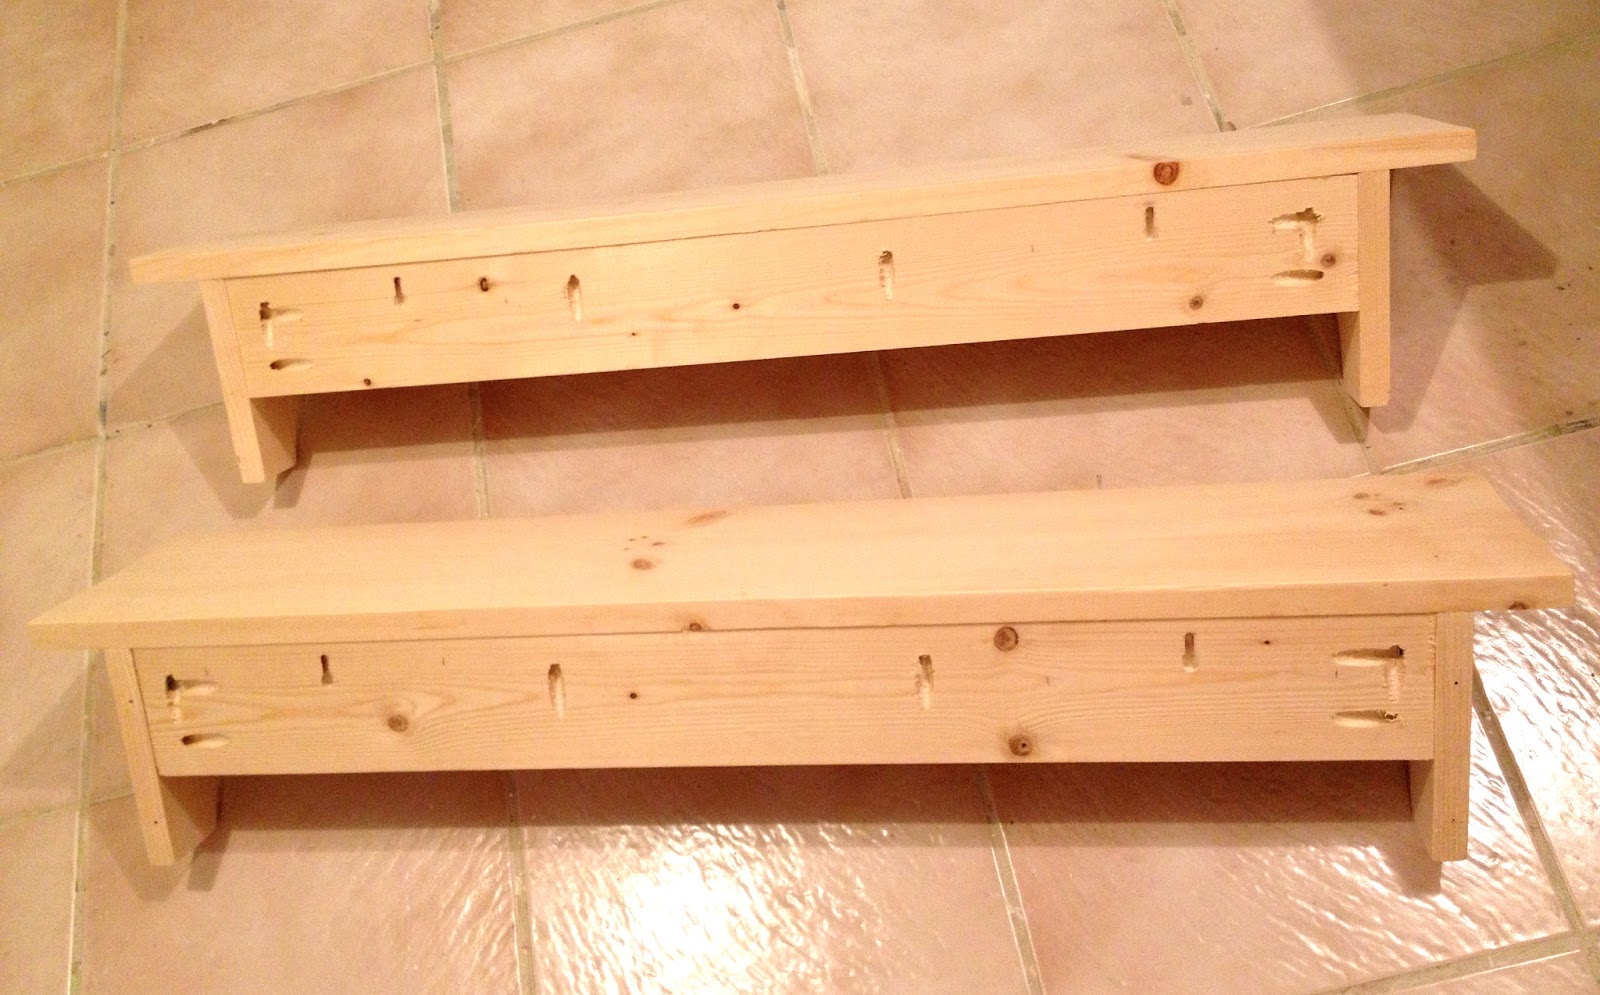
3. Sand, stain Minwax espresso and seal 3 coats Minwax Polycrylic satin:

You may also like...

  • DIY Charcuterie BoardDIY Charcuterie Board
  • DIY Wall Mirror with StorageDIY Wall Mirror with Storage
  • DIY 3 Drawer Nightstand with PlansDIY 3 Drawer Nightstand with Plans
  • DIY Primitive Nightstand with PlansDIY Primitive Nightstand with Plans
Share this post:

Filed Under: BUILD, DIY, HOME DECOR, HOME DECOR, ORGANIZATION, PAINT, SHELVES7 Comments

Reader Interactions

Comments

  1. Cassie @ Primitive & Proper says

    February 18, 2013 at 6:11 PM

    those look great! very rustic- i love the brackets!

    Reply
  2. Box Full of Pleasure says

    February 18, 2013 at 6:31 PM

    Great color 🙂

    Reply
  3. Rachel O. says

    February 19, 2013 at 12:31 AM

    They look fantastic! Awesome stain. I love it when you can DIY something for a fraction of the cost. You get to totally peronsalize it and make it look just the way you want.

    Reply
  4. Jenny Piirto says

    February 19, 2013 at 2:29 AM

    love these! they turned out great. They are so charming.

    Reply
  5. Hopping Along says

    February 19, 2013 at 4:56 AM

    These look great Jamie!! I definitely need a router now:-)

    Reply
  6. Kayla Janachovsky says

    February 26, 2013 at 1:28 AM

    Great DIY project! I host a DIY link party every Monday and would love for you to join! http://homecomingmn.blogspot.com/2013/02/the-diyers-link-party.html

    Reply
  7. Cher-Ann Texter says

    March 9, 2013 at 12:25 AM

    Really pretty!

    Cher @ Designs by Studio C
    http://designsbystudioc.com

    Reply

Leave a Reply Cancel reply

Your email address will not be published. Required fields are marked *

Primary Sidebar

Hi! I’m Jaime

Jaime Costiglio

Hello!

Thank you for stopping by.
Join me for lots of DIY.

Read more

Get new posts via email

Handbuilt Holiday: Gift Project Plans

handbuilt holiday gift project plans

Collection of DIY gift project plans to build.

The Home Depot Tool Prospective

THD Prospective

Tools to consider for the DIYer.

Archives

The Home Depot Logo
Copyright © 2026 Jaime Costiglio · Custom site by Moonsteam Design

Privacy Policy