• Home
  • Blog
  • About
  • Contact
    • Disclosure
    • Privacy Policy
  • SHOP
  • Widget area for main menu

    • Email
    • Facebook
    • Instagram
    • Pinterest
    • Twitter
    • YouTube
  • Skip to primary navigation
  • Skip to main content
  • Skip to primary sidebar

Jaime Costiglio

build - paint - sew

  • BUILD
    • BEDS
    • BENCHES
    • DESKS
    • DRESSERS
    • GAMES & TOYS
    • SCRAP WOOD
    • SHELVES
    • STORAGE
    • TABLES
  • TOOLS
  • PAINT
    • CRAFTS
    • FURNITURE
    • HOME DECOR
  • SEW
    • GIFTS
    • HOME DECOR
    • POUCHES
  • HANDBUILT HOLIDAY
    • 2021
    • 2019
    • 2018
    • 2017
    • 2016
    • 2015
    • 2014
    • 2013
  • GIFTS
    • BABIES
    • KIDS
    • FOR HER
    • FOR HIM
    • TEACHERS
    • WEDDINGS
  • SEASONAL
    • 4TH OF JULY
    • FALL
    • HALLOWEEN
    • CHRISTMAS
    • SUMMER
    • SPRING
    • ST. PATRICK’S DAY
    • THANKSGIVING
    • VALENTINE’S DAY
    • WINTER
  • SALTBOX PROJECT
    • BATHROOMS
    • DINING ROOM
    • EXTERIOR
    • FAMILY ROOM
    • FOYER / MUDROOM
    • KIDS BEDROOMS
    • KITCHEN
    • LIVING ROOM
    • MASTER BEDROOM
    • PLAYROOM
  • SCROLL SAW

“T” is for Thanks

October 2, 2011

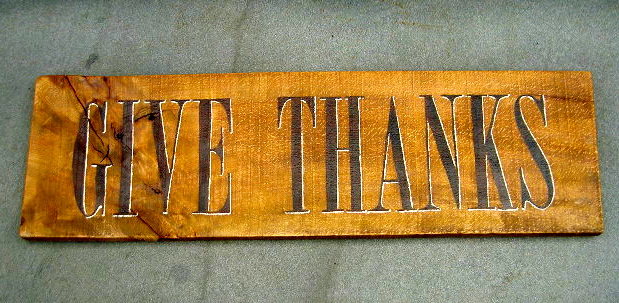
Give Thanks painted sign.

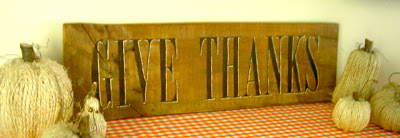
Simple but so meaningful.
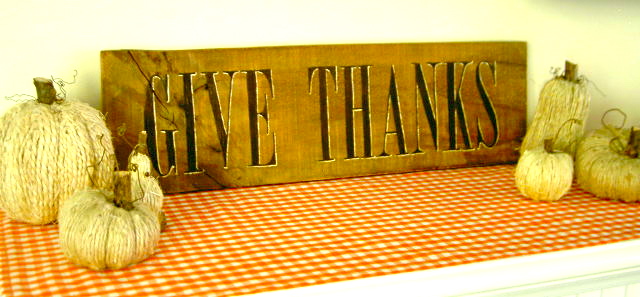
A daily reminder, especially for those young ones just beginning to read (and read everything everywhere we go!).

And perfect for Thanksgiving.
Here’s how I made the sign:

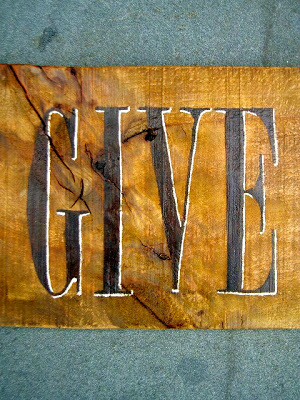
1. Using a piece of pallet wood lay out the printed letters.
Trace the letters with a ballpoint pen making a slight indent in the wood:
2. Paint inside the indent left behind:
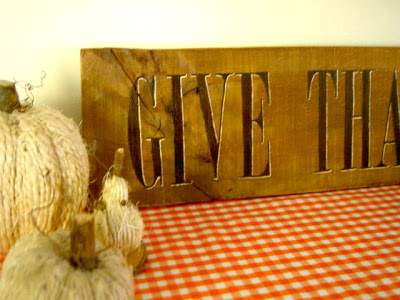
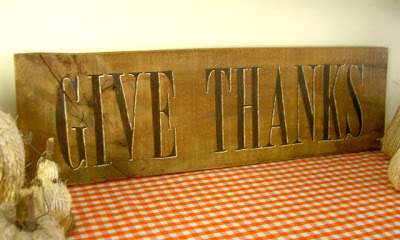
3. Layer up the paint colors: red, brown, black then highlight with off white.
Sand to distress.
Stain with Minwax special walnut.
Seal with satin poly.
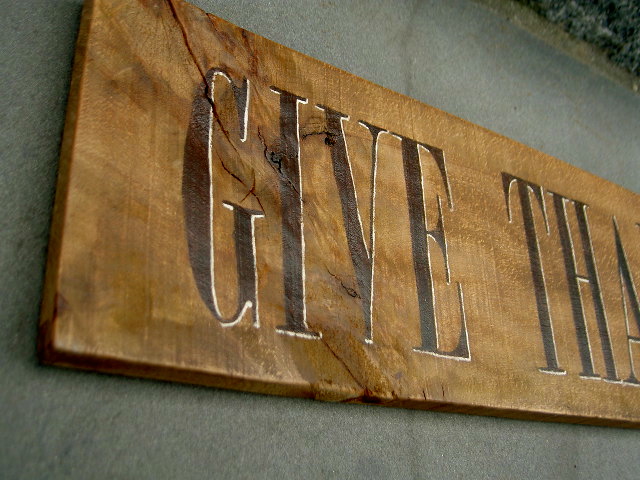
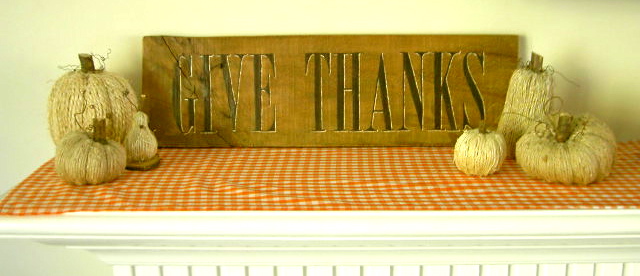
The pallet wood has lots of character:
A simple project with a big message.
I’m linking up to:
Whatcha Got Weekend @ Lolly Jane
SAS @ Funky Junk
Weekend Wrap Up @ Tatertots & Jello
Sundae Scoop @ I Heart Naptime
Sister Sunday @ Sisters of the Wild West
Sunday Showcase Party @ Under the Table & Dreaming
Just Something I Whipped Up @ The Girl Creative
DIY Fall Festival @ The DIY Showoff
Made by You Mondays @ Skip to My Lou
Making the World Cuter @ Making the World Cuter
Nifty Thrifty @ Coastal Charm
Tuesday Treasures @ My Uncommon Slice of Suburbia
Tutorials & Tips Tuesday @ Home Stories A to Z
Good Life @ A Beach Cottage
Delightfully Inspiring @ Delightful Order
Transformation Thursday @ The Shabby Creek Cottage
Strut Your Stuff @ Somewhat Simple
Share Awesomeness Thur @ The 36th Avenue
Flaunt it Friday @ Chic on a Shoestring
Tickled Pink @ 504 Main
Frugal Friday @ The Shabby Nest
SAS @ Just a Girl
Feathered Nest @ French Country Cottage
Remodelaholics Anonymous @ Remodelaholic
inspiration board @ Carolyns Homework
Weekly Challenge @ The CSI Project

Photobucket

You may also like...

  • Self Standing Station SignsSelf Standing Station Signs
  • DIY Handpainted SignDIY Handpainted Sign
  • No Tricks Only Treats Handpainted SignNo Tricks Only Treats Handpainted Sign
  • “C” is for Chore Chart“C” is for Chore Chart
Share this post:

Filed Under: CRAFTS, DIY, FALL, HOME DECOR, HOME DECOR, PAINT, SEASONAL, THANKSGIVING16 Comments

Reader Interactions

Comments

  1. Susan @ homeroad.net says

    October 2, 2011 at 9:34 PM

    Really Beautiful Jaime! I love the white highlights! Hope you had a beautiful day today!
    Susan

    Reply
  2. [email protected] says

    October 2, 2011 at 10:24 PM

    This is lovely! I do like the "character" pallet wood has.

    Reply
  3. pinktoesandpowertools says

    October 2, 2011 at 11:10 PM

    Ooooh, really like this one. Love the font and the highlights–really makes the lettering pop. I think this one is my favorite sign you've done so far!

    Reply
  4. Cassie @ Primitive & Proper says

    October 3, 2011 at 1:14 AM

    i love the rustic piece of wood you used! it looks great with the saying.

    Reply
  5. [email protected] Road says

    October 4, 2011 at 3:53 AM

    I love how you highlighted the letters! It's a beautiful sign, Jaime. I like the pallet wood, too.

    Reply
  6. Artsy VaVa says

    October 4, 2011 at 11:39 PM

    You did a great job on the sign! Thanks for sharing.

    Reply
  7. http://findingsecrettreasures.blogspot.com says

    October 6, 2011 at 3:13 AM

    Great sign! love how the wood looks, and it looks great with your pumpkins, which I also love!

    Reply
  8. [email protected] Charm says

    October 7, 2011 at 12:04 AM

    Beautiful job Jaime…thanks for sharing at my NTT party.

    Blessings,
    Linda

    Reply
  9. Patricia Torres says

    October 7, 2011 at 4:00 AM

    Wow!! I love love this… so cute.. such a lovely thought!! 🙂

    Reply
  10. Alida - Radcrafter says

    October 7, 2011 at 4:35 AM

    That's gorgeous, very professional look to it.

    Alida
    http://radcrafter.com

    Reply
  11. Joyce - Quilted Nest says

    October 7, 2011 at 12:25 PM

    Some great tips here. I have a sign in mind for a Christmas gift – so this was inspiring and helpful!

    Reply
  12. mommyroo says

    October 7, 2011 at 6:22 PM

    Love your sign…thanks so much for posting the instructions…I may try to make one for my home!

    Reply
  13. Meredith Resnick, M.Ed, MA says

    October 7, 2011 at 9:38 PM

    This came out beautifully. Thanks for the tutorial!

    ~ Meredith From A Mother Seeking Come find me on my blog, A Mother Seeking…

    Reply
  14. Anita @ GoingALittleCoastal says

    November 2, 2011 at 4:14 PM

    This is just perfect! I would love to make one too. I'm going to scrounge for some wood in the garage. Love how you highlighted the letters.

    Reply
  15. Kara @ June & Bear says

    November 10, 2011 at 1:16 PM

    I'm getting ready to paint my first sign and I hope that it turns out half as good as yours always do. I love how rustic and simple this one is.

    Reply
  16. Amy C says

    November 10, 2011 at 4:26 PM

    I really like your sign! I like that it's painted rather than using vinyl. I use vinyl all the time, but I think the painted gives it a feel! Thanks for sharing. 🙂
    Amy @ The Happy Scraps

    Reply

Leave a Reply Cancel reply

Your email address will not be published. Required fields are marked *

Primary Sidebar

Hi! I’m Jaime

Jaime Costiglio

Hello!

Thank you for stopping by.
Join me for lots of DIY.

Read more

Get new posts via email

Handbuilt Holiday: Gift Project Plans

handbuilt holiday gift project plans

Collection of DIY gift project plans to build.

The Home Depot Tool Prospective

THD Prospective

Tools to consider for the DIYer.

Archives

The Home Depot Logo
Copyright © 2023 Jaime Costiglio · Custom site by Moonsteam Design

Privacy Policy