
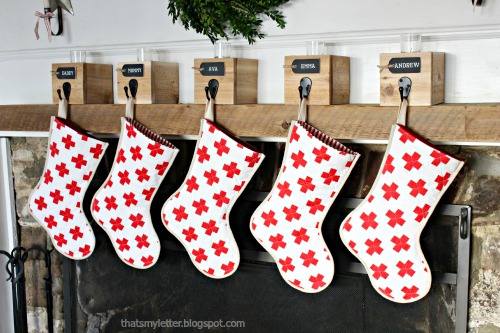
I’ve been seeing the swiss cross trend everywhere so I thought I’d jump on board and make a new set of stockings for our family this season. In true diy fashion I even went so far as to paint the red swiss cross pattern onto white cotton fabric in order to get the size, repeat and scale I wanted.

I choose to quilt the front portion sewing through the crosses.

The interior is lined with solid red cotton for contrast and the edging is bias cut binding made from linen.
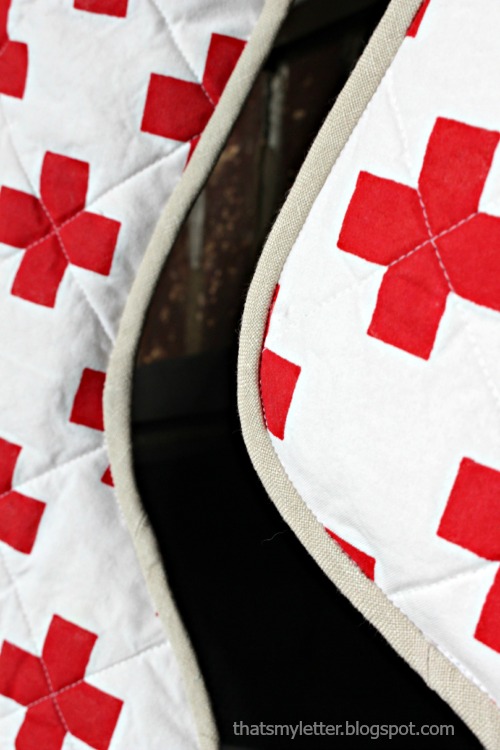
The binding is an easy finishing solution for a quilted stocking and makes a pretty edge.


The sharp modern edge of the swiss cross in red and white makes the perfect juxtaposition against our 1740 farmhouse dining room.

How to make quilted swiss cross stockings:
Supplies:
– white cotton fabric (exterior)
– red cotton fabric (interior)
– muslin (quilt backing)
– linen fabric (binding)
– batting
– stocking pattern
– lightbox
– red acrylic paint & paintbrush
– basic sewing supplies
**I prefer to wash and dry (where applicable) all fabrics prior to use.

Step 1: Trace stocking pattern onto white cotton (2 pieces for each stocking), the traced edge will be your sewing line. Cut out pieces with sufficient seam allowance.
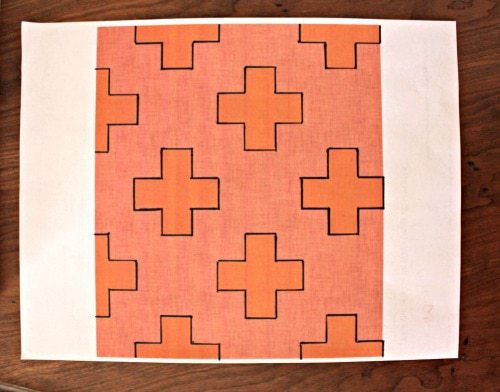
Step 2: Print desired swiss cross pattern. Trace crosses with black marker to make them more visible.

Step 3: Pin pattern to back of white cotton stocking piece.
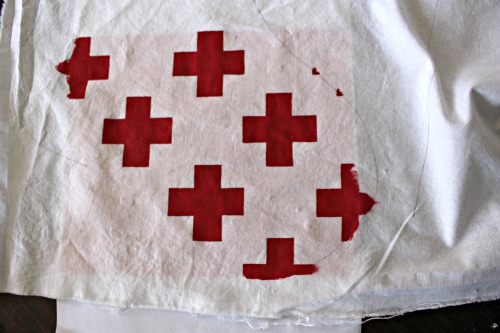
Step 4: Place white cotton with pattern on top of lightbox and paint inside crosses. Continue to re-pin pattern until entire stocking piece is filled with crosses.

Step 5: To make quilt sandwich place muslin, then batting, then white cotton and pin together.

Step 6: Quilt on the diagonal through the crosses.

Step 7: Wash and dry. This will give the fabric that desired puckered look. Press to smooth.

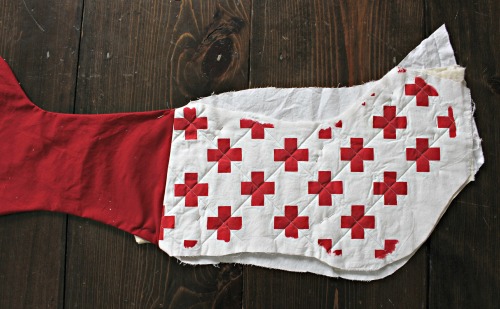
Step 8: Cut 2 stocking pieces from red cotton. Sew top edge right sides together as pictured above making mirrored pieces, be sure to insert bias ribbon hanger in back portion.

Step 9: Place red lining pieces right sides together matching up top edge seam. Sew on the traced lined then clip leaving scant 1/4″ seam allowance.
Step 10: Turn lining right side out then place wrong sides together of white cotton and pin.
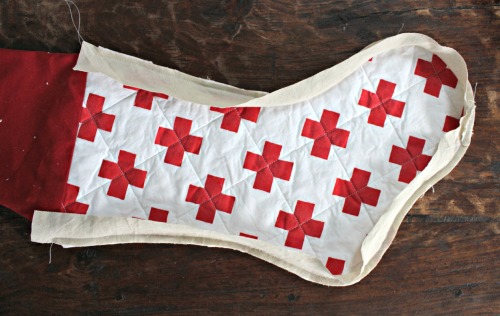
Step 11: Use a 1 1/2″ bias strip binding sew in place on the traced pencil line. Clip edge leaving scant 1/4″ seam allowance.

Detail of Step 11.

Step 12: Press binding open from front then wrap to back. Fold raw edge in and then over again to cover seam allowance. Pin in place. (Good binding tutorial here.)

Step 13: Stitch binding in place from the front, stitch in the ditch and be sure to catch folded edge on the back as you go.


i just adore these! gorgeous!
Just gorgeous! Love the Swiss cross design!
I NEED to know more about the cute wood box hangers you have for your stockings. I love them! Are the plans on here? I just stumbled onto your blog today.
Wow, these are incredible! I love your attention to detail 🙂
They turned out super cute.
I second the request for more info on the hangers.
These are so adorable!! I found you from Online Fabric Store online. The minute I saw them, I thought "IKEA" !! So cute. And I third the request on the hangers.
I think the binding on the edges is my favorite part. Such a great detail and the swiss crosses are PERFECT. I want these stockings in my life.