
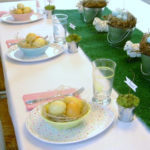
A simple bunny place card project for your Easter table today. Gather up your scrap wood and make these super cute place card holders just in time for the holiday.
And surprise! The backs of the bunnies have fun fabric, you could even use cardstock or decoupage any bright colored paper:

I attached mini clothespins to the painted side and then inserted the names printed on cardstock:

Below are the step by step instructions to make these bunny place cards. Be sure to read through all steps before beginning and always follow all safety precautions.
*This post contains affiliate links.
Supplies:
- 1/2″ mdf or plywood scraps
- bunny shape printable
- 1×2 pine boards cut @ 4″l
- pastel bright colored spray paint
- sandpaper
- cotton fabric scraps
- decoupage for fabric + brush
- small fabric scissors
- wood glue
- nailer and 1 1/4″ finish nails
- super glue
- mini clothespins

Step 1: Print out bunny shape here, apply light coat of spray adhesive and place on MDF. Cut out bunny heads from 1/2″ mdf or plywood scraps using a scroll saw or jig saw and sand smooth.
Apply primer especially if using mdf as it wants to soak up all the paint. Spray paint front and sides with bright pastel colored gloss spray paint.

Step 2: Cut a piece of scrap fabric slightly larger than bunny head.

Step 3: Apply decoupage to back of bunny then lay fabric onto bunny and smooth in place. Let dry.

Step 4: Trim fabric as close to edge of bunny as possible. If your fabric starts to fray apply a small dab of decoupage to the cut edge.

Step 5: Attach 1×2 base to bunny head using wood glue and 1 1/4″ finish nails.

Step 6: Use super glue to attach one side of mini clothespin to center top of bunny head.

Now print out the names onto cardstock, cut out and slip into clothespin. Self standing, so colorful and the cutest nod to Easter.

SHOP THIS PROJECT:

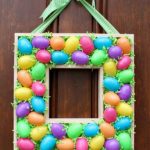
Another easy decorating idea for your Easter table is this plastic egg centerpiece:

Or how about egg place cards?

Leave a Reply