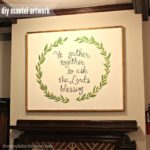
Painted stamp art.

Inspired by these stamps:

image from USPS
I’m giving full credit to Jose Ortega, the illustrator who created the design for these Love stamps.
In the words of the USPS, “award-winning illustrator José Ortega created an abstract garden of bright flowers, a butterfly, a strawberry, and doves, interlaced with vines that run from one stamp to another. Each prominent element of the design is in the shape of a heart.”
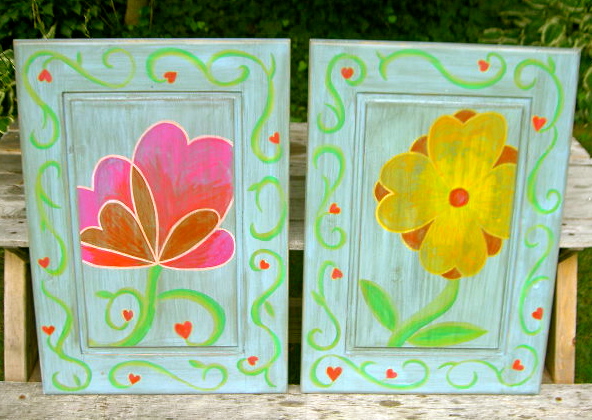
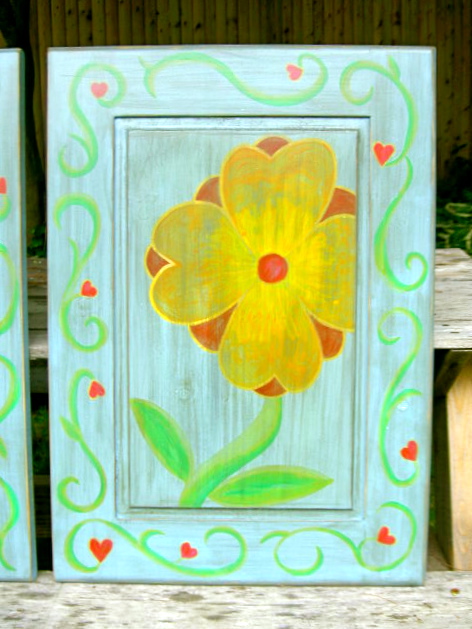
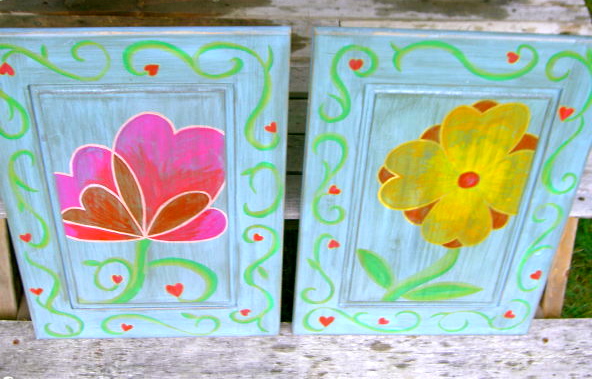
I simply did my own version on some reclaimed cabinet door pieces.

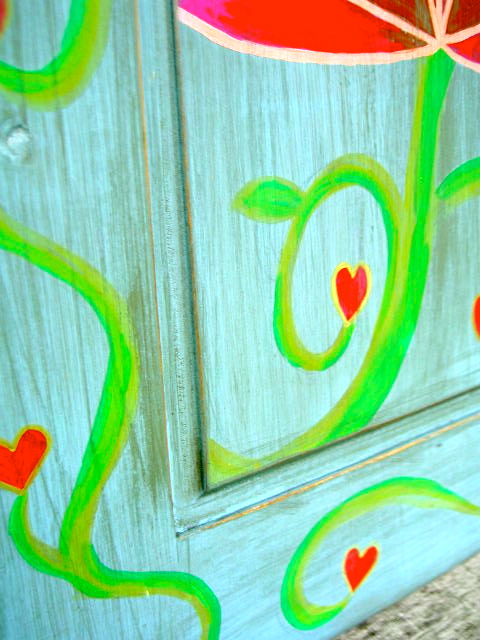
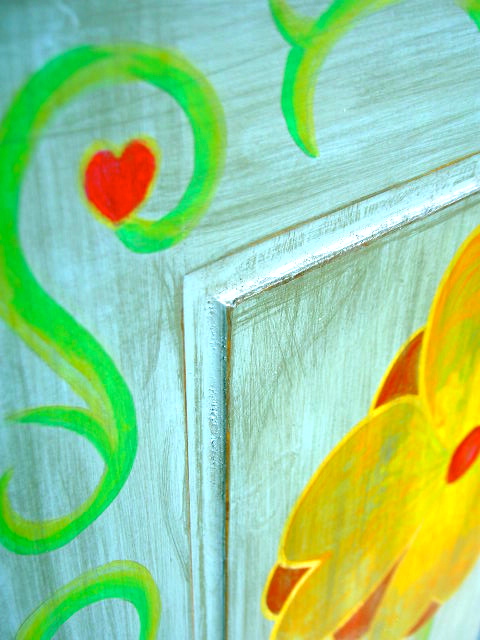
Detail image:
I just hope the US Postal Service doesn’t come after me!
I bought the stamps because the design was so beautiful, thank you Jose.

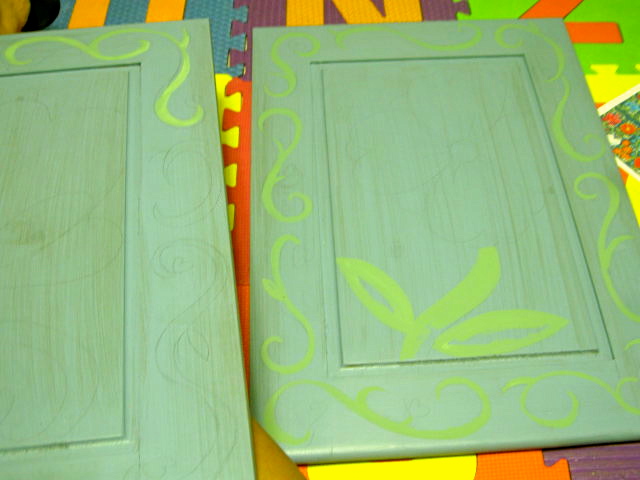
My version:
Here’s how I did it:
1. Filled holes and sanded cabinet door fronts.
Painted one coat BM wedgewood grey.

2. Draw design with pencil using stamps as inspiration:

3. Paint with acrylics, layer up the colors.
4. Sand to distress, seal with poly.

These lovelies don’t have a home yet but the wheels are spinning.
I’m linking up to:
http://delightfulorder.blogspot.com/, The 36th Avenue.
http://www.somewhatsimple.com/
http://www.abeachcottage.com/
http://www.theshabbycreekcottage.com/
http://www.504main.com/
http://www.504main.com/
http://chiconashoestringdecorating.blogspot.com/
http://www.remodelaholic.com/
http://frenchcountrycottage.blogspot.com/
Whatcha Got Weekend @ Lolly Jane
SAS @ Funky Junk
Lovely Crafty Weekend @ Lovely Crafty Home
Sister Sunday @ Sisters of the Wild West
Sunday Showcase Party @ Under the Table & Dreaming
Just Something I Whipped Up @ The Girl Creative
DIY Project Parade @ The DIY Showoff
Made by You Mondays @ Skip to My Lou
Making the World Cuter @ Making the World Cuter
Nifty Thrifty @ Coastal Charm
Tuesday Treasures @ My Uncommon Slice of Suburbia
Tutorials & Tips Tuesday @ Home Stories A to Z
those are so pretty- cheerful and colorful! just what i needed to see!
Very nice and thanks for the how to do!
Those are so fun and so pretty! I love the colors.
You are making me wish I didn't have so many woodworking projects on my to-do list that I want to get done before cold weather comes again. You aren't just DIY–love this artist side you have!
Love these! Cute!
♥Sweet Tea Serendipity
Cute! Thanks for the tutorial!
1 Year Old Birthday Party Ideas
Those are great. I love the colors and your inspiration. And they are perfect on those cabinet doors, too.
Oh, my goodness, I love the inspiration and how you used it for the doors! Fantastic!
Erika
Artful Rising
I have a bajillion drawer fronts – well maybe I am over exaggerating a bit, but I have a lot! This is such a pretty idea and great way to use up a few of those drawer fronts that I have stacked up in the workshop.
Just beautiful! Following you from The Girl Creative 🙂
What a great project! 🙂 I've featured this post on Craft Gossip here:
http://homeandgarden.craftgossip.com/stamp-art/
If you would like a "featured by" button, you can grab one here:
http://homeandgarden.craftgossip.com/grab-a-craft-gossip-button/
We liked this so much over at Copycat Crafts that we have decided to feature it today! You can view it here
http://www.copycatcrafts.com/postage-stamp-inspired-wall-art/
We'd love it if you'd like to display a featured button! You can grab your button on the right hand side of your post. Thanks!