• Home
  • Blog
  • About
  • Contact
    • Disclosure
    • Privacy Policy
  • SHOP
  • Widget area for main menu

    • Email
    • Facebook
    • Instagram
    • Pinterest
    • Twitter
    • YouTube
  • Skip to primary navigation
  • Skip to main content
  • Skip to primary sidebar

Jaime Costiglio

build - paint - sew

  • BUILD
    • BEDS
    • BENCHES
    • DESKS
    • DRESSERS
    • GAMES & TOYS
    • SCRAP WOOD
    • SHELVES
    • STORAGE
    • TABLES
  • TOOLS
  • PAINT
    • CRAFTS
    • FURNITURE
    • HOME DECOR
  • SEW
    • GIFTS
    • HOME DECOR
    • POUCHES
  • HANDBUILT HOLIDAY
    • 2021
    • 2019
    • 2018
    • 2017
    • 2016
    • 2015
    • 2014
    • 2013
  • GIFTS
    • BABIES
    • KIDS
    • FOR HER
    • FOR HIM
    • TEACHERS
    • WEDDINGS
  • SEASONAL
    • 4TH OF JULY
    • FALL
    • HALLOWEEN
    • CHRISTMAS
    • SUMMER
    • SPRING
    • ST. PATRICK’S DAY
    • THANKSGIVING
    • VALENTINE’S DAY
    • WINTER
  • SALTBOX PROJECT
    • BATHROOMS
    • DINING ROOM
    • EXTERIOR
    • FAMILY ROOM
    • FOYER / MUDROOM
    • KIDS BEDROOMS
    • KITCHEN
    • LIVING ROOM
    • MASTER BEDROOM
    • PLAYROOM
  • SCROLL SAW

“S” is for Slats

May 15, 2011

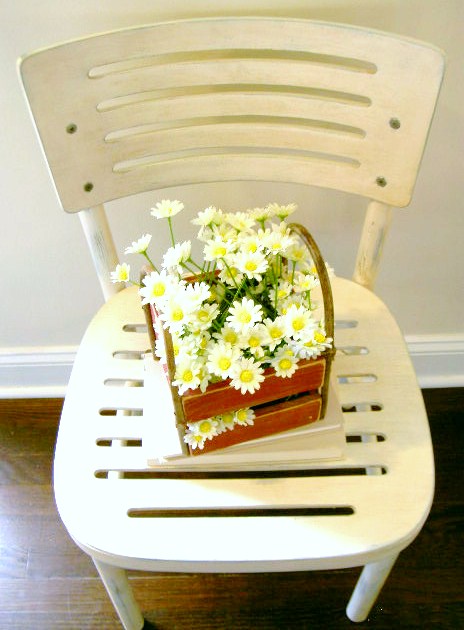
A slat chair makeover.
For comparison:
 
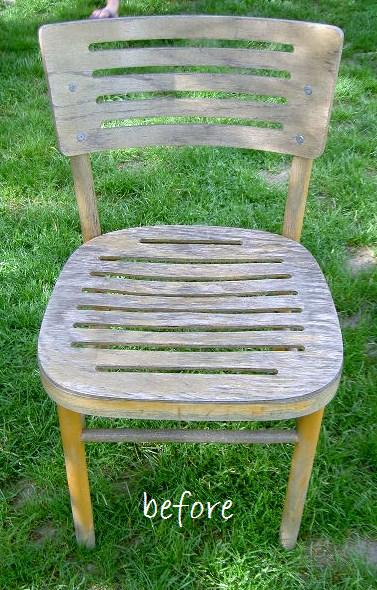
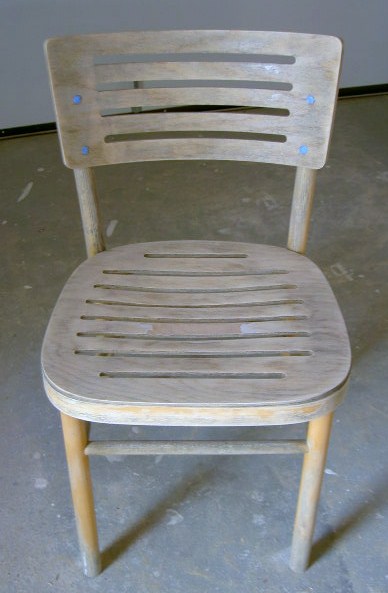
Clearly neglected and probably left outside for some time I snatched her up from a Freecycler for a rescue.
If anyone knows anything about the origins of this chair I’d love to hear it.
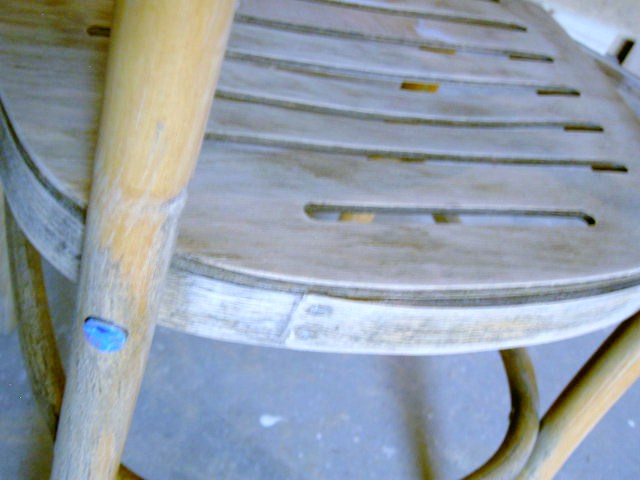
There are no markings for reference anywhere.
A little bit retro and utilitarian.
What is your story slat chair?
Here’s how I refinished the chair:

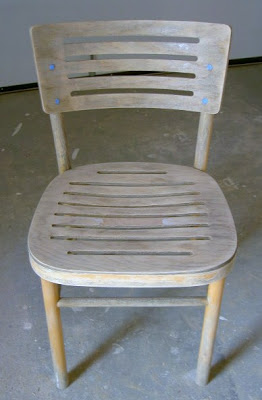
1. Sanded everywhere:

2. There were some minor repairs, one the back of the seat the banding was popping off – I glued, clamped and nailed it back in place.  Other places needed a little kwik wood epoxy.

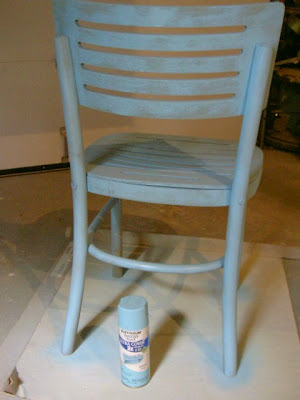
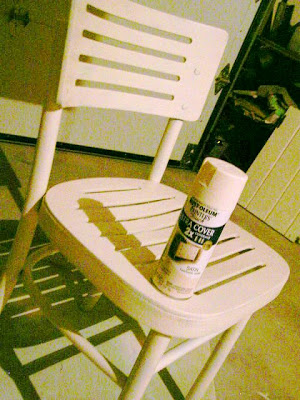
3. After sanding I covered the metal rivets and screws with painters tape:

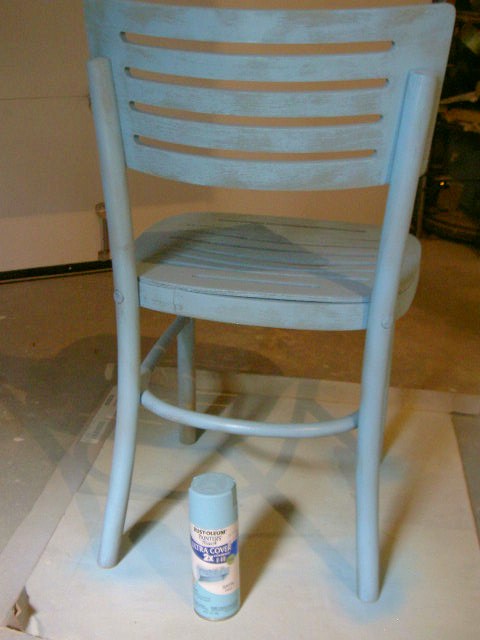
4. Sprayed one coat Rustoleum Aqua in satin.

5. Sprayed one coat Rustoleum Heirloom White in satin.

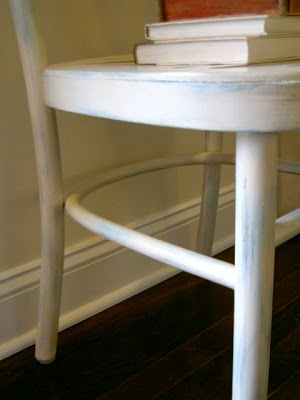
6. Sanded to distress, stained with Minwax antique walnut, sealed with 2 coats satin poly.

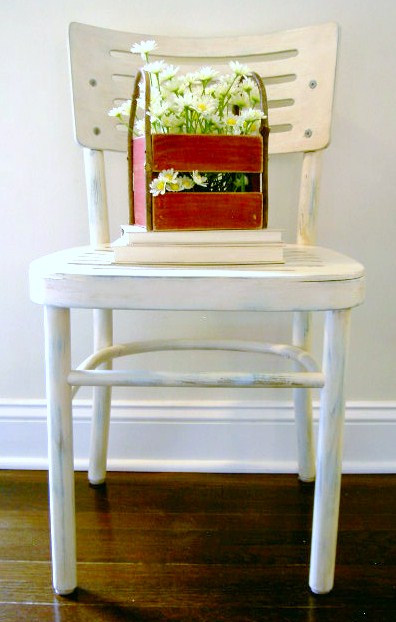
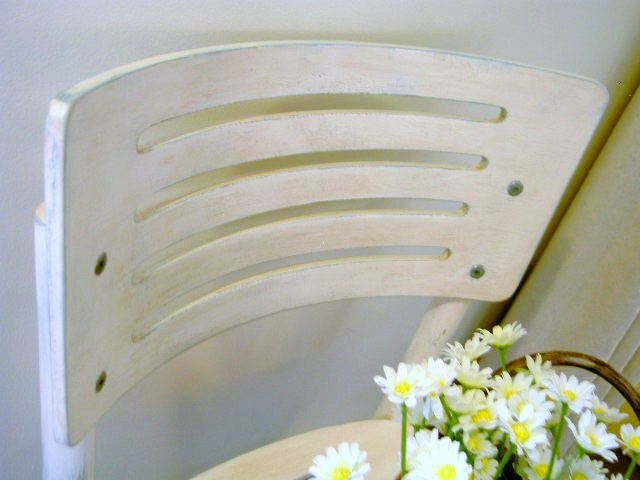
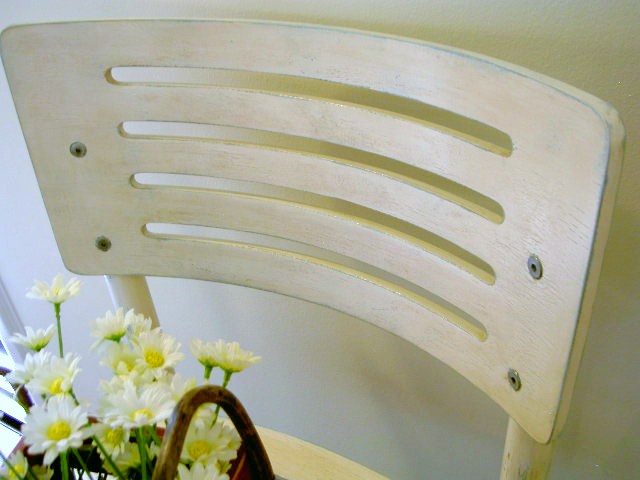
Detail of the finish.

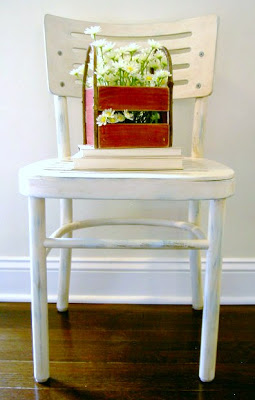
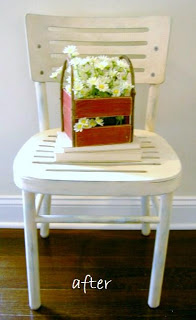
One last side by side:

One funky little chair.

I’m linking up to:
 Thumbnail for 'Made By You Monday' Making http://linda-coastalcharm.blogspot.com/Photobucket  The Shabby Nest Chic on a Shoestring Decorating  grabttimage
Visit thecsiproject.com  Photobucket  A BEACH COTTAGETransformation ThursdaySYS ThursThe Lettered Cottage Furniture Feature Fridays  The DIY Show Offbutton_thumb[12]

You may also like...

  • How to Install a Slat CeilingHow to Install a Slat Ceiling
  • Ceiling Makeover: Exposed Wood BeamsCeiling Makeover: Exposed Wood Beams
  • Family Room RefreshFamily Room Refresh
  • DIY Polka Spot Table MakeoverDIY Polka Spot Table Makeover
Share this post:

Filed Under: DIY, FURNITURE, FURNITURE, PAINT22 Comments

Reader Interactions

Comments

  1. Cassie @ Primitive & Proper says

    May 15, 2011 at 4:37 PM

    so pretty! i really like the unique style of that chair.

    Reply
  2. SANDI says

    May 15, 2011 at 4:52 PM

    I LOVE this little chair! It's unique. I LOVE the makeover you did. Thanks for sharing.

    Reply
  3. Comeca Jones says

    May 15, 2011 at 7:03 PM

    Very nice where will you keep it?!

    Reply
  4. Tiff says

    May 15, 2011 at 8:56 PM

    Your chair looks amazing! Those slats are fantastic, and it makes a great display! X

    Reply
  5. Trisha @ The Sweet Survival says

    May 15, 2011 at 9:34 PM

    That is a great chair! I love the aqua peaking through.

    Reply
  6. Allison@FabRehab says

    May 15, 2011 at 11:52 PM

    Love, love, love! Great tutorial!

    Reply
  7. Sarah, Three Boys says

    May 16, 2011 at 2:47 AM

    Awesome! I have never seen a chair like that, how cool! I have sold a few items on Craigslist and have found one store called Repurpose. That seems to be a good fit for my pieces. For now it is just on consignment but if they sell well, I will be brought on as whole sale. Keep your fingers crossed!! How is your store area going?

    Reply
  8. hilary @ the upcycle furniture co. says

    May 16, 2011 at 6:06 PM

    love… and that little box of daisys… so sweet!

    Reply
  9. Stephenie from Decorating Addiction says

    May 17, 2011 at 3:02 AM

    What a great makeover! It looks awesome and I love the flower display on top!

    Reply
  10. Serendipity Chic Design says

    May 17, 2011 at 10:51 PM

    wow…great rescue….Love the makeover you gave it!unk

    Reply
  11. KK says

    May 18, 2011 at 3:05 AM

    very nice rescue. she is standing proud and loved now. it shows.

    Reply
  12. Jane @ Jane's Junk and Treasures says

    May 18, 2011 at 4:31 PM

    I LOVE THAT CHAIR!!
    Can I have it!! ha

    Reply
  13. Erin says

    May 19, 2011 at 12:30 AM

    I ADORE that chair!! It looks so sweet with the little bucket of flowers on it. 🙂

    Reply
  14. Jen Migonis says

    May 19, 2011 at 4:55 PM

    what a great makeover! I just love how cottage-y and quaint it is!

    Jen
    http://www.migonishome.com

    Reply
  15. Tonya says

    May 19, 2011 at 8:47 PM

    Very cute!! Love it!

    Reply
  16. Angie @ The Country Chic Cottage says

    May 20, 2011 at 3:37 PM

    Man that chair is amazing!!

    Reply
  17. Sarah @ Cozy.Cottage.Cute. says

    May 21, 2011 at 1:21 PM

    Such a unique chair. Love your makeover!! 🙂

    Reply
  18. Randi~Dukes and Duchesses says

    May 26, 2011 at 11:58 AM

    Great chair!

    I don't know how I've never stumbled across your blog before but I found you through The CSI Project and I love your blog! I'm your newest follower.

    Reply
  19. Yanet @ 3 Sun Kissed Boys says

    June 3, 2011 at 2:06 AM

    That's so pretty! She's got great lines. Is that teak?

    Reply
  20. Bettsi says

    June 5, 2011 at 12:22 AM

    She is so cute! Looks Swedish to me.

    Reply
  21. gatheredinthekitchen.com says

    June 5, 2011 at 11:02 AM

    This is adorable! I love the crate of flowers on the chair! It makes it so perfectly feminine! Great job!

    Reply
  22. Ashleigh@Sincerely says

    June 6, 2011 at 5:14 PM

    Super cute! I haven't seen one quite like this. Love it 🙂

    Reply

Leave a Reply Cancel reply

Your email address will not be published. Required fields are marked *

Primary Sidebar

Hi! I’m Jaime

Jaime Costiglio

Hello!

Thank you for stopping by.
Join me for lots of DIY.

Read more

Get new posts via email

Handbuilt Holiday: Gift Project Plans

handbuilt holiday gift project plans

Collection of DIY gift project plans to build.

The Home Depot Tool Prospective

THD Prospective

Tools to consider for the DIYer.

Archives

The Home Depot Logo
Copyright © 2026 Jaime Costiglio · Custom site by Moonsteam Design

Privacy Policy