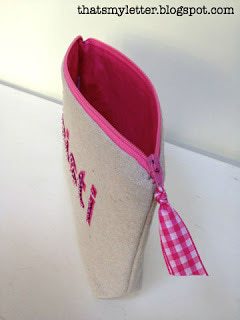
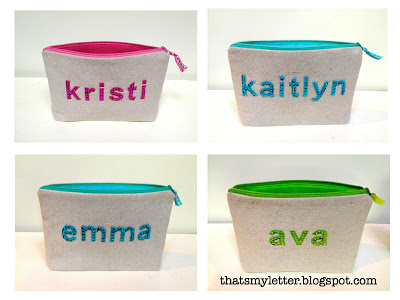
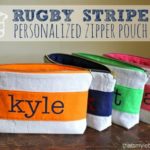
Sew: sequined pencil pouches
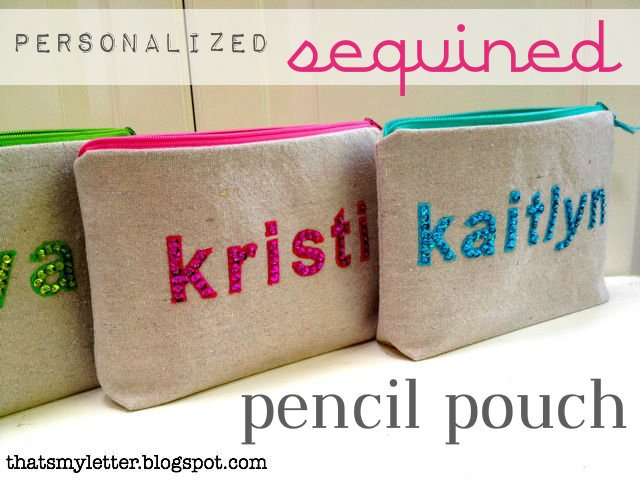
Personalized with each girls name:

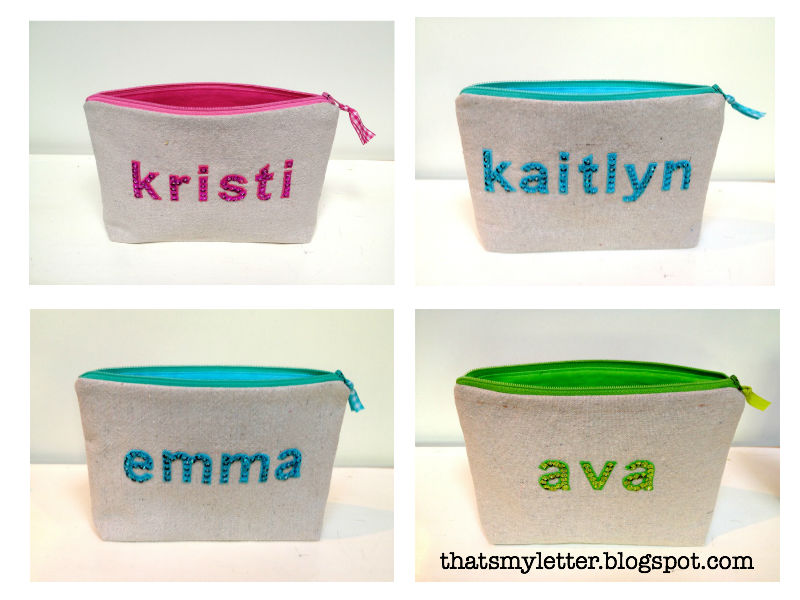
These girls will be blinged out for school this year.
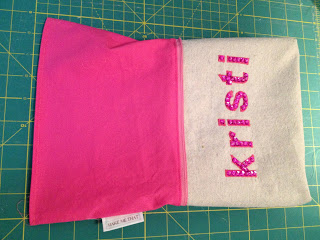
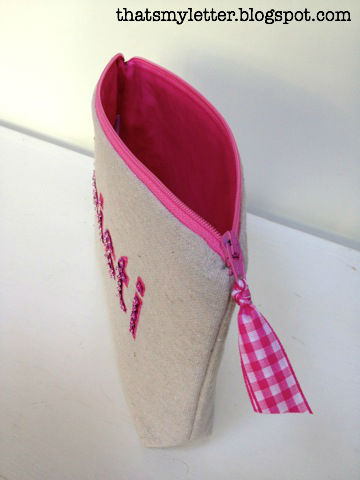
This pencil pouch measures 9″l x 6.5″h x 1.5″thick at base, big enough to hold the essential school supplies:

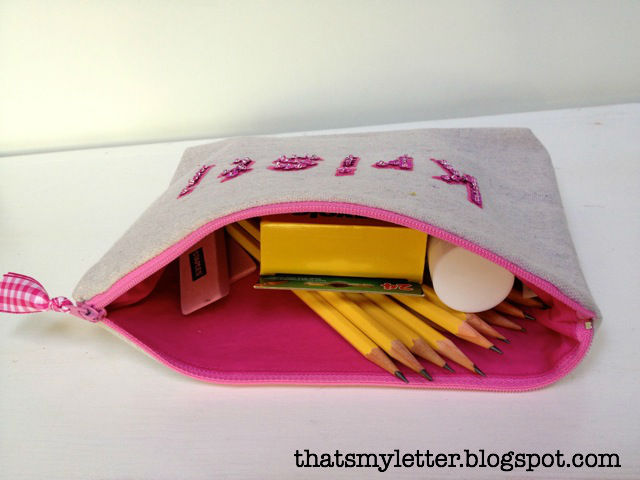
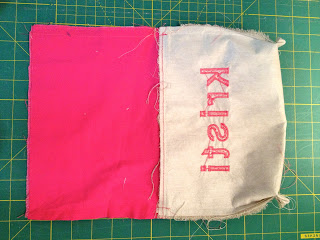
The interior lining matches the personalization on the exterior:


Here’s how I made the sequined pouches:
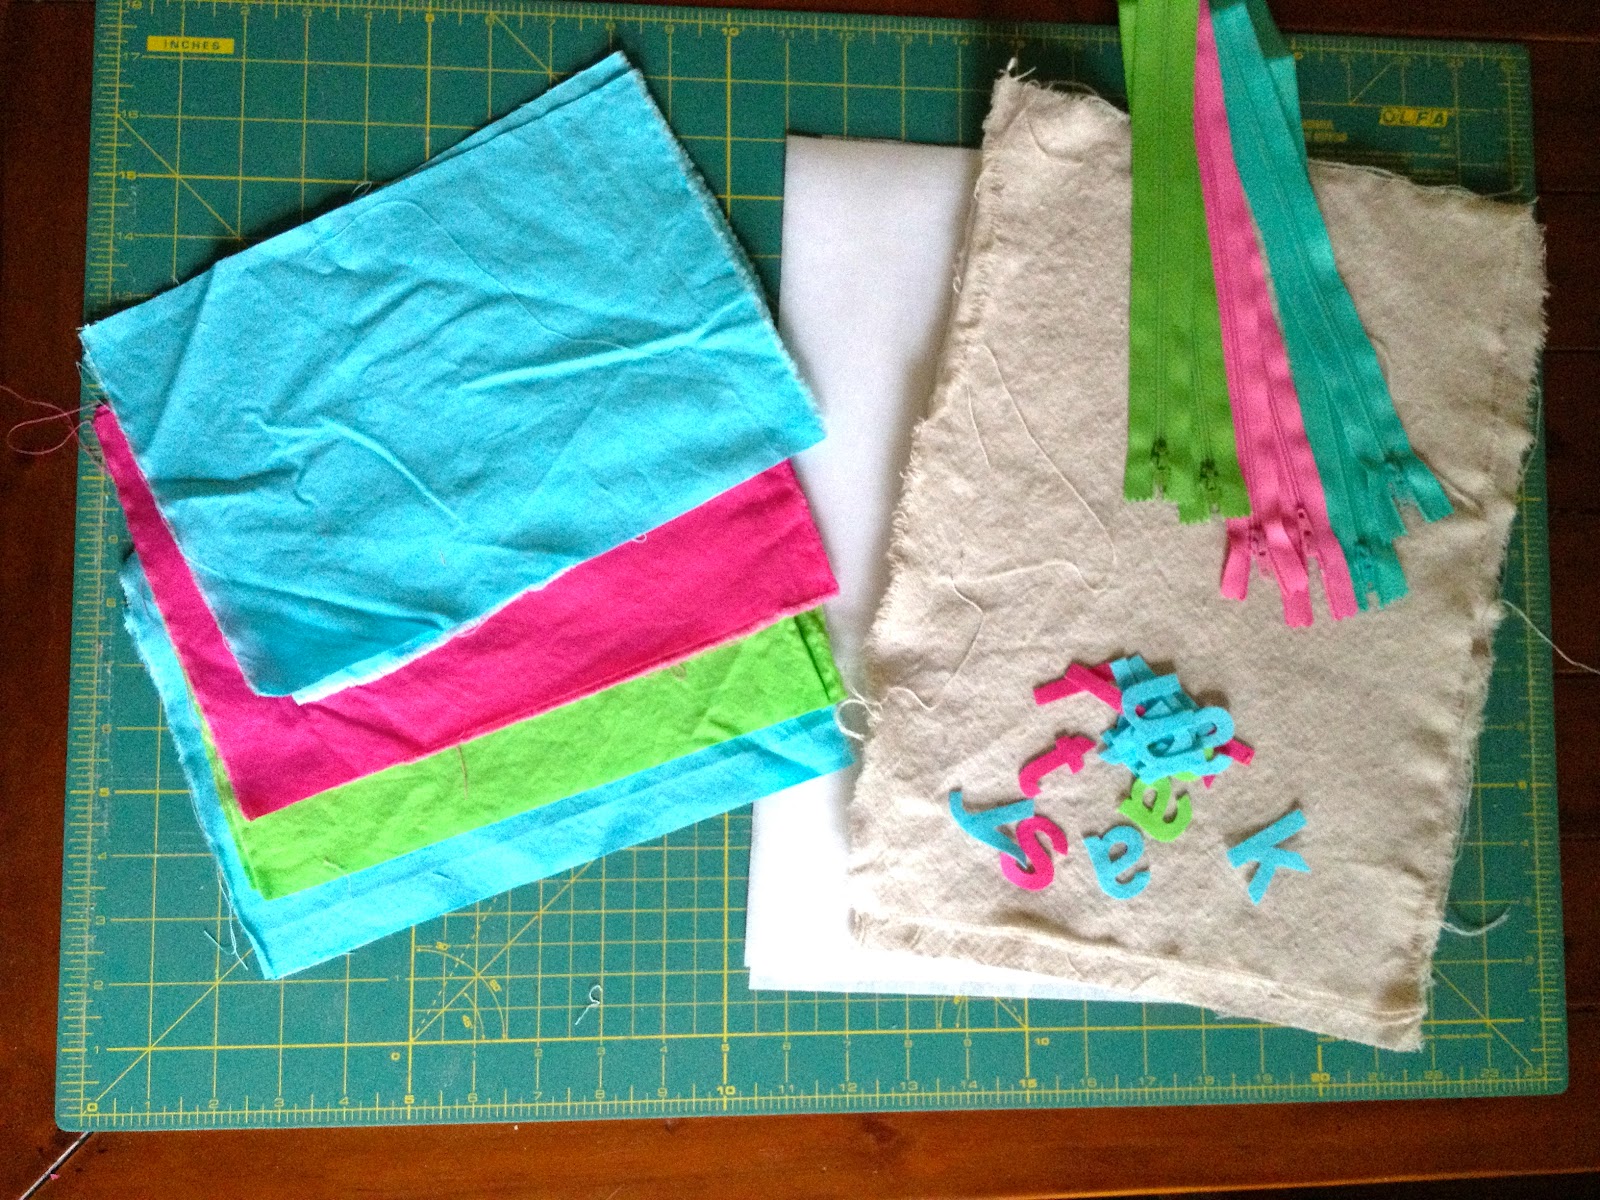
1. Supplies:
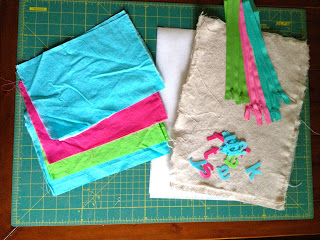


1. Supplies:
1 – drop cloth canvas @ 10″ x 14″
1 – fusible interfacing @ 10″ x 14″
2 – cotton lining @ 10″ x 7″
1 – 9″ zipper
ribbon for zipper pull
fabric letters (how to here)
sequins, beads, needle and thread
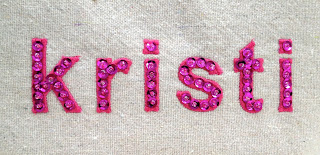
2. Make the letters.
Fuse interfacing to wrong side of fabric.
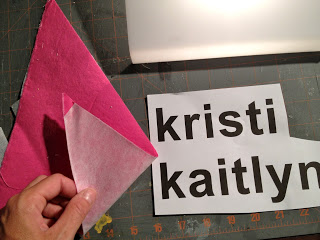
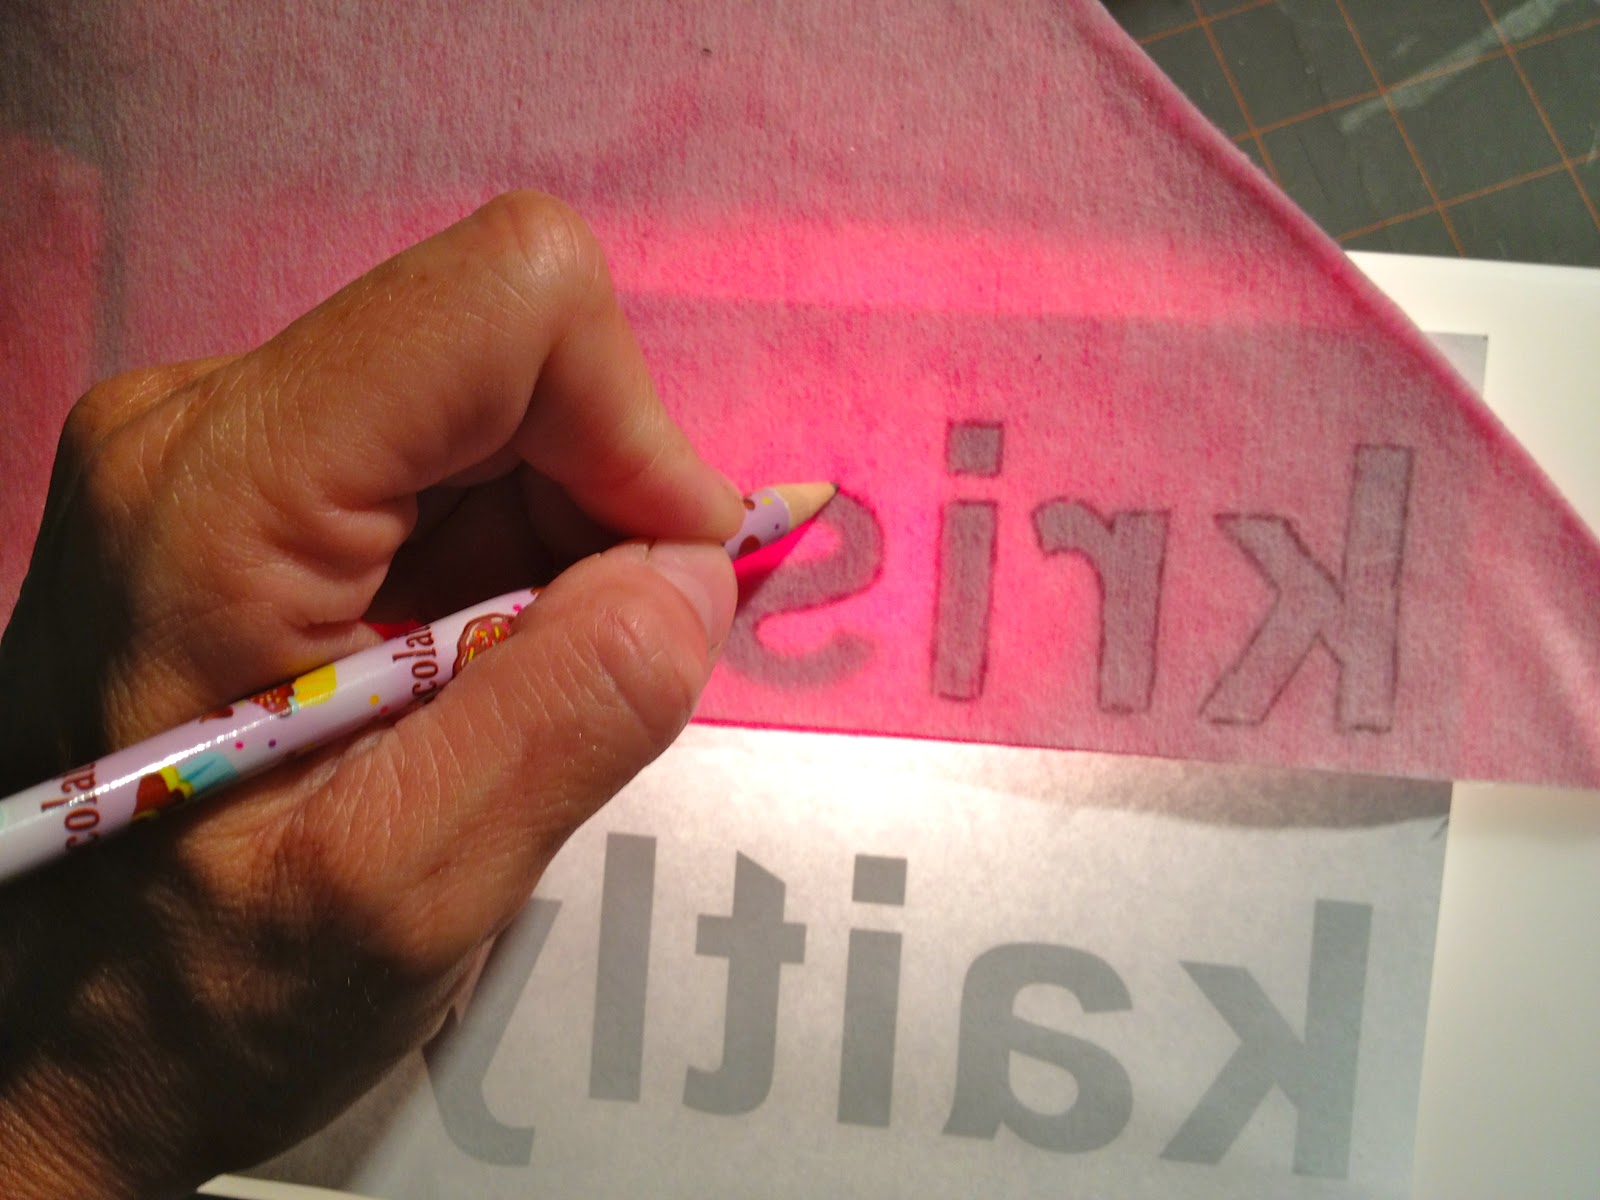
Print out letters (Ariel font 150 point), place printed letters face down onto lightbox then place fabric right side down on top of printout.

3. Trace outline of letters:
Then cut out letters.
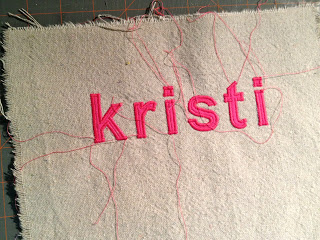
4. Pin letters in place:

5. Zigzag stitch around letters:

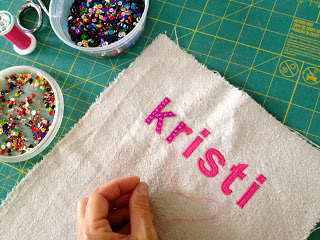
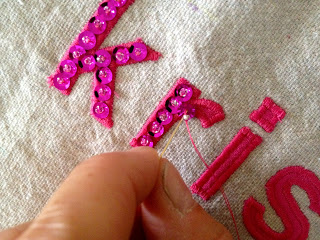
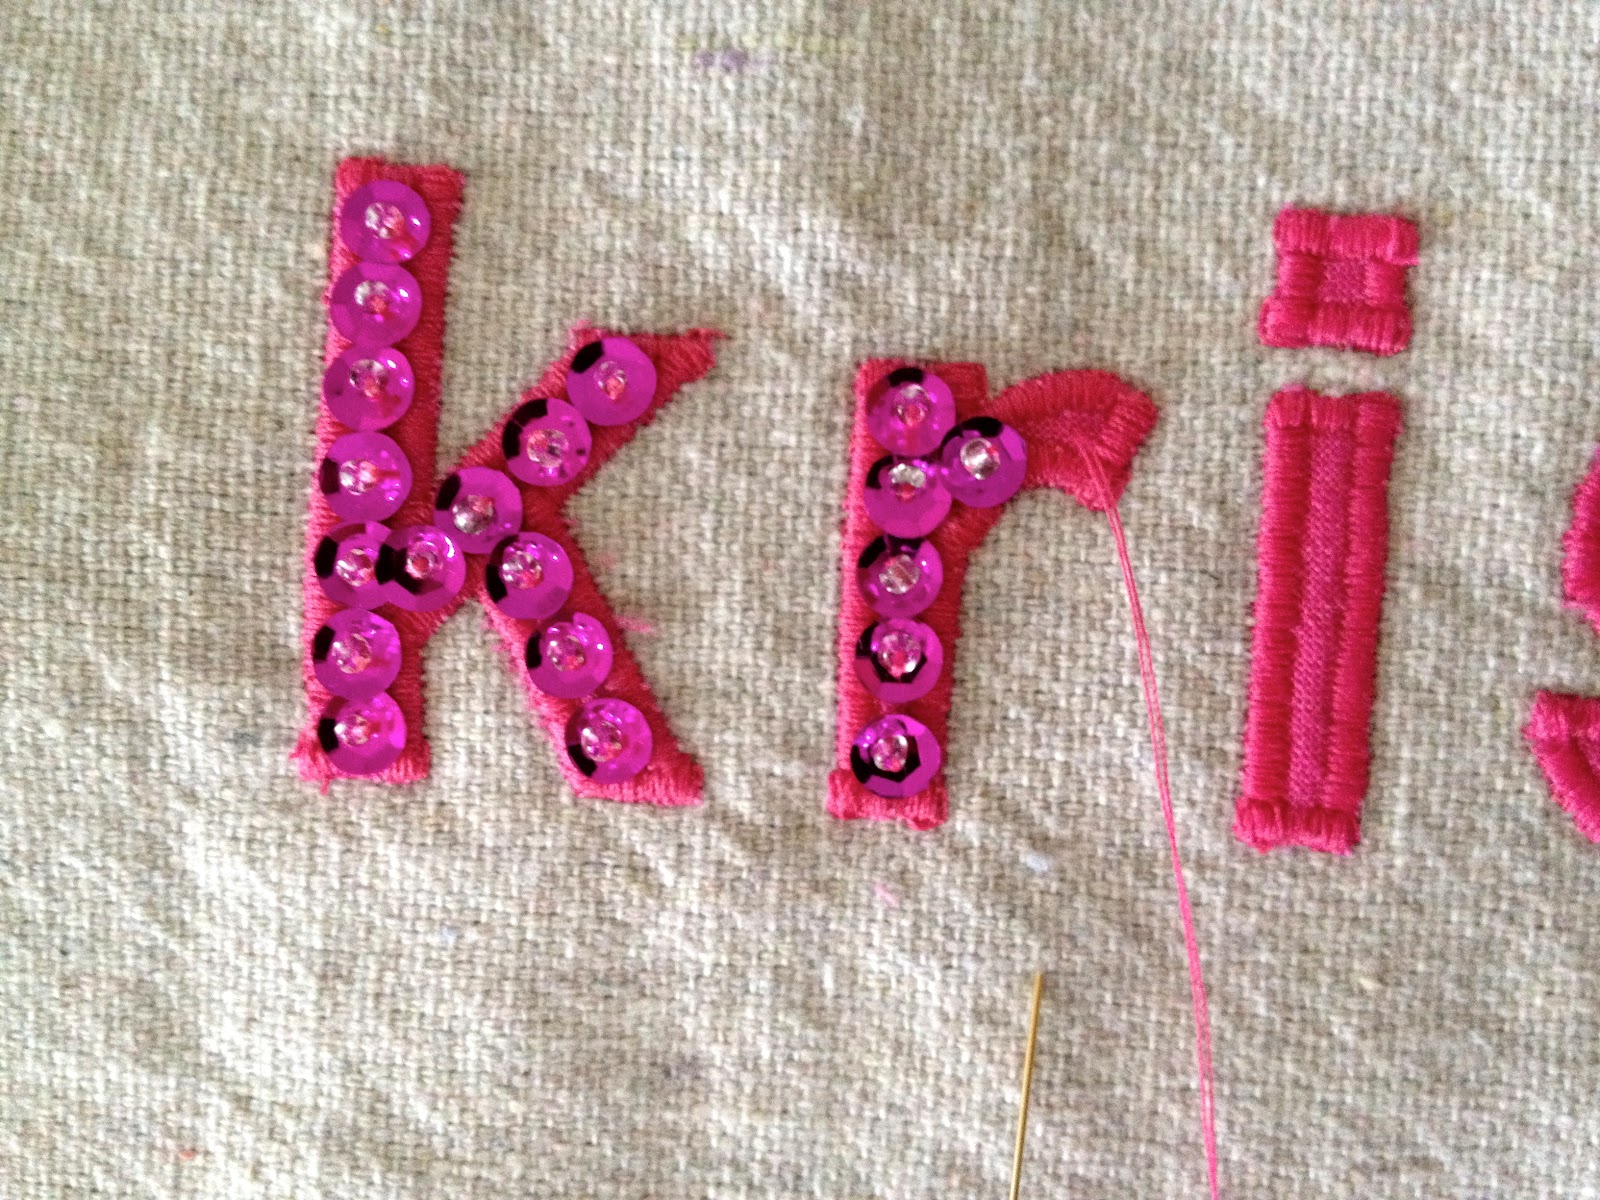
6. Attach sequins:

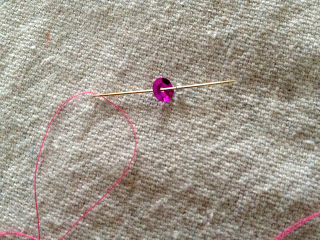
7. Slide sequin onto needle then tiny clear bead:

8. Now pierce needle down back into sequin only, using the bead to hold the sequin in place:


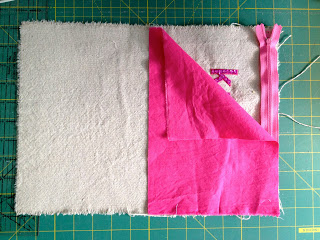
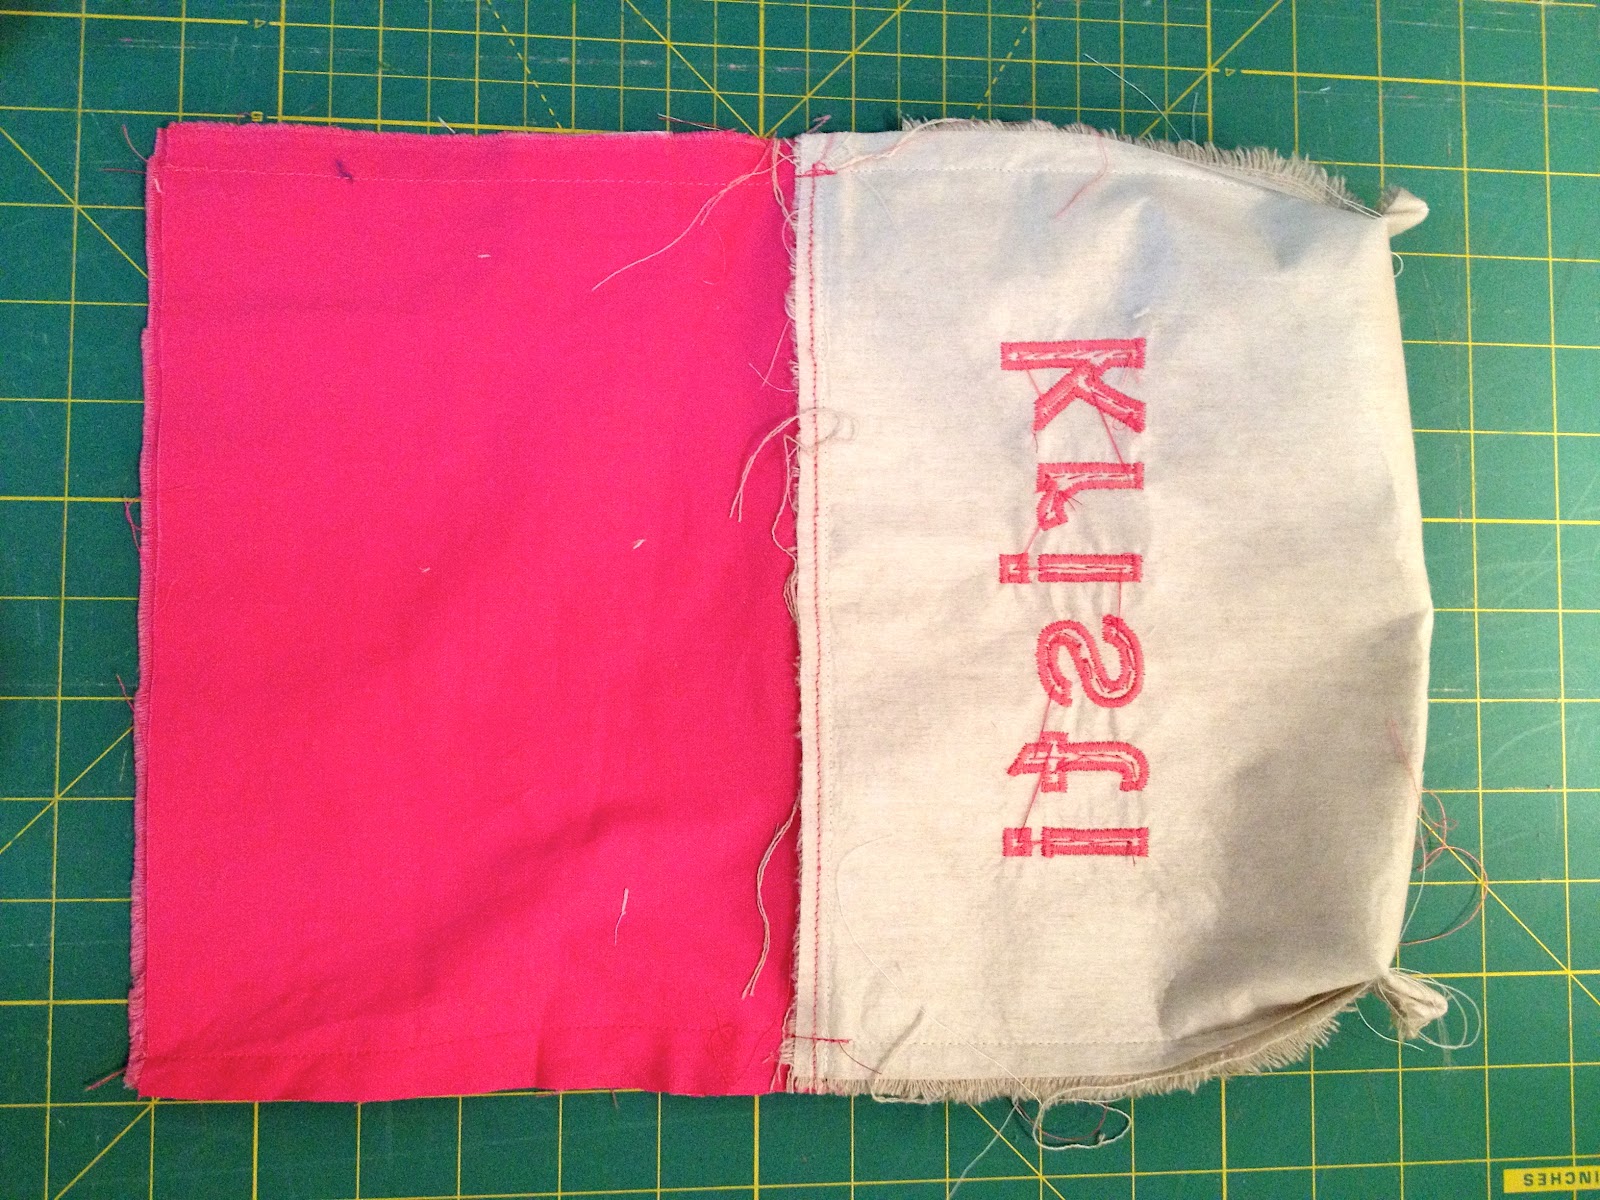
9. Place zipper right side down at top edge, then one lining piece:
Sew with zipper foot and repeat for other side.

10. Be sure to top stitch lining down to avoid getting caught in zipper:

11. Now sew side seams and make mitered corners:

12. Snip excess fabric from mitered corner, turn right side out.
Press raw edge of lining in 1/2″ and top stitch closed:

13. Push lining down into pouch and add ribbon to zipper pull.
I’m linking up to:
SAS @ Funky Junk
DIY Fall Festival @ The DIY Showoff
Tutorials & Tips Tuesday @ Home Stories A to Z
Strut Your Stuff @ Somewhat Simple
Share Awesomeness Thur @ The 36th Avenue
Pretty Things Thursday @ Scissors & Spatulas
Flaunt it Friday @ Chic on a Shoestring
Frugal Friday @ The Shabby Nest
SAS @ Just a Girl
Remodelaholics Anonymous @ Remodelaholic
inspiration board @ Carolyns Homework


These are so stinking cute! I've never sewn anything this complicated but you make it look so easy! Thanks for sharing this. I will definitely have to give this a try!
Those are some very lucky little girls! Adorable, Jaime.
Those pouches are awesome! I'm very impressed with the sequins.
Cute. ness.!
Awesome! Thank you!