
It’s another challenge folks and this time Mindi @ My Love 2 Create came up with the brilliant idea for a Repurpose It Challenge.
I choose to repurpose an old card catalog into a side table but you must see what my 7 other blogger friends came up with:


- Amy @ Her Tool Belt: rustic arrow
- Kim @ The Kim Six Fix: coat rack from hammers
- Corey @ Sawdust 2 Stitches: repurposed dresser
- Donna @ Funky Junk Interiors: reclaimed wood tray
- Gail @ My Repurposed Life: dressing table repurposed desk
- Kathy @ Crafty Chica: repurposed jewelry holder
- Mindi @ My Love 2 Create: succulent planters from light fixtures
- Jaime @ That’s My Letter: card catalog side table
I took this dusty and beat up old card catalog that was given to me from a friend of a friend about 3 years ago:

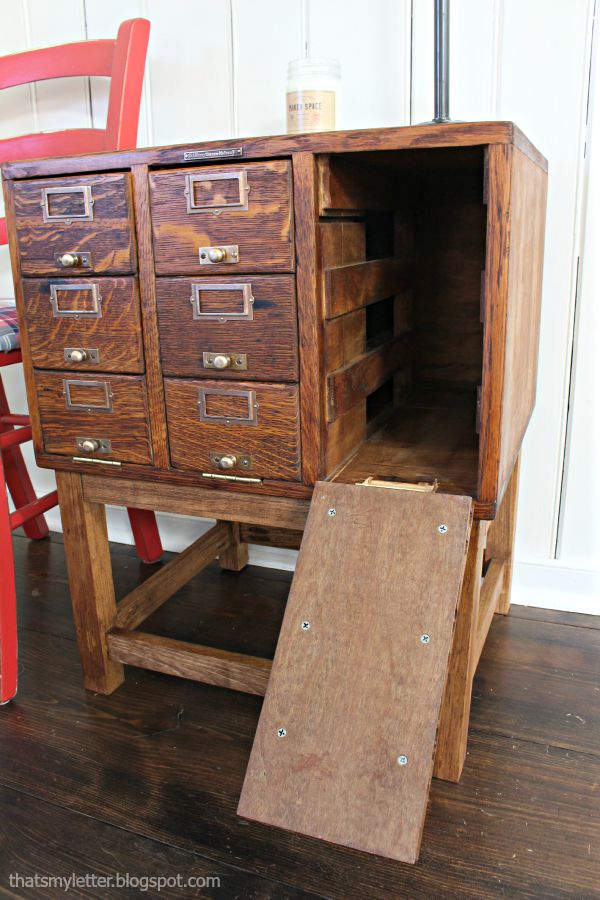
And made it in a functional side table:


The drawers were in really bad shape and not functioning so I made three pull down compartments:

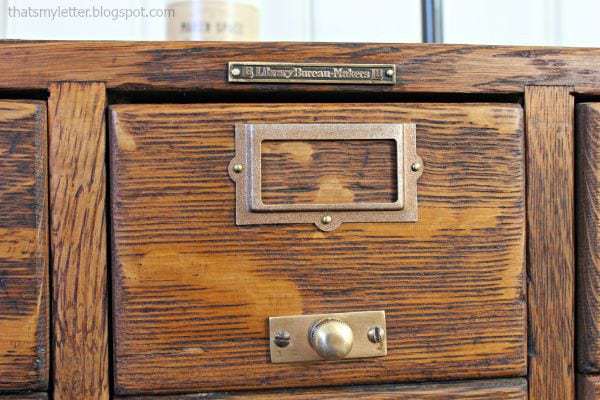
I cleaned up all the hardware and added new label holders:

How to make a card catalog into a side table:
SUPPLIES:
- 2 – 2x2x8 boards
- 1 – 1x2x6 board
- 2 1/2″ & 1 1/4″ pocket hole screws
- wood glue
- 1/4″ plywood scraps
- 2″ & 3/4″ wood screws

Step 1: Build the base. Cut 4 legs (25″ – height of card catalog) then cut cross supports. I inset the base 1/2″ on all sides from the dimensions of the card catalog (see pic below). Attach cross supports to legs using pocket hole screws and wood glue.
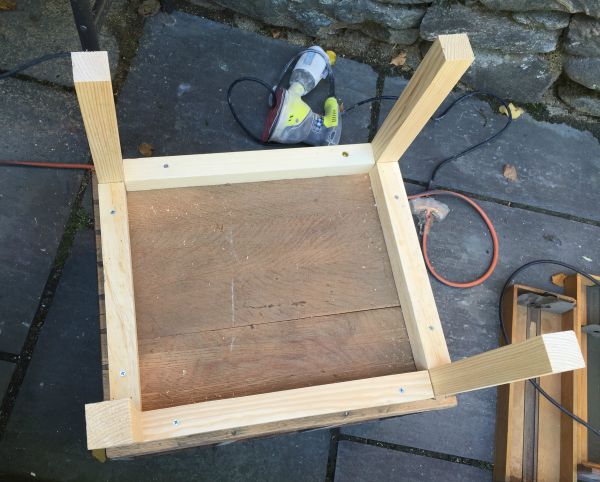
Step 2: Attach base to bottom of card catalog. Use wood glue and countersunk 2″ wood screws.
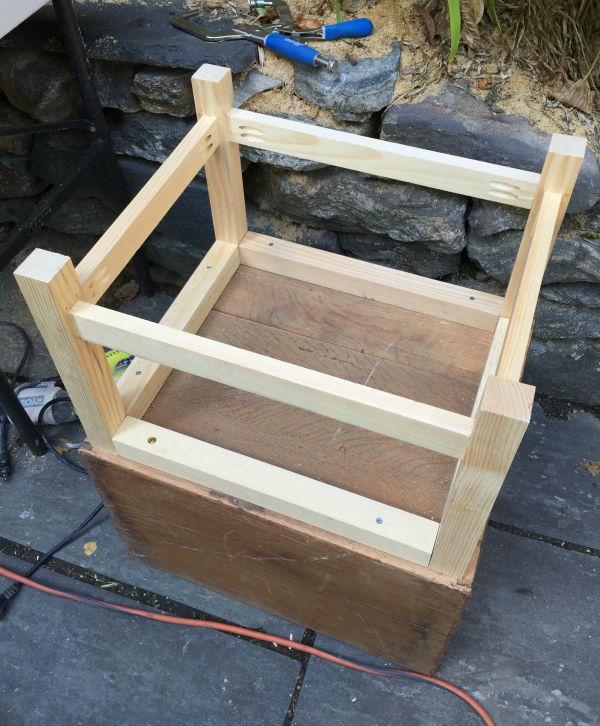
Step 3: Attach 1×2 cross supports on legs 2″ from bottom using wood glue and 1 1/4″ pocket hole screws.
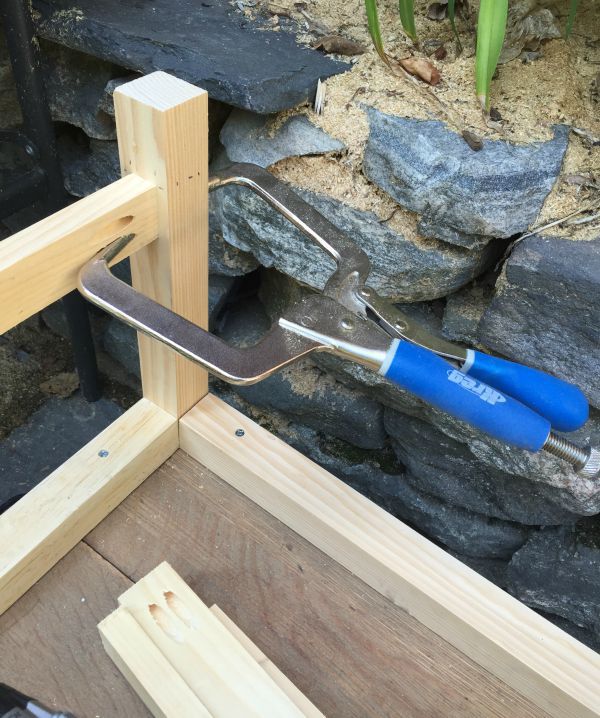
Use a Kreg right angle clamp to hold 1×2 in position while securing screw.
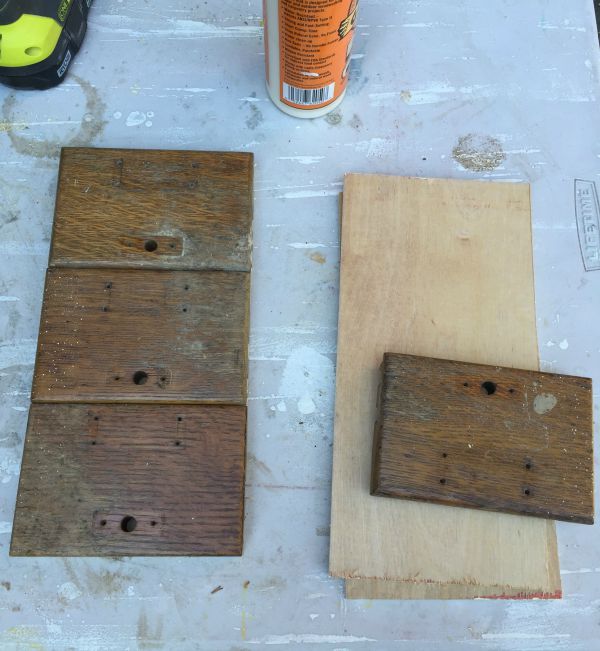
Step 4: Prepare the drawer fronts. Disassemble drawers keeping the front piece in tact. Cut 1/4″ plywood panel to fit width and height of 3 drawer fronts.
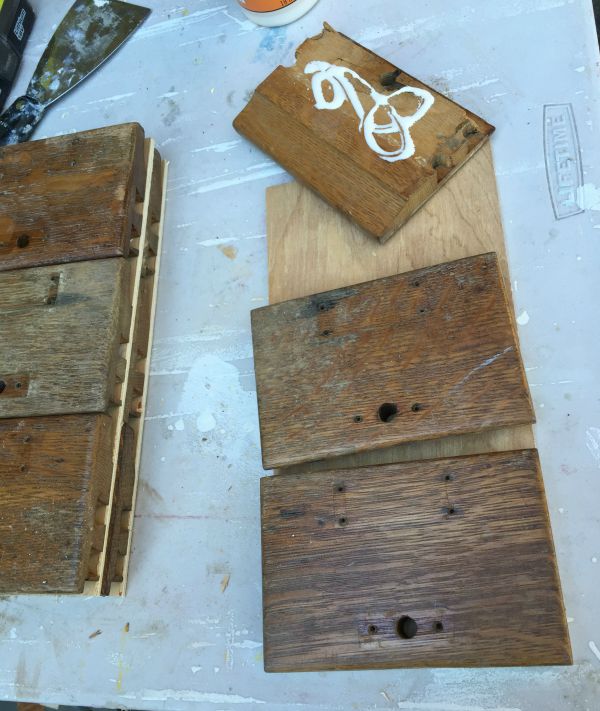
Step 4 cont’d: Apply wood glue to back of drawer front and place them onto plywood. Let dry.
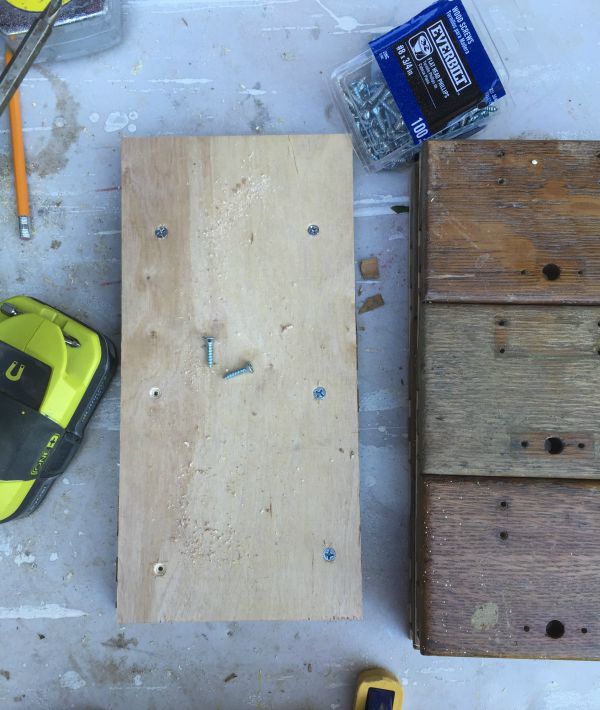
Step 5: Flip fronts over and secure using countersunk 3/4″ wood screws.

Step 6: Prepare card catalog body for drawer fronts. In order to accommodate the added thickness of the 1/4″ plywood I had to cut out 1/4″ sliver from the existing drawer glides. This way the drawer fronts will sit flush with the cabinet body.

Sand and stain as desired. I used Minwax early american.

Step 7: Notch out a generous 1/8″ deep groove for the hinge.

Step 8: Attach hinge to base of drawer front then attach to cabinet.

Step 8: Prepare hardware to go back on. I had to cut off the long rod portion of the knob handle using my Dremel.

Step 9: Clean the hardware. Above is a before picture of all the dirty faceplates, knobs and screws.
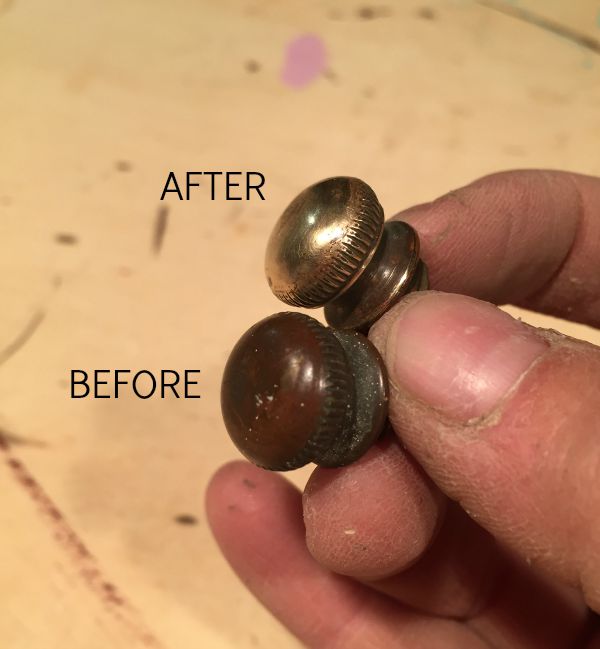
Step 9 cont’d: After a little rubbing with steel wood the difference is amazing.
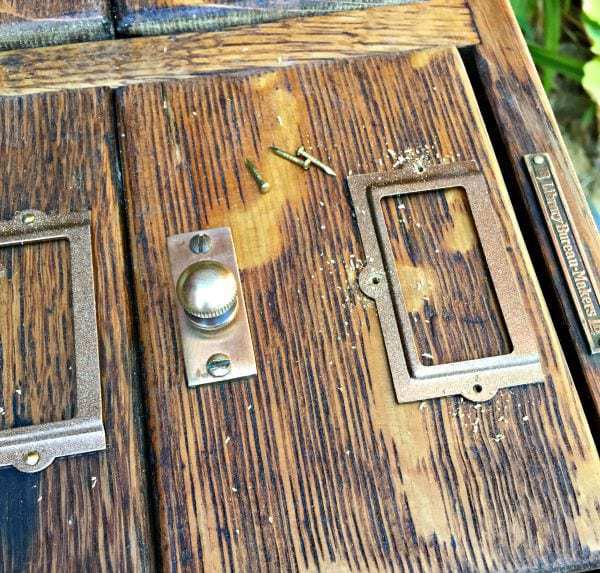
Step 10: Attach the label holders with nails provided. I predrilled the hole and also spray painted the holders to match more closely to the existing hardware.
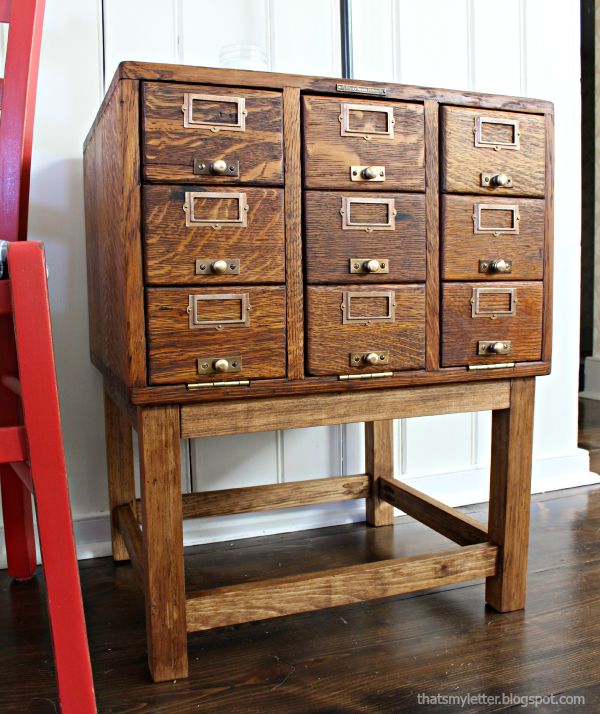
Seal everything with Minwax wipe on poly in satin finish and your side table is ready to use!
I’m linking up to:


LOVE that card catalog! Nice repurpose!
Beautiful job Jaime! That was a really old card catalog and you gave it a fabulous new life and purpose!
gail
It looks amazing Jaime! You are so cleaver to take out the drawers and make them into compartments, I love that idea, and it is perfect to store those games! I love the cute chunky legs too, awesome job! Thank you so much for participating in the challenge! 🙂
Those drop down panels are so cool! I would never have known. What a beautiful piece! You certain rose up to this challenge!
Love this project, Jaime! Lots of function now as a side table. The hardware is so cute. Great re-purpose!
FABULOUS!!!
You gave that catalog new life. And I love how your refinishing brought out the grain.. especially the dovetails on the top. So pretty! And now it's so functional! I love it.
I LOVE The way this turned out, and I am a sucker for the surprise storage! Awesome job lady!
Jaime I love that you turned it into a side table, functional and gorgeous! When I saw the preview I had no idea that the base didn't come with the top, they match so well. I just can't get over the difference from the before to after. Love that hardware, wow!
I'm so jealous of your card catalog! I have been on the hunt for one for years and never come across one that isn't way too expensive. I love how you fixed it up!
I absolutely love love love this! I have been wanting a card catalogue forever and they are so hard to come by! Love how you gave this new life! I would love it if you shared this project and any others you have done at my Making Broken Beautiful party. The party has started already but it goes each week from Thursday to saturday evenings! I hope you will join! You do lovely work!
Smiles!
Terry
http://thecuratorscollection.wordpress.com