
How to build a three drawer rolling dresser. I used plans here from Ana White to build this super stripy rolling dresser:

Ana recently posted plans for the rustic rolling dresser here (double wide version) and I knew once I saw it I just had to have the single version.
She sent over the plans quick as a bunny, I got to work and built this:

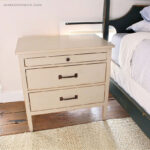
I opted to painted the dresser rather than stain but still kept that rustic feel by distressing and applying stain:

And added stripes on the sides and top for a boyish feel and to keep it fun:

It has tons of storage with deep drawers:

And the wheels add both charm and function, these wheels are 2 1/2″ diameter but you could go bigger.
Notice the back wheels have locks:

Please don’t tell anyone but this dresser has no back!
It’s not really necessary so I opted to go backless:

You’d never know the secret by looking at it from the front:

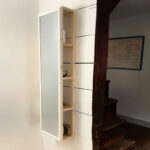
If you’re curious about that green framed chalkboard see my post here and yes the plans are from Ana too!


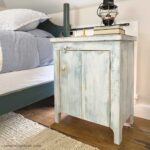
And just to keep it all in perspective on the other side of the room (it has been moved from the original position) is this bed, plans from Ana here:
It’s a complete Ana White kids bedroom!


Here’s how to build the single rolling dresser:
1. Use plans from Ana White here.
Make cuts and begin with sides construction.

2. Construct following Ana’s plans.
It’s definitely worth checking out the Shanty sisters post here for the double version, they have lots of tips on where to place pocket holes and how to measure for drawers.

3. I should note I choose to predrill and screw my 2×2 face frame on from the front.
I knew I would be painting the piece (and I had a slight mishap when the collar on my pocket hole bit slipped making the holes WAY deeper than planned rendering them useless)!
Back view with cross support in place:

Drawer boxes in place:

4. Ready for paint, use tape to cover drawer slides:
*Another note I choose to use plywood scraps for some of the drawer boxes and drawer fronts (instead of new pine boards), if you have the scrap pieces and don’t mind cutting down it’s worth the savings.

5. After base paint (two coats semi gloss white) measure out stripe, the middle blue stripe is about 1″ thick done in Benjamin Moore admiral blue:

Measure out side stripes and repeat process, green is Glidden lucky shamrock.
Seal with Minwax clear satin poly.
6. Once dry add wheels to bottom in 3 corners:


Fabulous job! I love the stripes. 🙂
love it!!! the casters are awesome!!!!!
Love it. I need a few of these. Do you have a good source for drawer slides?
How much was it? I want to build this x 2 for nightstands in our master.
You are so creative. I'm blown away that you built the dresser. I love it. I have a link party called Wednesdays Adorned From Above Blog Hop and would love to have you share this and any other posts with everyone. It runs from Tuesday night through midnight Sunday. Here is the link to the party.
http://www.adornedfromabove.com/2013/01/wednesdays-adorned-from-above-blog-hop_22.html
Debi and Charly @ Adorned From Above
I am always so impressed with people who can build furniture! My husband won't let me near the power tools! You did a great job. The stripes are a perfect touch!
I super duper LOVE the paint stripe! That is so unique J. I love the whole room!