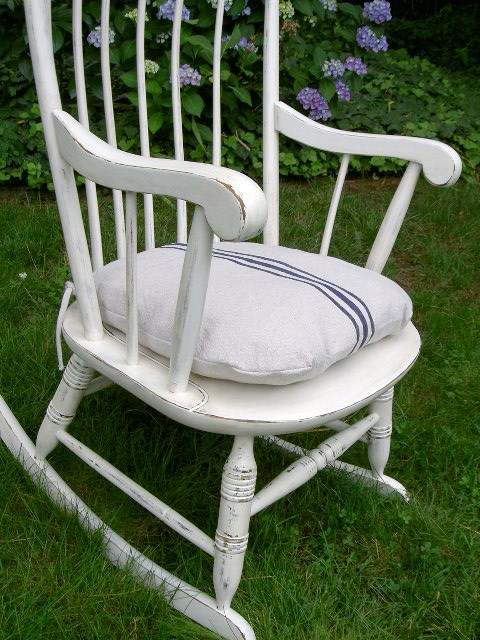
A rocking chair makeover.
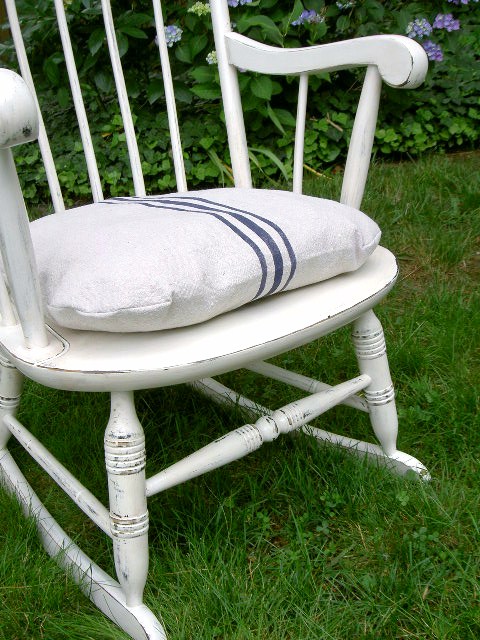
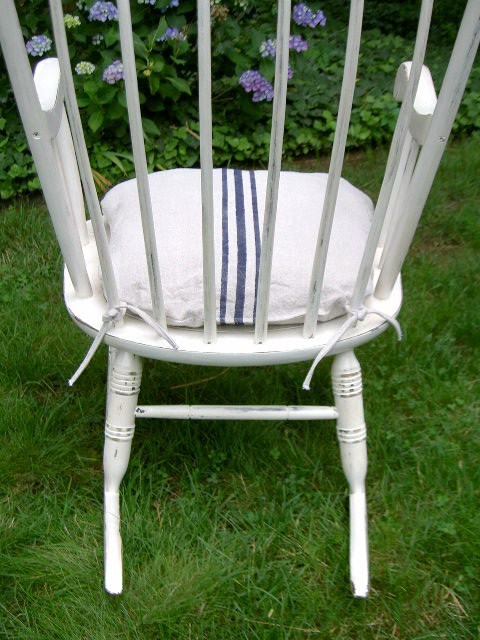
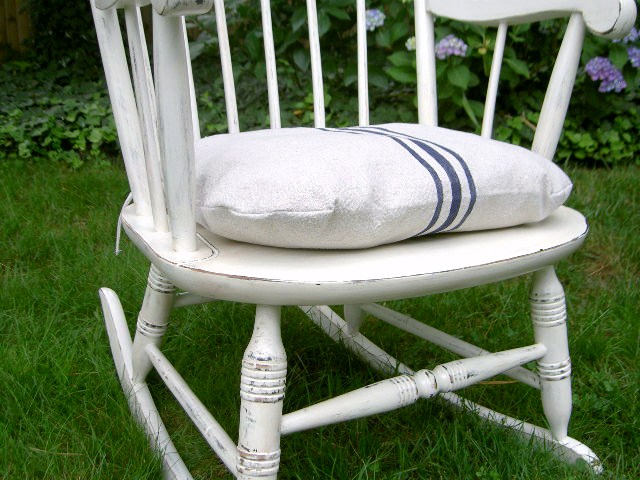
Complete with striped cushion.


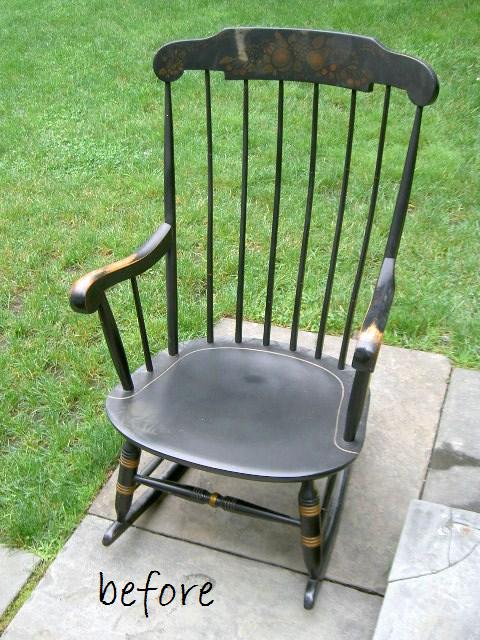
This was a black beauty with lovely gold detailing:

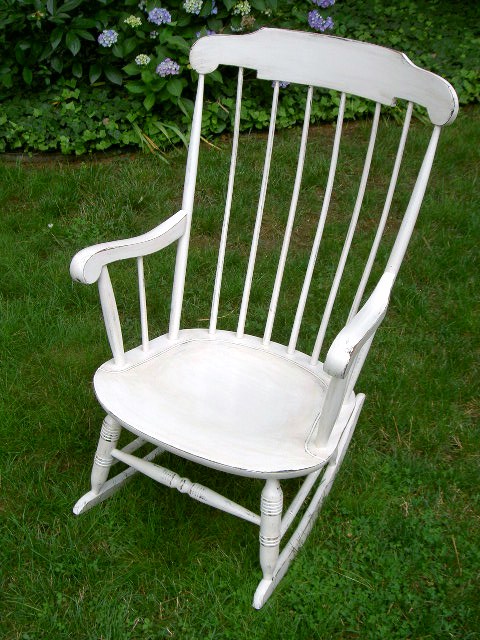
But the black had to go for something a little more fresh:


Here’s how I did it:
1. Sand off old finish:

2. Paint 3 coats off white paint.
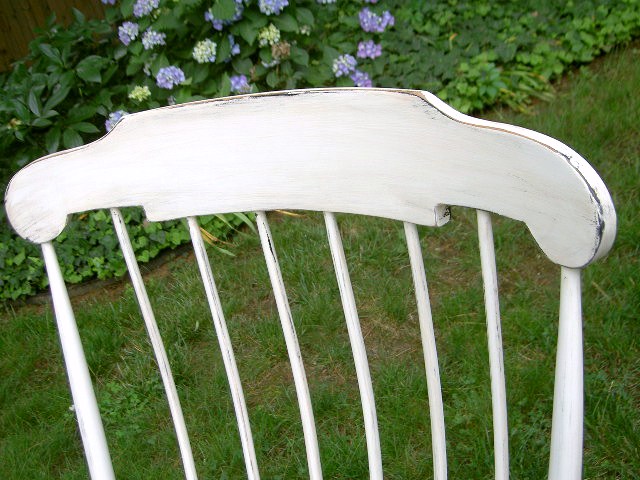
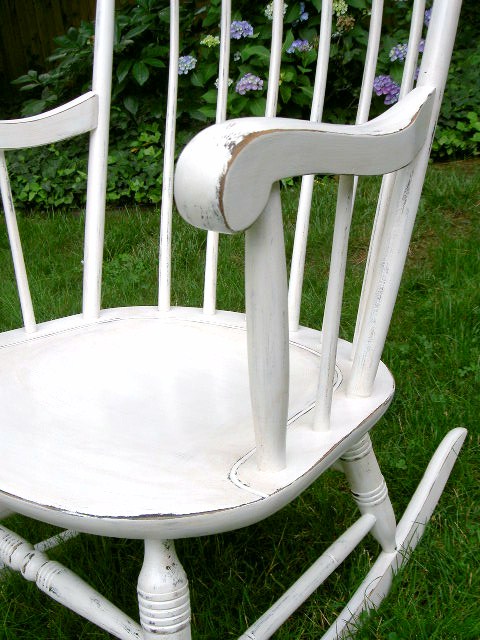
3. Sand to distress.
4. Stain with Minwax cherry.
5. Apply Minwax wipe on poly satin finish.
For the cushion:
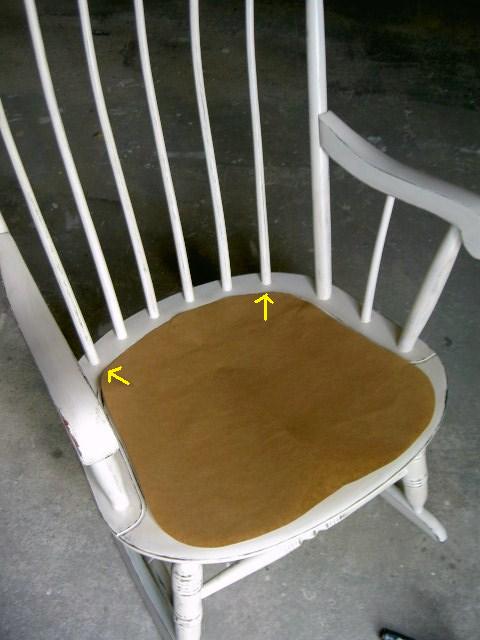
1. Make a paper template of the seat area:
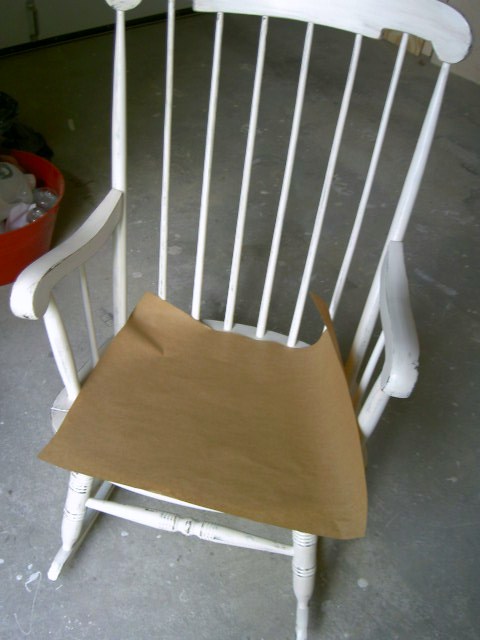
2. Be sure to mark on the template where your ties need to attach to the chair:
(see yellow arrows)
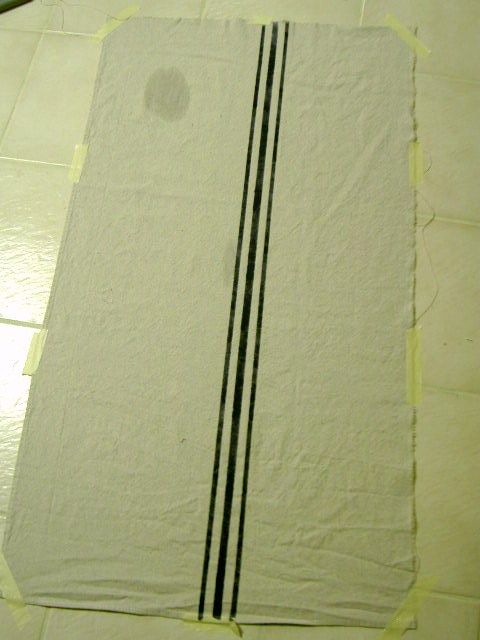
3. Prepare your fabric. I used canvas drop cloth taped to the floor.
Use masking tape to mark off stripes and stencil in with navy paint:

4. Let stripes dry and heat set with hot, dry iron:
5. Fold fabric in half so fold is on the outer front edge of the cushion, line up stripes and position paper template:
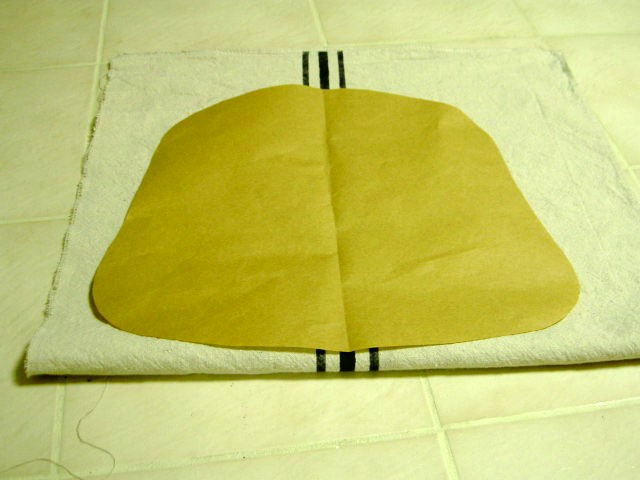
6. Cut fabric leaving at least 1″ border around edges:
(need to allow for fill)

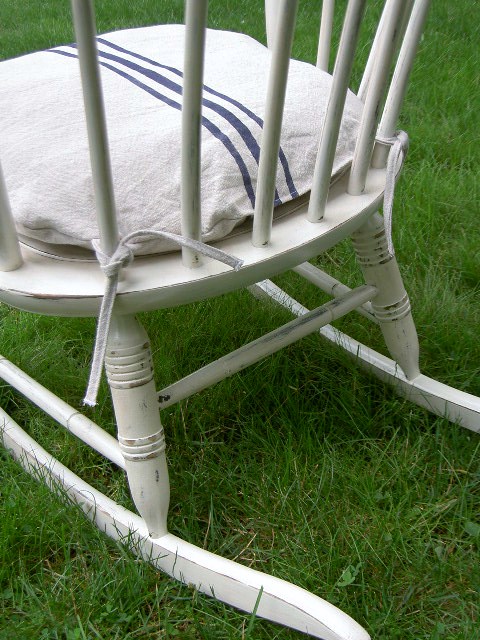
7. Refold fabric placing right sides together, position and pin ties as per marks on your template:

8. Sew cushion shut, be sure to leave an opening for filling then straight stitch shut.

Over time the cushion will become less dense as people sit on it.
Use ties to secure in place.
Now where to put this beauty?

One last side by side:

I’m linking up to:


http://www.homestoriesatoz.com/, http://www.theshabbychiccottage.net/
http://frenchcountrycottage.blogspot.com/
http://chiconashoestringdecorating.blogspot.com/
http://www.somewhatsimple.com/
http://shabbynest.blogspot.com/
http://www.remodelaholic.com/
http://tatertotsandjello.blogspot.com/
http://www.lovelycraftyhome.com/
http://lollyjaneboutique.blogspot.com/
http://missmustardseed.blogspot.com/
http://www.iheartnaptime.net/
http://sistersofthewildwest.blogspot.com/
http://www.bystephanielynn.com/
http://www.thegirlcreative.com/
http://funkyjunkinteriors.blogspot.com/
http://thediyshowoff.blogspot.com/
http://www.skiptomylou.org/
http://makingtheworldcuter.blogspot.com/
http://thriftydecorchick.blogspot.com/
http://justagirlblog.com/


Your chair looks great! In fact, great enough to inspire me. I have a black bentwood rocker just sitting in the basement not being used. I feel bad because there is a lot of sentimental attachment — it was one of the first pieces of furniture I purchased after college and after I met my husband and we had our two boys, they were rocked to sleep in that chair several times a day. I have resisted painting it because I just thought I "shouldn't". Now I am thinking…"WHY NOT???" Thanks for the nudge.
Nan
super cute! the cushion was the perfect touch for it! i can see it in a baby boys classic nursery.
If I've seen one of those black rockers at the thrift stores, I've seen 20! They are everywhere…and I love what you did with yours!!
I love it!!! I am a new follower and look forward to seeing more of your creations!
Veeeery Nice!
The cushion you made is my favorite part! You make it look so easy!
What great transformation! It now looks amazing and the cushion was the perfect finishing touch. Great job girl!
I love it! The cushion is great and the distressed look is perfect:)
I love your rocking chair redo. She's much prettier now. Thanks for showing how to make the cushion.The next time I need one, I may attempt to make my own.
cute… love the cushion! : )
Lovely redo! I have a child version of it glued and ready to spray paint "watermelon" this weekend.
LOVE it! Thanks so much for linking it to All Things Furniture!
🙂
shaunna
Looks fabulous! What a great transformation. This post would be such a great addition to my blog party! I hope you stop by and join in.
alchemyfineliving.com
You do good work! Love the cushion.
I really want to find a rocker to re-do now! You are so talented!
That looks lovely, you've done a great makeover on the chair and I love the cushion. I had a white rocking chair as a child, only mine was distressed by my infant self using it as a step/shelf/table! Seeing your post makes me wish I still had mine!
Great toot, you describe the steps very well:)
Love your chair but I especially love your pillow!!
Tracey
Such a charming little rocker now!! Love the paint and love love that pillow! Thanks for sharing it at FNF 🙂
It turned out so cute! I love the cushion. It's a great touch.
I have a rocking chair that I have primer, and then it's gotten pushed into a storage room, I was stuck at what to do next, let alone a cushion? Thanks for your great tips, and for sharing step by step how you achieved such a classy look! Thanks!
I love it!
I love it!
I just bought the same exact rocker at a swap meet. Do yo know who the manufacturer is???