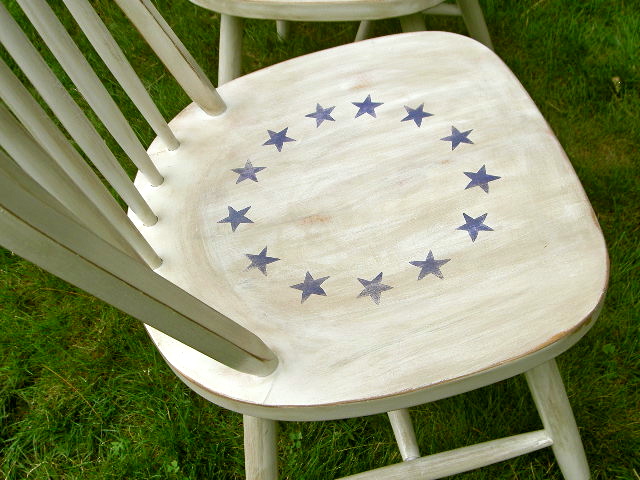
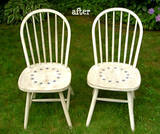
Side chair makeover, Betsy Ross inspired.

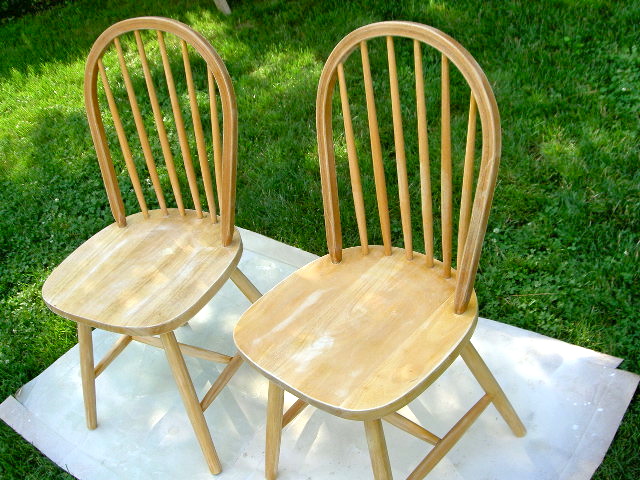
I started with these chairs from my Freecycle friend Denise:

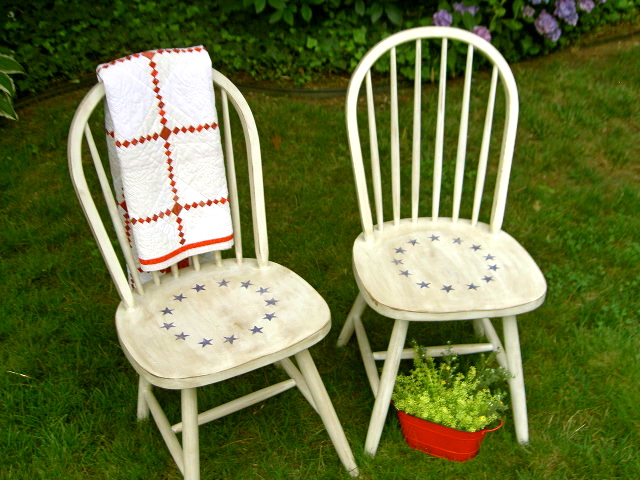
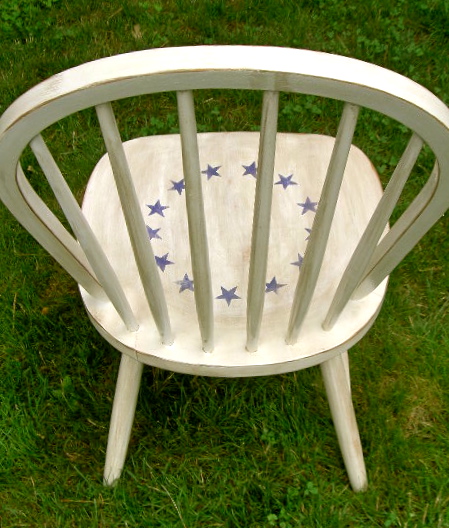
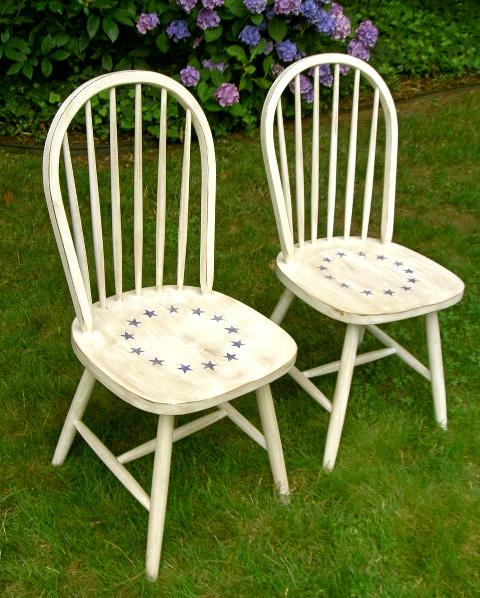
And after a little paint and inspiration I now have these:
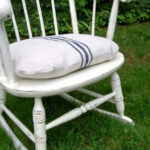
I used the 13 stars idea from this picture:
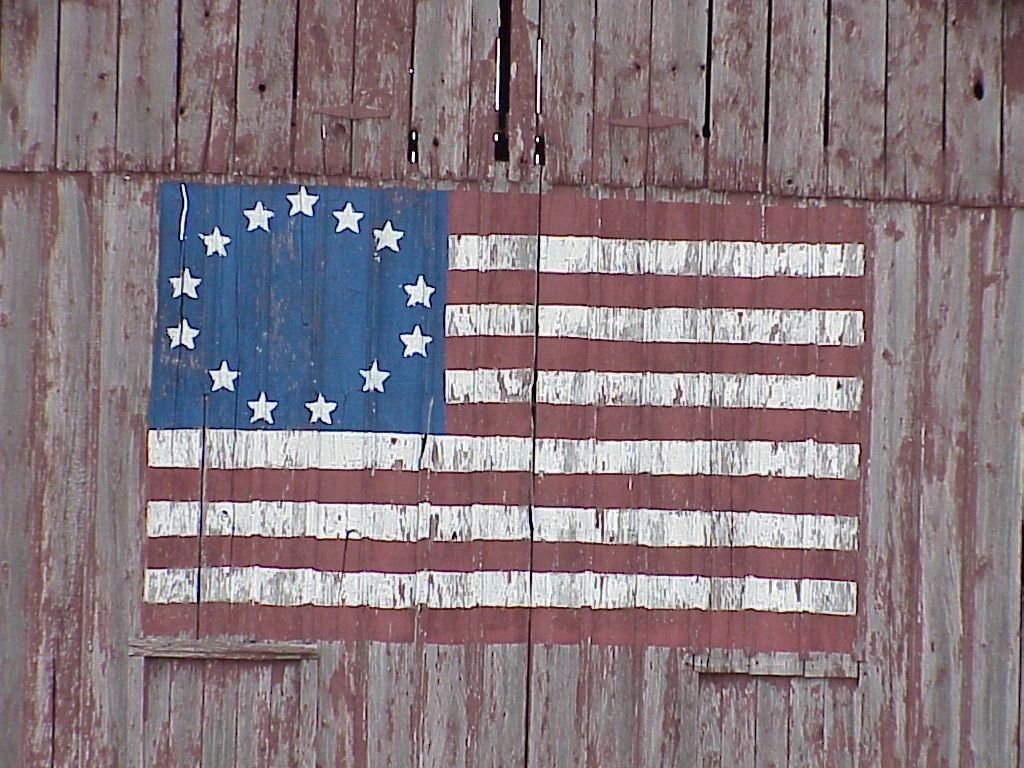
image via flicker
That’s the American flag done by Betsy Ross (although there is quite a bit of controversy in that statement).
Makes for a great design.

Here’s how I did it:
1. Sand off old poly finish:
2. Primed with spray primer:
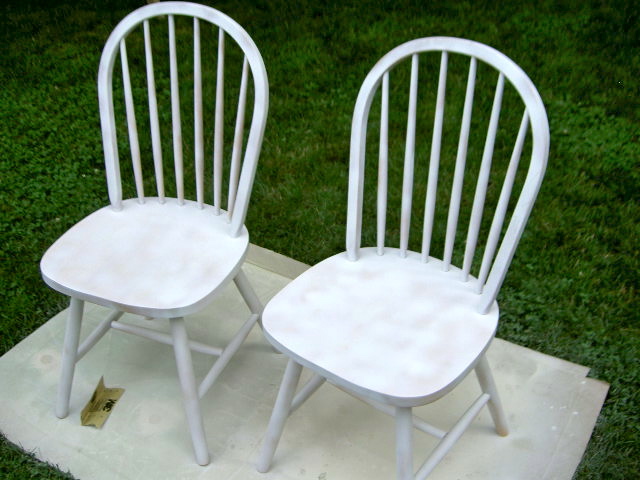
3. Paint with two coats off white.
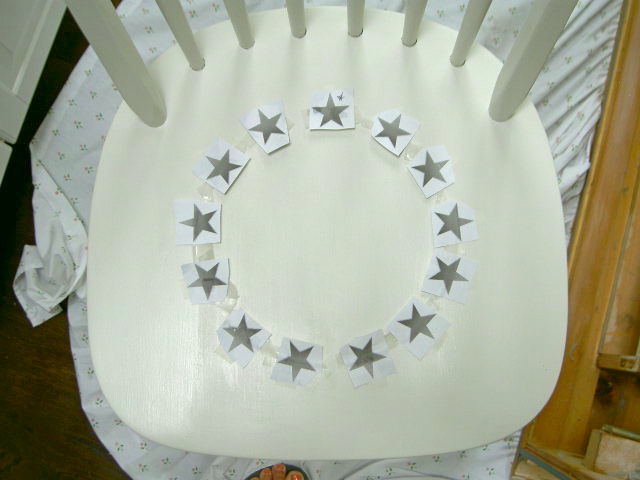
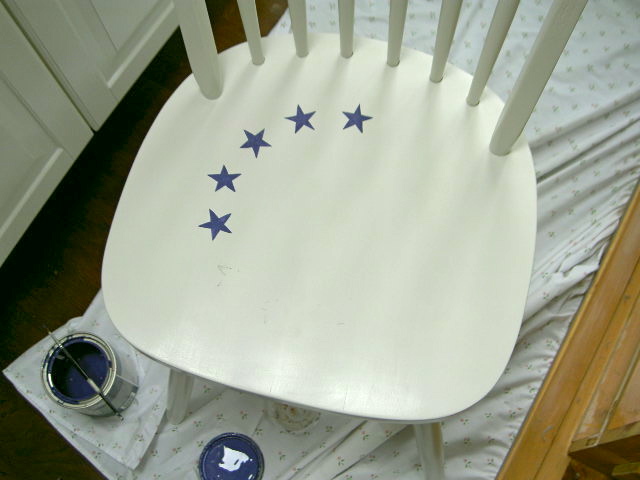
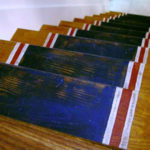
4. Using a plastic container lid for the circle shape, tape stars around edge evenly spaced and position on seat:

5. Tape stars to chair gently prying off plastic lid:
6. Trace stars with ballpoint pen to create slight indent in seat.
7. Paint inside the indent.
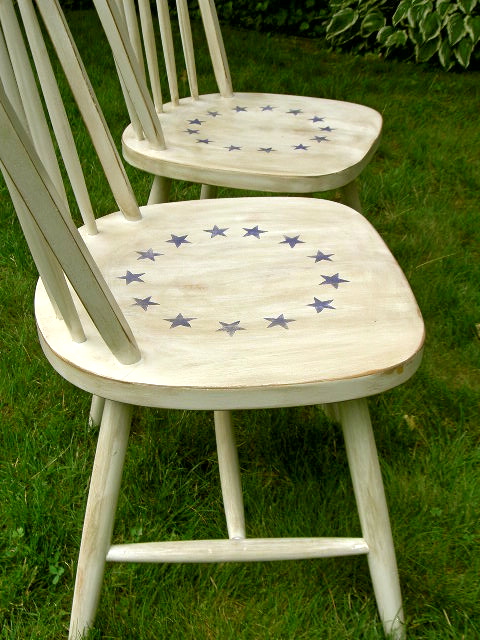
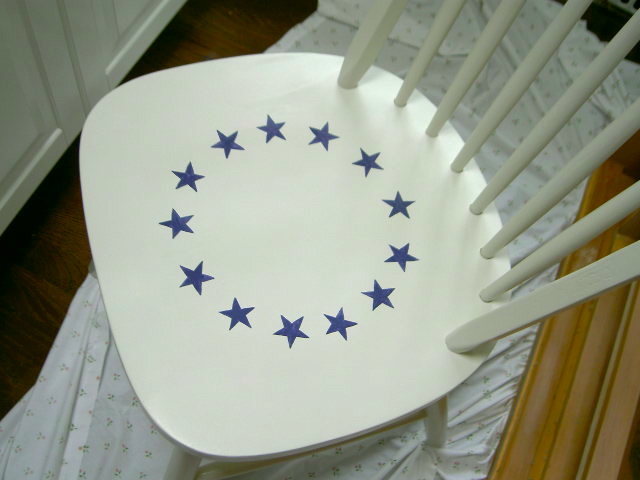
8. All stars painted:
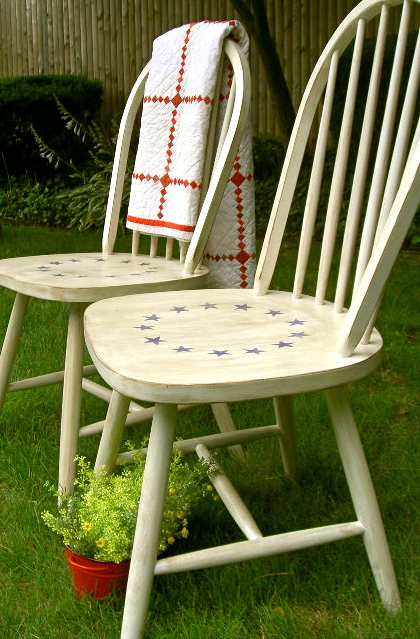
9. Sand to distress, stain with Minwax dark walnut, seal with satin poly.
A little paint goes a long way to give these chairs a little character.
Thanks Betsy.
I’m linking up to:
http://lollyjaneboutique.blogspot.com/
http://funkyjunkinteriors.blogspot.com/, http://www.iheartnaptime.net/, http://sistersofthewildwest.blogspot.com/
http://www.bystephanielynn.com/
http://www.thegirlcreative.com/
http://thediyshowoff.blogspot.com/
http://thriftydecorchick.blogspot.com/
http://www.skiptomylou.org/
http://thediyshowoff.blogspot.com/
http://thriftydecorchick.blogspot.com/
http://www.skiptomylou.org/
http://makingtheworldcuter.blogspot.com/, http://linda-coastalcharm.blogspot.com/
http://www.homestoriesatoz.com/
http://www.abeachcottage.com/
http://primitiveandproper.blogspot.com/
http://www.myuncommonsliceofsuburbia.com/
http://delightfulorder.blogspot.com/, http://www.theshabbychiccottage.net/
The 36th Avenue., http://www.somewhatsimple.com/, http://www.504main.com/
The 36th Avenue., http://www.somewhatsimple.com/, http://www.504main.com/
http://shabbynest.blogspot.com/
http://chiconashoestringdecorating.blogspot.com/
http://chiconashoestringdecorating.blogspot.com/
http://www.remodelaholic.com/
http://frenchcountrycottage.blogspot.com/, http://justagirlblog.com/
http://missmustardseed.blogspot.com/
http://tatertotsandjello.blogspot.com/
http://www.perfectlyimperfectblog.com/
http://theletteredcottage.net/

Oh wow, these are just beautiful. I love the Betsy Ross flag and I love when it is used for other decorations.
Maria @ Linen & Verbena
those are adorable! what a great idea!!! love the ring of stars.
I love these so much!! I "pinned" them on Pinterest! Maybe one day I can use this idea =)
Love what you did with the chairs!
Love how your chairs turned out…so beautiful!!
~Cindy~
They look great Jaime!
L- is for love….and I do..they look amazing !
Lucy
I love it! I want to go looking for some chairs to paint now 🙂
These are really great. I have 6 of the same chairs around our kitchen table that so need a makeover…and putting a stencil on the seat is so cute.
THanks for sharing.
liZ
(simplesimonandco)
PERFECT execution! The graphic shape and chair seat are meant for each other. Very striking combination!
Shared this on FJI Facebook for SNS 89. 🙂
https://www.facebook.com/photo.php?fbid=10150302534451141&set=a.192514281140.164586.175378011140&type=1&theater
Donna
Those are so wonderful..LOVE them !! [ since I am Canadian have no trouble with the betsy Ross thing..LOL ]
It came out so cute!!! Nice work 🙂
You were right! I do love them!
I love how you took some sort of ho hum chairs and turned them into something so cool! I think we're going to see circles of stars popping up everywhere now. 🙂
These are so pretty! I love patriotic accents that aren't overly done. You did a beautiful job – so unique!
I absolutely love these! Your stars made a HUGE difference in the appeal of these chairs! Beautiful.
Love your transformation! Your chairs has such a wonderful rustic feel! Hope you will share with my Pink Hippo party @ http://pinkapotamus.blogspot.com/2011/07/pink-hippo-party-37.html
I love how these turned out! The distressed look is so beautiful! Please stop by http://www.laughloveandcraft.com and link up to my Share the Wealth Wednesday Link Party!
What great chairs! I love the patriotic country look. I love when freecycle finds turn out to be awesomely crafted up home improvements!
I found you through the DIY Showoff link party and am your newest follower. Come check me out, too, if you're interested @ Carissa's Creativity Space
great job, love the stars decorating it!
They look great. I love the 13 stars idea too 🙂
Blessings,
Marcia
So cute!
I HEART these chairs!
come link it to my woot woot wednesday party!
http://www.tootsiewootsieboutique.blogspot.com
These chairs are Super Stars! I love Americana, so they were sure to be a hit. Love the circle. Interesting how you did it. I would've stenciled the stars. Love them!
Love it!
I love the stars! You're very talented:)
Love this idea! So creative and darling!!!
-emily
nestnestingnested.blogspot
oooooo…I want to see where you sit these!
Wow, what a transformation. This is just perfect for a summer porch. Thank you so much for the tutorial!
love this idea! love your blog too
Jaime, those are adorable!! I want a pair!!! 🙂
Love them!
From free to fabulous…beautiful job! 🙂
LOVE your chairs. So awesome!!! Found you on Remodelholic.
I would love for you to link it up at my weekend Link Party, Once Upon a Weekend. Today is my first-ever party, and I am so hoping someone will participate! 🙂
Here's the link if you're interested:
http://www.familyeverafter.blogspot.com
Also, if you have a list of favorite link parties, I'd love to be included on Fridays. Thanks a ton!
Love the stars, Jaime! These really turned out great!
I totally love these. Once again I features you in my friday night features.
Thank you so much for sharing your chairs at the link party…
I just want you to know that I am featuring them tomorrow at The 36th Avenue.
Fell free to come and button-up 😉
I love your chair. I have a think for stars and stripes. Come on over and share at http://www.itssoverycheri.com as well.
xo
Cheri
Not sure if you participate, but I did nominate you for an award on my blog.
Have a great evening!
Angela