• Home
  • Blog
  • About
  • Contact
    • Disclosure
    • Privacy Policy
  • SHOP
  • Widget area for main menu

    • Email
    • Facebook
    • Instagram
    • Pinterest
    • Twitter
    • YouTube
  • Skip to primary navigation
  • Skip to main content
  • Skip to primary sidebar

Jaime Costiglio

build - paint - sew

  • BUILD
    • BEDS
    • BENCHES
    • DESKS
    • DRESSERS
    • GAMES & TOYS
    • SCRAP WOOD
    • SHELVES
    • STORAGE
    • TABLES
  • TOOLS
  • PAINT
    • CRAFTS
    • FURNITURE
    • HOME DECOR
  • SEW
    • GIFTS
    • HOME DECOR
    • POUCHES
  • HANDBUILT HOLIDAY
    • 2021
    • 2019
    • 2018
    • 2017
    • 2016
    • 2015
    • 2014
    • 2013
  • GIFTS
    • BABIES
    • KIDS
    • FOR HER
    • FOR HIM
    • TEACHERS
    • WEDDINGS
  • SEASONAL
    • 4TH OF JULY
    • FALL
    • HALLOWEEN
    • CHRISTMAS
    • SUMMER
    • SPRING
    • ST. PATRICK’S DAY
    • THANKSGIVING
    • VALENTINE’S DAY
    • WINTER
  • SALTBOX PROJECT
    • BATHROOMS
    • DINING ROOM
    • EXTERIOR
    • FAMILY ROOM
    • FOYER / MUDROOM
    • KIDS BEDROOMS
    • KITCHEN
    • LIVING ROOM
    • MASTER BEDROOM
    • PLAYROOM
  • SCROLL SAW

DIY Plastic Easter Egg Wreath

March 11, 2016

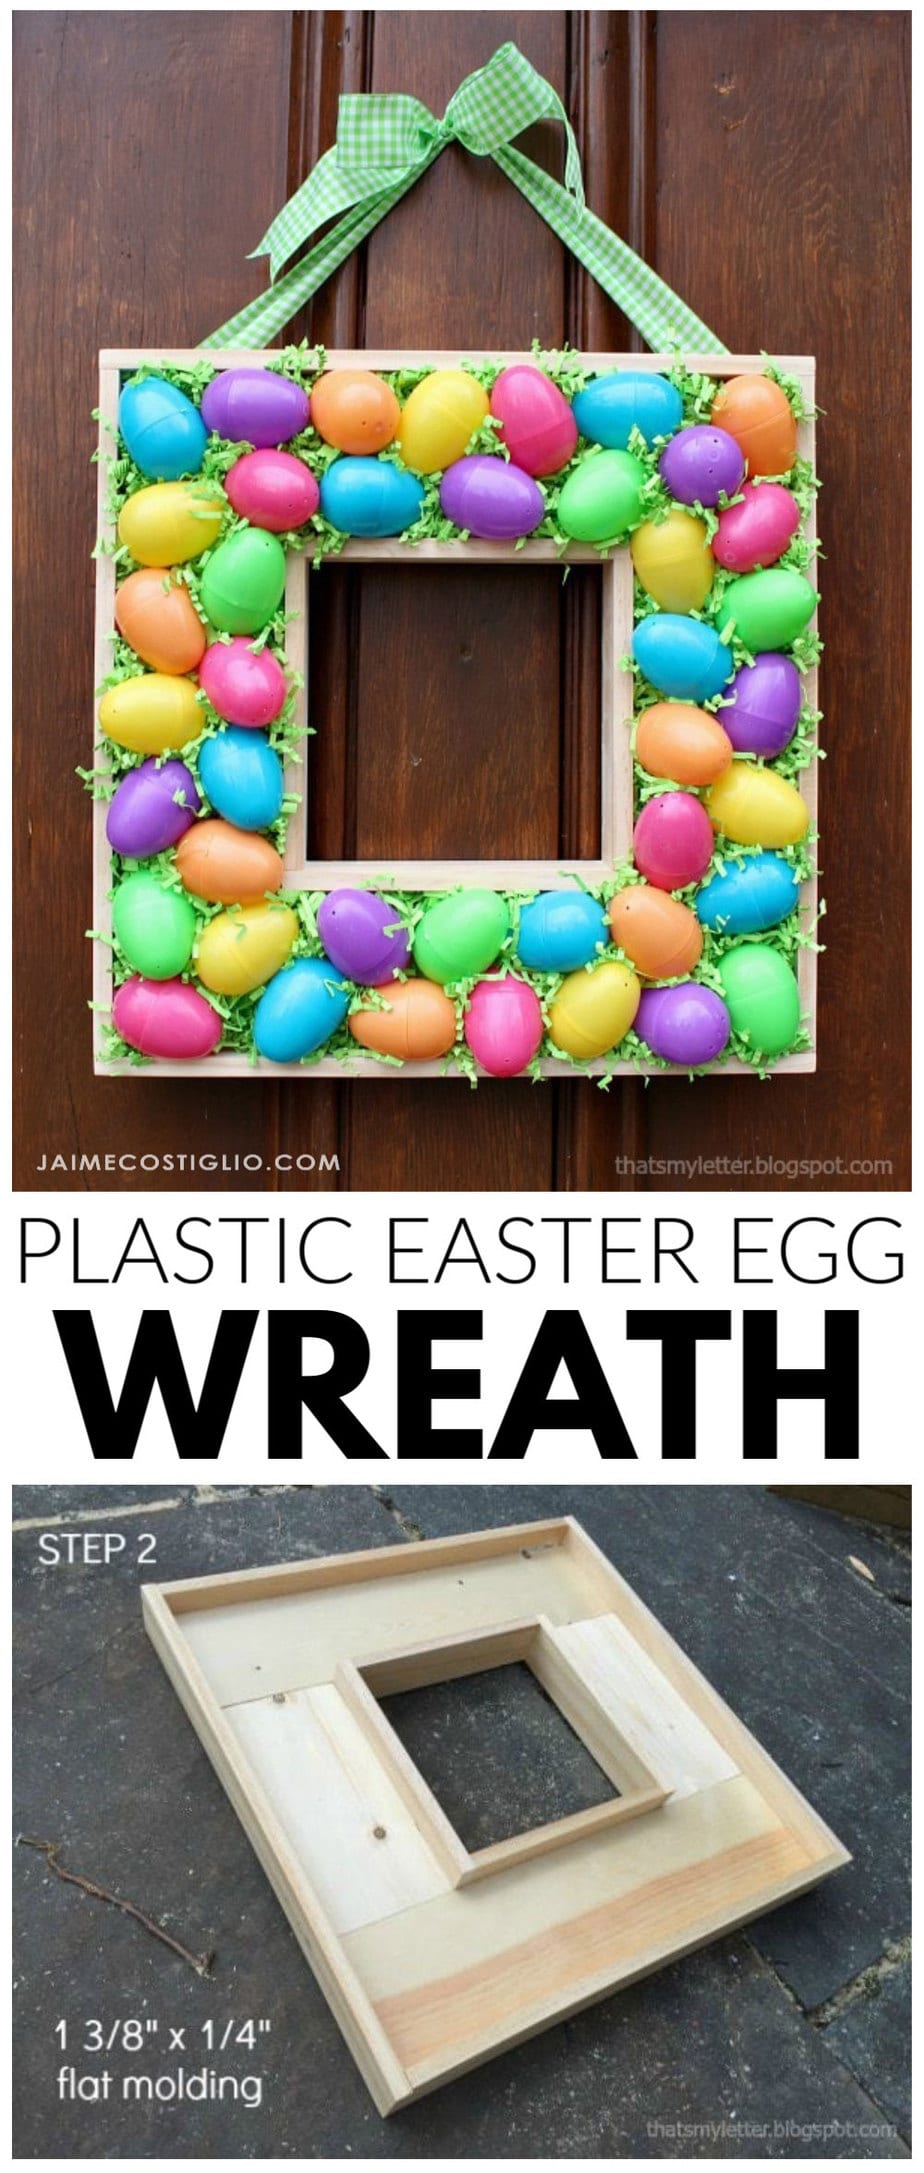
Spring is on the horizon and Easter is around the corner so I made this super easy scrap wood wreath with plastic eggs for the front door.  You could make this wood wreath and fill it with anything but I thought plastic Easter eggs were fitting for this season.
diy plastic egg and scrap wood wreath

A DIY tutorial to make an Easter wreath using plastic eggs and scrap wood. Create this fun and simple Spring wreath with plastic eggs! square Easter wreath

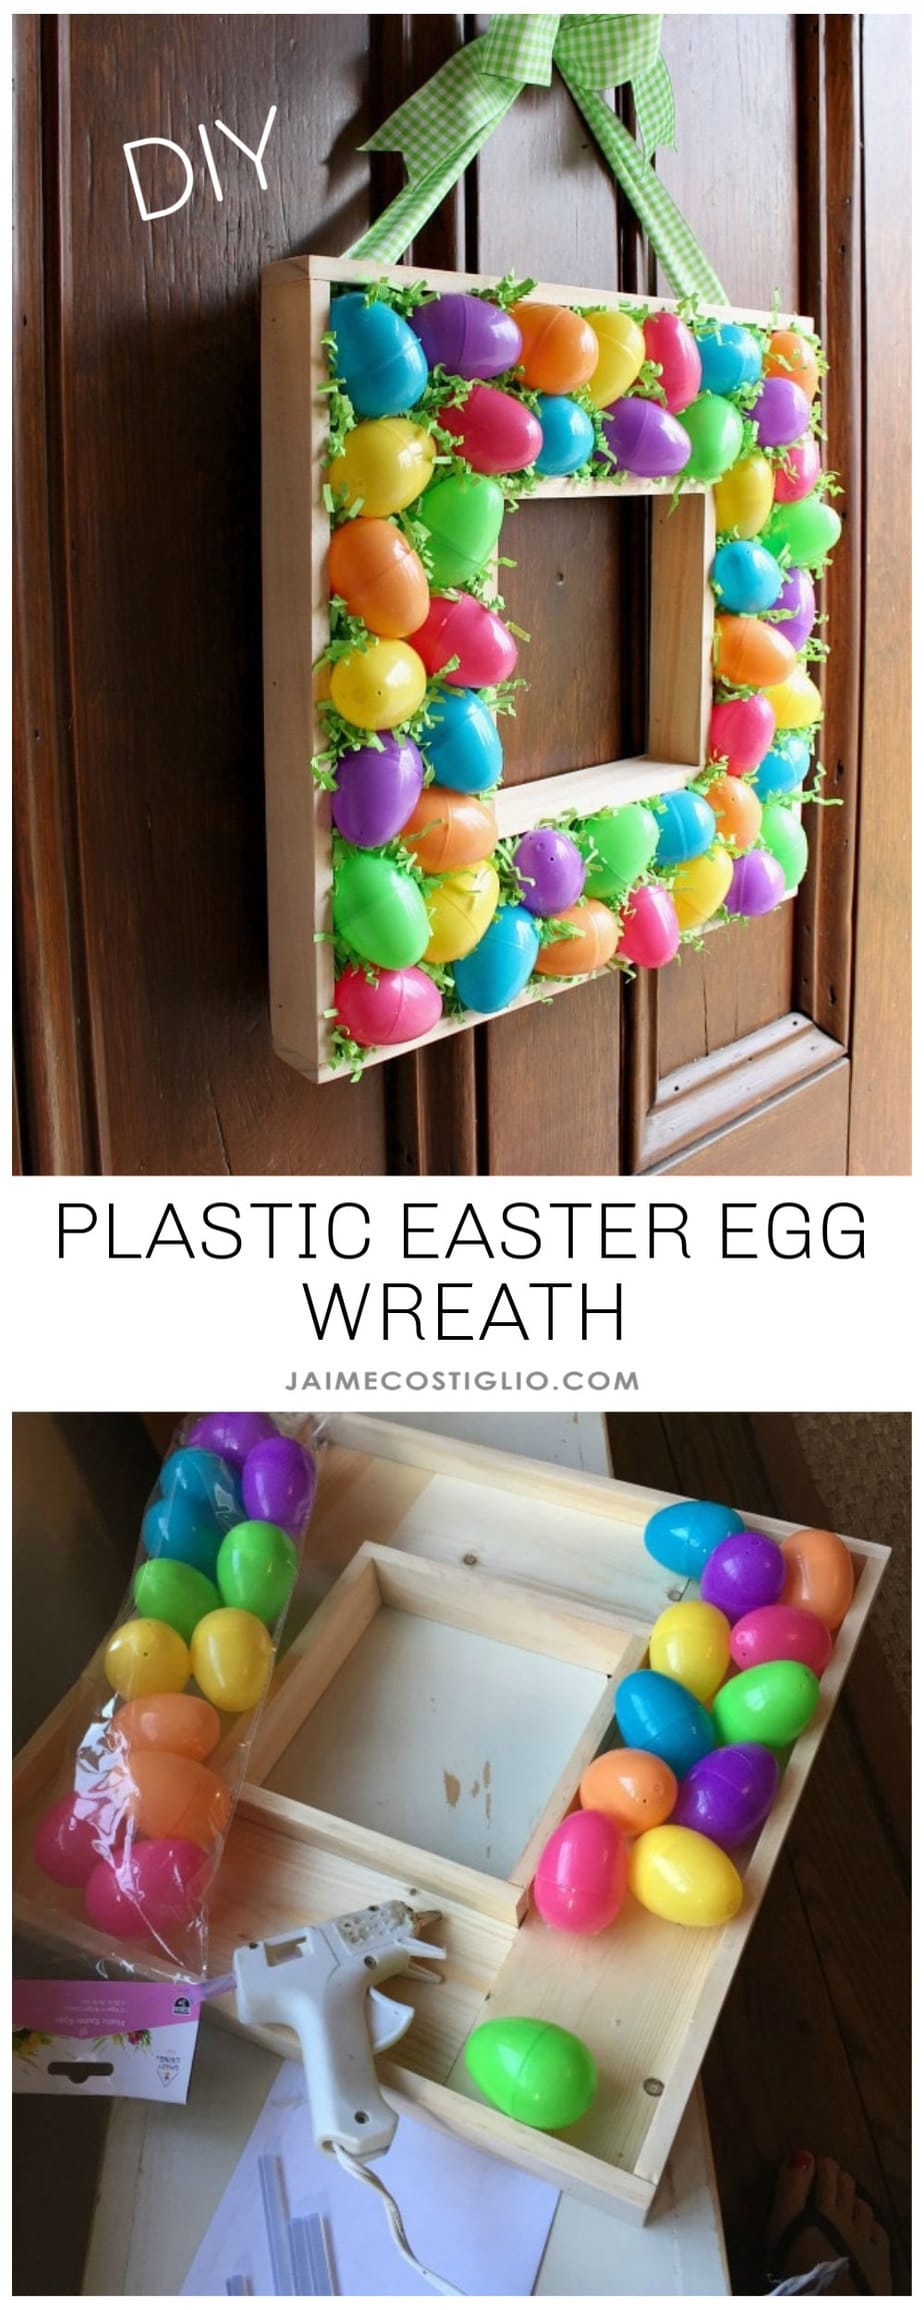
The bright plastic eggs make a super fun and colorful addition to the door plus it only cost me $4!  I already had the scrap wood on hand and the bits of shredded green paper filler.  The paper shreds add great texture and fill in the gaps between the eggs.
plastic Easter egg wreath
Below are the step by step instructions to make the plastic egg wreath.  The overall dimensions of this wreath are 14 1/2″ x 14 1/2″.

Supplies:

  • 1×4 scrap wood pieces (2 @ 14″, 2 @ 7″)
  • 1 3/8″ x 1/4″ flat molding (about 8′ total)
  • pocket hole jig
  • 1 1/4″ pocket hole screws
  • miter saw
  • drill
  • wood glue
  • nail gun
  • 1″ finish nails
  • plastic Easter eggs
  • hot glue gun & glue
  • green shredded paper filler (or easter grass)
  • hanging wire
scrap wood wreath
Step 1: Use 1×4 scrap wood to make a square from 2 – 14″ pieces and 2 – 7″ pieces.  Attach the shorter sides to the long sides using wood glue and 1 1/4″ pocket hole screws.
square scrap wood wreath
Step 2: Add 1 3/8″ x 1/4″ flat molding around the edges to create the sides.  Use wood glue and 1 1/4″ finish nails to attach to the side of the 1×4 frame.
hot glue plastic eggs to wood base
Step 3: Hot glue plastic eggs in place.
stuff green paper shreds in gaps
Step 4: Shove easter grass filler in between the eggs.  It should be tight enough to stay put but you could secure with hot glue.
square scrap wood wreath wire hanger
Step 5: Add a hanging wire to the back.  Then staple ribbon at the back corners and tie in a bow at center.
plastic eggs on wreath
Use the wire to hang the wreath.  Because of the weight of the wreath I don’t recommend hanging the wreath from the ribbon.  The ribbon is purely decoration.

Thanks for joining me for this plastic egg wreath project.  Please leave any questions in the comments below and be sure to follow me on social media for sneak peeks, tools and project inspiration:

Instagram / Pinterest / Facebook / Youtube / Twitter

SHOP THIS PROJECT:
diy plastic easter egg and scrap wood wreath
diy plastic Easter egg wreathplastic Easter egg wreath tutorial

You may also like...

  • DIY Fence Style Easter Basket Free PlansDIY Fence Style Easter Basket Free Plans
  • DIY Turf WreathDIY Turf Wreath
  • DIY Bunny Place CardsDIY Bunny Place Cards
  • DIY Mini WheelbarrowDIY Mini Wheelbarrow
Share this post:

Filed Under: CRAFTS, DIY, HOME DECOR, SCRAP WOOD, SEASONAL, SPRING4 Comments

Reader Interactions

Comments

  1. Lorenza says

    March 13, 2016 at 8:47 AM

    Very beautiful!

    Reply
  2. The Disney Chef says

    March 13, 2016 at 12:39 PM

    I love this clever idea… I have so many of those eggs laying around (hahahahaha, no pun intended) that it'd be nice to put them to some good use. 🙂 – Jerusha, TheDisneyChef.com

    Reply
  3. Brooke Stephens says

    March 13, 2016 at 2:03 PM

    So cute, Love the shape, so unique. Thanks for sharing.

    Reply

Leave a Reply Cancel reply

Your email address will not be published. Required fields are marked *

Primary Sidebar

Hi! I’m Jaime

Jaime Costiglio

Hello!

Thank you for stopping by.
Join me for lots of DIY.

Read more

Get new posts via email

Handbuilt Holiday: Gift Project Plans

handbuilt holiday gift project plans

Collection of DIY gift project plans to build.

The Home Depot Tool Prospective

THD Prospective

Tools to consider for the DIYer.

Archives

The Home Depot Logo
Copyright © 2023 Jaime Costiglio · Custom site by Moonsteam Design

Privacy Policy