• Home
  • Blog
  • About
  • Contact
    • Disclosure
    • Privacy Policy
  • SHOP
  • Widget area for main menu

    • Email
    • Facebook
    • Instagram
    • Pinterest
    • Twitter
    • YouTube
  • Skip to primary navigation
  • Skip to main content
  • Skip to primary sidebar

Jaime Costiglio

build - paint - sew

  • BUILD
    • BEDS
    • BENCHES
    • DESKS
    • DRESSERS
    • GAMES & TOYS
    • SCRAP WOOD
    • SHELVES
    • STORAGE
    • TABLES
  • TOOLS
  • PAINT
    • CRAFTS
    • FURNITURE
    • HOME DECOR
  • SEW
    • GIFTS
    • HOME DECOR
    • POUCHES
  • HANDBUILT HOLIDAY
    • 2021
    • 2019
    • 2018
    • 2017
    • 2016
    • 2015
    • 2014
    • 2013
  • GIFTS
    • BABIES
    • KIDS
    • FOR HER
    • FOR HIM
    • TEACHERS
    • WEDDINGS
  • SEASONAL
    • 4TH OF JULY
    • FALL
    • HALLOWEEN
    • CHRISTMAS
    • SUMMER
    • SPRING
    • ST. PATRICK’S DAY
    • THANKSGIVING
    • VALENTINE’S DAY
    • WINTER
  • SALTBOX PROJECT
    • BATHROOMS
    • DINING ROOM
    • EXTERIOR
    • FAMILY ROOM
    • FOYER / MUDROOM
    • KIDS BEDROOMS
    • KITCHEN
    • LIVING ROOM
    • MASTER BEDROOM
    • PLAYROOM
  • SCROLL SAW

DIY Mini Wheelbarrow

March 20, 2013

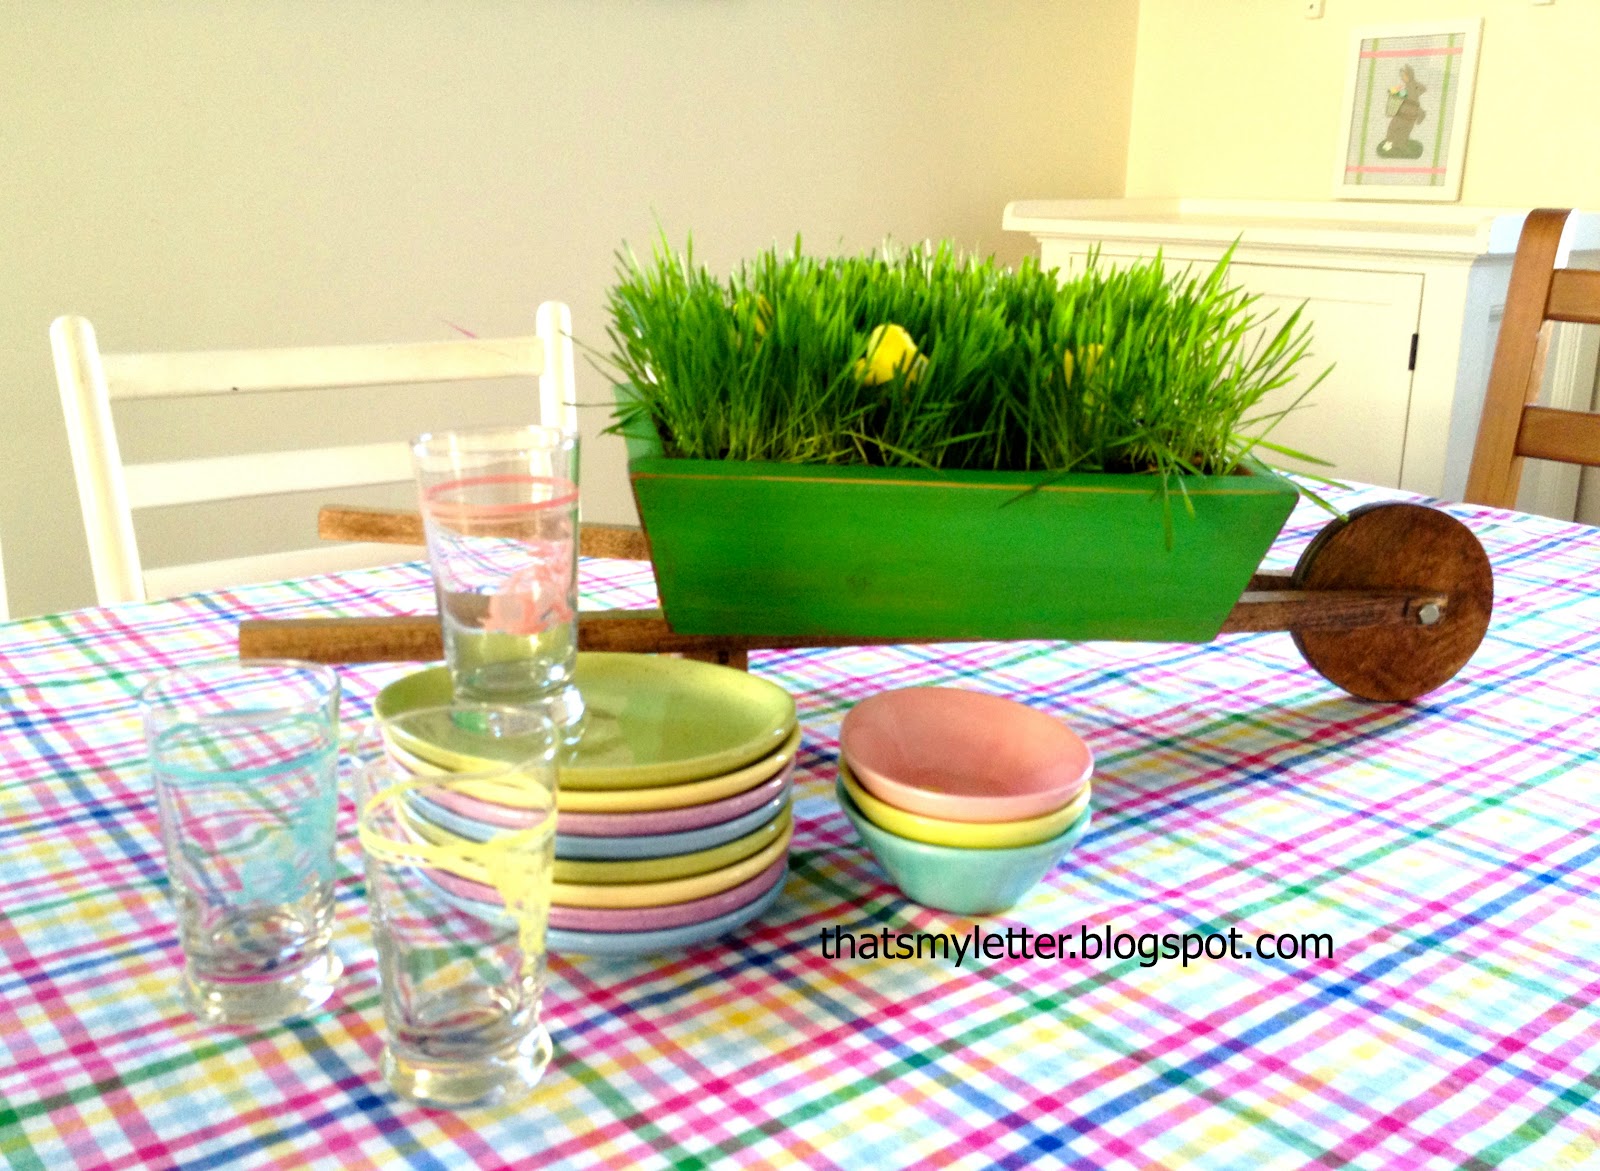
Build: mini wheelbarrow

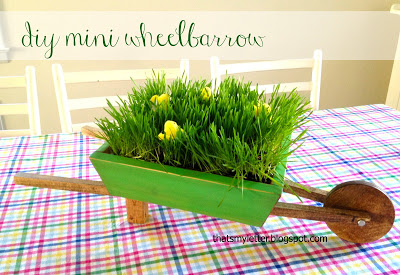
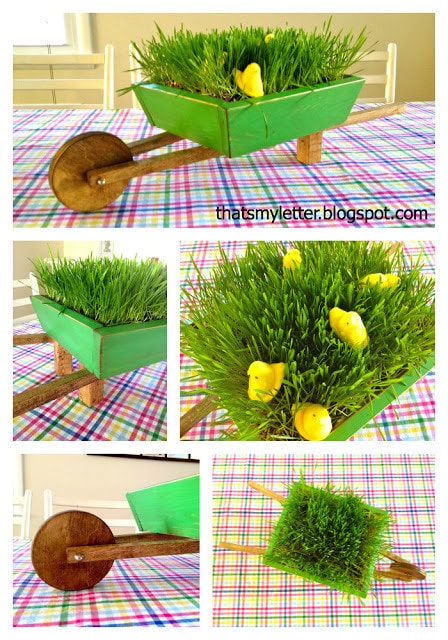
Build your own wooden mini wheelbarrow to make the perfect Spring table decor. 

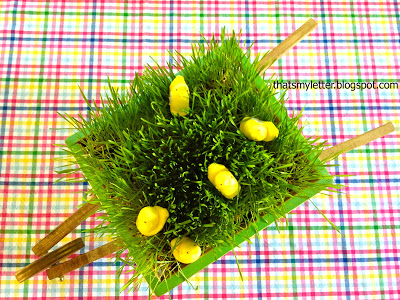
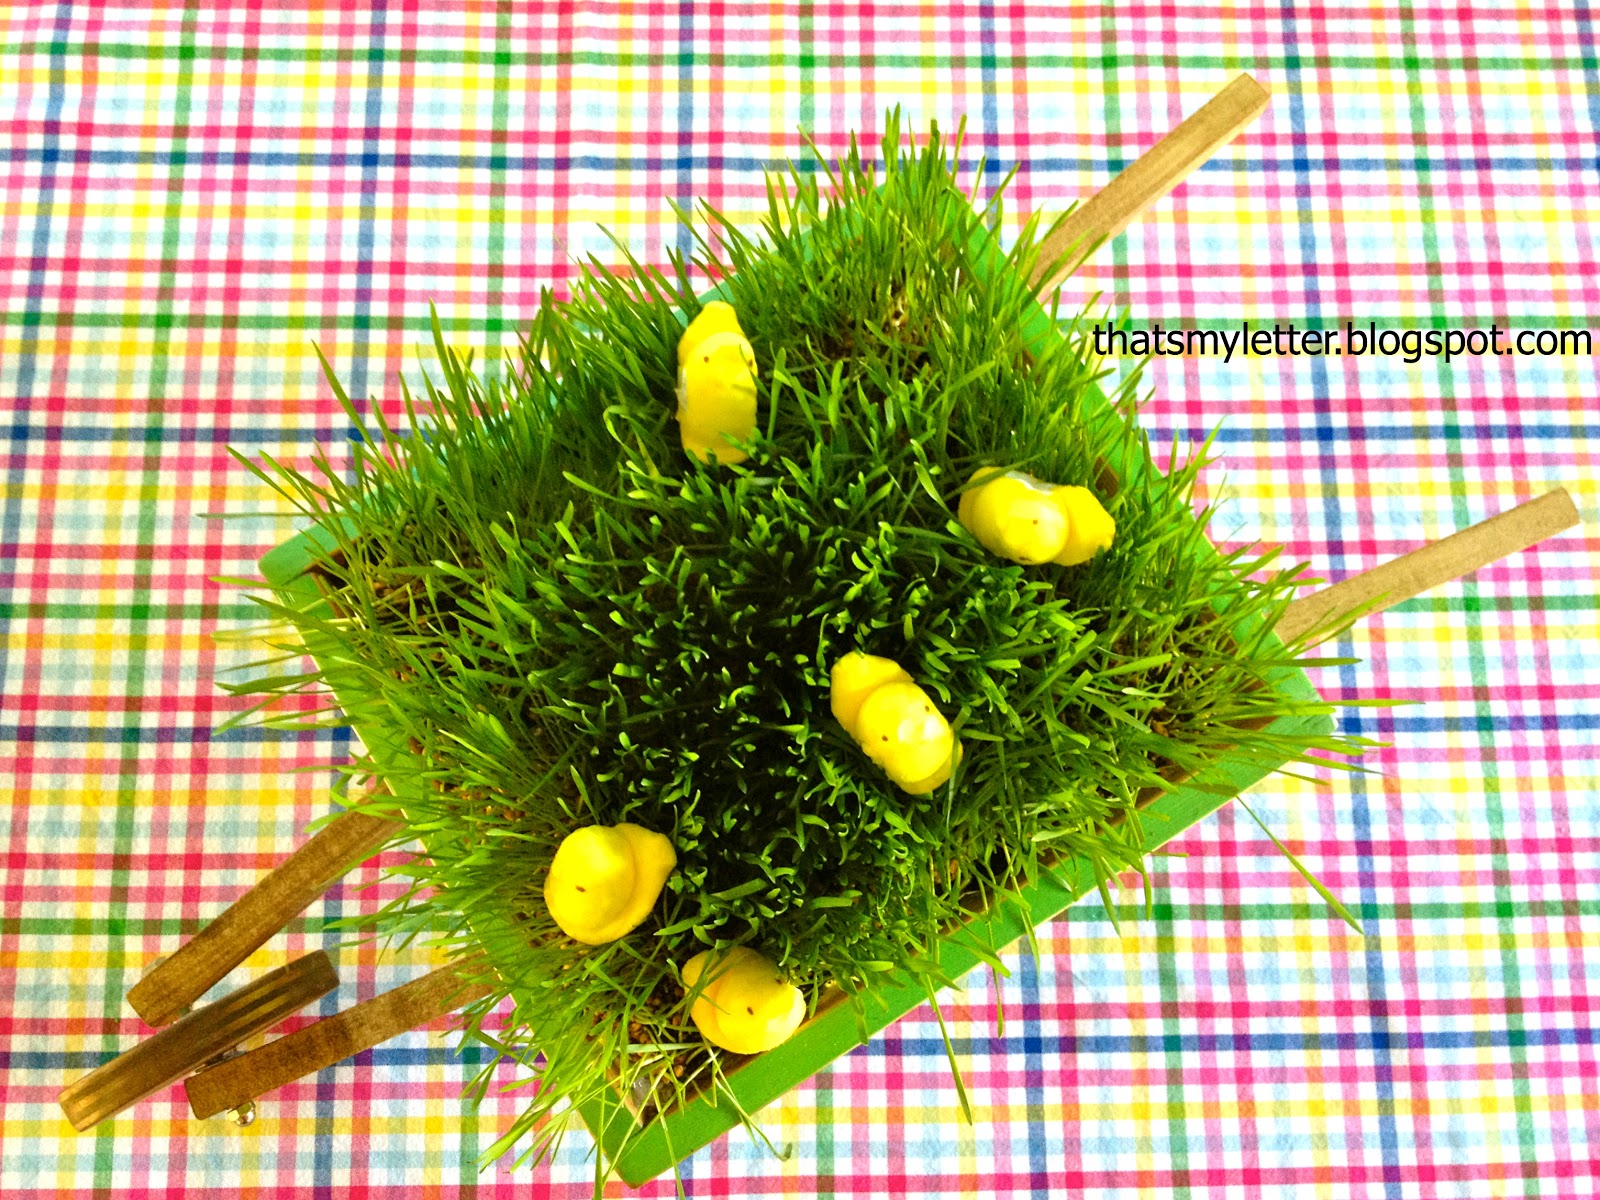
Some marshmallow peeps were hiding in our grass:

This wheelbarrow could hold anything – plastic eggs, bread, wrapped silverware for a buffet setting:

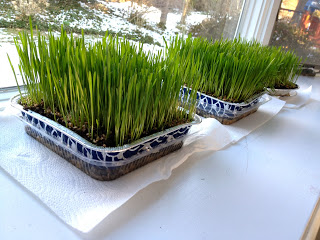
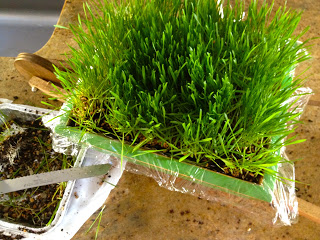
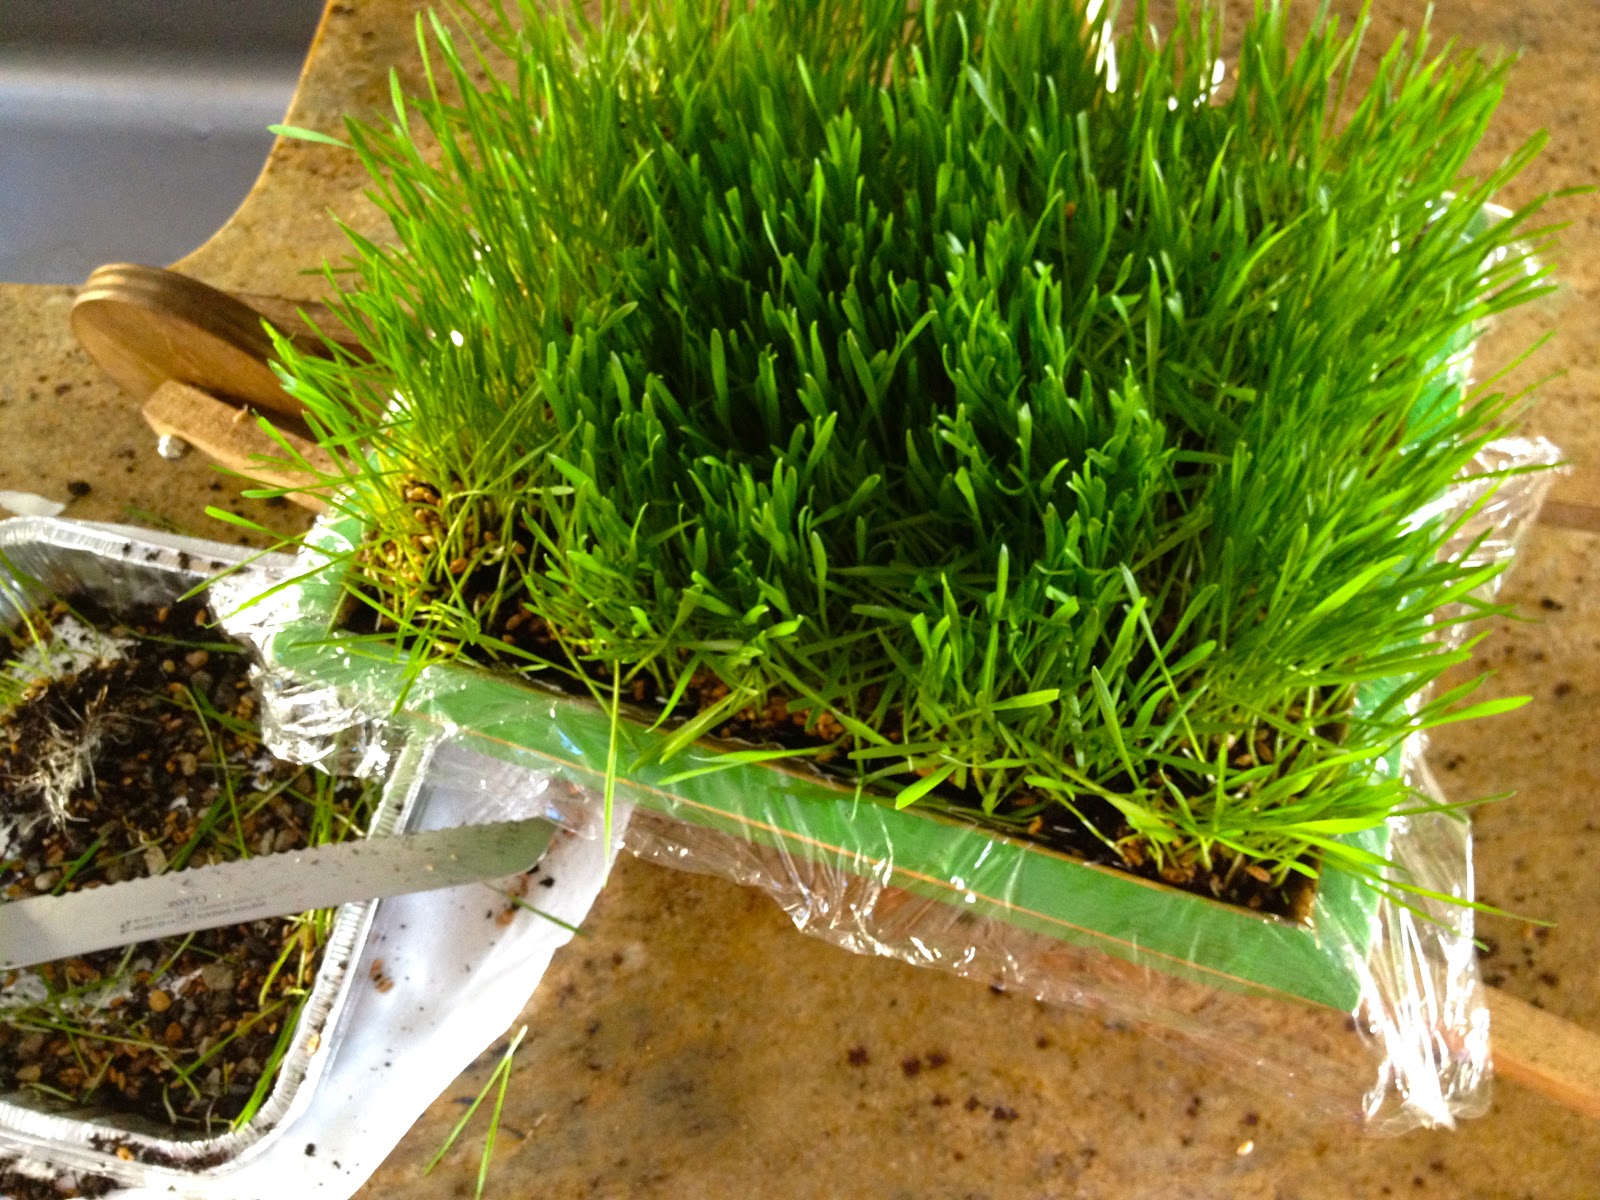
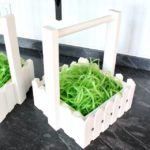
We starting growing wheat grass last week and now we have this:

I lined the wheelbarrow box with plastic wrap and plopped in one whole tray of grass.
Then I cut up the other square tray into long strips and shoved the grass down the sides:

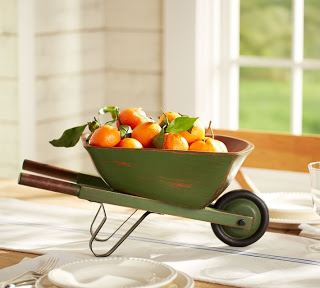
I was inspired by Pottery Barn’s wheelbarrow serve bowl:
(Currently sold out so you’ll want to make your own!)

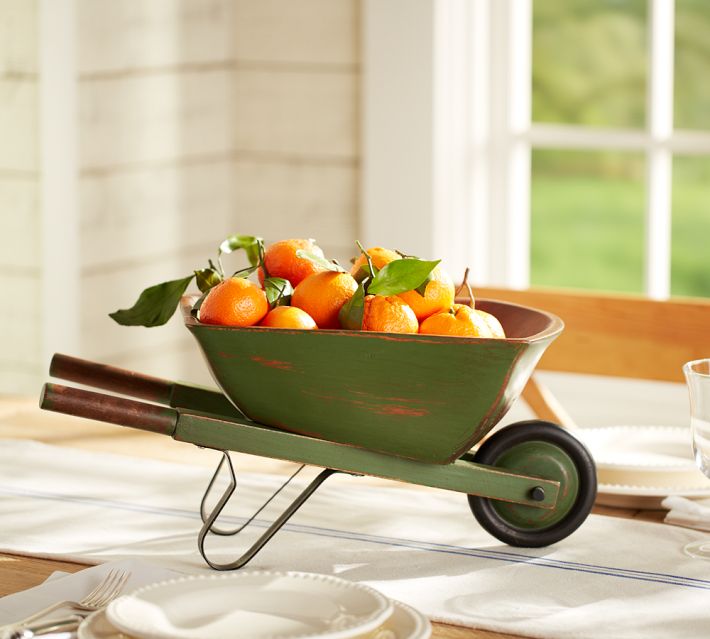
My version is a teeny bit different:

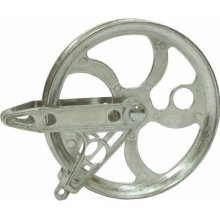
And I did find this laundry line wheel at the local hardware store AFTER I had my wheel all cut and ready to go but it would make a great industrial looking option:

Here’s how to make the mini wheelbarrow:

1. Cut list:
2 – 1×4 @ 13″ cut ends 15 degrees not parallel (box long sides)
2 – 1×4 @ 10″ cut ends 15 degrees not parallel (box short ends)
1/4″ plywood @ 9 3/4″ x 8 1/2″*(box base)
5″ circle cut from 3/4″ plywood (wheel)
2 – 1×1 @ 26″ (handles/supports)
2 – 2×2 @4″* cut one end 10 degrees (legs)
3″ hex screw, washers and nut
* measure actual space prior to making cut
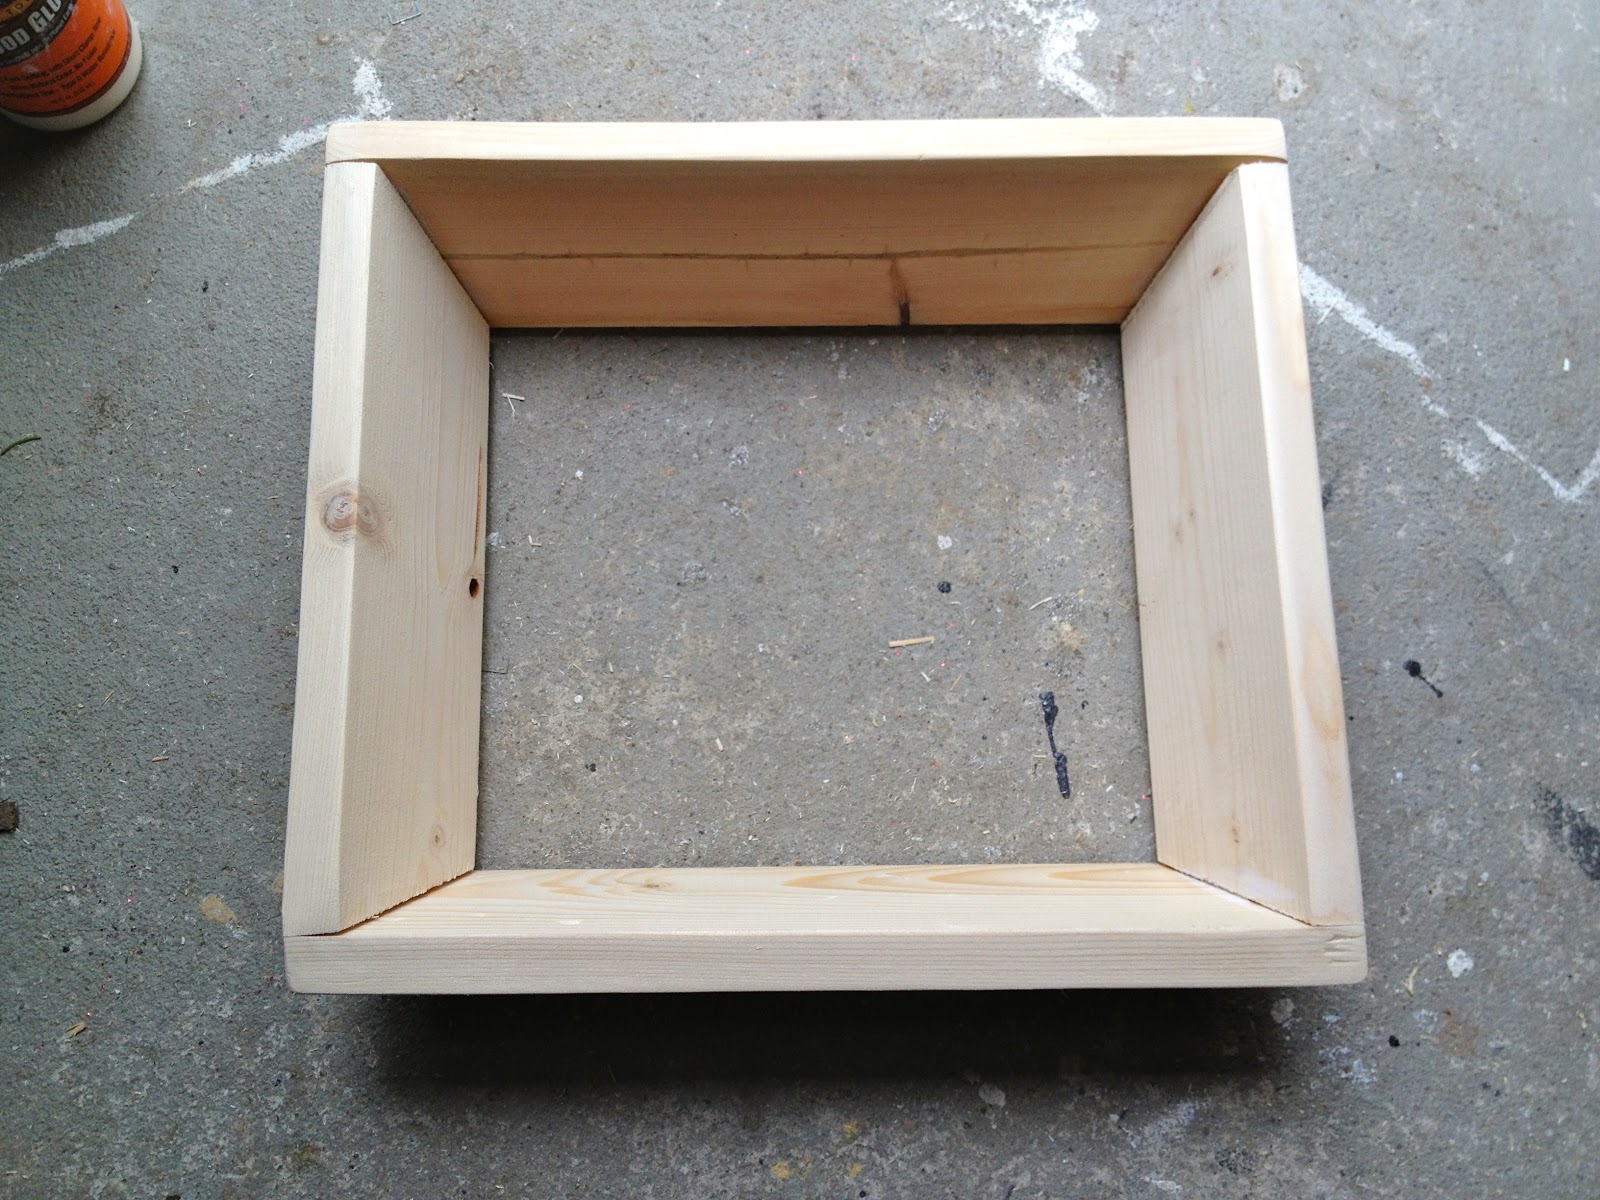
2. Build the box.
Using 2″ finish nails and glue start with one long side and two short ends:
Add the remaining long side:
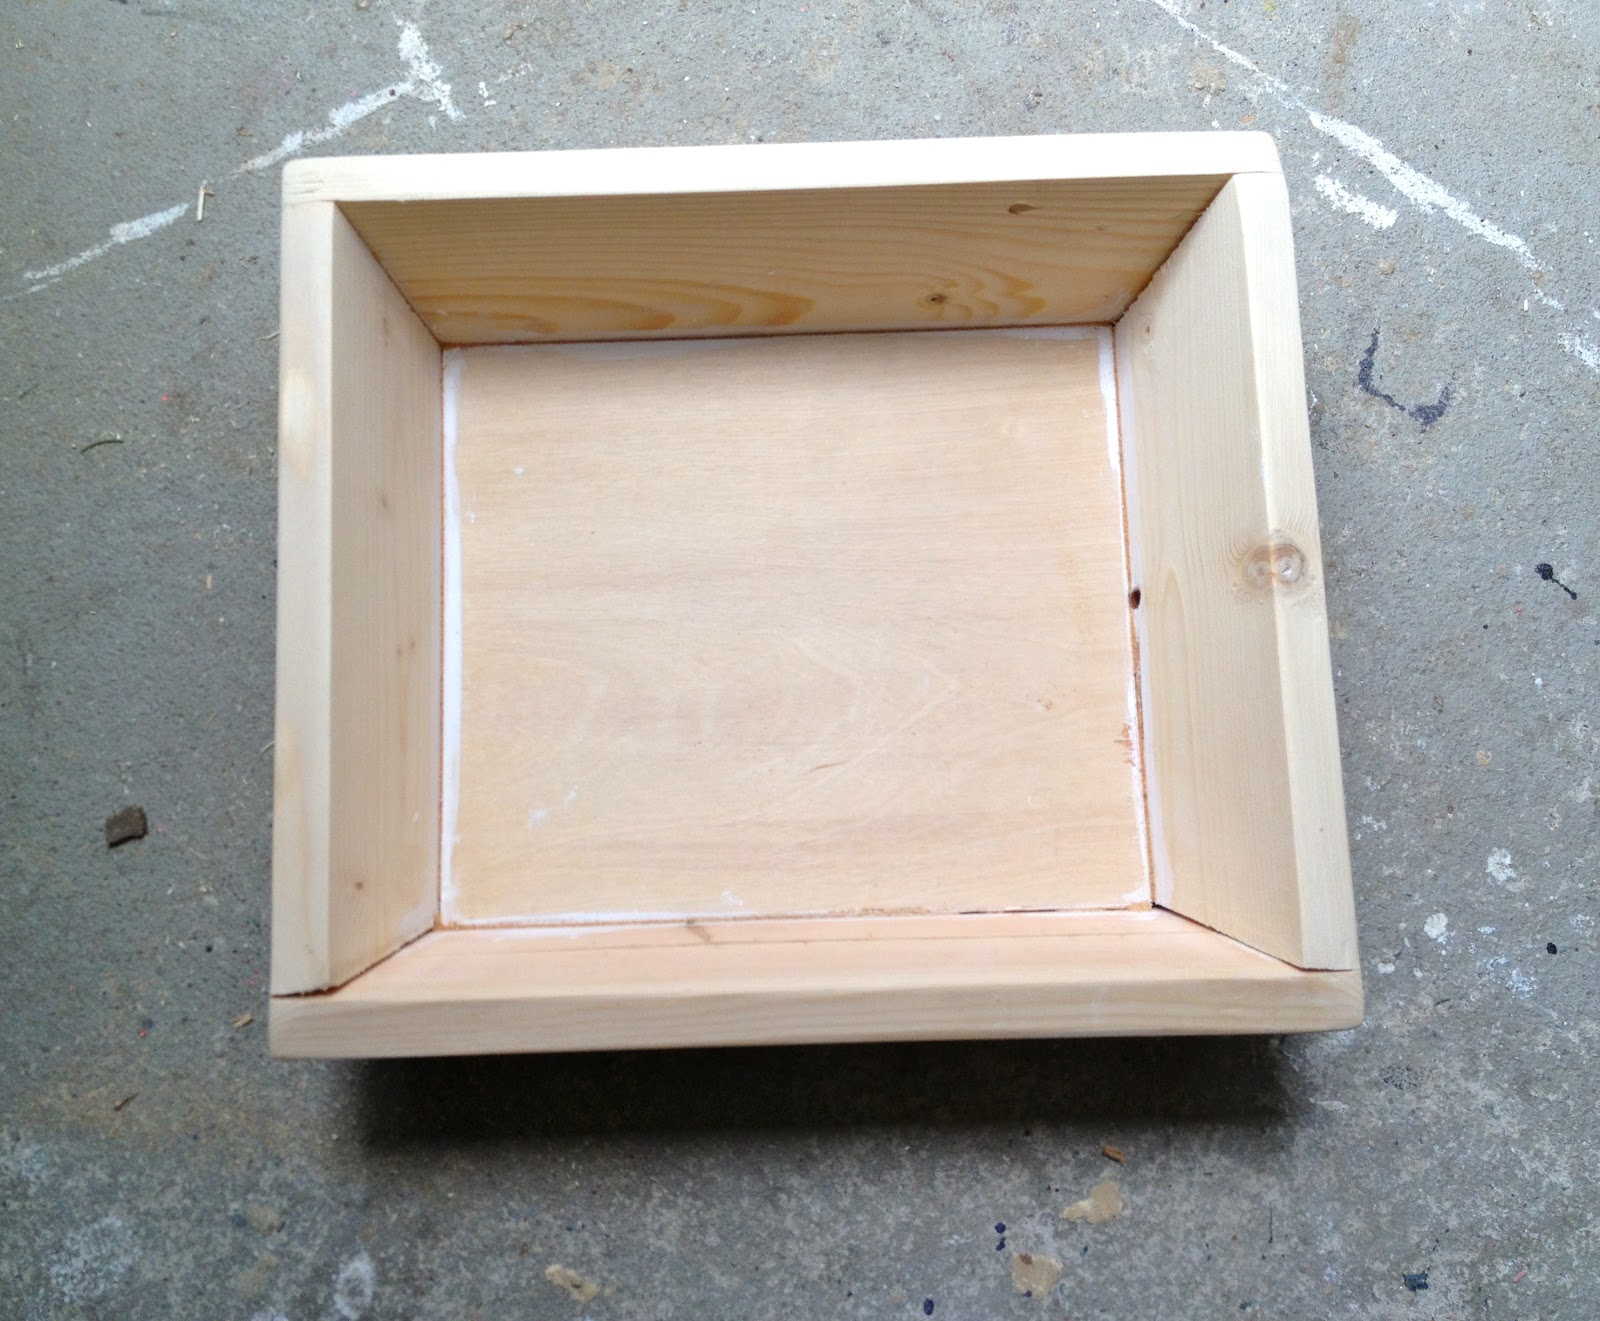
Then glue the 1/4″plywood base in place, pushing down in from the top:
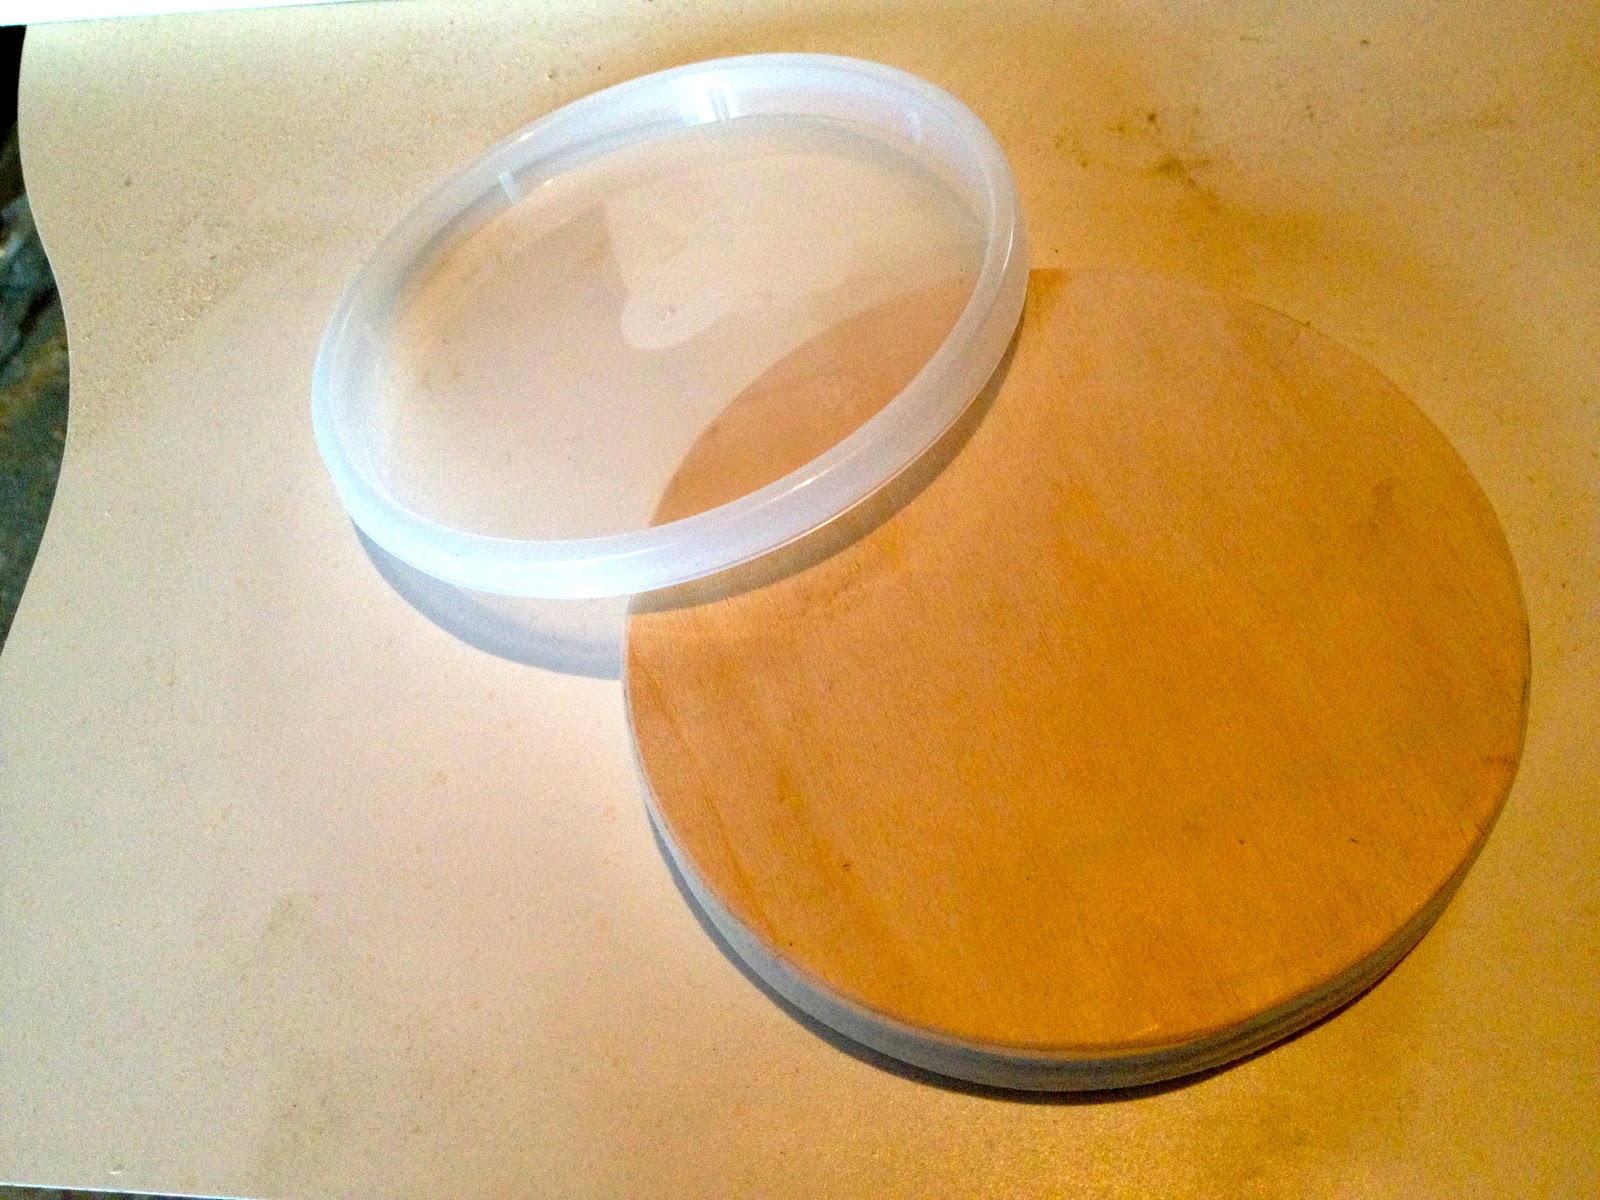
3. Cut wheel.
Trace around a plastic deli container top to get a perfect circle.
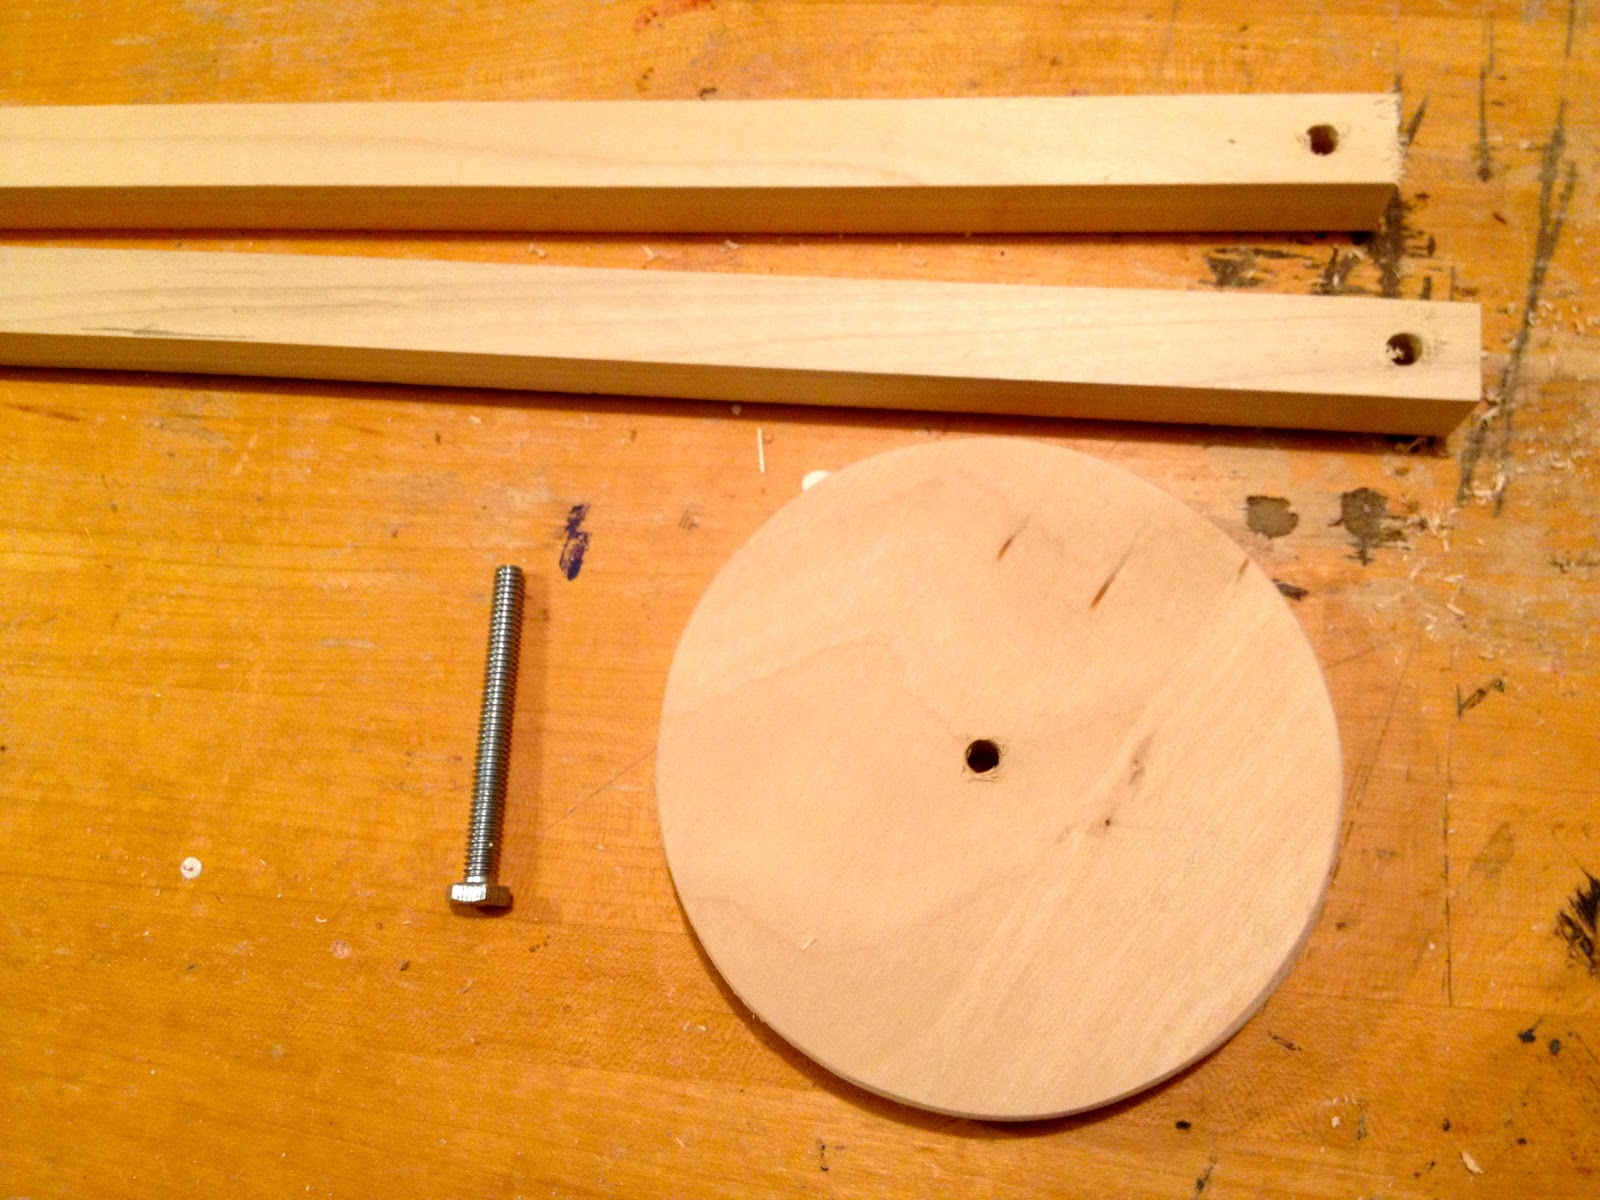
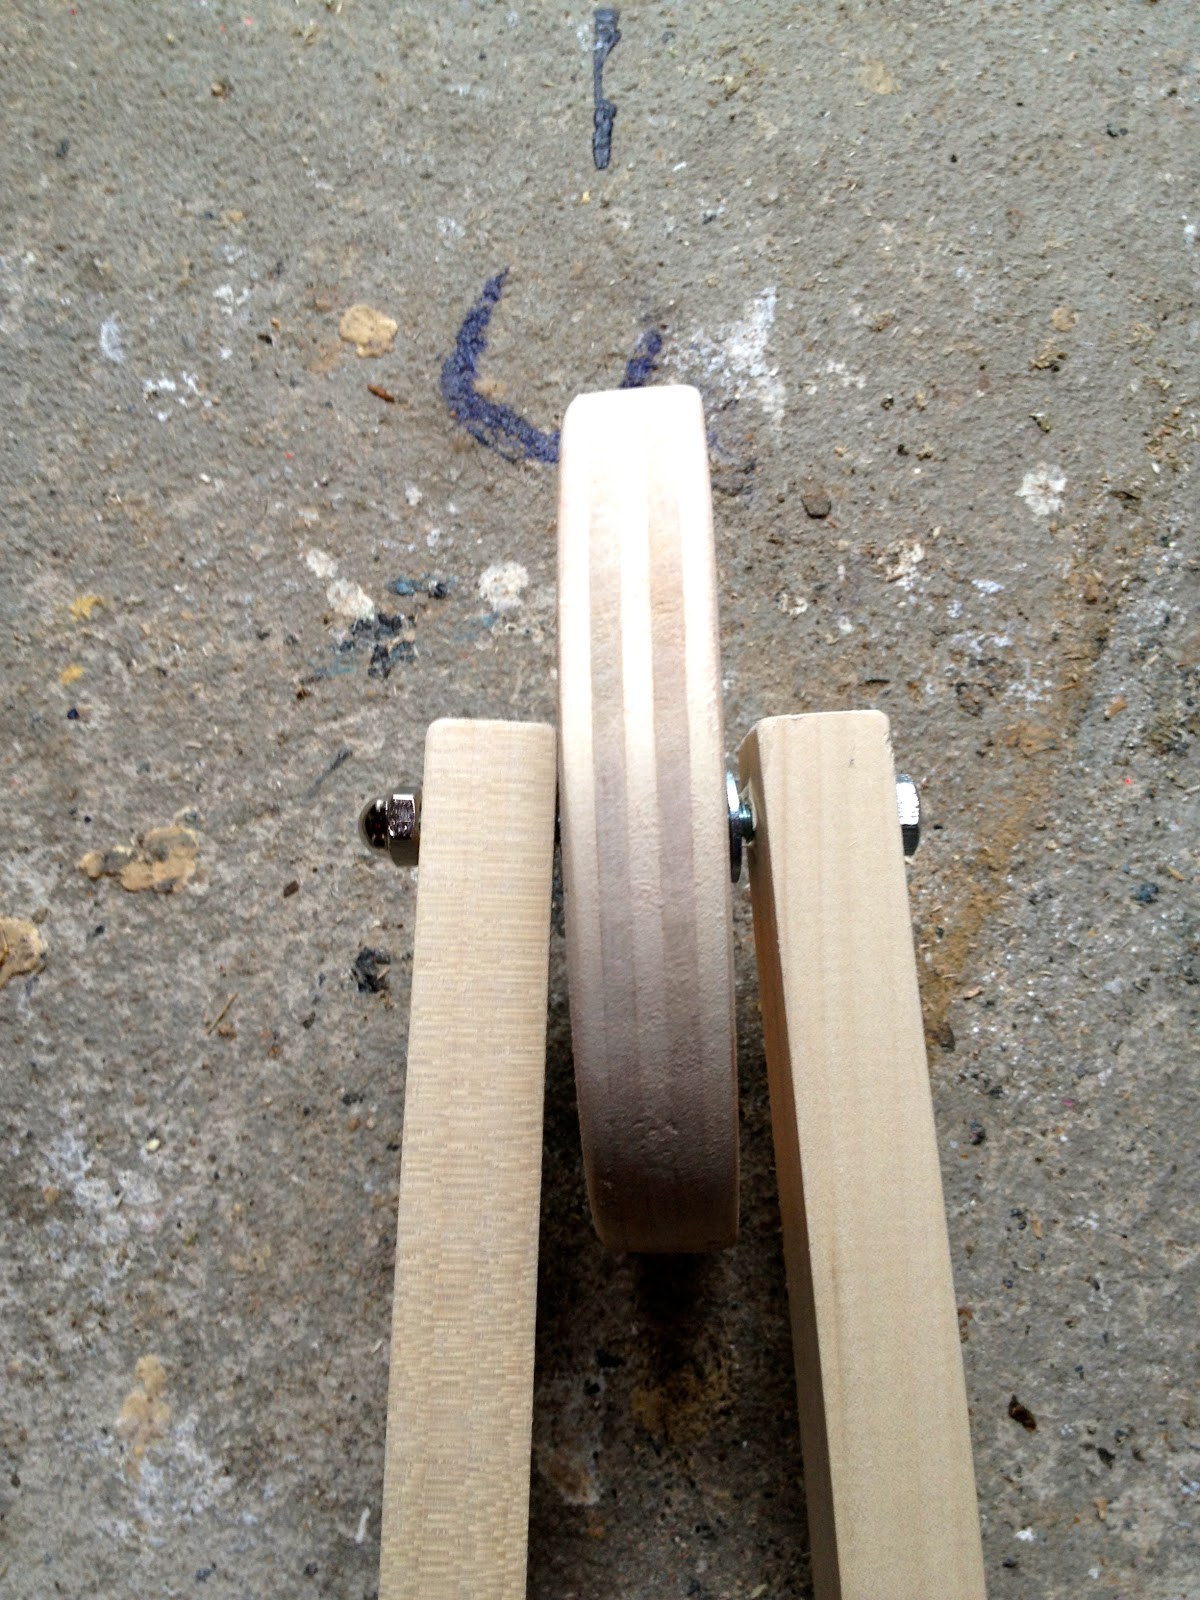
4. Drill hole in center of wheel using drill bit to fit 3″ hex screw:
Drill holes at end of 1×1 handles, try to angle hole slightly so handles can angle outwards:
5. Put wheel and handles together:
6. Attach handles to underside of box at one short end.
Predrill, glue and screw with 2″ wood screws:
(You could also add screws at other short end of box but it’s not necessary.)
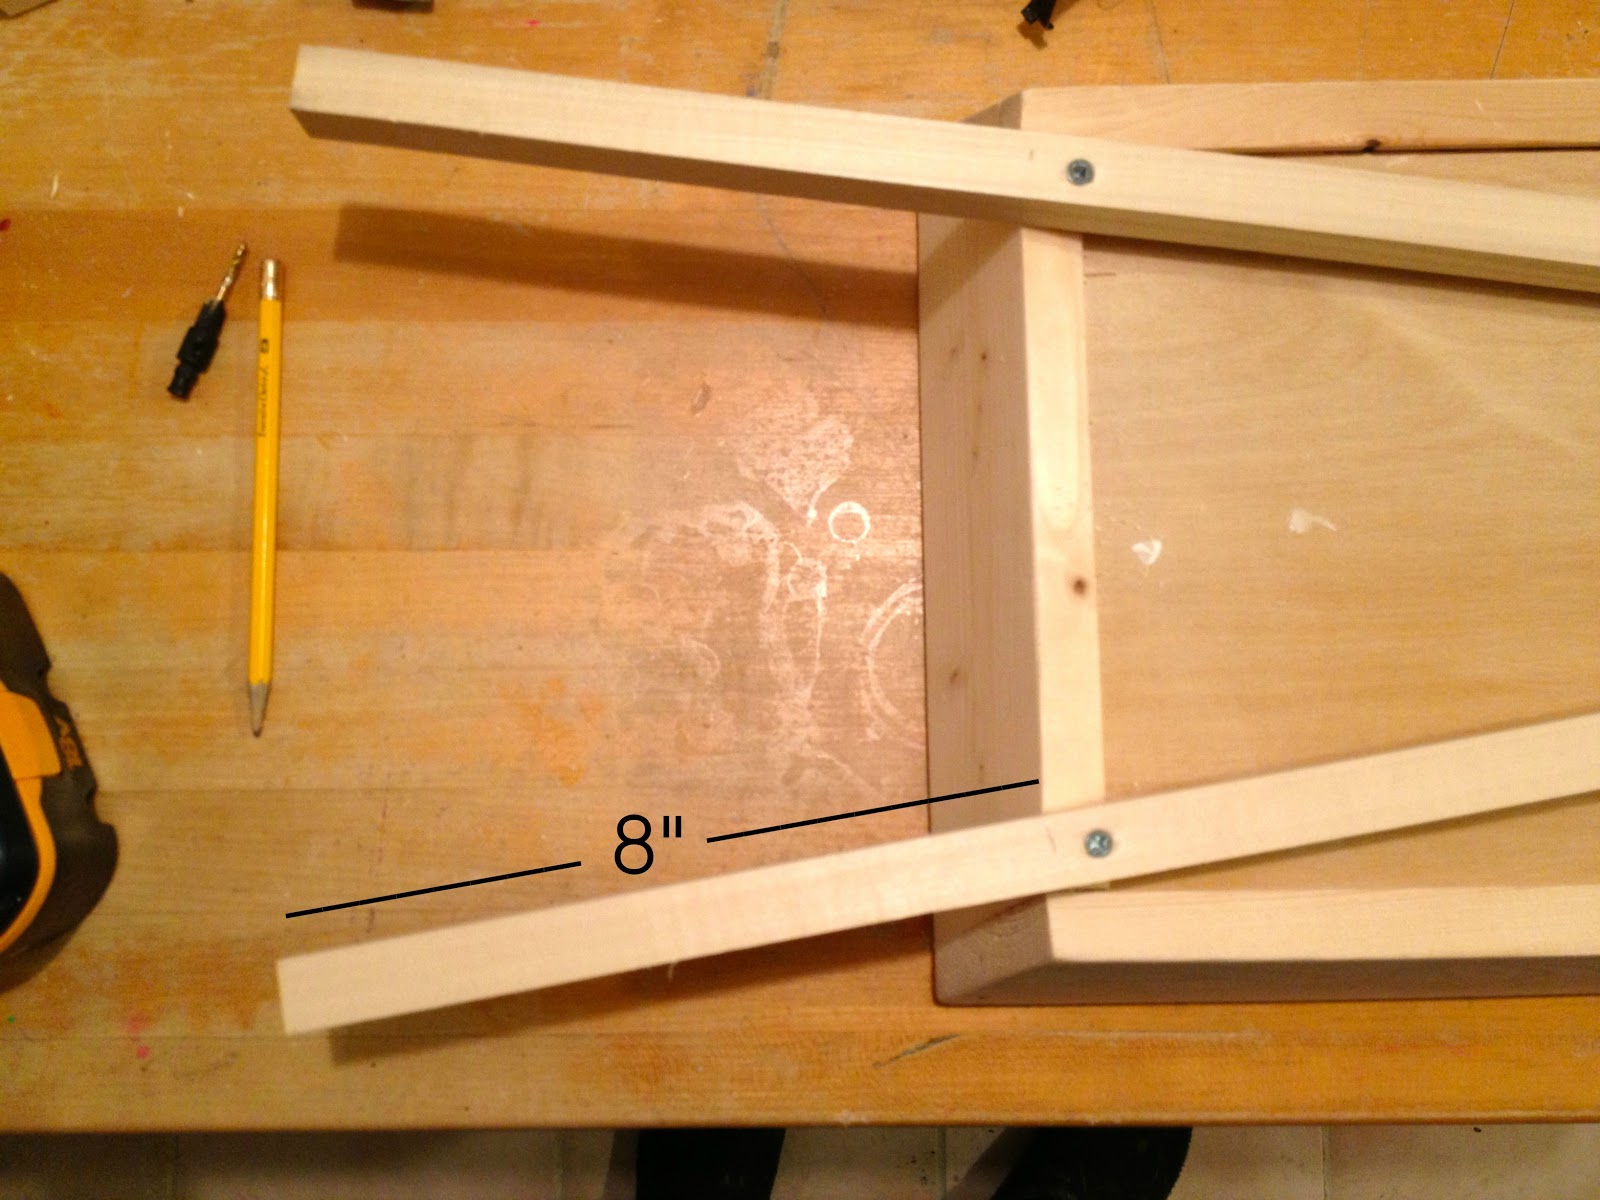
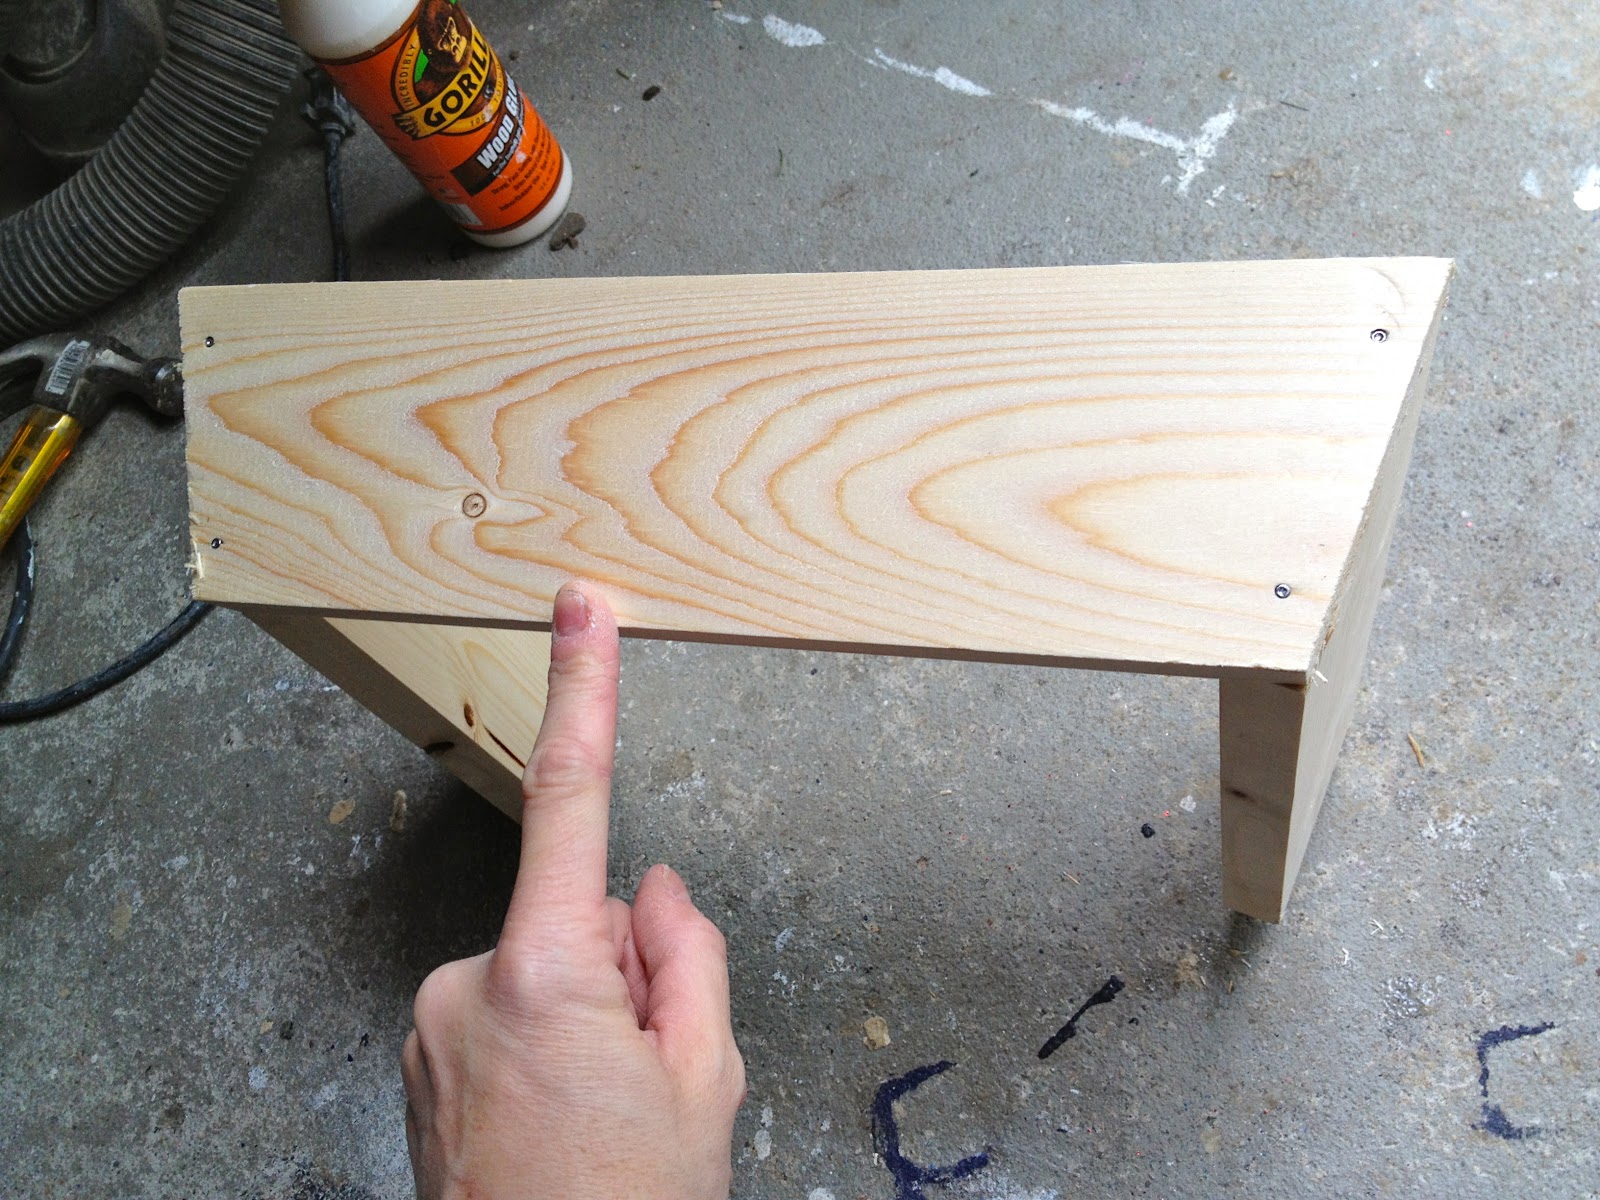
7. Cut legs:
(Legs are pictured upside down.)
8. Line up legs just inside handles on underside of box:
Glue and screw down from box into leg:
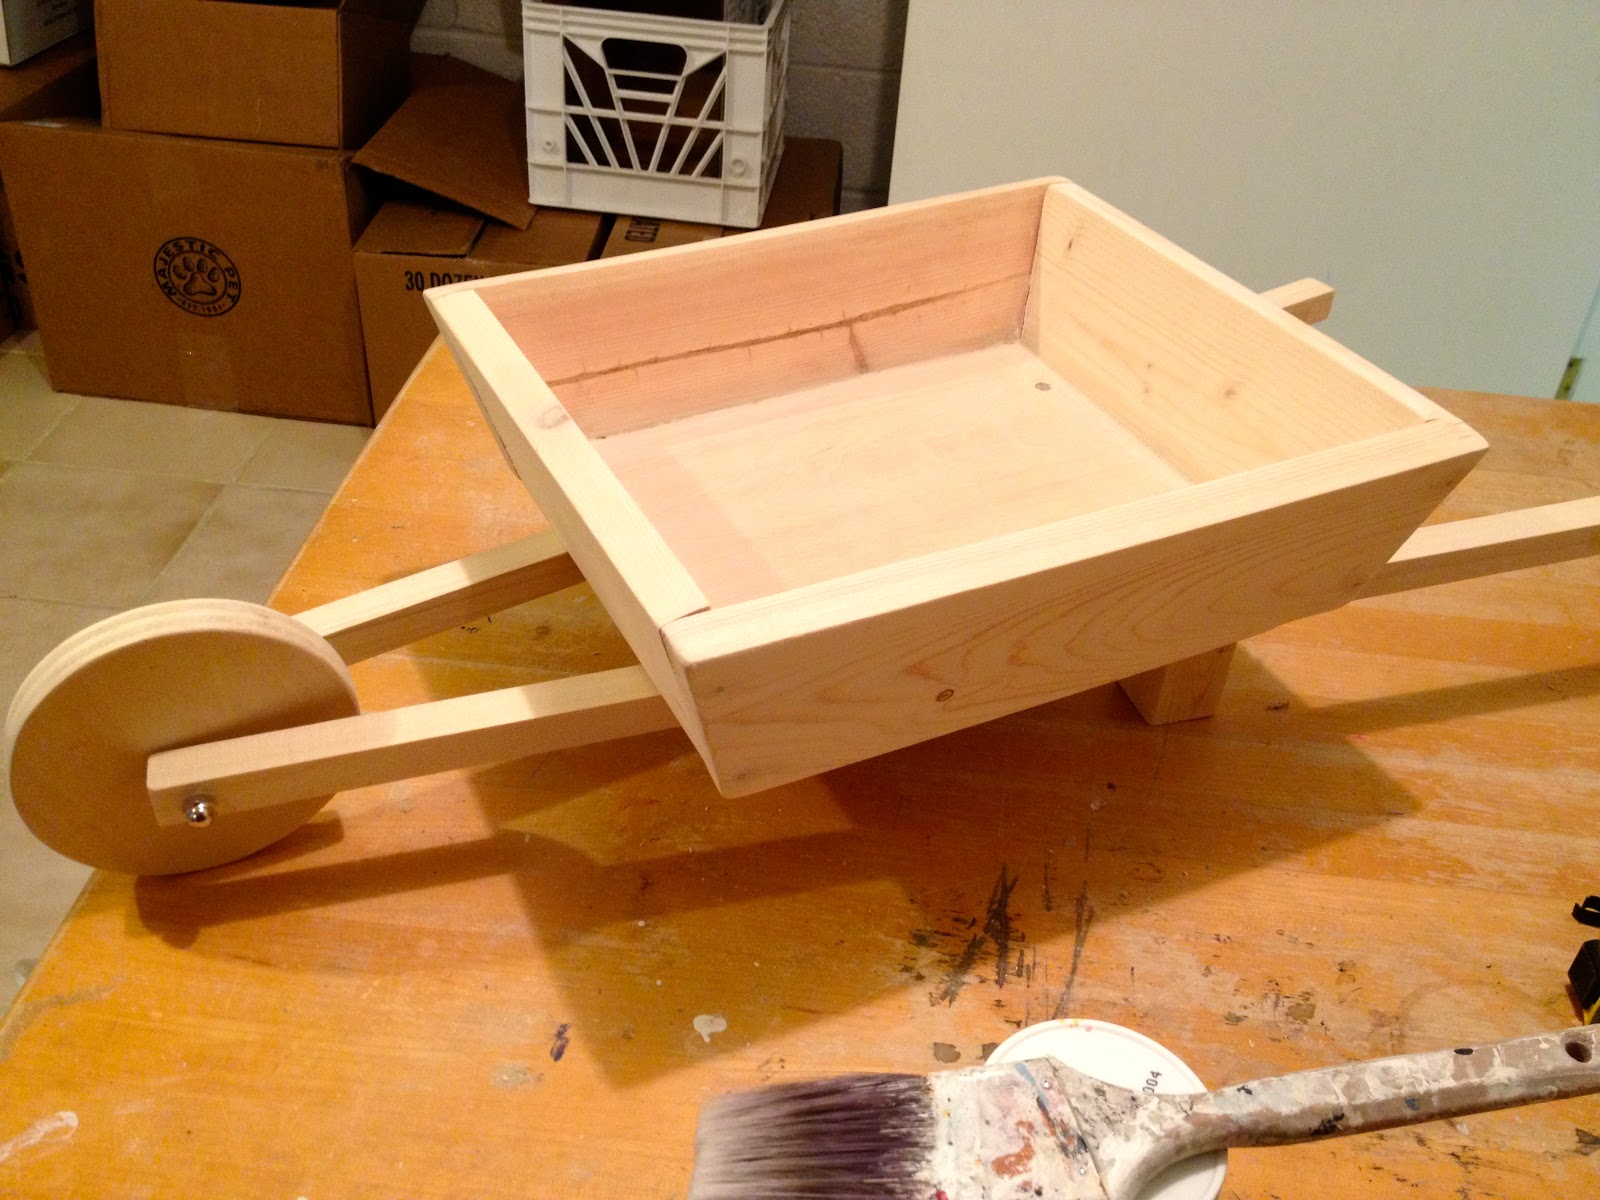
Ready for paint:
9. Paint box Benjamin Moore lucky shamrock:
Distress, stain Minwax Early American and seal clear satin poly:

You may also like...

  • DIY Plant Stand with Free PlansDIY Plant Stand with Free Plans
  • DIY Fence Style Easter Basket Free PlansDIY Fence Style Easter Basket Free Plans
  • DIY Ottoman Tray Parquet PatternDIY Ottoman Tray Parquet Pattern
  • DIY Mason Jar Tote free plansDIY Mason Jar Tote free plans
Share this post:

Filed Under: BUILD, DIY, HOME DECOR, HOME DECOR, PAINT, SCRAP WOOD, SEASONAL, SPRING9 Comments

Reader Interactions

Comments

  1. Cassie @ Primitive & Proper says

    March 22, 2013 at 10:22 AM

    super cute and i love the grass, and it showed up in my reader!

    Reply
  2. Inspire Me Heather says

    March 22, 2013 at 10:57 AM

    Your wheelbarrow is too sweet Jaime!

    Reply
  3. Our Pinteresting Family says

    March 22, 2013 at 11:26 AM

    Cute idea, Jaime. I love the green. 🙂

    Reply
  4. Susan @ homeroad.net says

    March 22, 2013 at 11:33 AM

    Jamie this is adorable! I love the metal wheel option too. Great project and great tutorial!
    Susan

    Reply
  5. [email protected] says

    March 22, 2013 at 1:57 PM

    Cute! The grass looks great in it.

    Reply
  6. Kilder E. Garza says

    August 18, 2013 at 2:11 PM

    Muy bonito.Felicitaciones

    Reply
  7. Kilder E. Garza says

    August 18, 2013 at 2:12 PM

    Muy bonito.Felicitaciones

    Reply

Leave a Reply Cancel reply

Your email address will not be published. Required fields are marked *

Primary Sidebar

Hi! I’m Jaime

Jaime Costiglio

Hello!

Thank you for stopping by.
Join me for lots of DIY.

Read more

Get new posts via email

Handbuilt Holiday: Gift Project Plans

handbuilt holiday gift project plans

Collection of DIY gift project plans to build.

The Home Depot Tool Prospective

THD Prospective

Tools to consider for the DIYer.

Archives

The Home Depot Logo
Copyright © 2023 Jaime Costiglio · Custom site by Moonsteam Design

Privacy Policy