• Home
  • Blog
  • About
  • Contact
    • Disclosure
    • Privacy Policy
  • SHOP
  • Widget area for main menu

    • Email
    • Facebook
    • Instagram
    • Pinterest
    • Twitter
    • YouTube
  • Skip to primary navigation
  • Skip to main content
  • Skip to primary sidebar

Jaime Costiglio

build - paint - sew

  • BUILD
    • BEDS
    • BENCHES
    • DESKS
    • DRESSERS
    • GAMES & TOYS
    • SCRAP WOOD
    • SHELVES
    • STORAGE
    • TABLES
  • TOOLS
  • PAINT
    • CRAFTS
    • FURNITURE
    • HOME DECOR
  • SEW
    • GIFTS
    • HOME DECOR
    • POUCHES
  • HANDBUILT HOLIDAY
    • 2021
    • 2019
    • 2018
    • 2017
    • 2016
    • 2015
    • 2014
    • 2013
  • GIFTS
    • BABIES
    • KIDS
    • FOR HER
    • FOR HIM
    • TEACHERS
    • WEDDINGS
  • SEASONAL
    • 4TH OF JULY
    • FALL
    • HALLOWEEN
    • CHRISTMAS
    • SUMMER
    • SPRING
    • ST. PATRICK’S DAY
    • THANKSGIVING
    • VALENTINE’S DAY
    • WINTER
  • SALTBOX PROJECT
    • BATHROOMS
    • DINING ROOM
    • EXTERIOR
    • FAMILY ROOM
    • FOYER / MUDROOM
    • KIDS BEDROOMS
    • KITCHEN
    • LIVING ROOM
    • MASTER BEDROOM
    • PLAYROOM
  • SCROLL SAW

“P” is for Pillow

March 23, 2012

Sew: personalized kids lumbar pillow

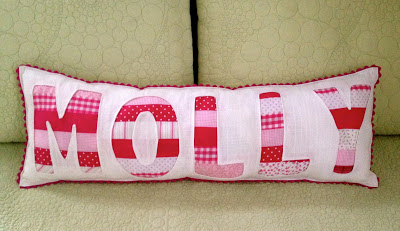
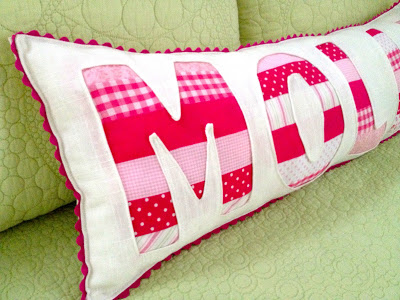
Reverse applique technique with stripe pieced pink fabrics and ric rac trim:

A gift for young girl who collects stuffed animals and such for her bed.
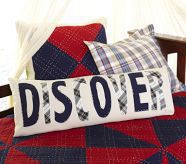
Inspired by this decorative pillow from Pottery Barn Kids:
Here’s how I made the pillow:

1. Sew 2″ stripes to fit the height of your letters:
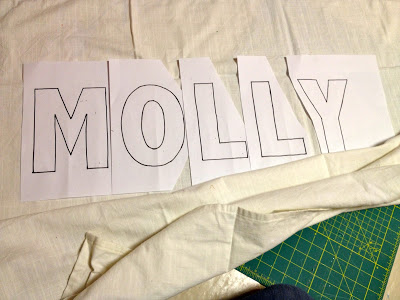
2. Lay out letters, trace with permanent marker:

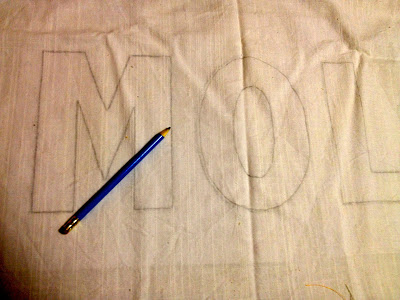
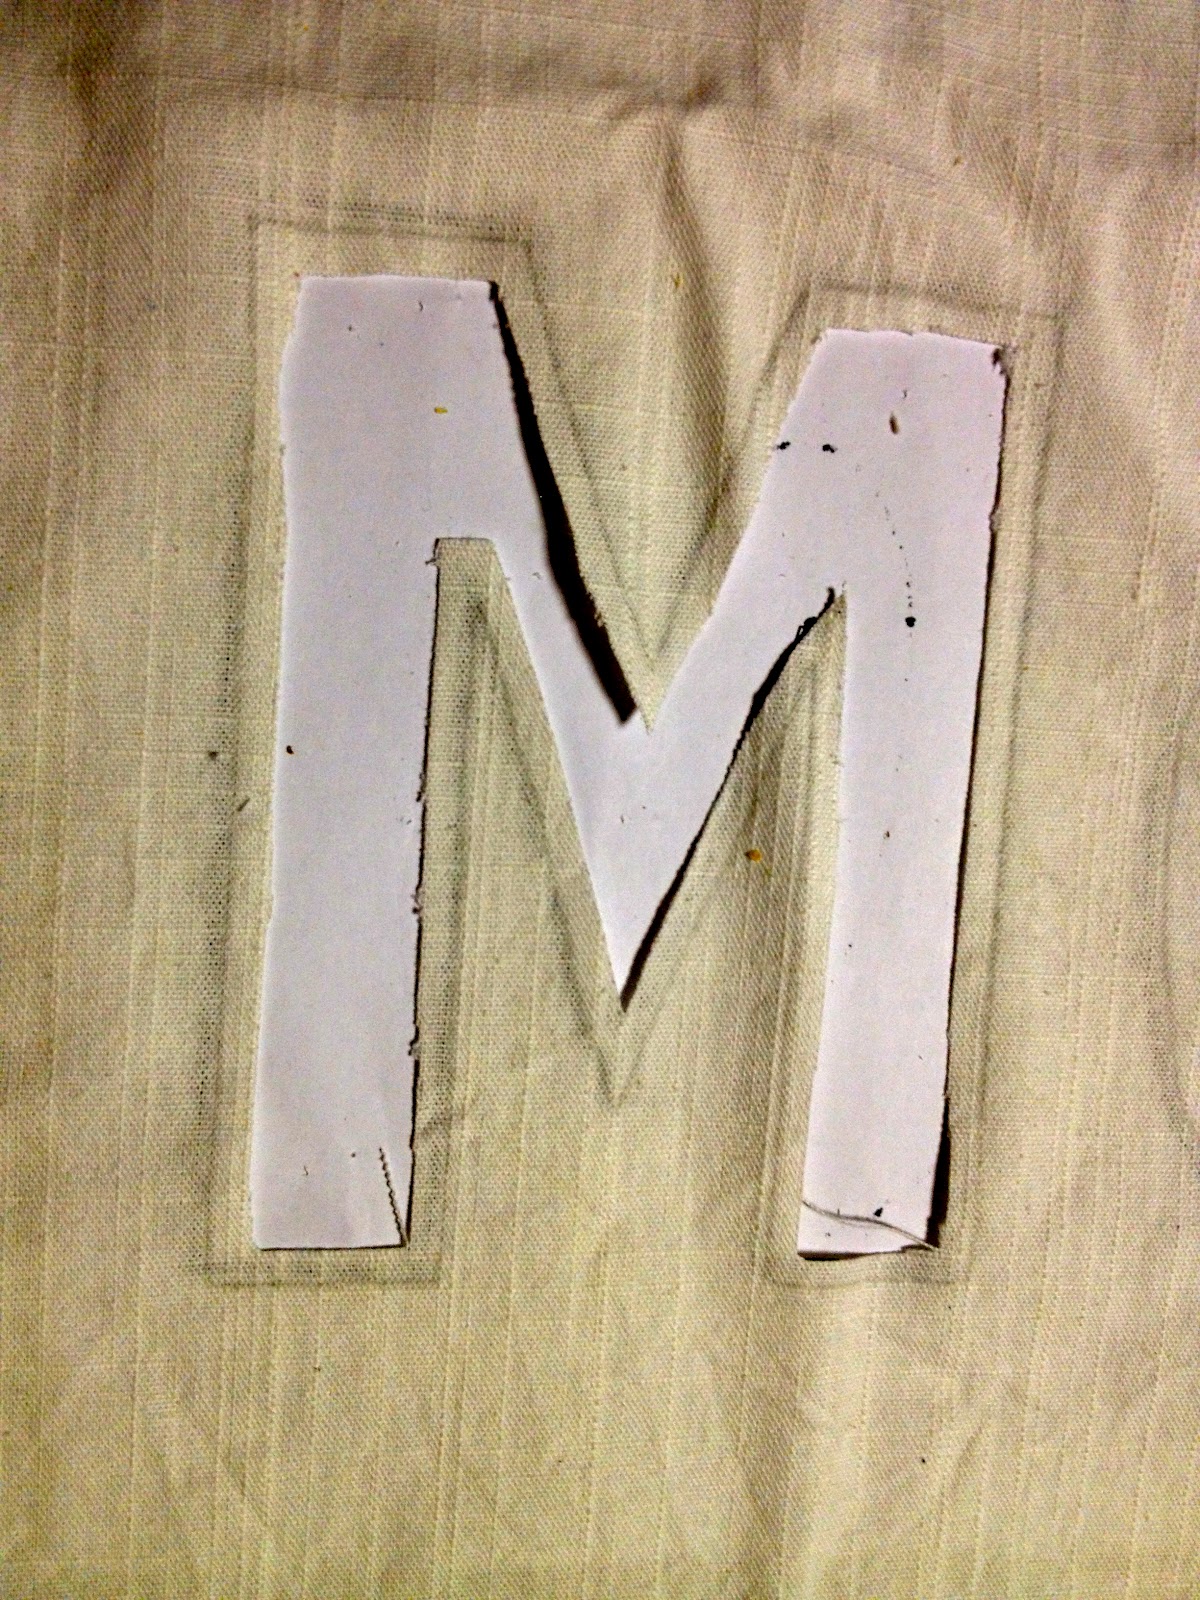
3. Place pillow fabric on top of letters and trace outline with pencil:

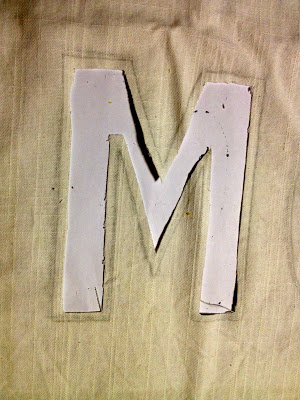
4. Cut out inner portion of letter about 1/4″ inside pencil tracing:
**Work one letter at a time.

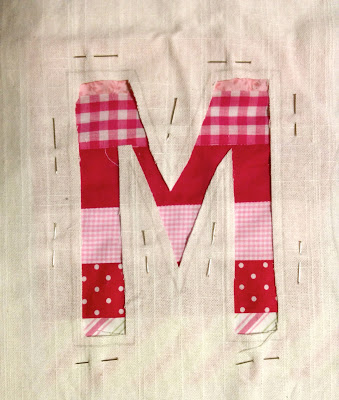
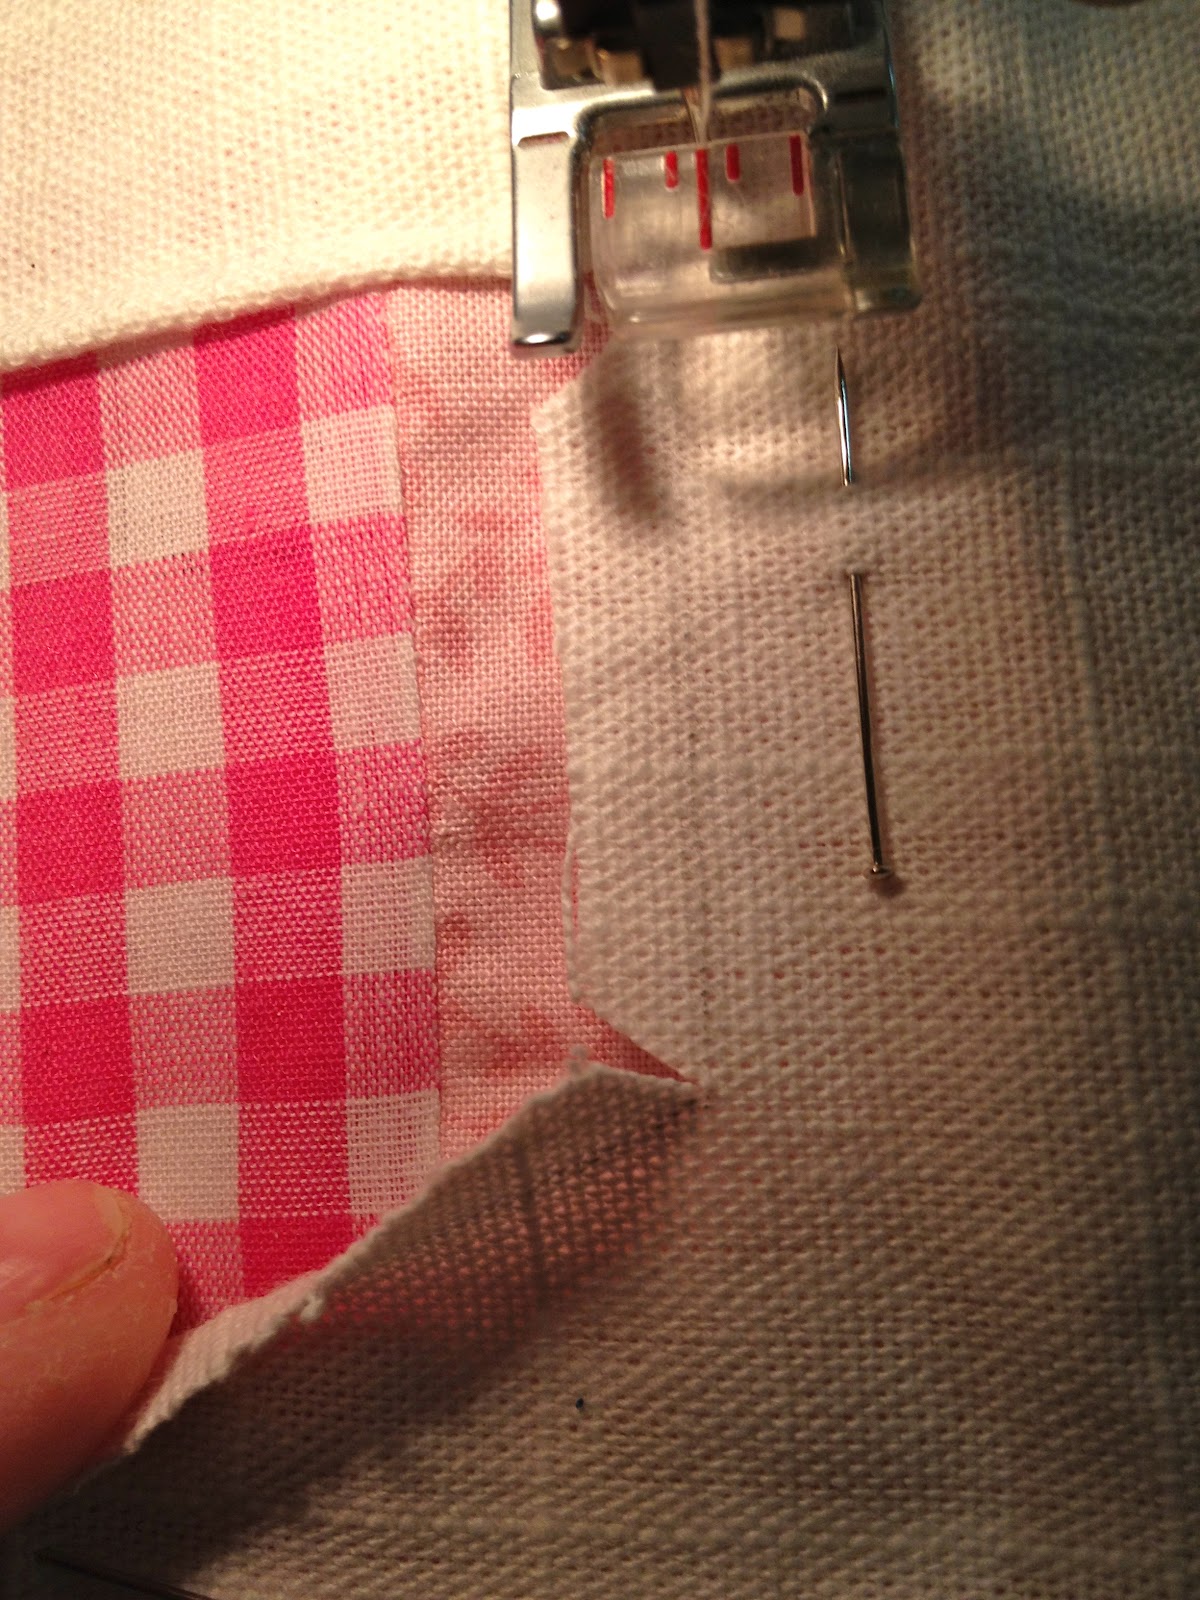
5. Pin pink stripe piece behind cut out letter:

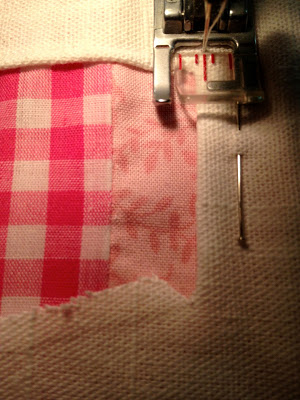
6. Top stitch around letter, folding under 1/4″ raw edge up to pencil line:
* Be sure to clip corners for ease.

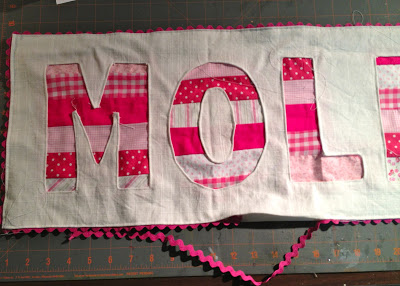
7. All letters sewn in place.
Cut backing same size as front piece:

8. Press in edge of pillow front and back at 1/2″.
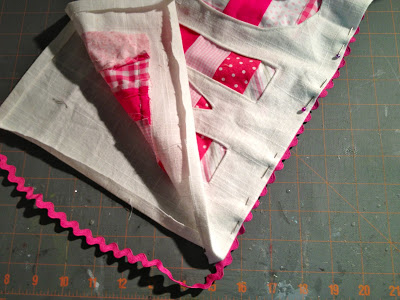
Pin ric rac trim in between pillow front and back:

9. Top stitch ric rac in place (this also closes up edge seams), leave 4″ gap open at bottom for filling:

10. Stuffing with polyfil, top stitch opening shut:
I’m linking up to:


Whatcha Got Weekend @ Lolly Jane
SAS @ Funky Junk
Weekend Wrap Up @ Tatertots & Jello
Sundae Scoop @ I Heart Naptime
Sister Sunday @ Sisters of the Wild West
Sunday Showcase Party @ Under the Table & Dreaming
Just Something I Whipped Up @ The Girl Creative
DIY Project Parade @ The DIY Showoff
Made by You Mondays @ Skip to My Lou
Making the World Cuter @ Making the World Cuter
Nifty Thrifty @ Coastal Charm
Tuesday Treasures @ My Uncommon Slice of Suburbia
Tutorials & Tips Tuesday @ Home Stories A to Z
Good Life @ A Beach Cottage
Delightfully Inspiring @ Delightful Order
Transformation Thursday @ The Shabby Creek Cottage
Strut Your Stuff @ Somewhat Simple
Share Awesomeness Thur @ The 36th Avenue
Flaunt it Friday @ Chic on a Shoestring
Tickled Pink @ 504 Main
Frugal Friday @ The Shabby Nest
SAS @ Just a Girl
Feathered Nest @ French Country Cottage
Remodelaholics Anonymous @ Remodelaholic
inspiration board @ Carolyns Homework
Textiles @ Freckled Laundry

You may also like...

  • Cross Stitch Monogram Ornament PlacecardCross Stitch Monogram Ornament Placecard
  • DIY Welcome Sign and StandDIY Welcome Sign and Stand
  • DIY Wedding Cake Ornament FavorsDIY Wedding Cake Ornament Favors
  • DIY Wood Cut Out Name PlaqueDIY Wood Cut Out Name Plaque
Share this post:

Filed Under: DIY, GIFTS, GIFTS, HOME DECOR, SEW, SEWING8 Comments

Reader Interactions

Comments

  1. Amy says

    March 23, 2012 at 12:47 PM

    What a great idea! I love that. Love the fabrics you put together as well.

    Reply
  2. Ricochet says

    March 23, 2012 at 1:39 PM

    Excellent! I love that ric-rac detail! We'll link to this post for the voting portion of the Typography Challenge. 🙂

    Reply
  3. Alisha @ Crafty Brooklyn Army Wife says

    March 27, 2012 at 9:25 PM

    These came out great!! I love the fabric. Stopping by from Remodelaholic's linky party.

    Here is what I shared this week: http://craftybrooklynarmywife.blogspot.ca/2012/03/vinyl-amp-cover.html

    Reply
  4. SimplyMe says

    March 28, 2012 at 7:40 AM

    Beautiful work. Easy tutorial too. Thanks. Thinking of trying this.

    Reply
  5. Southern Sassie Girls says

    March 28, 2012 at 1:05 PM

    Found you through Knock off Decor, so glad I did. Love the pillow.

    Cindy Sue

    Reply
  6. michele says

    April 1, 2012 at 5:35 PM

    have to try this!

    hope you'll visit soon–a great giveaway hapenning:

    http://hellolovelyinc.blogspot.com/2012/04/april-giveaway.html

    smiles.

    michele

    Reply
  7. Kei says

    April 4, 2012 at 10:05 PM

    That is such an awesome idea! It looks lovely 😀

    Reply
  8. Lisa Ross says

    July 31, 2014 at 2:58 AM

    How did you happen to connect the inside of the O, since you cut it.

    Reply

Leave a Reply Cancel reply

Your email address will not be published. Required fields are marked *

Primary Sidebar

Hi! I’m Jaime

Jaime Costiglio

Hello!

Thank you for stopping by.
Join me for lots of DIY.

Read more

Get new posts via email

Handbuilt Holiday: Gift Project Plans

handbuilt holiday gift project plans

Collection of DIY gift project plans to build.

The Home Depot Tool Prospective

THD Prospective

Tools to consider for the DIYer.

Archives

The Home Depot Logo
Copyright © 2026 Jaime Costiglio · Custom site by Moonsteam Design

Privacy Policy