Welcome your guests and designate your event space with a simple DIY welcome sign and stand. Make this wooden sign and stand well ahead of your special day and your guests will surely appreciate the special touch.
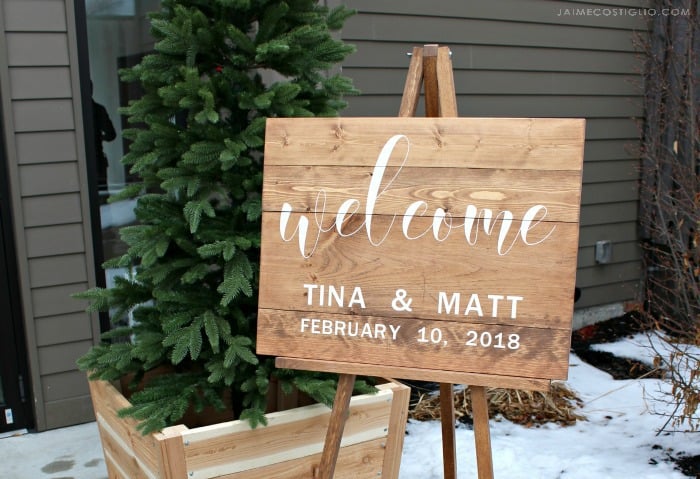
Adding a wood welcome sign and stand to your party decor transforms a space from bland and boring to warm and welcoming.

My friends Tina and Matt selected a reception venue space with a beautiful, industrious interior but the exterior was rather cold and corporate looking. We easily remedied that cool entrance space with large DIY cedar planters and trees plus the addition of a personalized welcome sign. All that natural wood brings life to an otherwise cold exterior.
Below is a quick video tutorial for the welcome sign and stand and the complete plans and step by step instructions are here.
Welcome Sign
Start with the sign board, dig through your wood scrap bin to find a few boards that will work.

I prefer to paint the lettering first using a gloss acrylic paint. The stain will not stick to the gloss paint allowing it to pop through once the stain is applied.
Portable Sign Stand
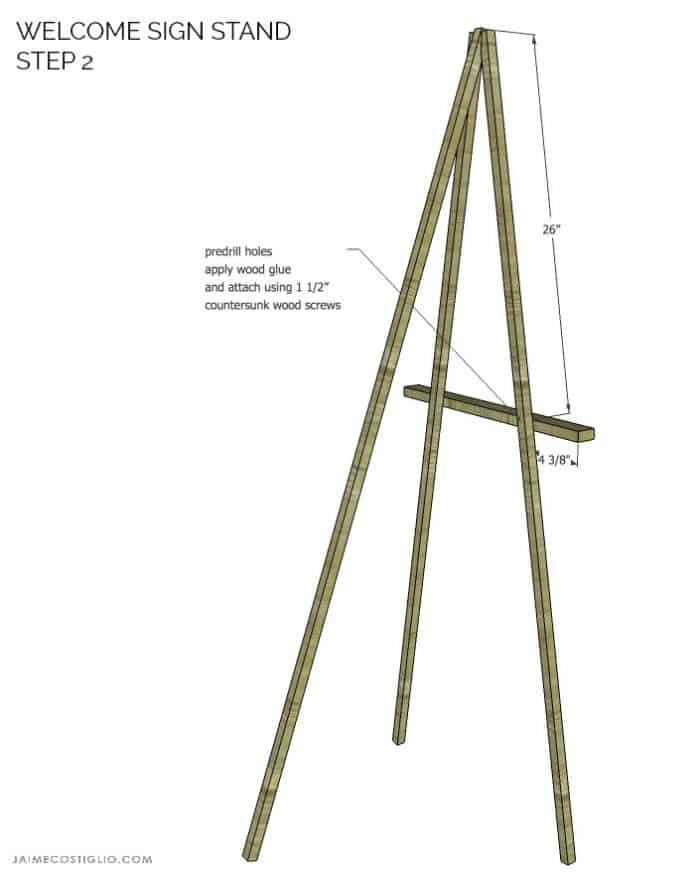
Build the stand as per the plans and then attach the horizontal sign support piece from the back. Once the sign is in position on the stand you could add flowers or greenery to make it even more beautiful. And you’ve also created a keepsake for the couple to hang in their future home!
Thanks for joining me for this welcome sign and stand project. Please leave any questions in the comments below and be sure to follow me on social media for sneak peeks, tools and project inspiration:


Do you offer instructions for all your beautiful projects?
The plans are not available on ryobi. Ive tried over and over. Any suggestions?
Hi Becky, thanks for letting me know. The plans are now available here: https://www.sprucdmarket.com/plans/welcome-sign-stand/