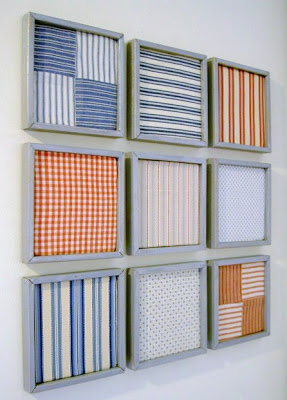
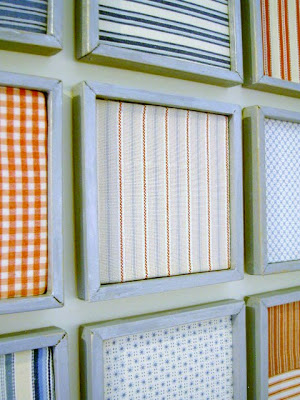
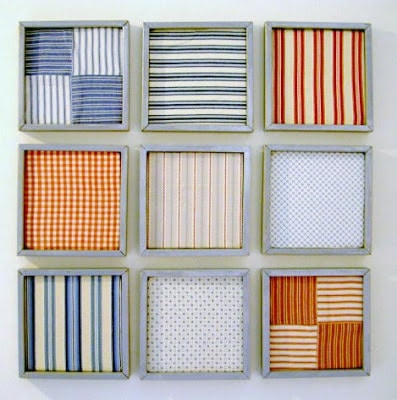
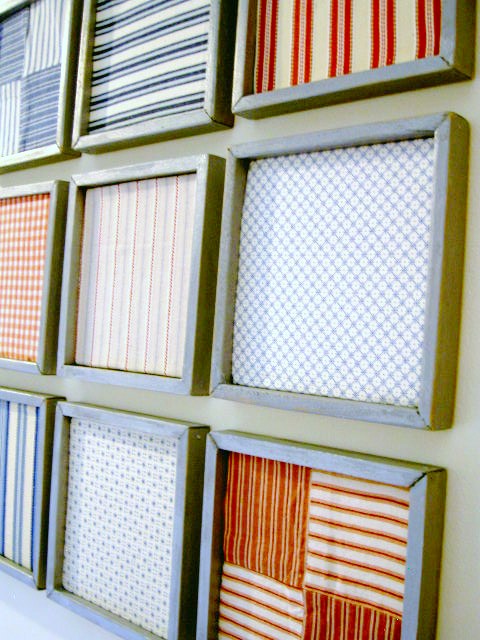
Patchwork wall art.

A knock off of Ballard Design’s Patchwork Prints:

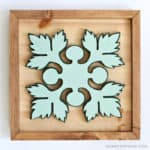
image from Ballard Designs
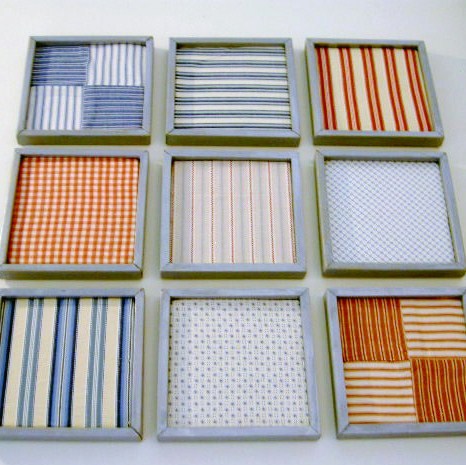
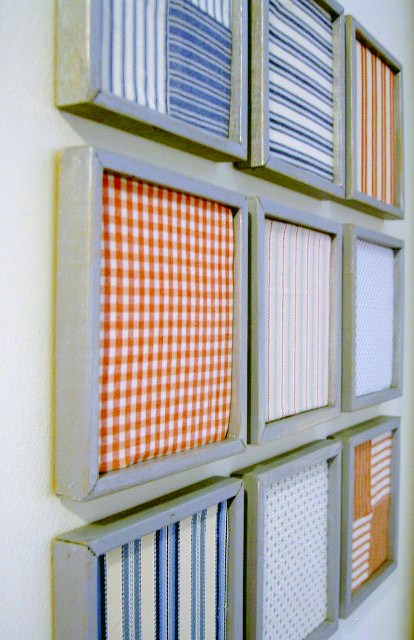
My prints are actually pieces of fabric, the squares measure 6 1/2″ each.
Here’s how I made them:
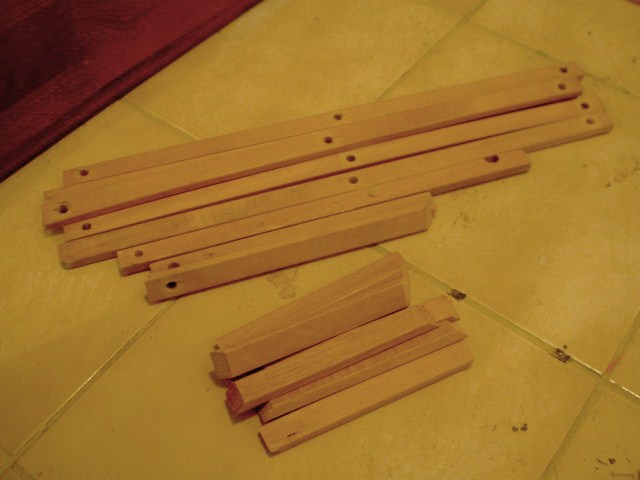
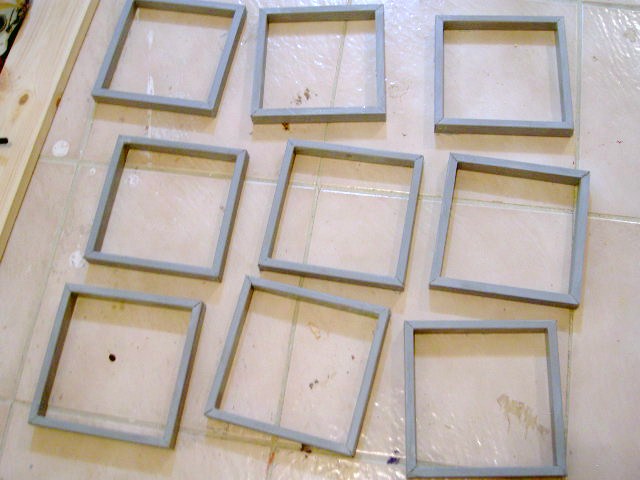
1. My drying rack recently broke so I used the side wood pieces:


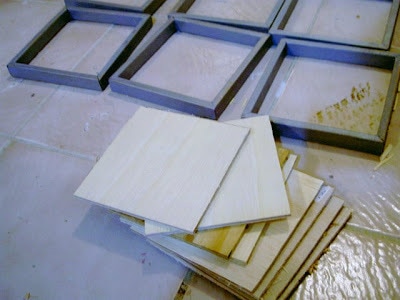


2. Disassemble the rack and cut 6 1/2″ pieces with mitered corners:
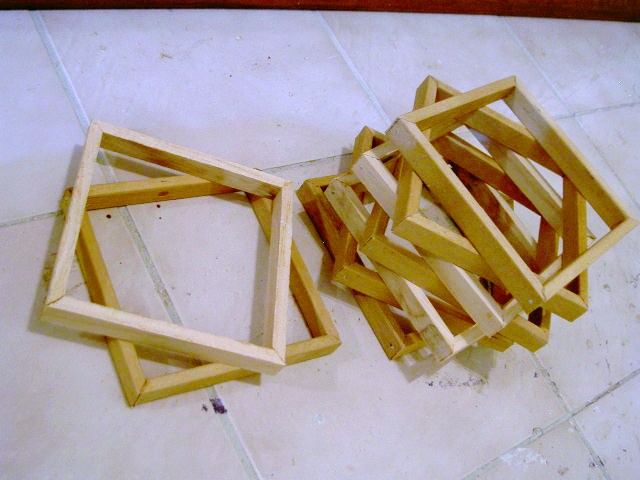
3. Assemble frames using wood glue and nails. (I did buy one 5′ piece of moulding in order to make 9 frames.)
4. Paint frames grey.
5. Sand rough edges and excess glue, dry brush paint with silver metallic.
6. Cut 9 pieces of 1/4″ plywood (mine are 5 3/4″ x 5 3/4″ to fit snug inside the frame).
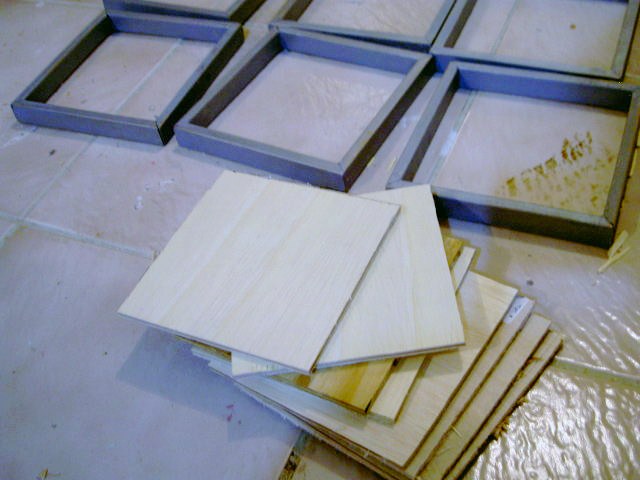
7. Apply spray adhesive to plywood and attach fabric. Snug plywood into frame leaving about 1/4″ depth of frame in front and hot glue inside corners from back side.

I’ll save the $169 plus shipping and make my own patchwork prints!

And I won’t feel so bad when I want to change them out for something new.


Ok those are just TOO CUTE – love it!!!
I was thinking of doing something like this, but didn't want to buy that many frames. Kuddos for making your own. Looks great and love your fabric choices.
This turned out awesome! Very creative thinking by using the drying rack. 😉
Awesome, creative use of the rack, they turned out wonderfully!
Wow, what a neat idea! You are so creative!!!
good job! I looove Ballards, but never the prices, lol
They look super great! I use to live near a Ballard's Clearance Center and the prices were STILL too darn up there!!! Who needs 'em…..lol
You're so creative, mine broke and to the trash went.. I could've done this.
This is SO cute!! I might have to make some for MY place!! 😉
That is one very pretty patchwork! Great idea to reuse the drying rack too.
Well, how cute is that. You are so creative and good. Thanks so much for sharing this at the party this week!
Love love love your knock off!!!
what an awesome idea reusing those wood slats for frame pieces! And I like your assortment of fabric too, visually interesting mix. Great job!
I was still in awe of the cute patchwork art when I read that you made the frames! That blew me away! wow… amazing. I love it!
They are absolutely fantastic!! And the fact that you recycled a drying rack makes is just that much better! 🙂
It's posts like this that make me into a pack rat–instead of pitching stuff, I'm telling myself "I'm sure I could find a use for this…".
Love your wall art!
So smart to re-use your rack! It looks amazing! 🙂
I love this! What a great idea and it's such a unique piece of wall art!
Wow, these look fantastic! What an ingenius use for your broken drying rack, too!
Wow. I can't believe you used a broken drying rack to make the frames. Brilliant! I like your colors much better than the Ballard version. This is fantastic!
So great! Yours looks better than Ballard!
Kelly
How adorable! I have fabric squares on my living room wall, but they aren't framed like yours. I just may have to do something about that. 🙂
So simple but so pretty! I love the prints you picked
Great idea! Love where you got the wood from!
I love those! Reminds me of an old quilt!
As a lover of anything patchwork, these are right up my alley! Love how you repurposed the drying rack, too.
Off to add this to my tumblr for future project inspiration… 🙂
Erin
Carolina Country Living
http://carolinacountryliving.blogspot.com
This is better than your inspiration! I love it.
These look amazing! You are so inspiring!!! X
I love these. Thanks for sharing.
Pam x
I love all kinds of fabric, so this is a great idea! They look great!
Those are sweet! What a fab idea!
u need to make these and sell them! i would totally buy!!! love this for my boys room! : )
These are just darling~ I love your take on the patchwork prints- so sweet! Thanks for linking this up to FNF 🙂
Love it! Creative frames!
Love, love, love how these turned out! SO GREAT! ~Jen @ http://www.icantstopcrafting.blogspot.com
These are great!! Really delightful. Thanks for sharing them. I have 2 girls and a little guy myself. 🙂 🙂
Fabulous idea! I am definitely going to have to copy it! Thanks for the inspiration!
I am so impressed, you are super resourceful! They turned out so cute! Please stop by http://www.laughloveandcraft.com and link up to my Share the Wealth Wednesday Link Party! I'm your newest follower!
These are so fun! I love that you repurposed your broken drying rack. Nice!
This is such a cute idea! Love that you used the wood from an old drying rack. I've seen this in the Ballard catalog. Great thrifty alternative!
Amazing transformation! So resourceful…I would have never thought to turn that old rack into beautiful frames. Love this!
Great idea! Nice Knockoff! I am saving this idea! Love your fabric choices. wanda
That's just so cool! I never would have thought of making frames from a clothes rack. Excellent way to reuse it! I love how colorful and cheerful they are.
It reminds me of the embroidery hoops that people have been putting fabric in – I LOVE the fabric you chose and I love that they are square!
Awesome, Jaime! Love the fabric, too.
LOVE IT!! I would never have thought to cut up one of those racks (which I totally have and am about to take a saw to). Thanks for linking up! I'm featuring you tomorrow!
I'm IN LOVE with these Jaime! I'll be featuring them tonight.
Stopping by from tt&j link up party. These are cute and my walls are bare…
So So cute, I saw those prints in the Ballard catalog and have been saving the page for my own project! Yours turned out so great!!
Those are so cute! I love that you used your broken drying rack too:)
Love those. They are even better that the Ballard ones. Perfect summer colors and I love how you were able to reuse the drying rack and didn't just toss it in the trash.
I've put together a round up of great wall art ieas on Craft Gossip today and included your post. 🙂 You can see it here
http://homeandgarden.craftgossip.com/25-awesome-wall-art-ideas/
If you would like a Craft Gossip badge showing you've been featured, you can grab one here 🙂
http://homeandgarden.craftgossip.com/grab-a-craft-gossip-button/
These are AMAZING! I had seen this on Ballard and hoped there would be some more affordable versions in crafty blogworld soon, but I can't even believe you made those frames from a broken drying rack – that's awesome! I'm your newest follower and can't wait to look around! : )
What a great idea!!
What a great idea!!