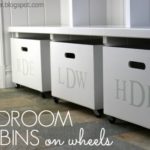
• Home
  • Blog
  • About
  • Contact
    • Disclosure
    • Privacy Policy
  • SHOP
  • Widget area for main menu

    • Email
    • Facebook
    • Instagram
    • Pinterest
    • Twitter
    • YouTube
  • Skip to primary navigation
  • Skip to main content
  • Skip to primary sidebar

Jaime Costiglio

build - paint - sew

  • BUILD
    • BEDS
    • BENCHES
    • DESKS
    • DRESSERS
    • GAMES & TOYS
    • SCRAP WOOD
    • SHELVES
    • STORAGE
    • TABLES
  • TOOLS
  • PAINT
    • CRAFTS
    • FURNITURE
    • HOME DECOR
  • SEW
    • GIFTS
    • HOME DECOR
    • POUCHES
  • HANDBUILT HOLIDAY
    • 2021
    • 2019
    • 2018
    • 2017
    • 2016
    • 2015
    • 2014
    • 2013
  • GIFTS
    • BABIES
    • KIDS
    • FOR HER
    • FOR HIM
    • TEACHERS
    • WEDDINGS
  • SEASONAL
    • 4TH OF JULY
    • FALL
    • HALLOWEEN
    • CHRISTMAS
    • SUMMER
    • SPRING
    • ST. PATRICK’S DAY
    • THANKSGIVING
    • VALENTINE’S DAY
    • WINTER
  • SALTBOX PROJECT
    • BATHROOMS
    • DINING ROOM
    • EXTERIOR
    • FAMILY ROOM
    • FOYER / MUDROOM
    • KIDS BEDROOMS
    • KITCHEN
    • LIVING ROOM
    • MASTER BEDROOM
    • PLAYROOM
  • SCROLL SAW

DIY Monogrammed Mudroom Bins

June 6, 2012

Build: mudroom bins

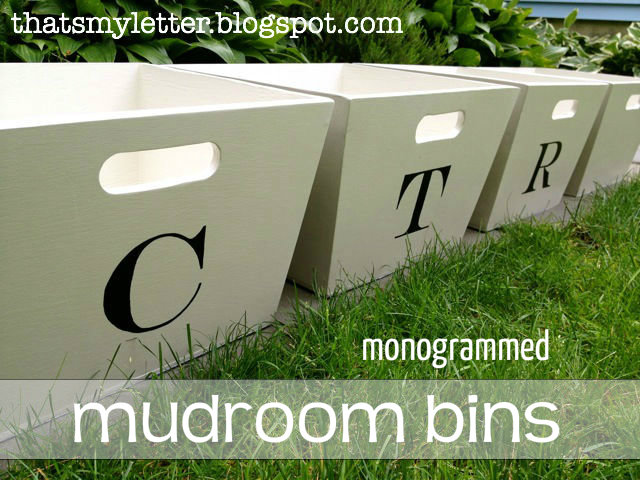
Custom size tapered wooden bins made to fit the cubby space in Tracy’s mudroom.

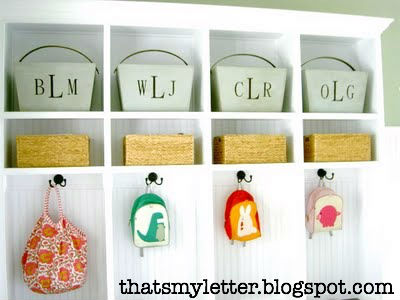
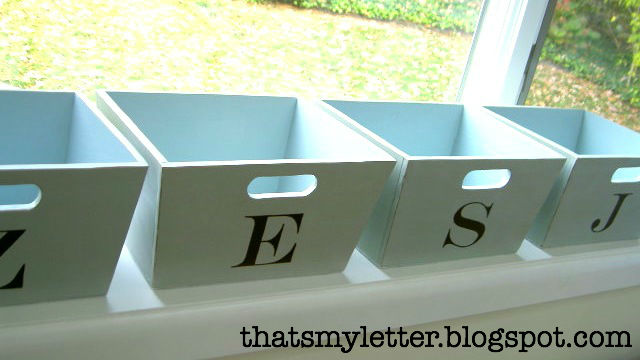
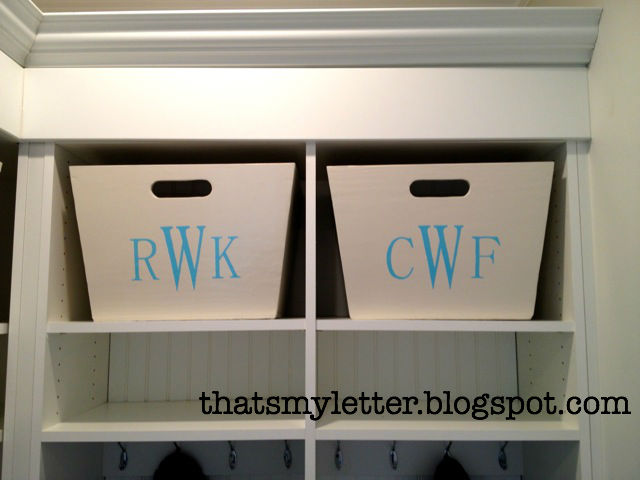
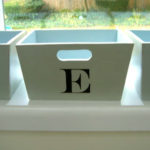
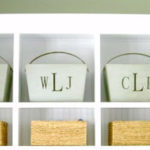
Monogrammed with a single letter, one for each child:

And a cutout handle:
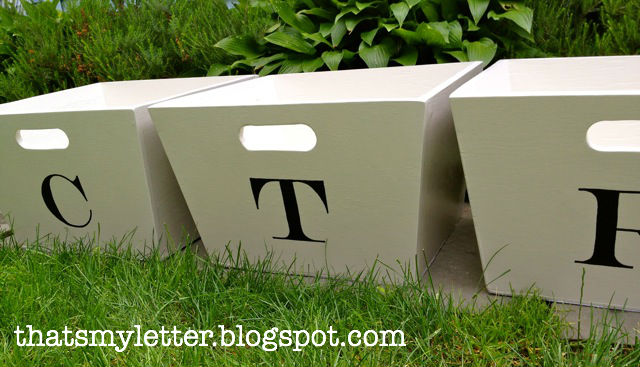
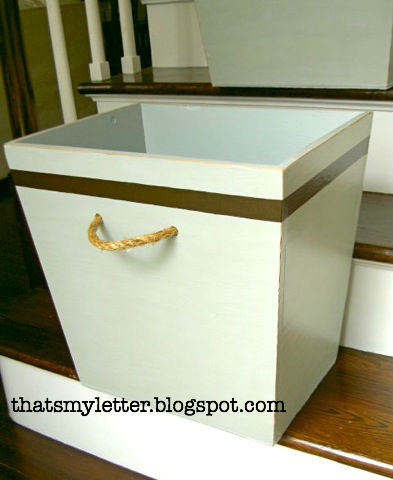
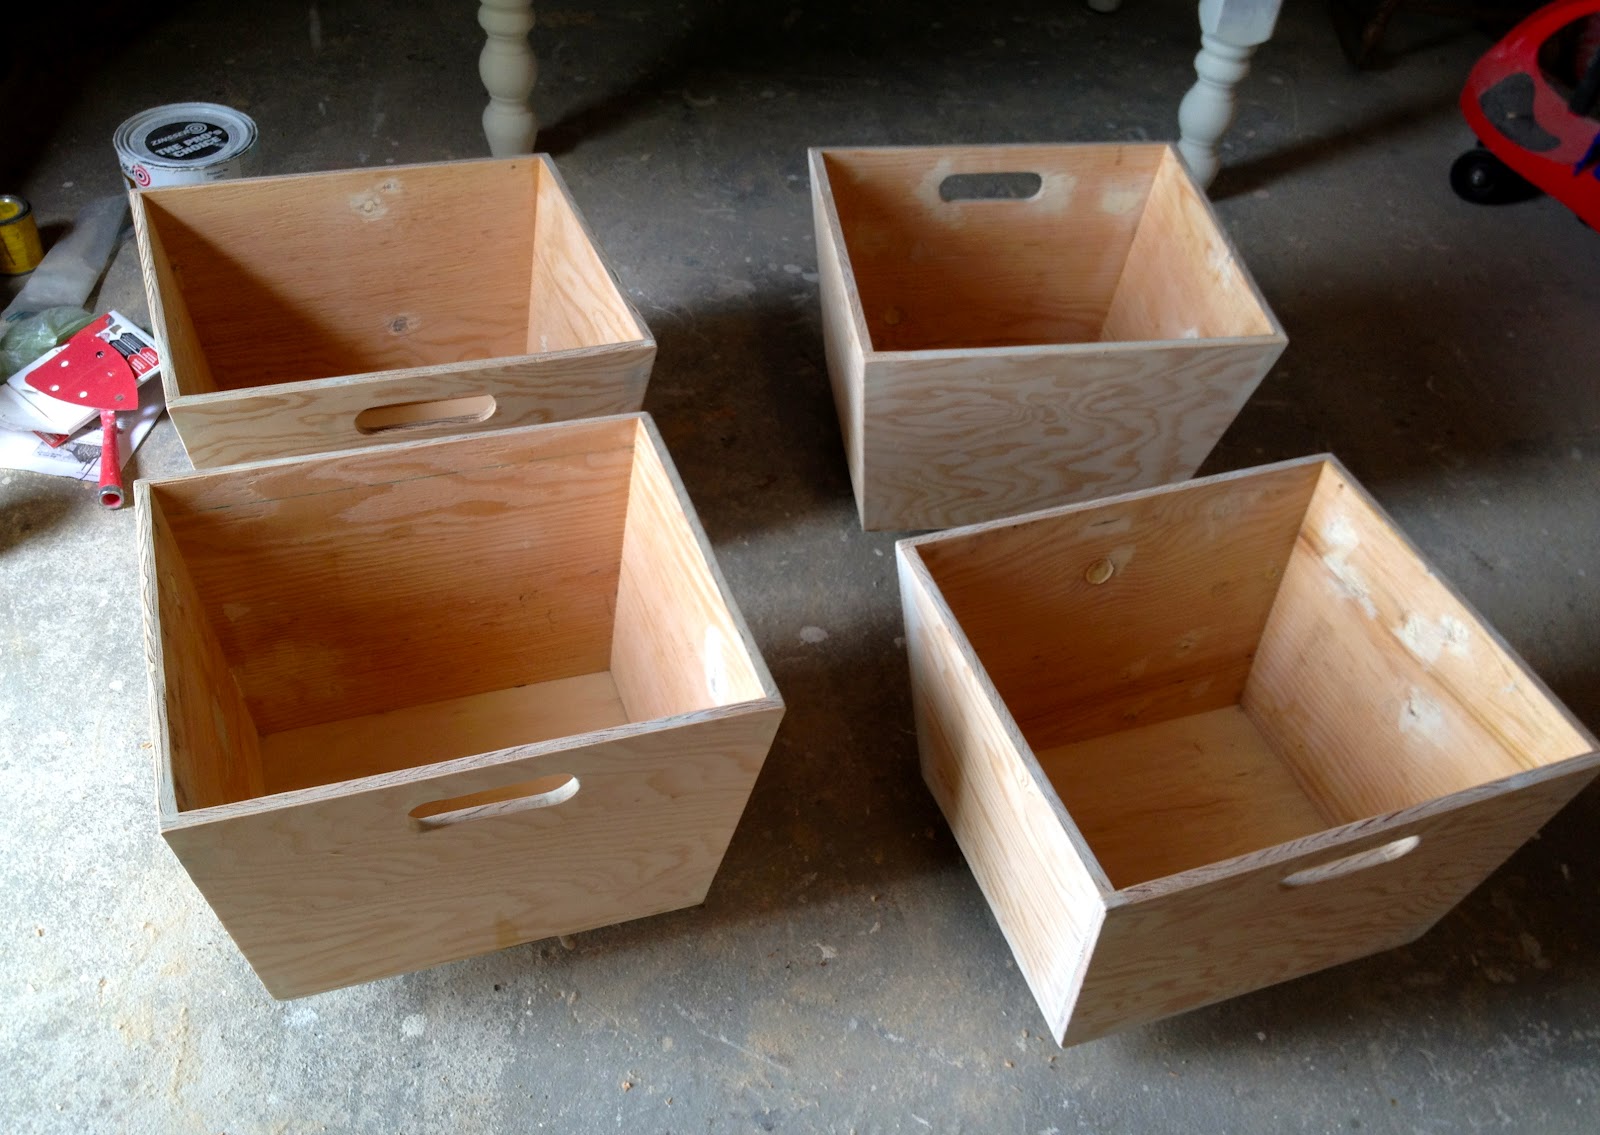
These bins measure 17″w x 15″d x 11″h, big and deep enough to hold all that cubby clutter – gloves, scarves, etc:

I’ve built lots of mudroom bins now, they are the perfect solution to fill the cubby space with a personalized, decorative, useful accessory.
#1: Full monogram with handles:

#2 Part A: Single monogram, shorter bin:
#2 Part B: Tall bin with stripe and rope handle:

#3: Full monogram in teal:

Here’s how I built the mudroom bins:

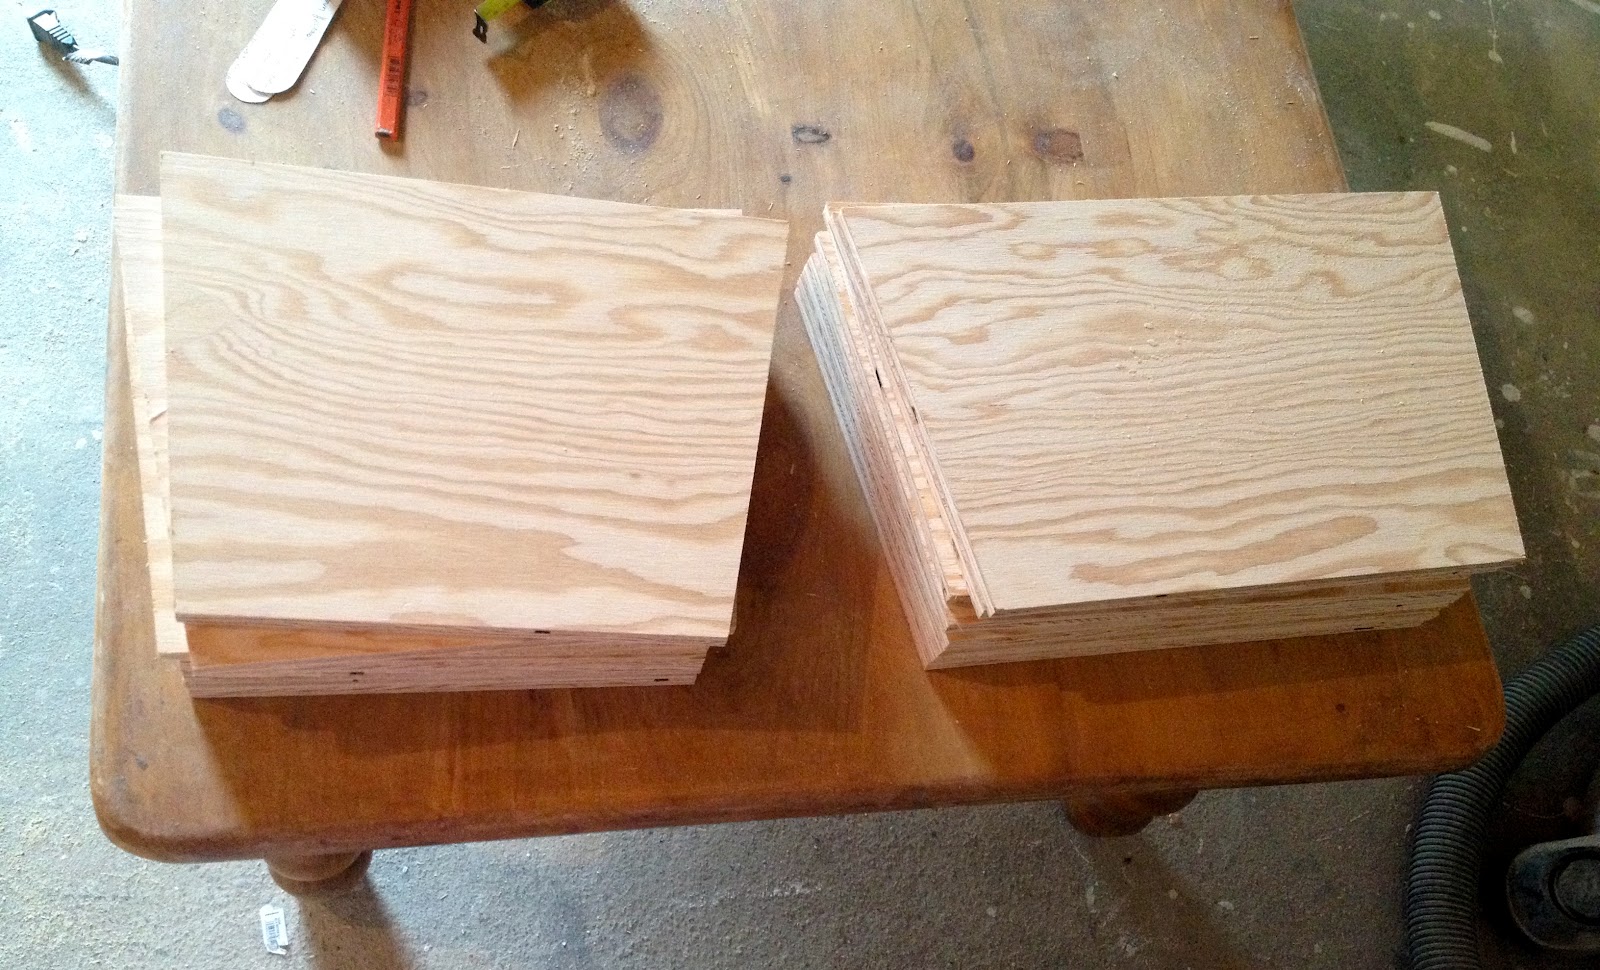
1. Cut 1/2″ plywood to size:
The sides are tapered in 1.5″ on the lower edge.
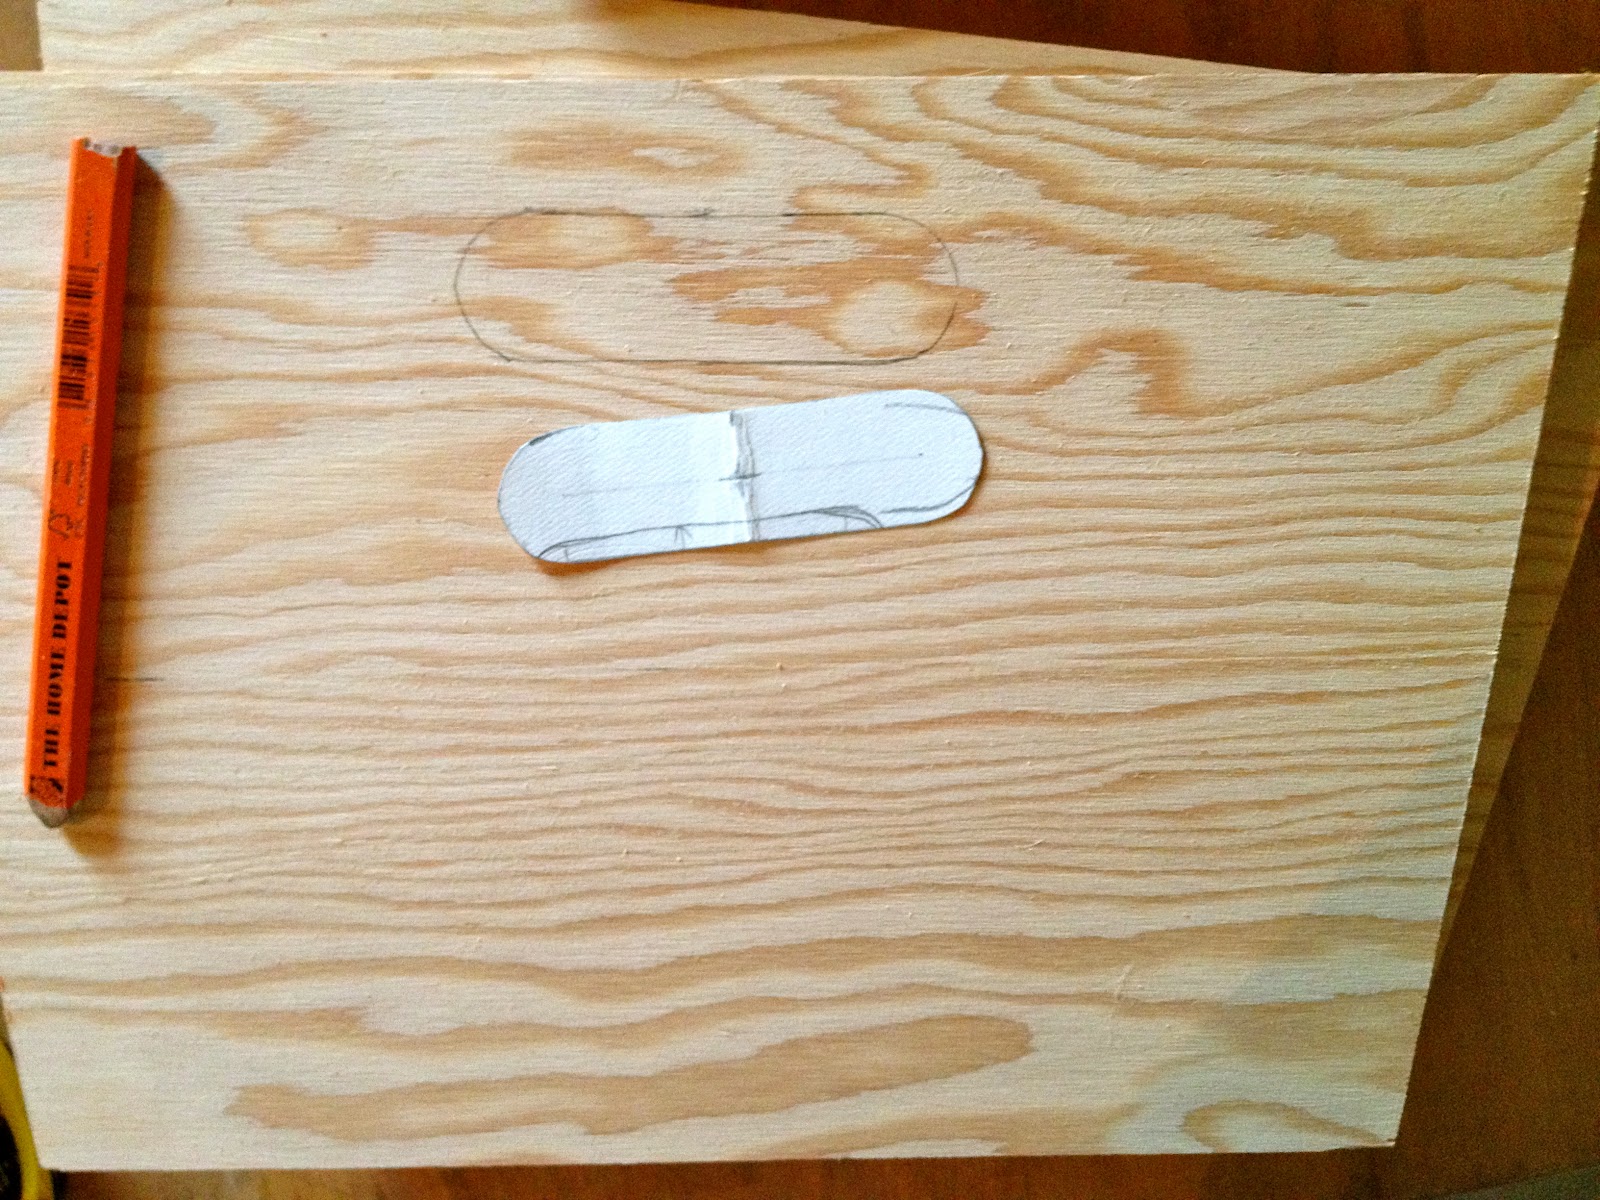
2. Mark handle cutout with template:

3. Using circular drill bit remove end portions of handle cutout:

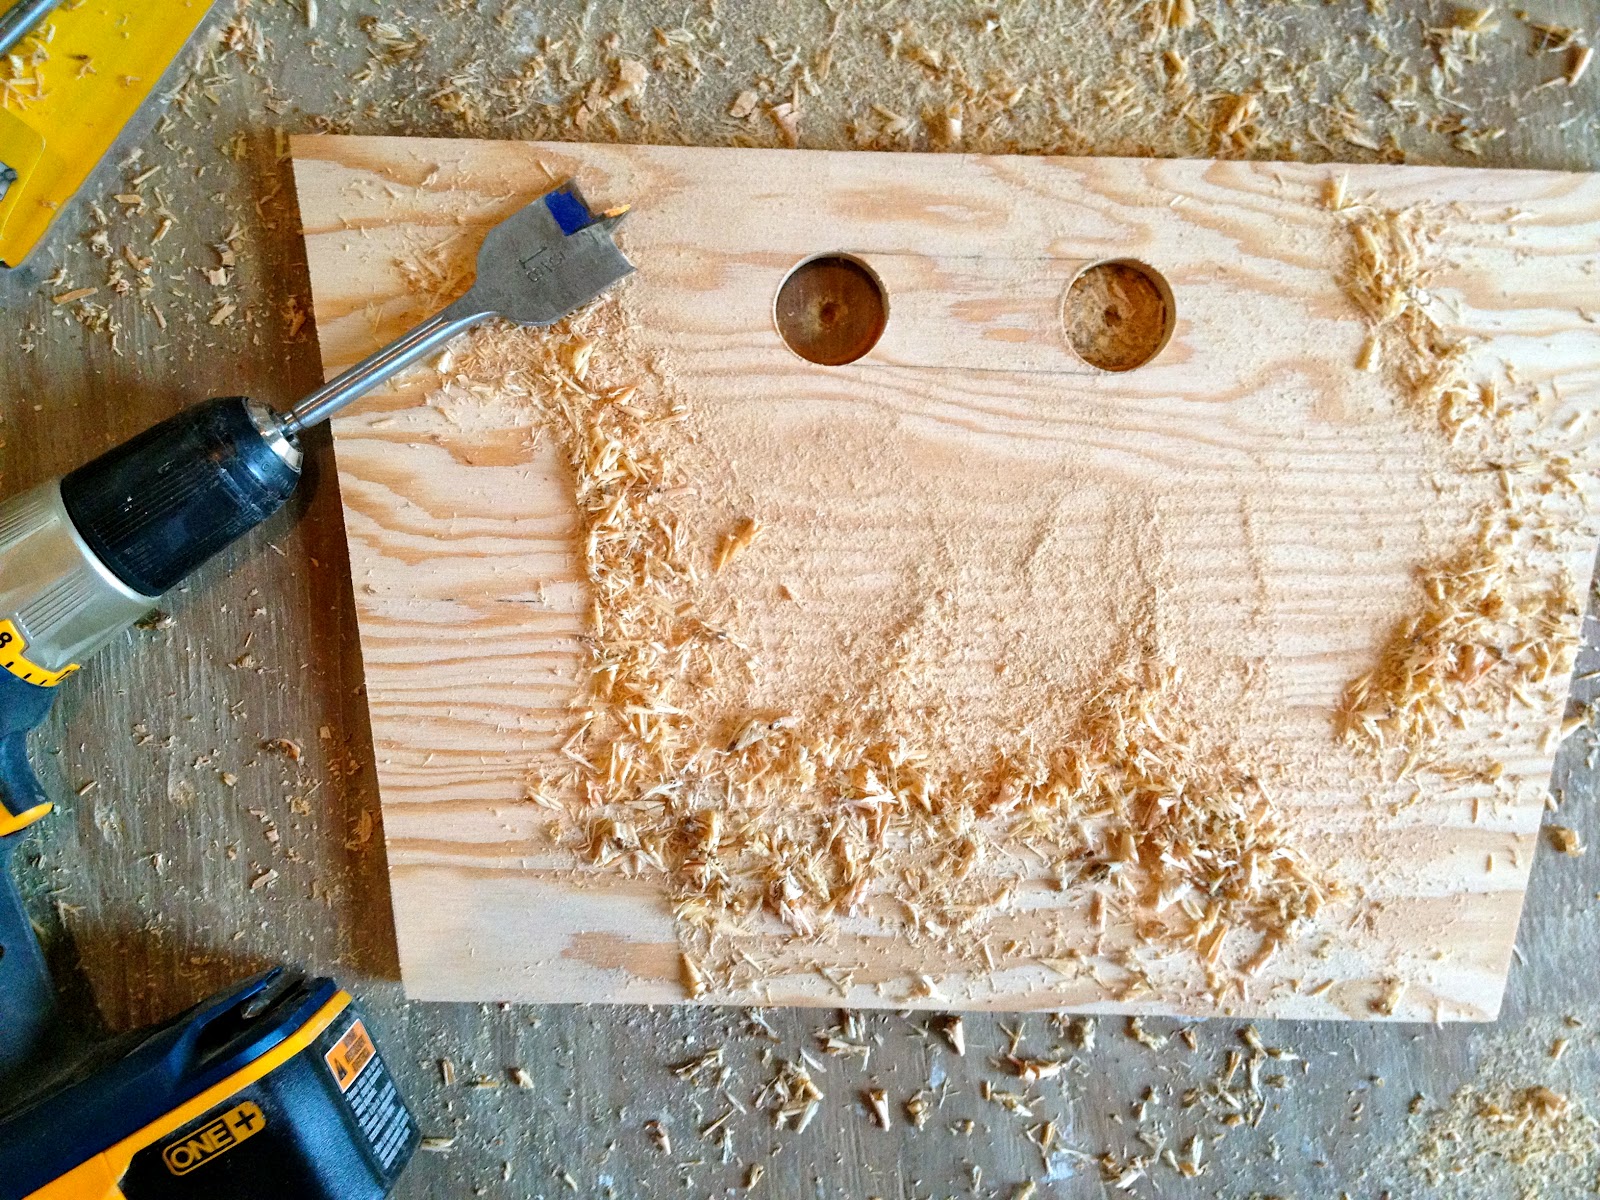
Then use a jigsaw to remove middle portion with a straight cut.
4. Construct with #6 – 1 1/2″ wood screws and glue.
Then cut bottom from 1/4″ plywood, nail and glue in place.
Putty, sand and prime.

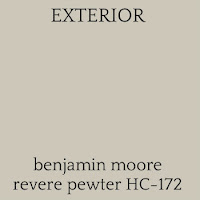
5. Paint, I used Benjamin Moore high gloss enamel:

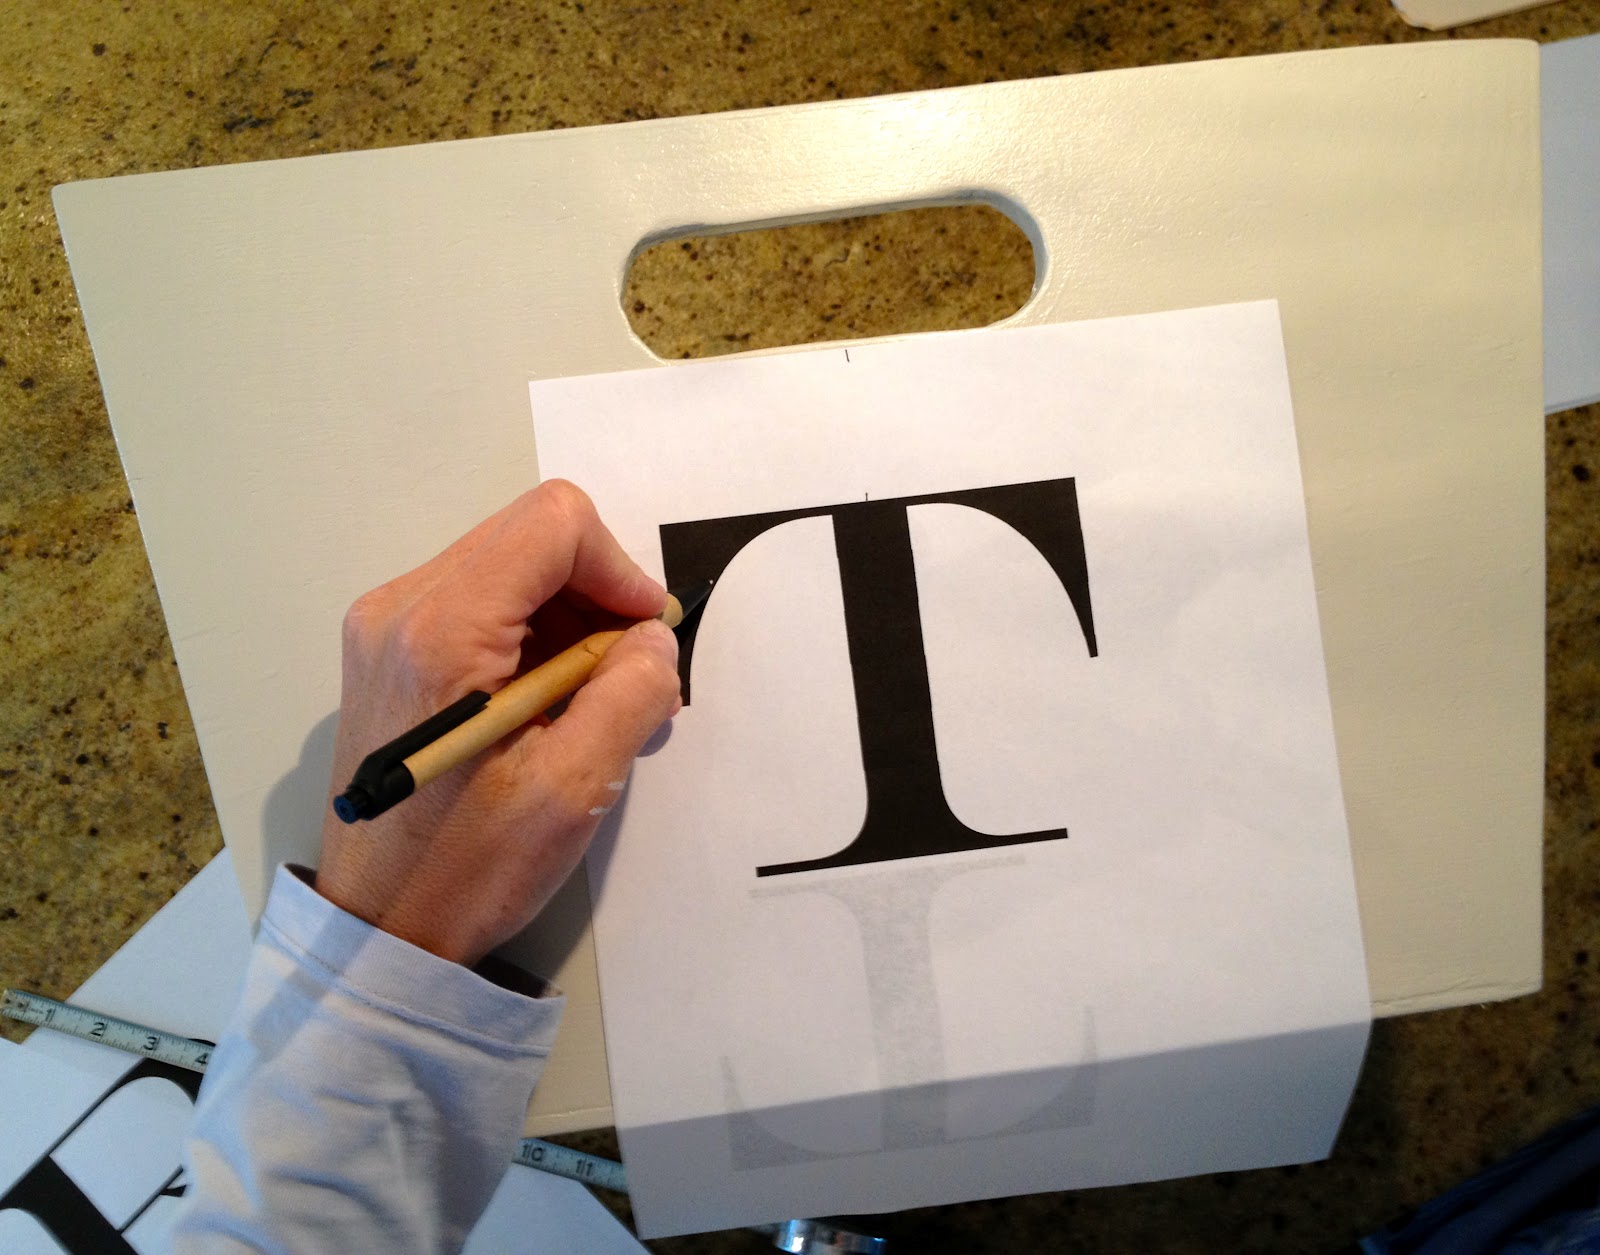
6. Print out letter, I used Engravers font 425 point.
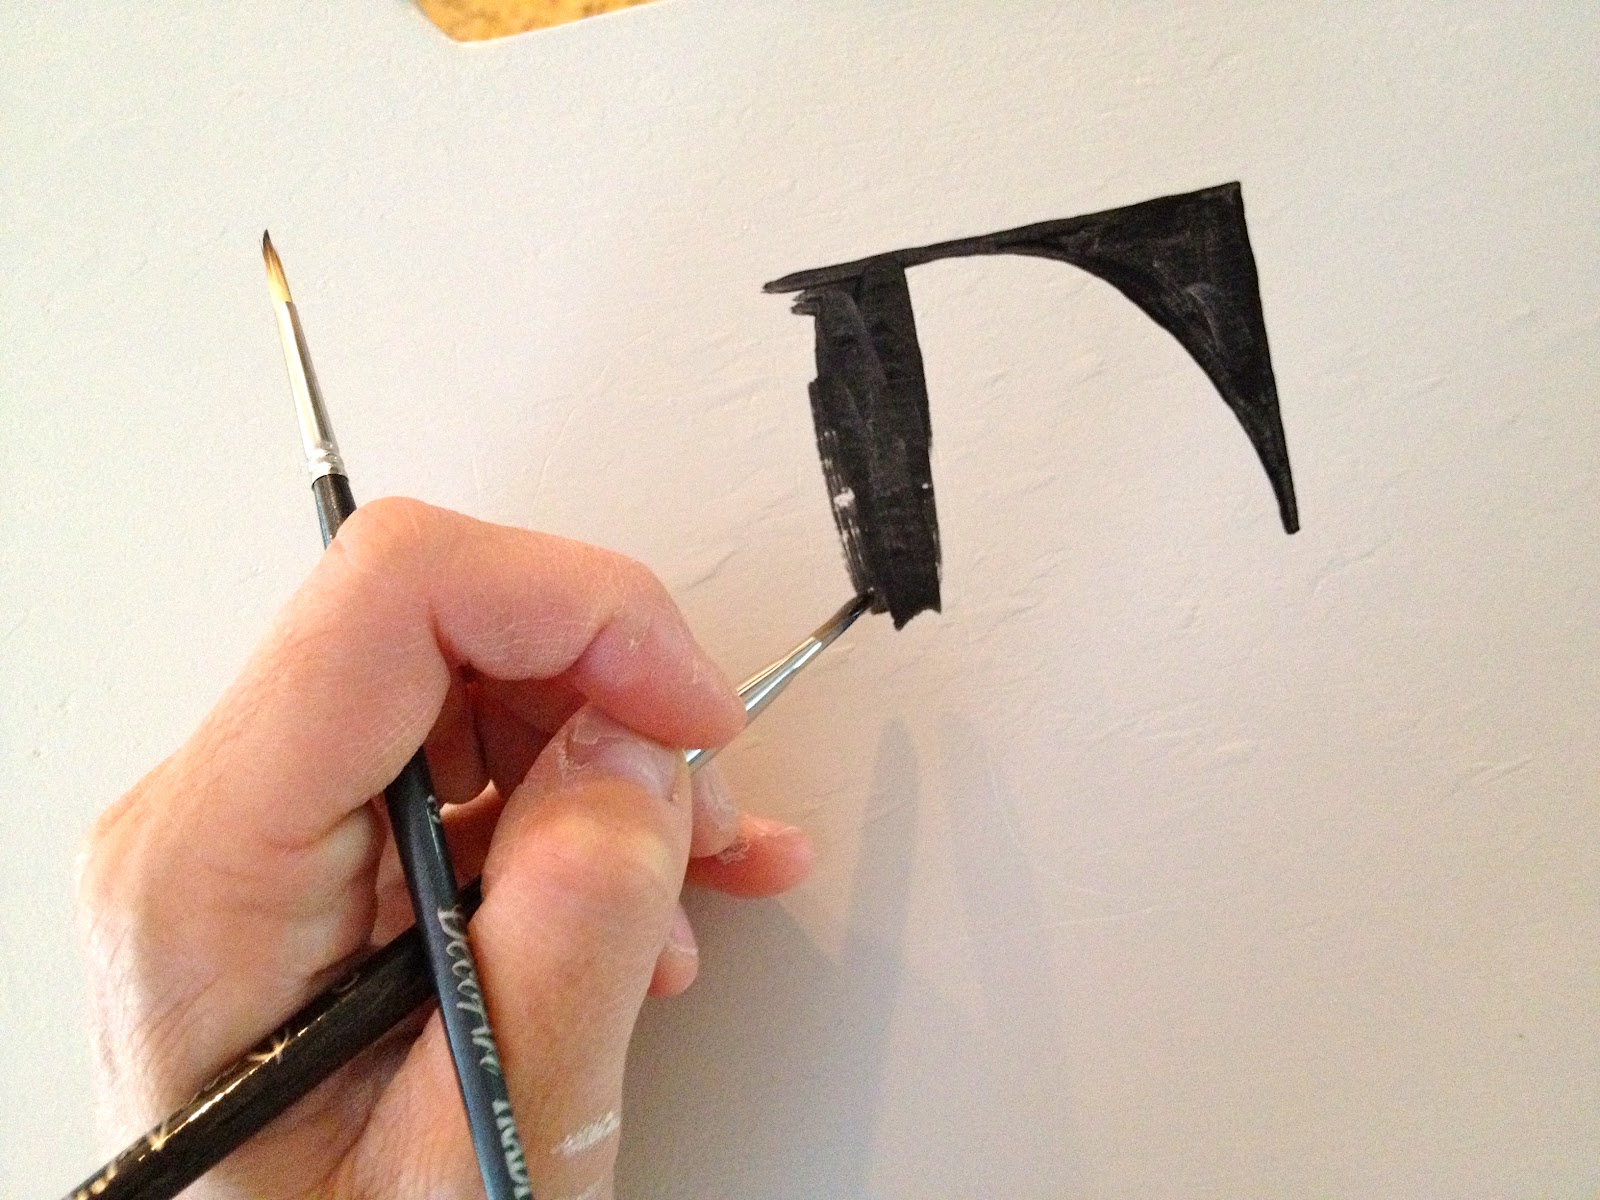
Align print out and trace letter with ballpoint pen:

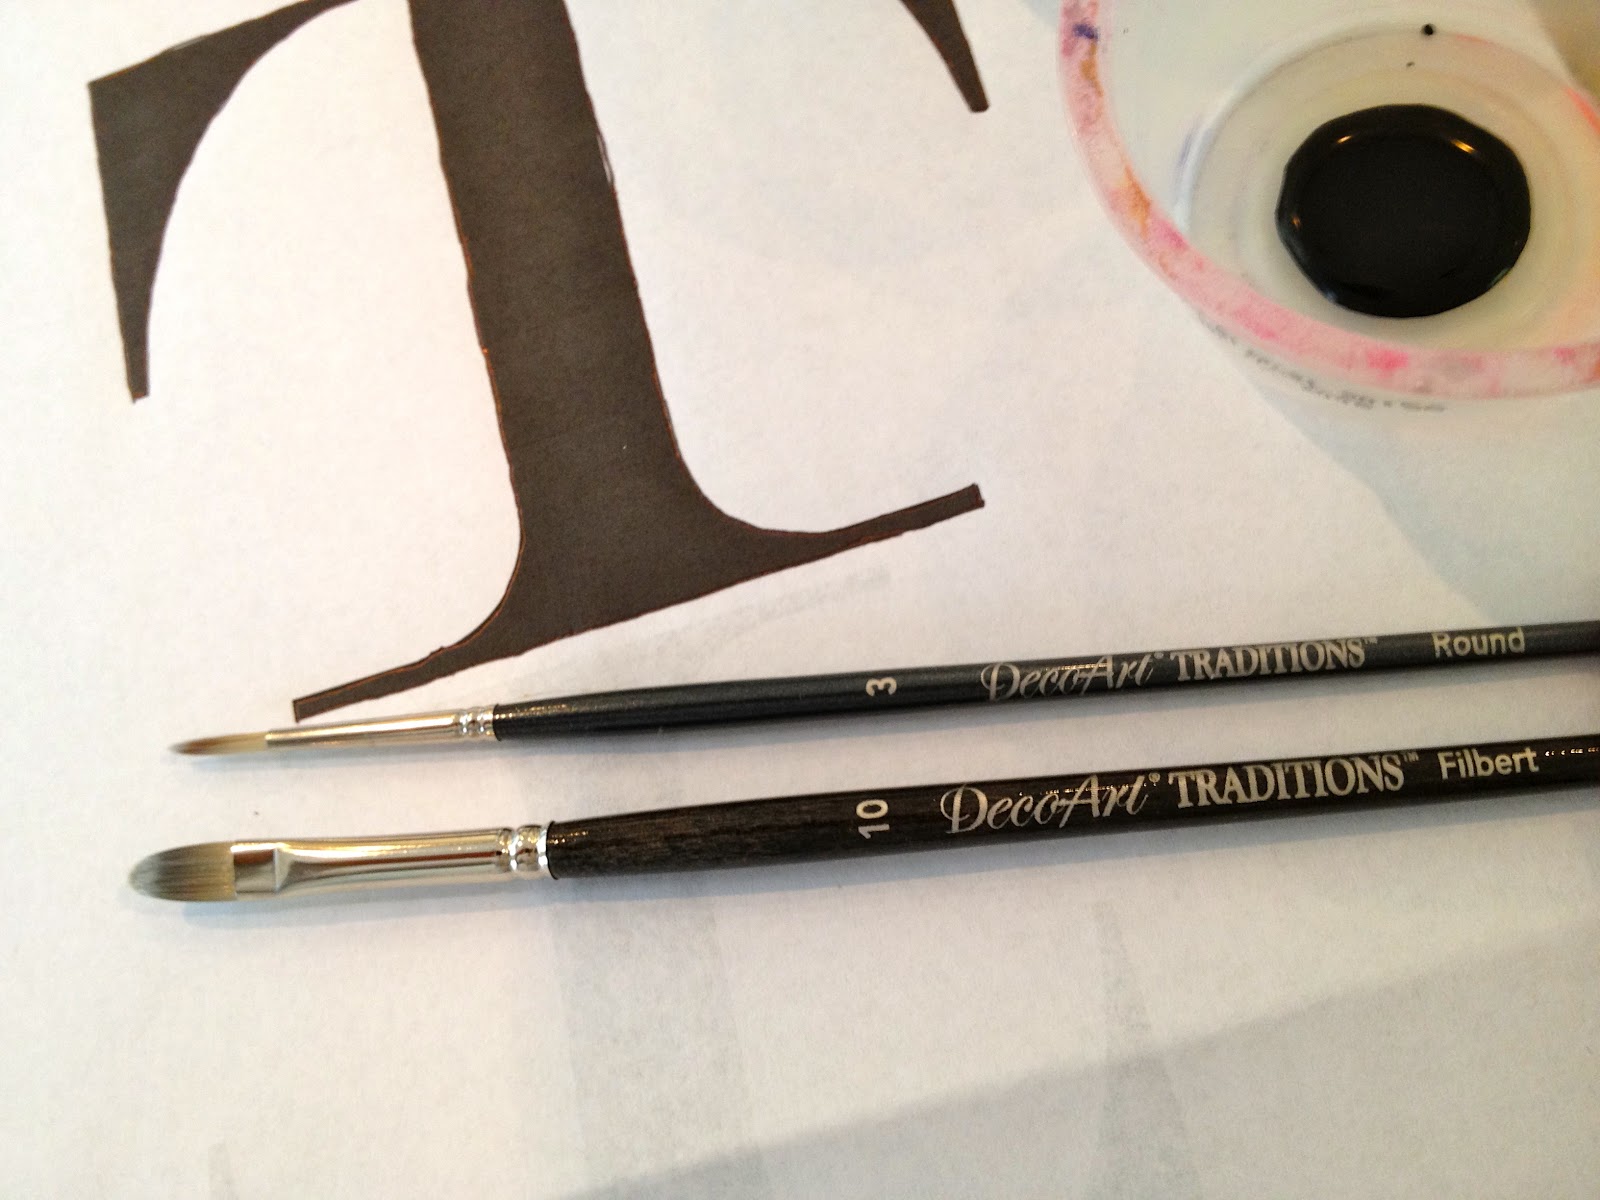
7. To paint I used DecoArt Traditions brushes, #3 round and #10 Filbert:

8. Paint on and inside the indent left by the pressure from the pen:

9. Seal with clear acrylic spray gloss.
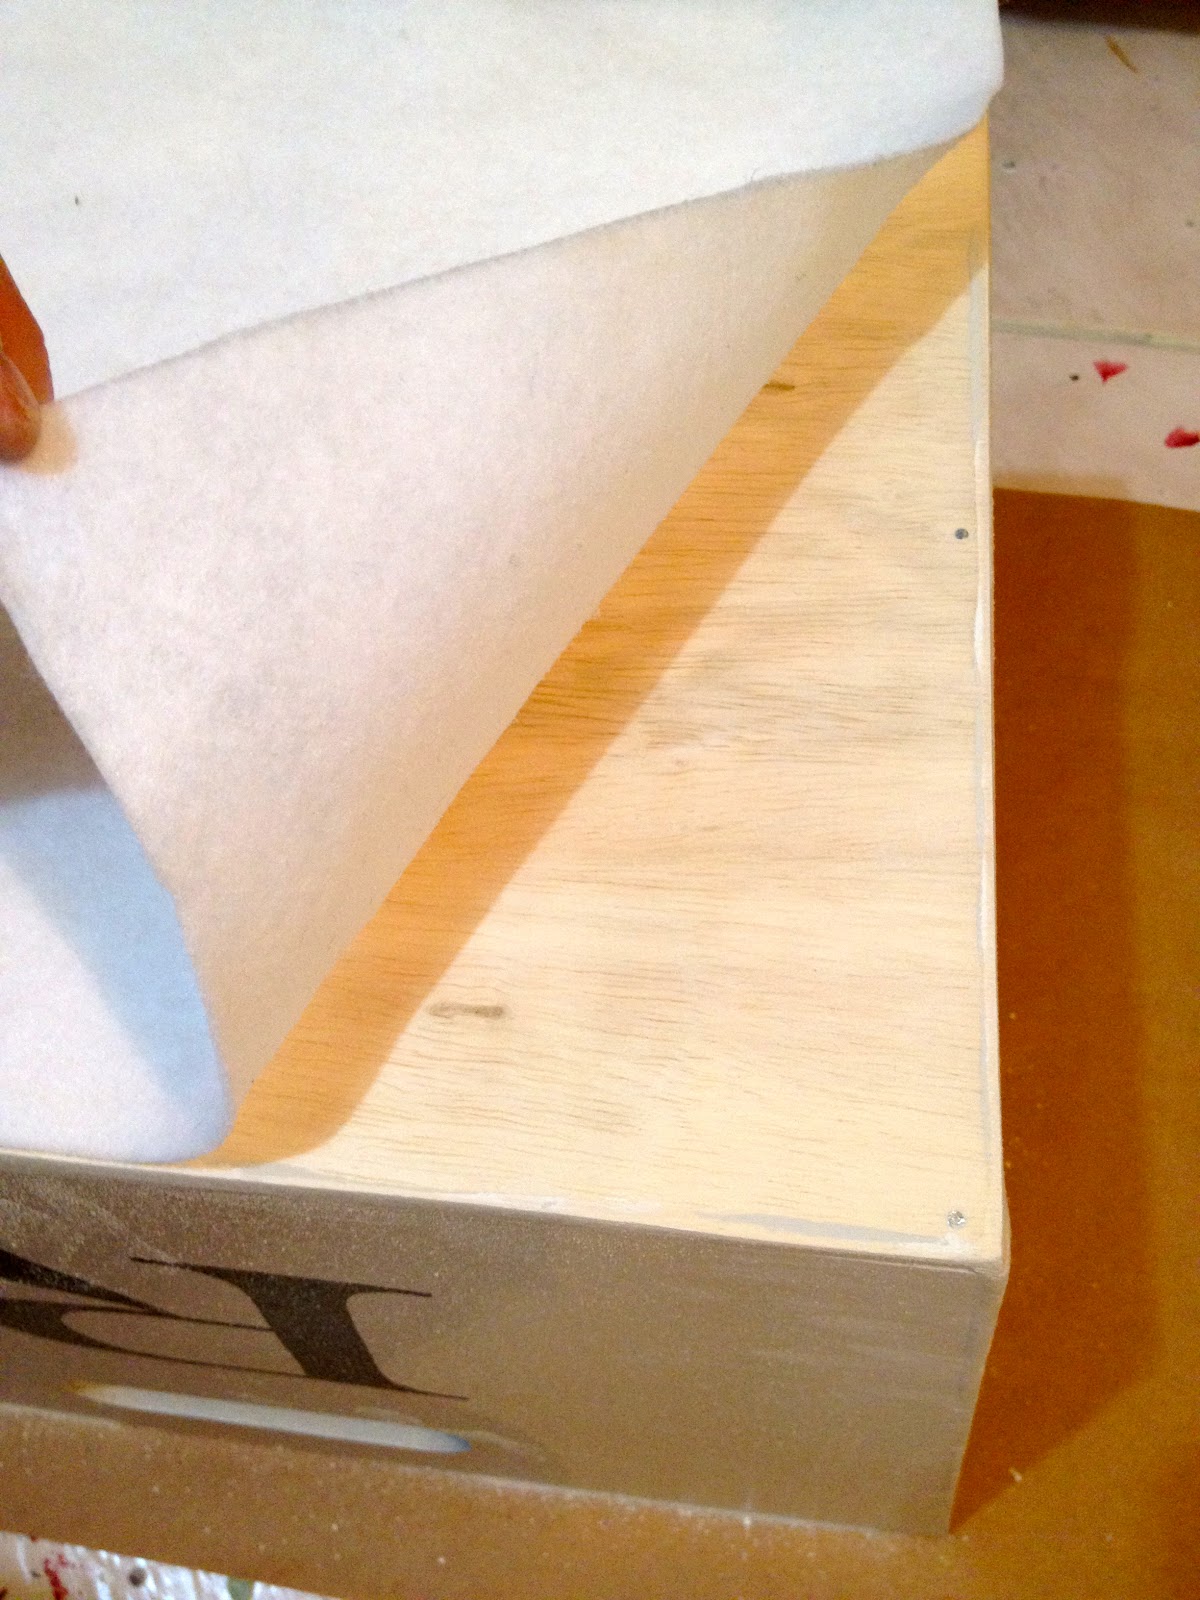
10. Add felt to bottom.
Trace bin on white felt:

11. Cut out felt.
Sand base of bin to remove any excess paint.
Apply felt with spray adhesive then trim excess.

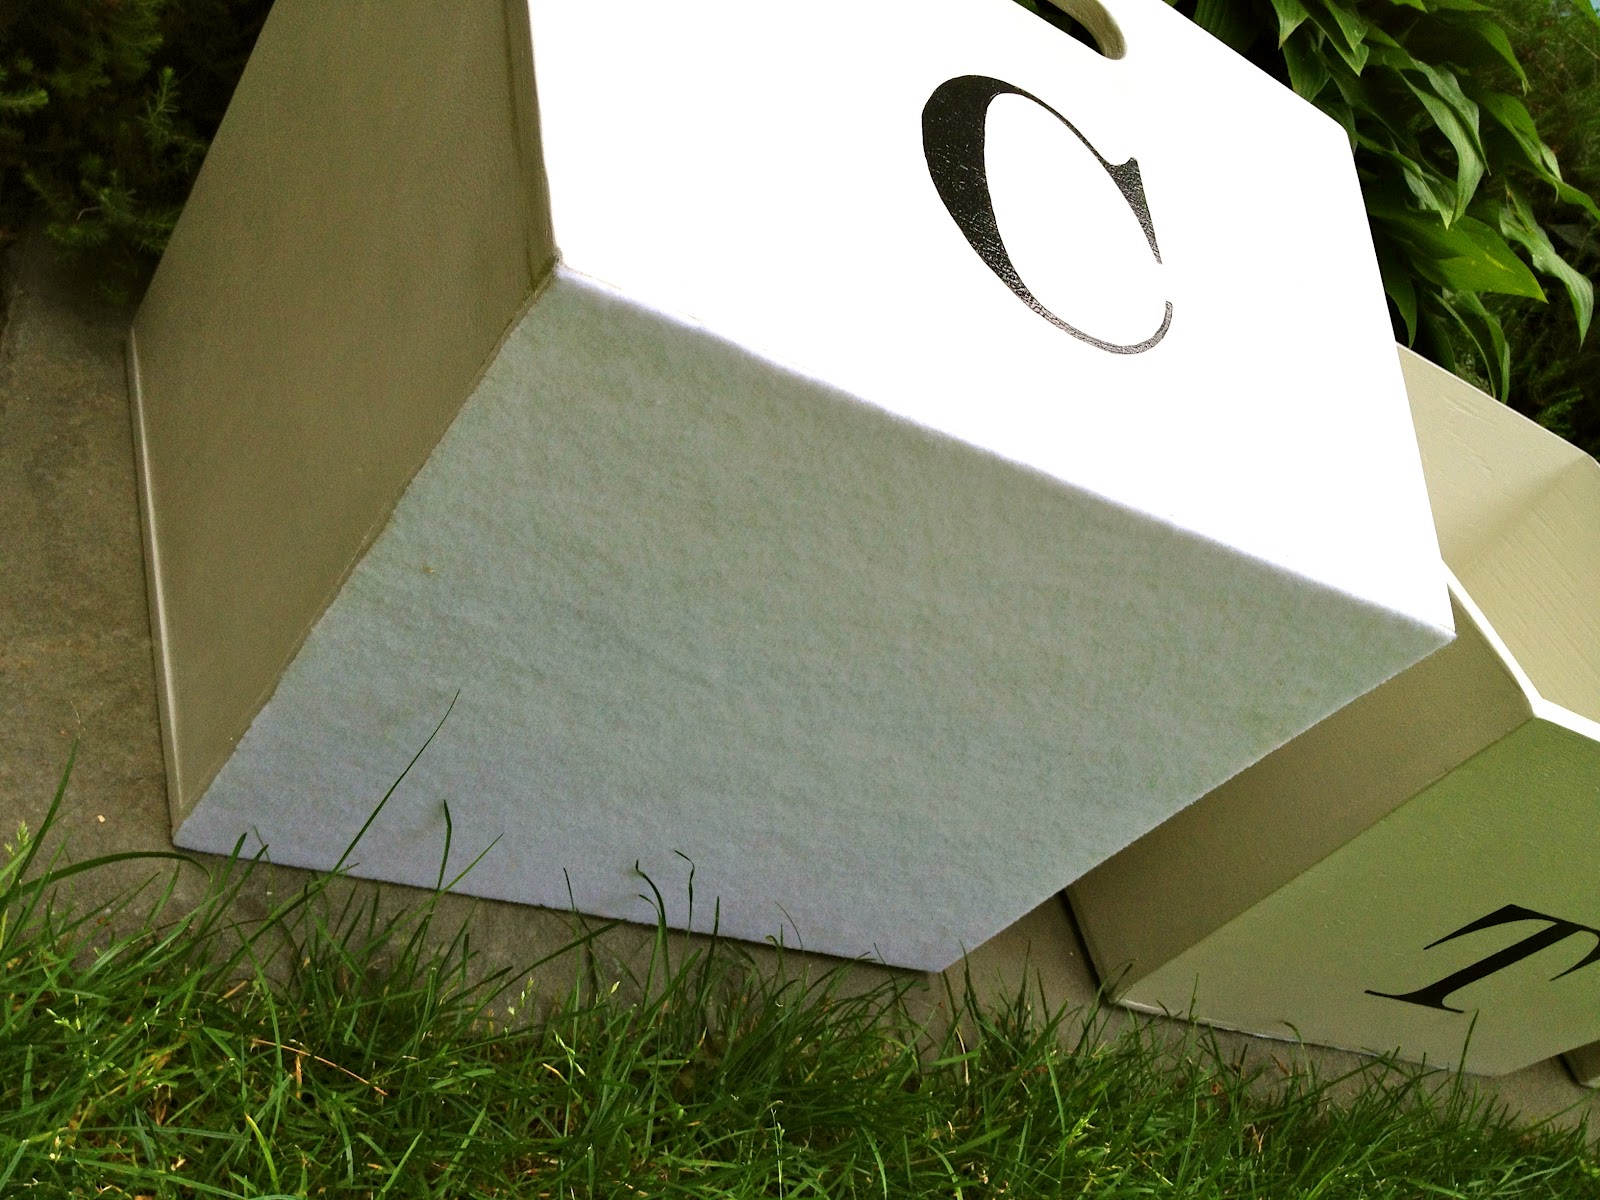
12. The felt is optional but a really nice touch to protect the finish on the cubbies and for ease when pulling the bin in and out:

Thank you Tracy, I hope your family enjoys their new bins.

You may also like...

  • DIY Mudroom Bins on WheelsDIY Mudroom Bins on Wheels
  • DIY Square Mudroom BinsDIY Square Mudroom Bins
  • DIY Tapered Mudroom BinsDIY Tapered Mudroom Bins
  • DIY Tapered Mudroom Bins with Curved HandleDIY Tapered Mudroom Bins with Curved Handle
Share this post:

Filed Under: BUILD, DIY, HOME DECOR, HOME DECOR, PAINT, STORAGE10 Comments

Reader Interactions

Comments

  1. Christina at I Gotta Create! says

    June 8, 2012 at 2:30 AM

    Love the shape – how they taper! And of course the letters make them PERFECT! They look great!
    <3 Christina at I Gotta Create!
    Wildly Original Round Up party is open!

    Reply
  2. The Cottage Market {Andrea} ♥ says

    June 11, 2012 at 12:21 PM

    Oh i adore the shape of these and the monogram is picture perfect! LOVE IT!!! thanks for sharing…hugs from your newest follower : )

    Reply
  3. The Cottage Market {Andrea} ♥ says

    June 11, 2012 at 12:21 PM

    ps…found you over at skip to my lou! : )

    Reply
  4. Jean @ Flower Hill says

    June 12, 2012 at 12:51 PM

    Lovely!

    Reply
  5. KCoake says

    June 12, 2012 at 1:47 PM

    You make it look so easy! I would not have thought to try to make my own. Thanks for the tutorial.

    Reply
    • Kathy says

      August 17, 2018 at 3:30 PM

      Where is the tutorial?

      Reply
      • Jaime says

        August 17, 2018 at 3:37 PM

        Hi Kathy, the tutorial to build the bins is within the post above. There are both photos and steps listed out to assist. Hope that helps.

        Reply
  6. DIY Show Off says

    June 19, 2012 at 1:11 PM

    Awesome, Jaime! Definitely pinning these for future reference and sharing a link back in the DIY highlights. 🙂 Thanks for sharing – I love your creativity.

    Reply
  7. Marcie says

    June 19, 2012 at 11:36 PM

    I love these. Makes everything look clean and neat! Would love you to share on my linky party! http://www.igottatrythat.com/p/blog-hop-linky-colde.html
    Thanks
    Marcie @ http://www.IGottaTryThat.com

    Reply
  8. Jessica Ellis says

    November 7, 2014 at 2:09 PM

    I LOVE these and they would be perfect for my entry but I am new to all this. How do you nail and screw it together without the screws/nails showing. Can you give any more info on placement of the nails and screws?

    " 4. Construct with #6 – 1 1/2" wood screws and glue. Then cut bottom from 1/4" plywood, nail and glue in place."

    Reply

Leave a Reply Cancel reply

Your email address will not be published. Required fields are marked *

Primary Sidebar

Hi! I’m Jaime

Jaime Costiglio

Hello!

Thank you for stopping by.
Join me for lots of DIY.

Read more

Get new posts via email

Handbuilt Holiday: Gift Project Plans

handbuilt holiday gift project plans

Collection of DIY gift project plans to build.

The Home Depot Tool Prospective

THD Prospective

Tools to consider for the DIYer.

Archives

The Home Depot Logo
Copyright © 2026 Jaime Costiglio · Custom site by Moonsteam Design

Privacy Policy