• Home
  • Blog
  • About
  • Contact
    • Disclosure
    • Privacy Policy
  • SHOP
  • Widget area for main menu

    • Email
    • Facebook
    • Instagram
    • Pinterest
    • Twitter
    • YouTube
  • Skip to primary navigation
  • Skip to main content
  • Skip to primary sidebar

Jaime Costiglio

build - paint - sew

  • BUILD
    • BEDS
    • BENCHES
    • DESKS
    • DRESSERS
    • GAMES & TOYS
    • SCRAP WOOD
    • SHELVES
    • STORAGE
    • TABLES
  • TOOLS
  • PAINT
    • CRAFTS
    • FURNITURE
    • HOME DECOR
  • SEW
    • GIFTS
    • HOME DECOR
    • POUCHES
  • HANDBUILT HOLIDAY
    • 2019
    • 2018
    • 2017
    • 2016
    • 2015
    • 2014
    • 2013
  • GIFTS
    • BABIES
    • KIDS
    • FOR HER
    • FOR HIM
    • TEACHERS
    • WEDDINGS
  • SEASONAL
    • 4TH OF JULY
    • FALL
    • HALLOWEEN
    • CHRISTMAS
    • SUMMER
    • SPRING
    • ST. PATRICK’S DAY
    • THANKSGIVING
    • VALENTINE’S DAY
    • WINTER
  • SALTBOX PROJECT
    • BATHROOMS
    • DINING ROOM
    • EXTERIOR
    • FAMILY ROOM
    • FOYER / MUDROOM
    • KIDS BEDROOMS
    • KITCHEN
    • LIVING ROOM
    • MASTER BEDROOM
    • PLAYROOM
  • SCROLL SAW

DIY Mudroom Bins on Wheels

January 29, 2014

Build: mudroom bins on wheels

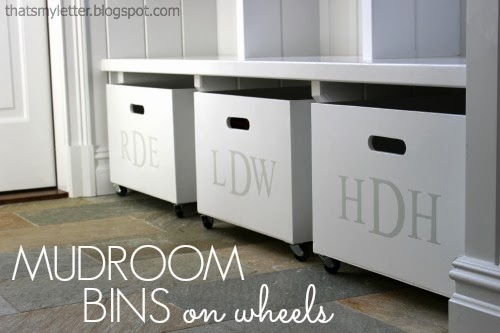
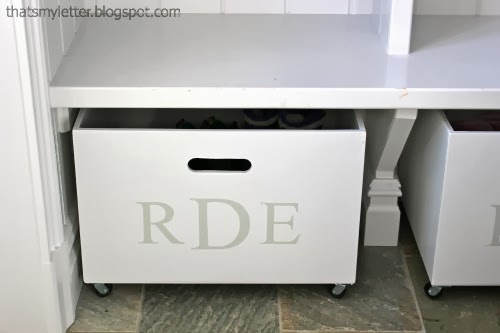
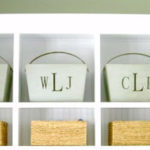
These sisters each have a huge storage bin for all their shoes thats both functional AND looks pretty!
I handpainted their monograms at center front:

How to build mudroom bins on wheels:

1. Use 1/2″ plywood and cut (1) front & (1) back and (2) sides.
Determine the cut out handle placement and drill (2) 1 1/2″ holes using a spade bit:
2. Then jig saw out the middle portion:
3. Construct the bin using #6 – 1 1/2″ wood screws and glue.
Predrill and countersink.
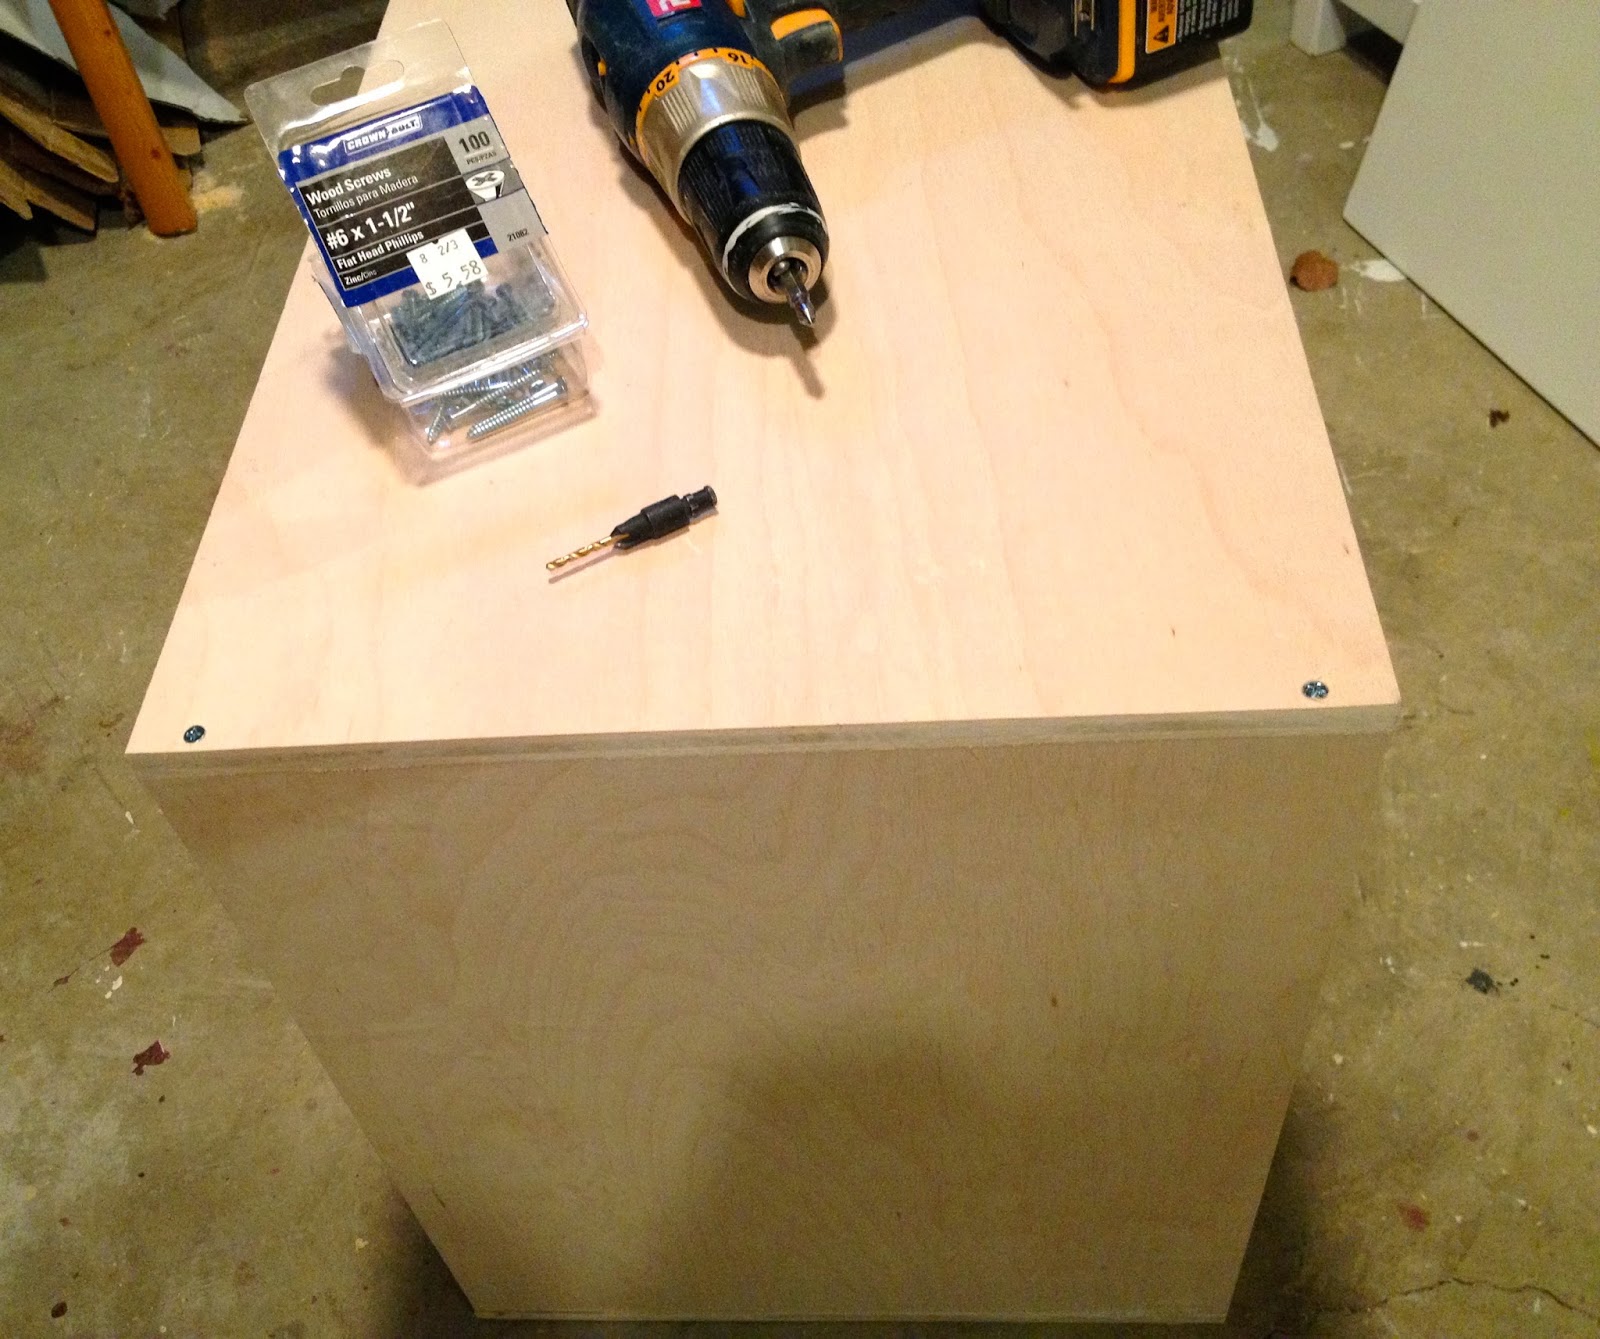
4. Attach the 1/4″ plywood bottom with screws too.
Sand and paint.
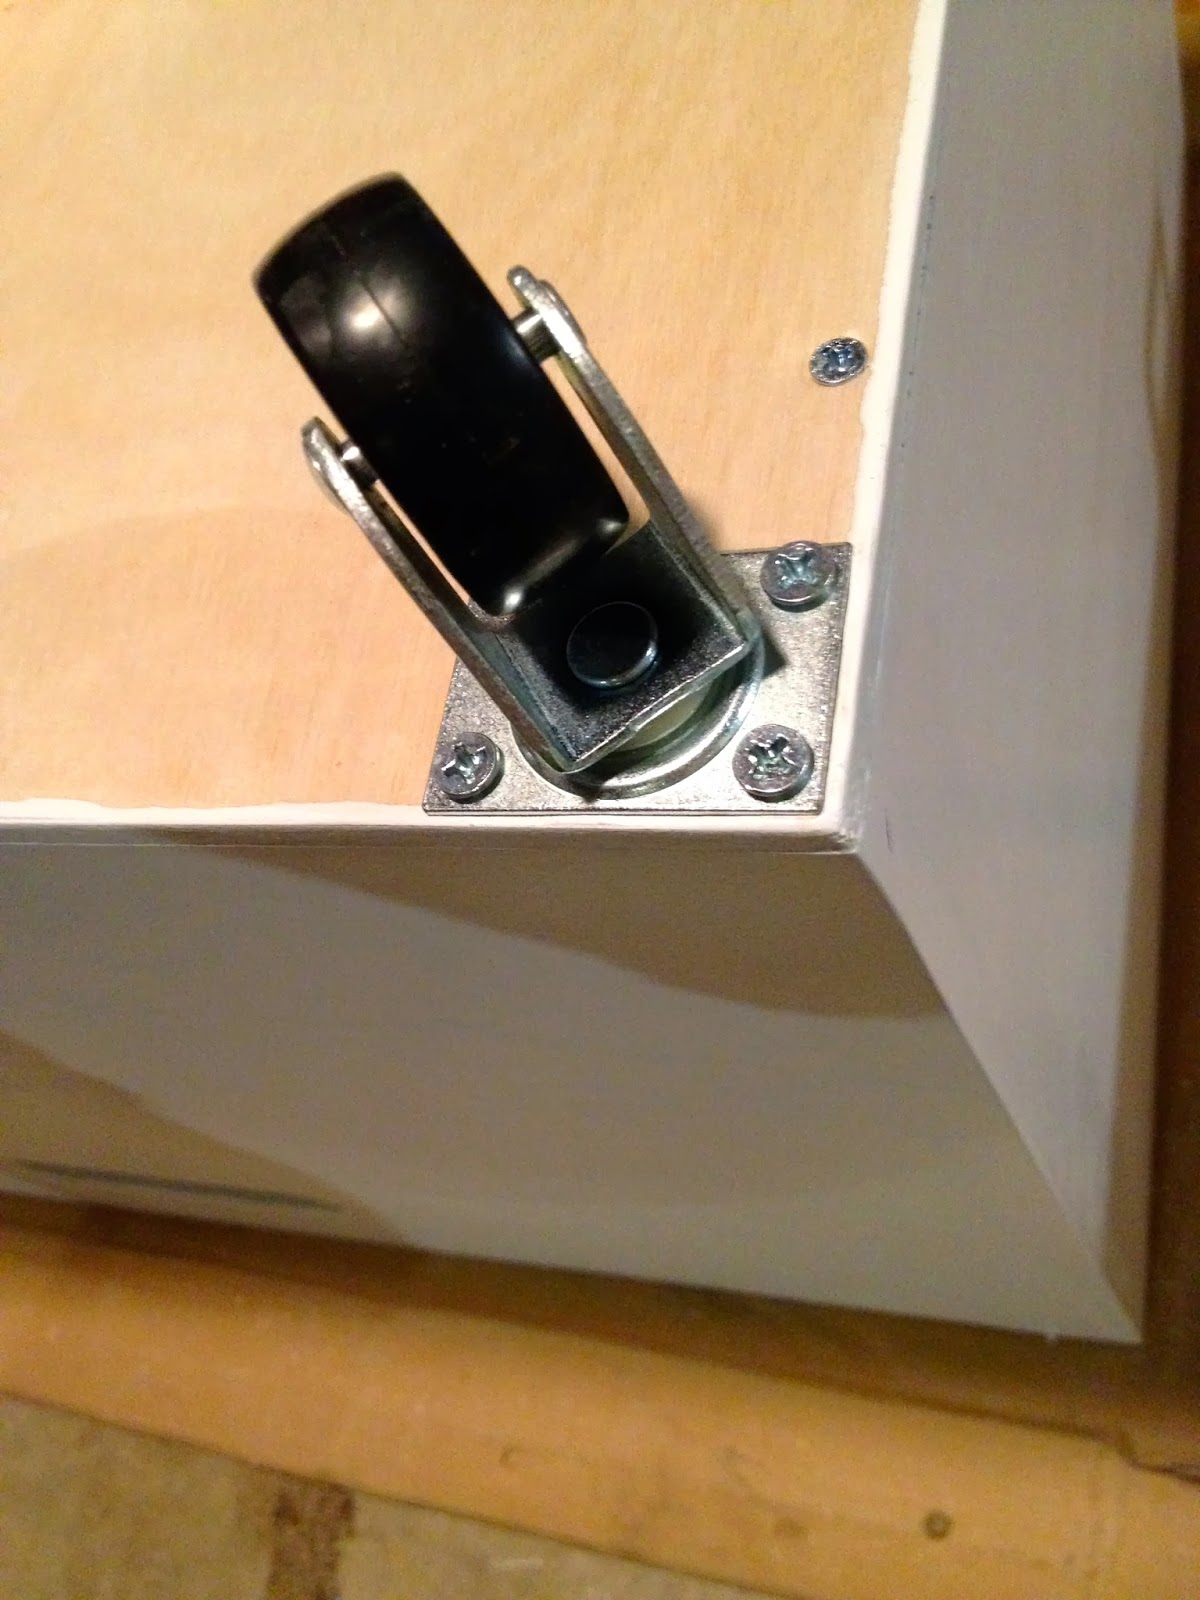
5. Put the wheels in place and mark the screw holes:
6. Predrill 3 holes:

7. Attach wheel:

8. Print out desired letters.
I used Times New Roman font at 425 and 525 point:

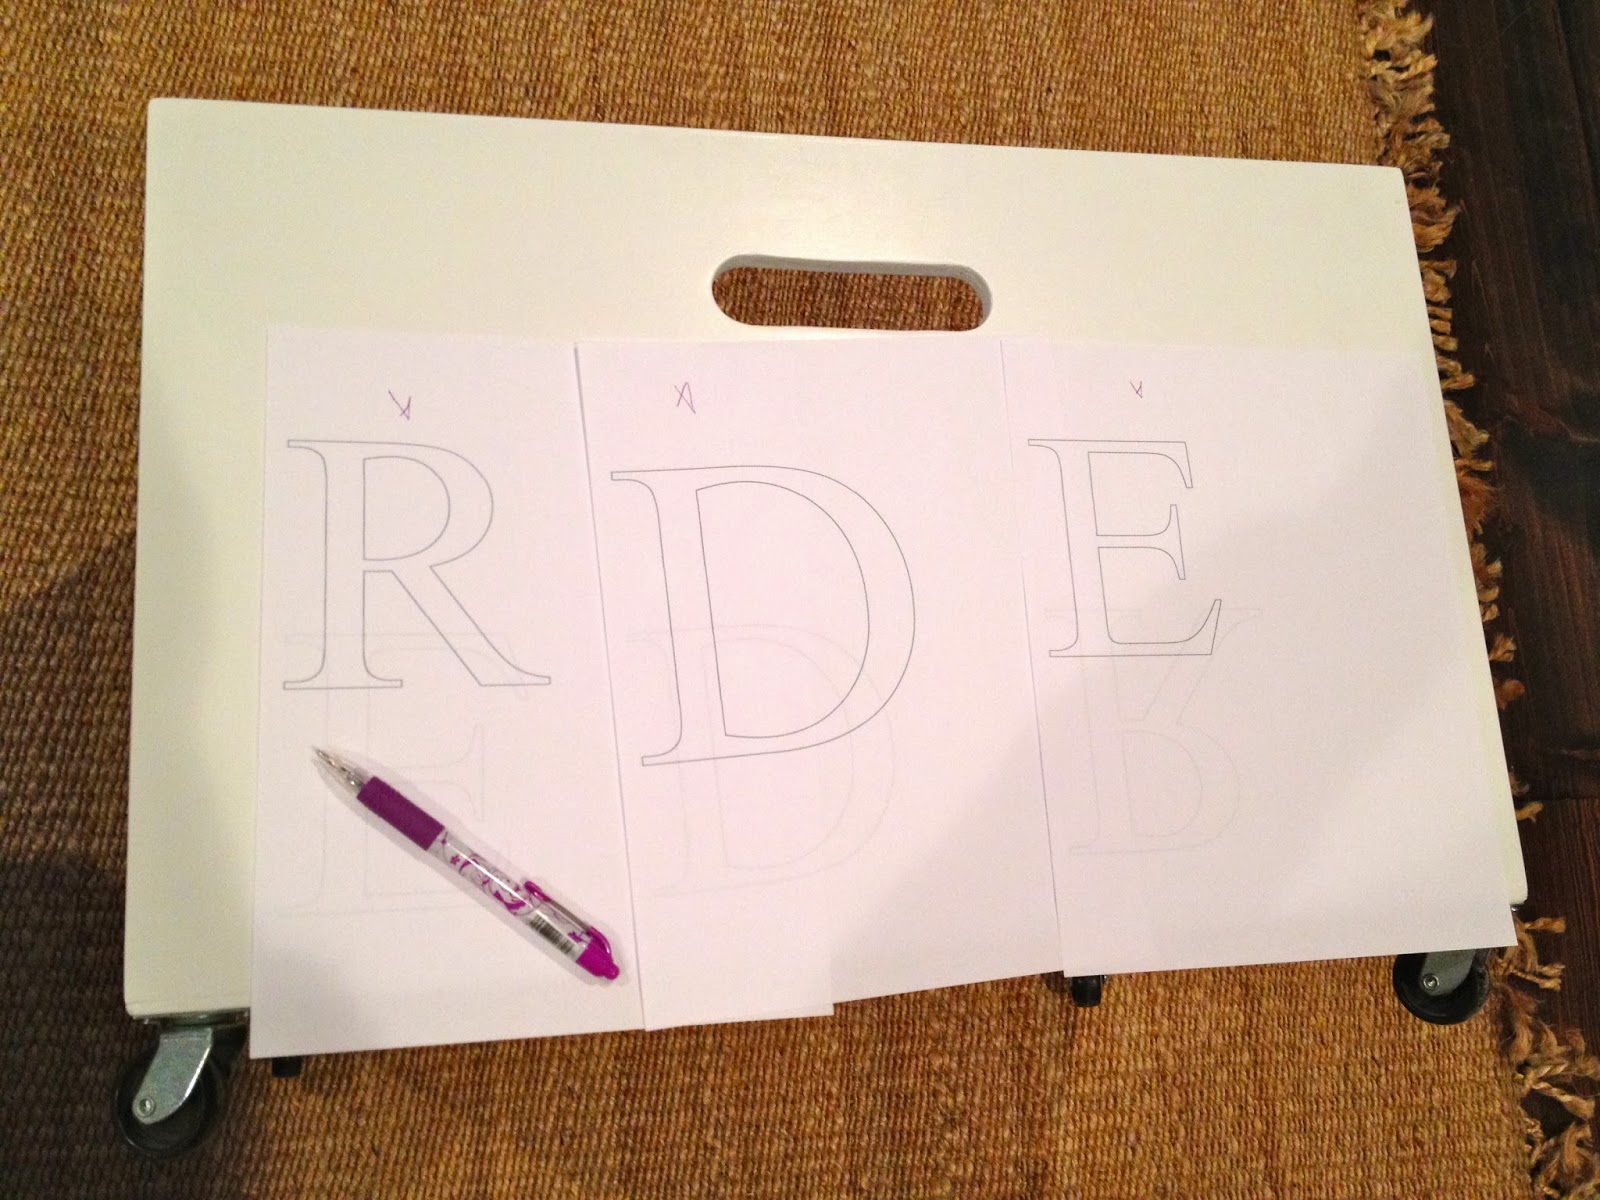
9. Find the center and line up the middle letter:

10. Use a ballpoint pen to trace the outline of the letter:

11. The pressure of the pen creates an indent in the wood:

12. Paint on and inside the indent:

13. Repeat the process for the two side letters:

You may also like...

  • DIY Square Mudroom BinsDIY Square Mudroom Bins
  • DIY Tapered Mudroom Bins with Curved HandleDIY Tapered Mudroom Bins with Curved Handle
  • DIY Caddy GiftDIY Caddy Gift
  • “K” is for Kids Step Stool“K” is for Kids Step Stool
Share this post:

Filed Under: BUILD, DIY, FURNITURE, ORGANIZATION, PAINT, STORAGE7 Comments

Reader Interactions

Comments

  1. [email protected] says

    January 29, 2014 at 3:11 PM

    You have such a knack for making storage pretty!

    Reply
  2. Heather says

    February 12, 2014 at 2:56 PM

    Jaime, did you build the mudroom space from a plan? I really like your set up and think it would go well in our garage, along with the bins.

    I really enjoy your blog!

    Reply
  3. Shannon Kidd says

    February 23, 2014 at 8:54 PM

    Love how functional and pretty they are!

    Reply
  4. Katherine says

    September 7, 2019 at 2:59 PM

    What do you use for the bottom?

    Reply
    • Jaime says

      September 8, 2019 at 12:00 PM

      Hi Katherine, I believe the bottom is 1/4″ plywood. Depending on the size of your bins you may consider 1/2″ plywood to carry the load (and any kids who decide to stand in there).

      Reply

Leave a Reply Cancel reply

Your email address will not be published. Required fields are marked *

Primary Sidebar

Hi! I’m Jaime

Jaime Costiglio

Hello!

Thank you for stopping by.
Join me for lots of DIY.

Read more

Get new posts via email

The Home Depot Tool Prospective

THD Prospective

Tools to consider for the DIYer.

Handbuilt Holiday: Gift Project Plans

handbuilt holiday gift project plans

Collection of DIY gift project plans to build.

Archives

The Home Depot Logo
Copyright © 2021 Jaime Costiglio · Custom site by Moonsteam Design

Privacy Policy