• Home
  • Blog
  • About
  • Contact
    • Disclosure
    • Privacy Policy
  • SHOP
  • Widget area for main menu

    • Email
    • Facebook
    • Instagram
    • Pinterest
    • Twitter
    • YouTube
  • Skip to primary navigation
  • Skip to main content
  • Skip to primary sidebar

Jaime Costiglio

build - paint - sew

  • BUILD
    • BEDS
    • BENCHES
    • DESKS
    • DRESSERS
    • GAMES & TOYS
    • SCRAP WOOD
    • SHELVES
    • STORAGE
    • TABLES
  • TOOLS
  • PAINT
    • CRAFTS
    • FURNITURE
    • HOME DECOR
  • SEW
    • GIFTS
    • HOME DECOR
    • POUCHES
  • HANDBUILT HOLIDAY
    • 2021
    • 2019
    • 2018
    • 2017
    • 2016
    • 2015
    • 2014
    • 2013
  • GIFTS
    • BABIES
    • KIDS
    • FOR HER
    • FOR HIM
    • TEACHERS
    • WEDDINGS
  • SEASONAL
    • 4TH OF JULY
    • FALL
    • HALLOWEEN
    • CHRISTMAS
    • SUMMER
    • SPRING
    • ST. PATRICK’S DAY
    • THANKSGIVING
    • VALENTINE’S DAY
    • WINTER
  • SALTBOX PROJECT
    • BATHROOMS
    • DINING ROOM
    • EXTERIOR
    • FAMILY ROOM
    • FOYER / MUDROOM
    • KIDS BEDROOMS
    • KITCHEN
    • LIVING ROOM
    • MASTER BEDROOM
    • PLAYROOM
  • SCROLL SAW

DIY Square Mudroom Bins

August 29, 2012

Build: monogrammed mudroom locker bins

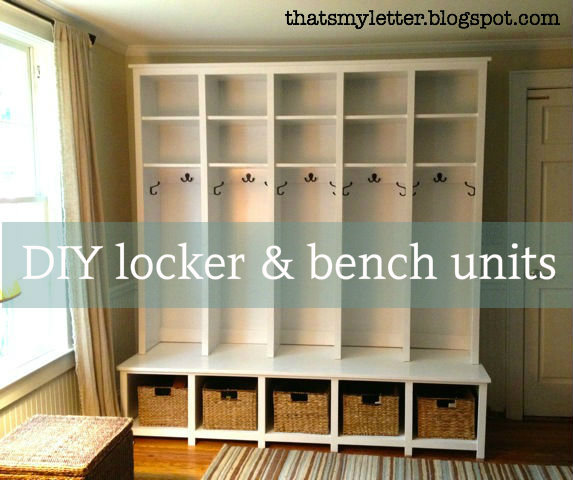
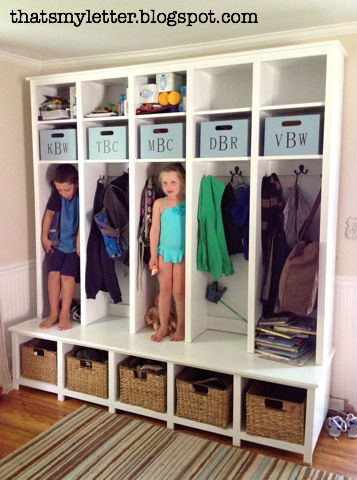
The finishing touch to this locker and bench unit I had built:
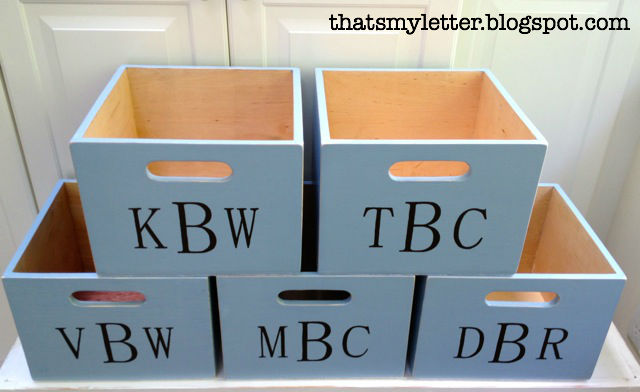
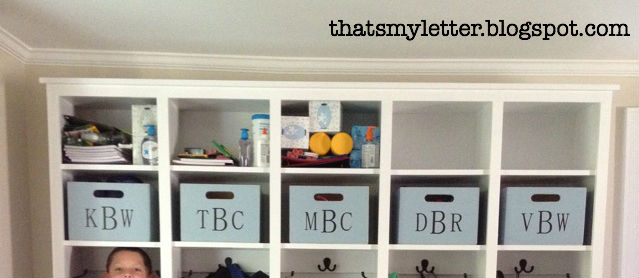
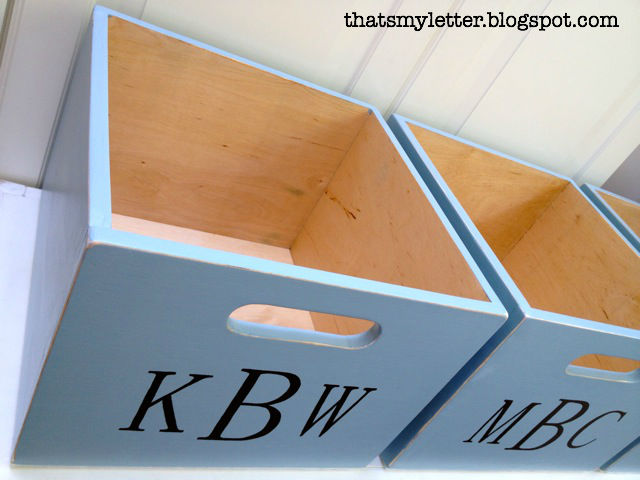
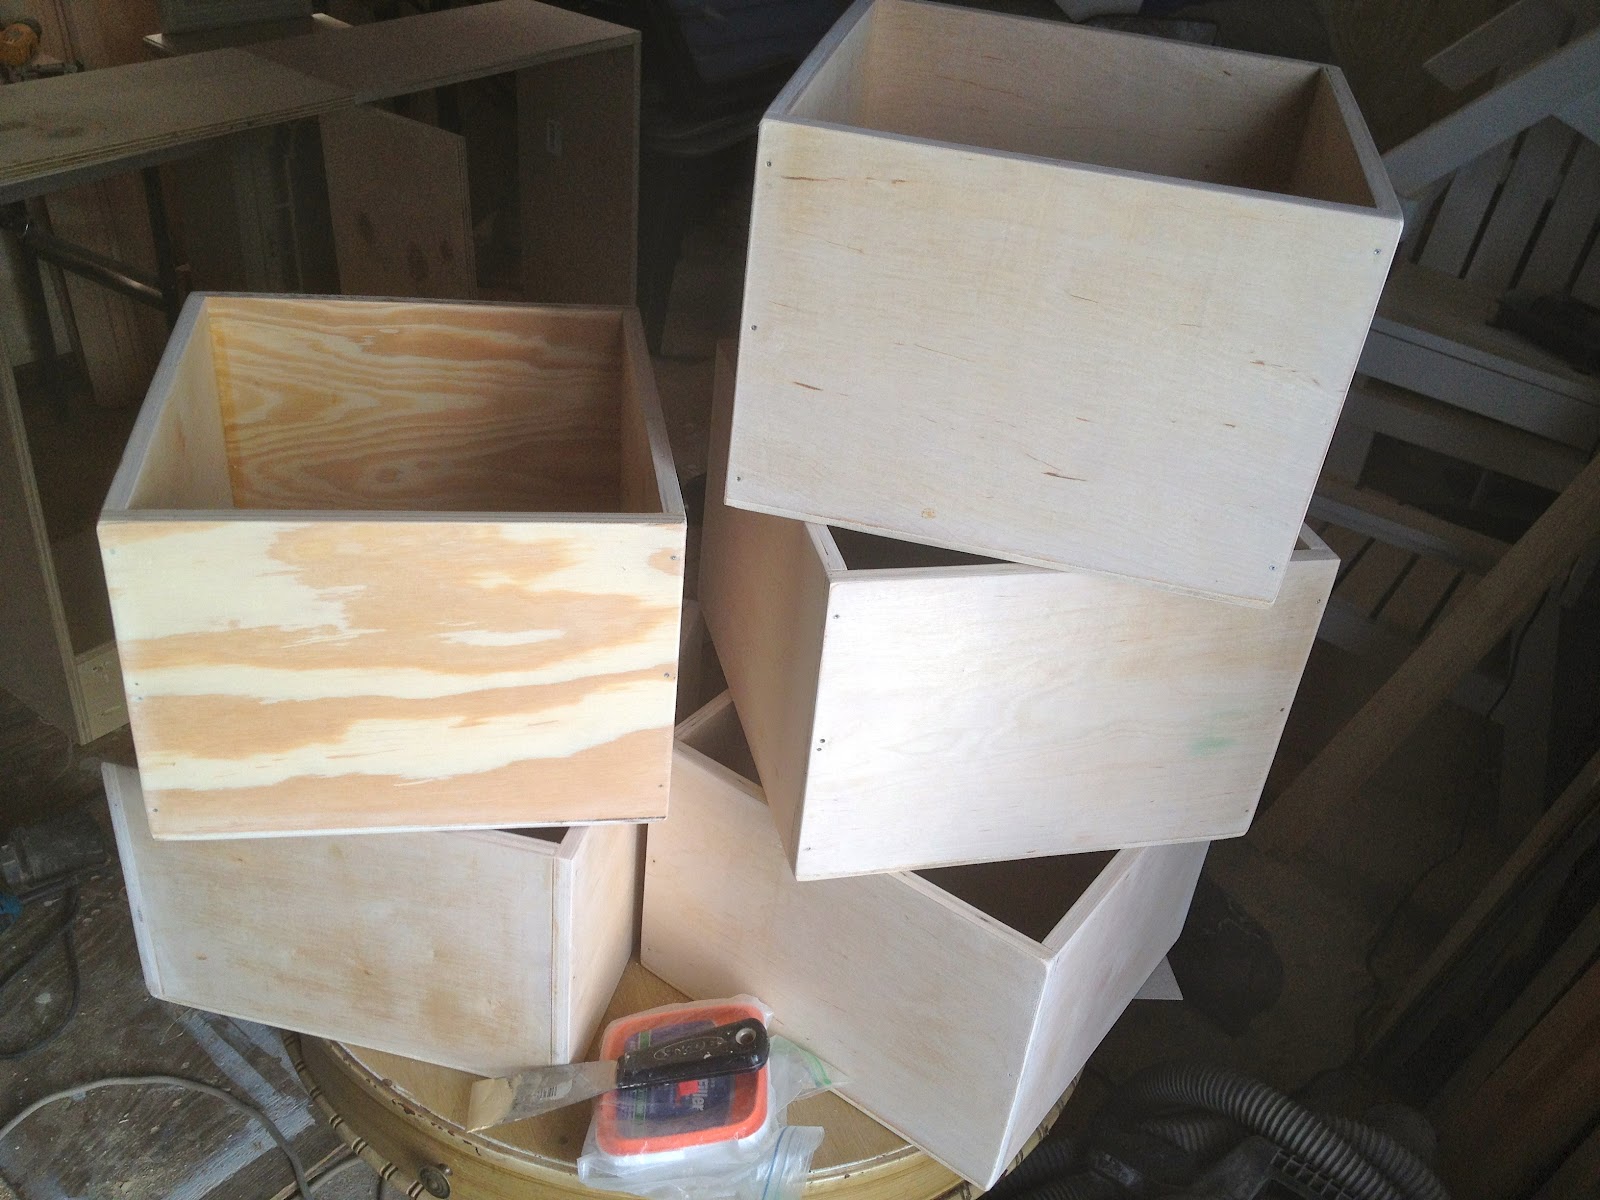
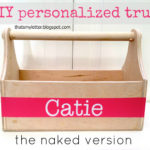
Each kid needed a personalized bin for their locker so I made square bins to fit the space complete with their monogram:
The finished size of each bin is 11 1/2″w x 11 3/4″d x 8 1/4″h:

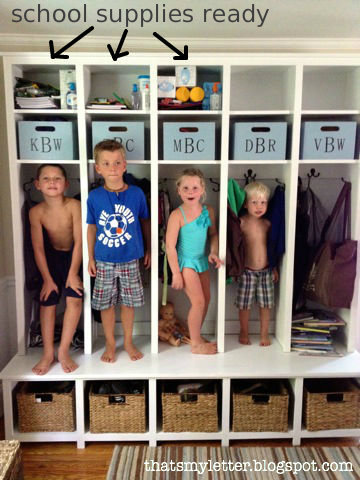
I love seeing the kids actually using the lockers, baskets and bins, it makes all the hard work worth it to know they’re getting good use of the piece:

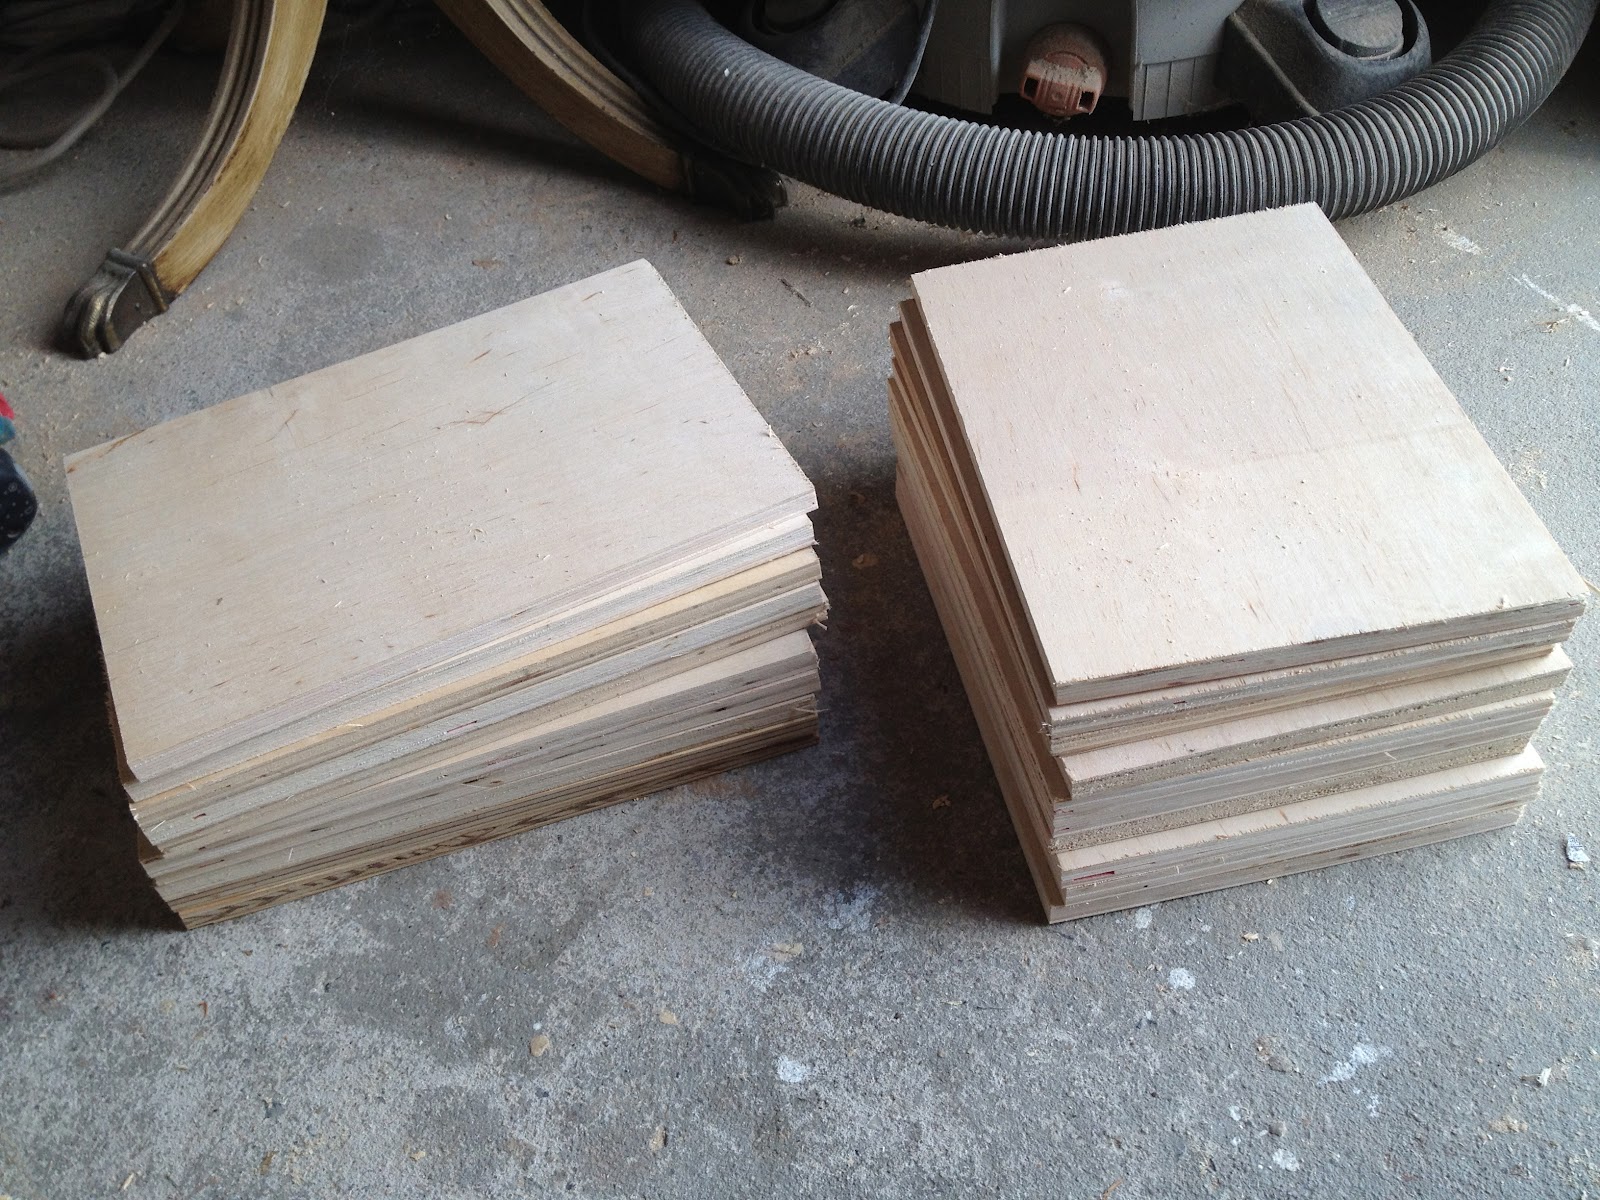
Here’s how I made the mudroom locker bins:

1. Cut 1/2″ birch plywood to size:
10 @ 11 1/2″ x 8″
10 @ 10 3/4″ x 8″
2. Assemble using 2″ finish nails, I prefer to preset the nails in the end pieces then glue and hammer into the sides (if I had a nail gun this would be much easier!):

3. To ensure the glue and boxes dry square secure with clamps:

4. Cut and nail 1/4″ plywood on the bottom then sand:

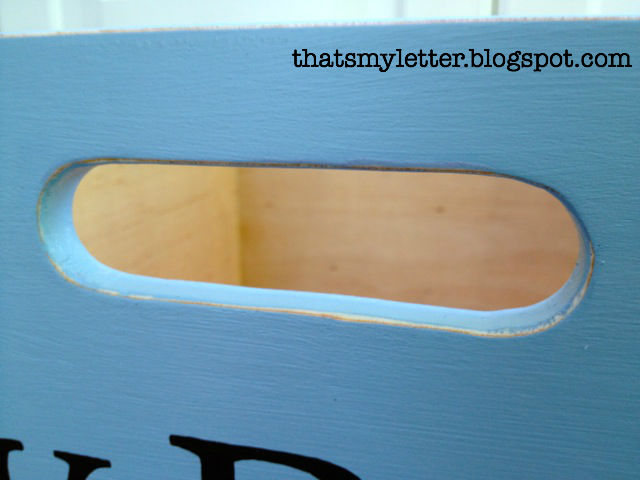
5. Make handle cutout using circular spade bit.  I forgot to do this before assembly so I secured a piece of scrap behind my cut to prevent splitting:

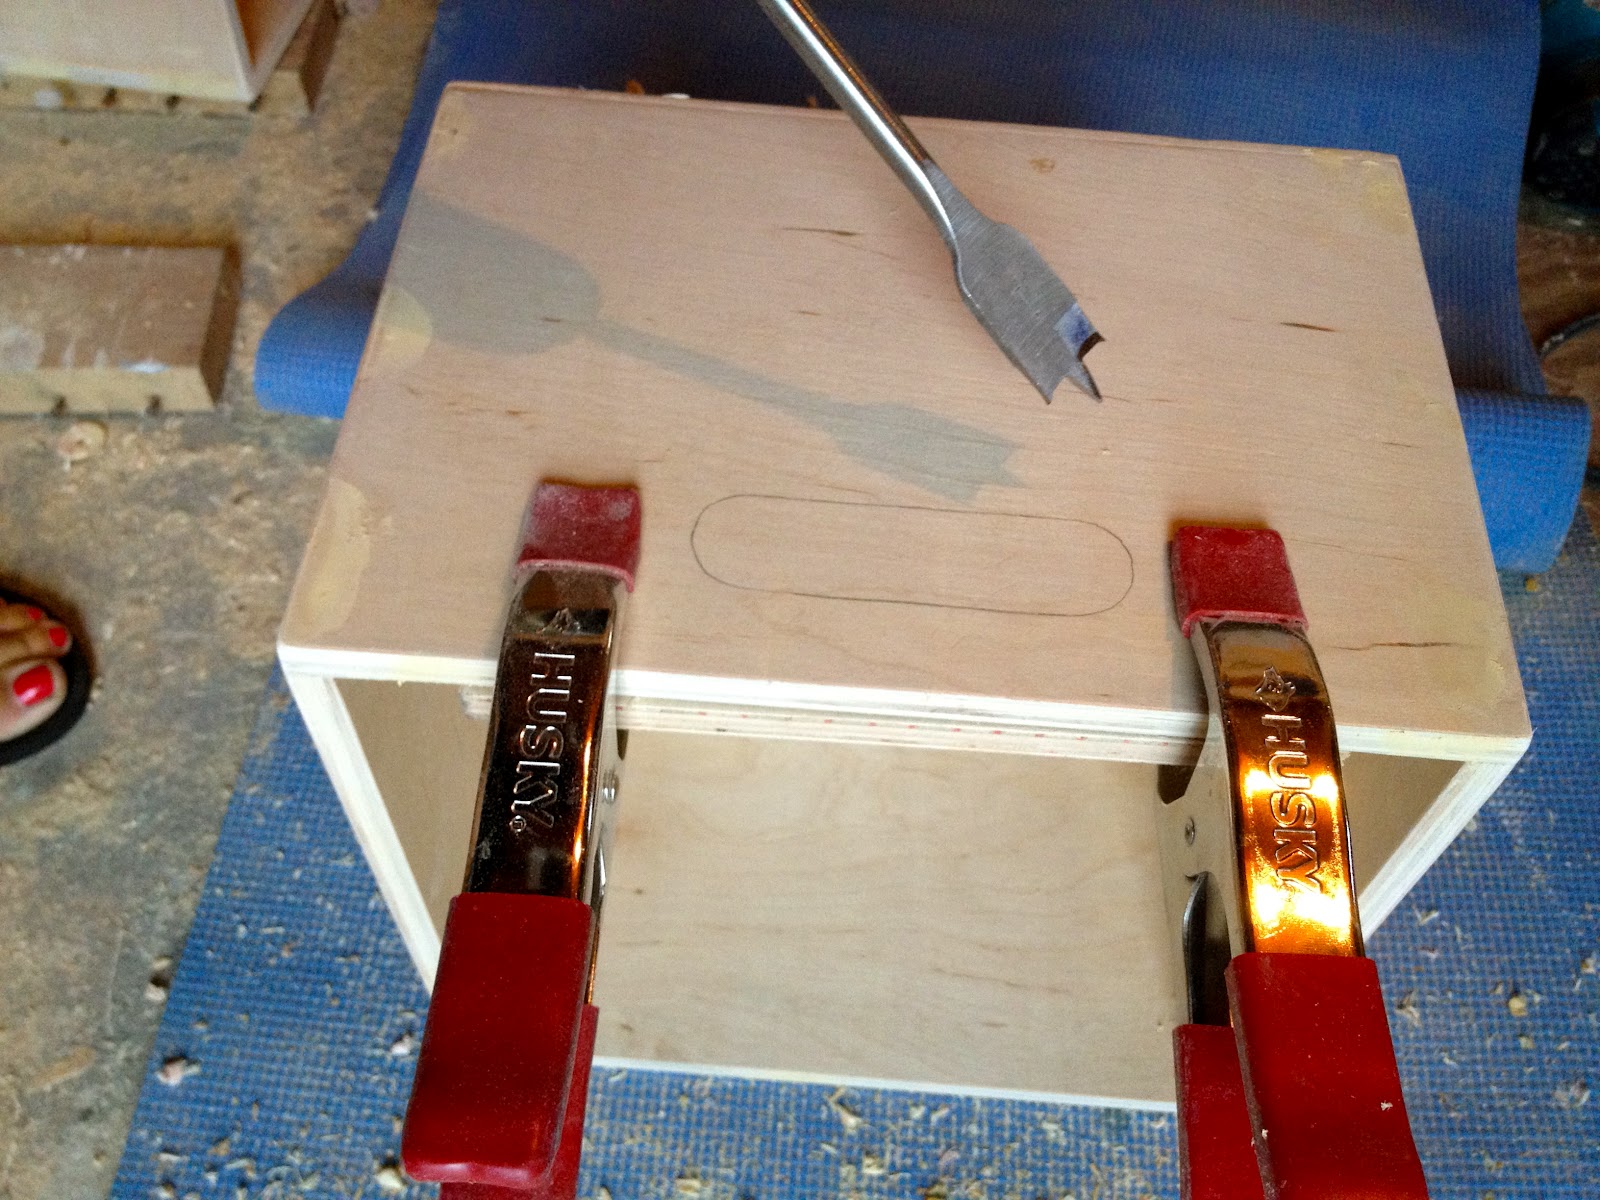
Start with circles at either end:

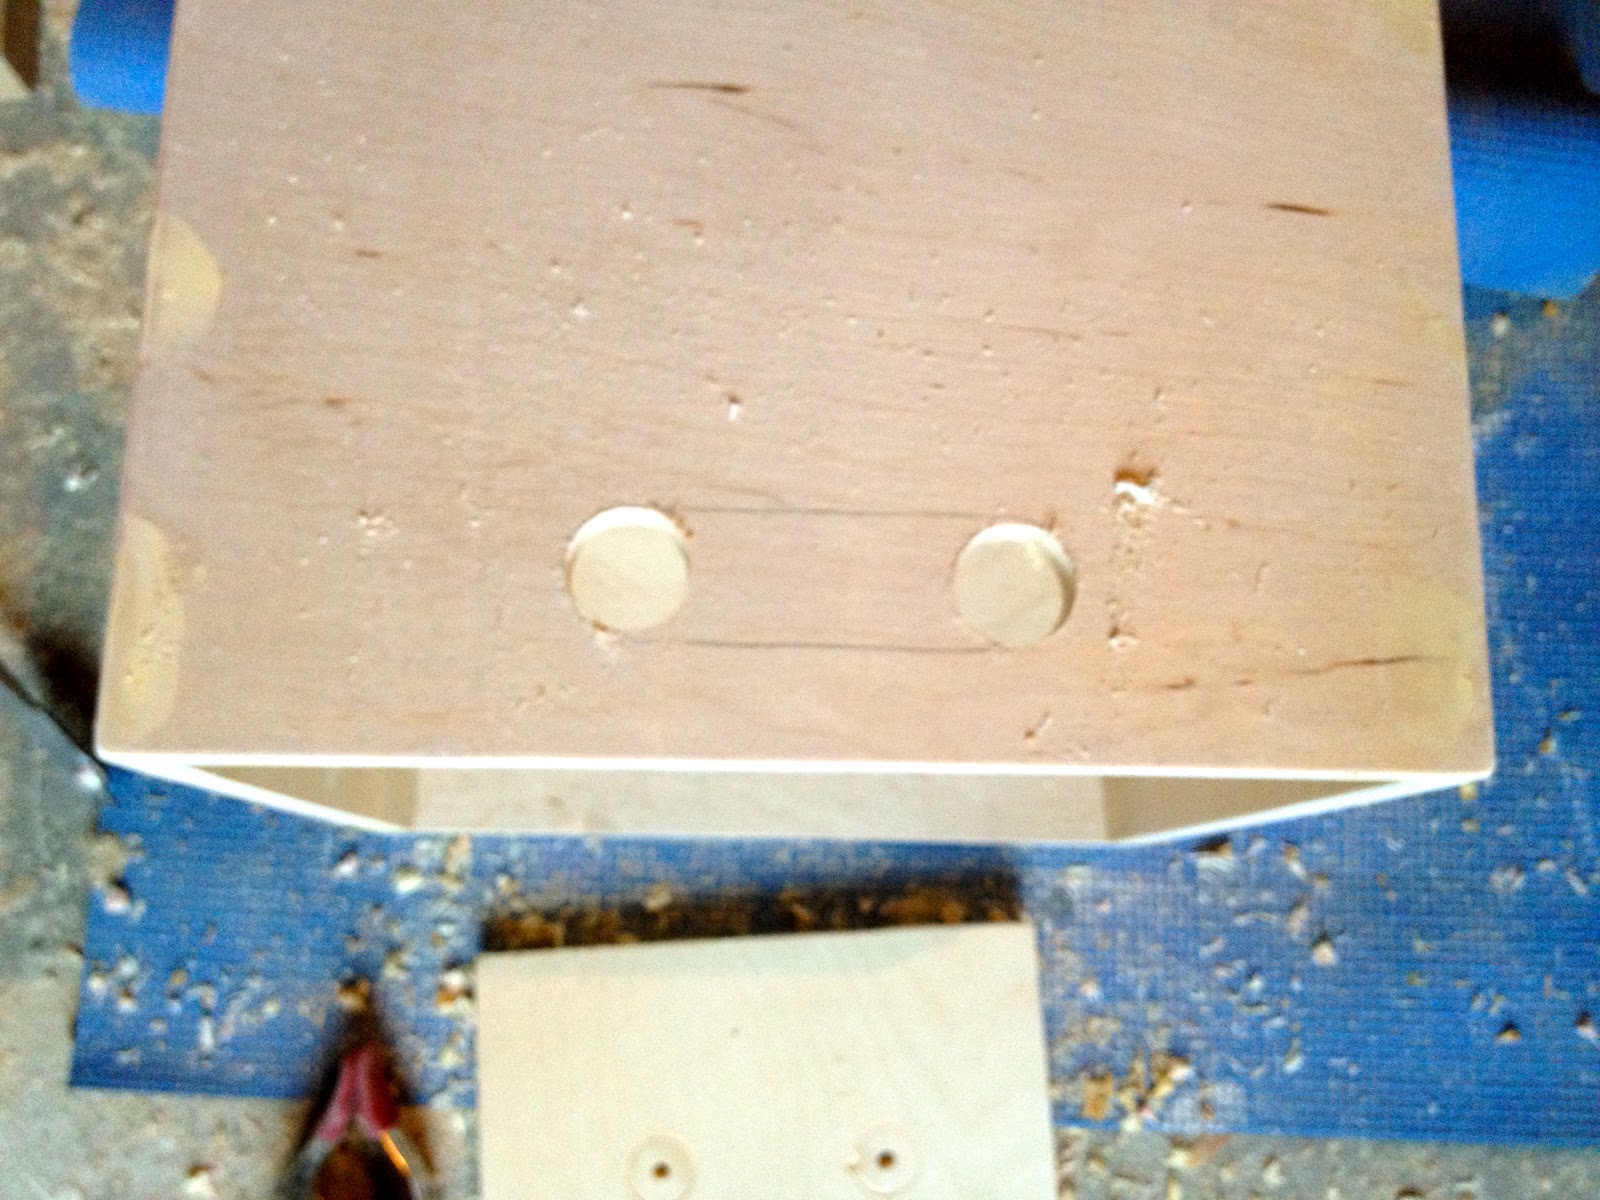
Then use jigsaw for middle portion:

6. Paint two coats BM Aura Ocean City blue, then distress edges:
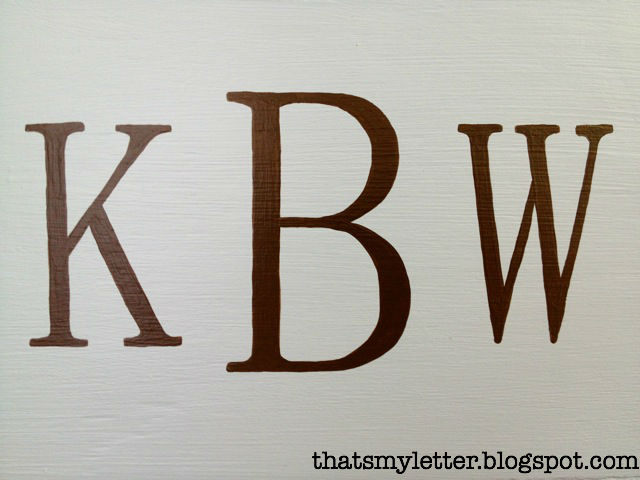
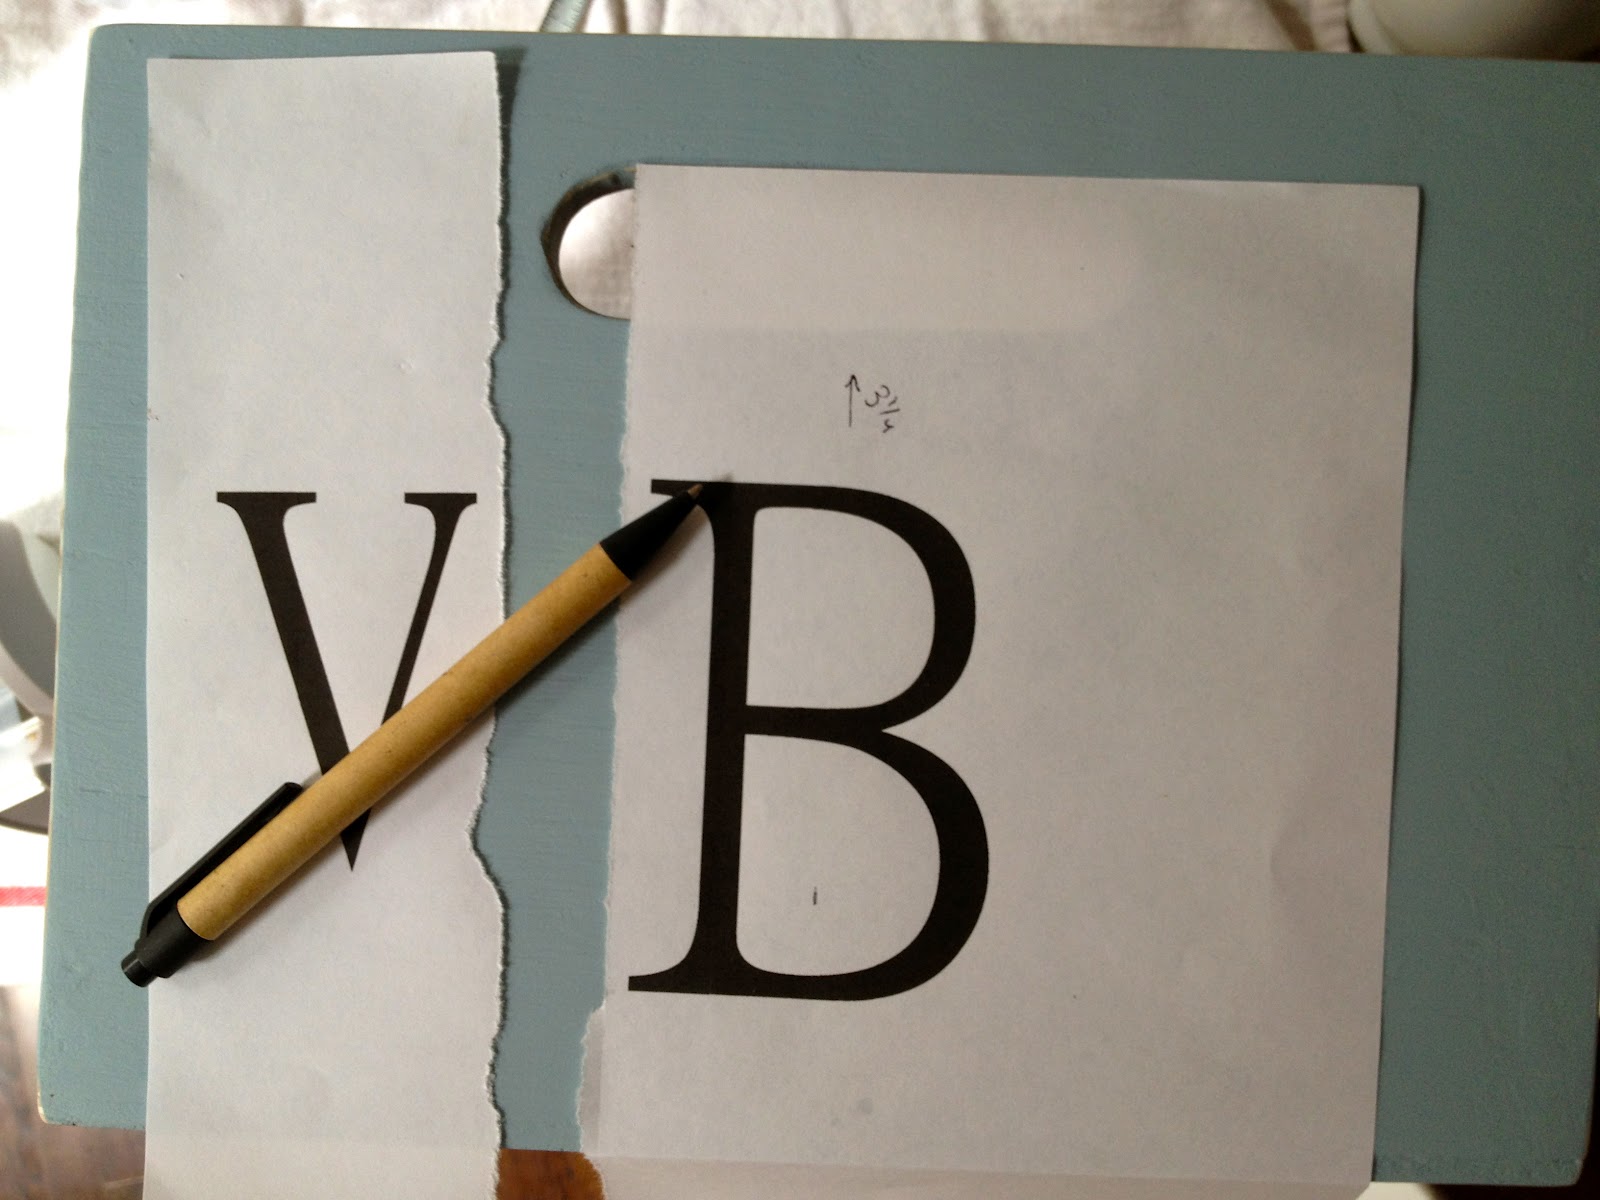
7. Print letters to size, line up and trace outline using ballpoint pen:

8. Paint on and inside indent left from the pen using dark brown:

9. Seal with clear satin poly using foam brush.
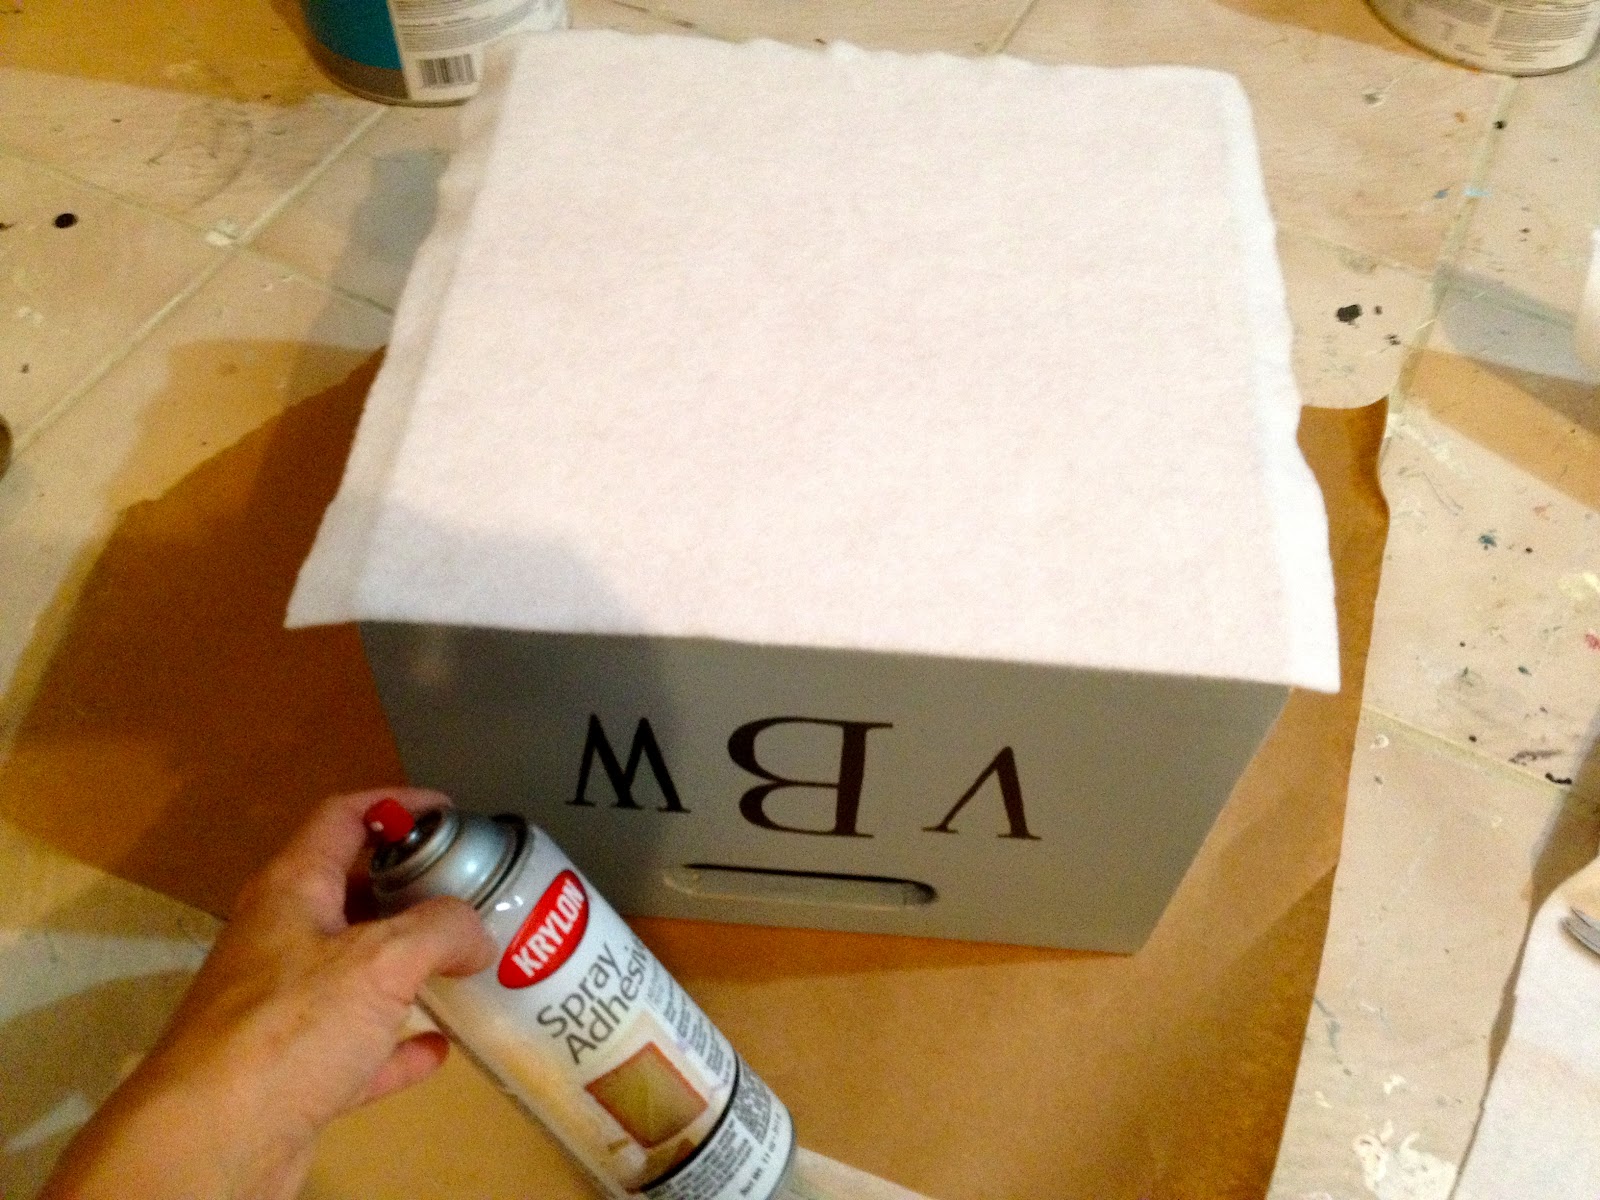
10. Cut white felt to fit base, apply spray adhesive to felt then smooth onto base:

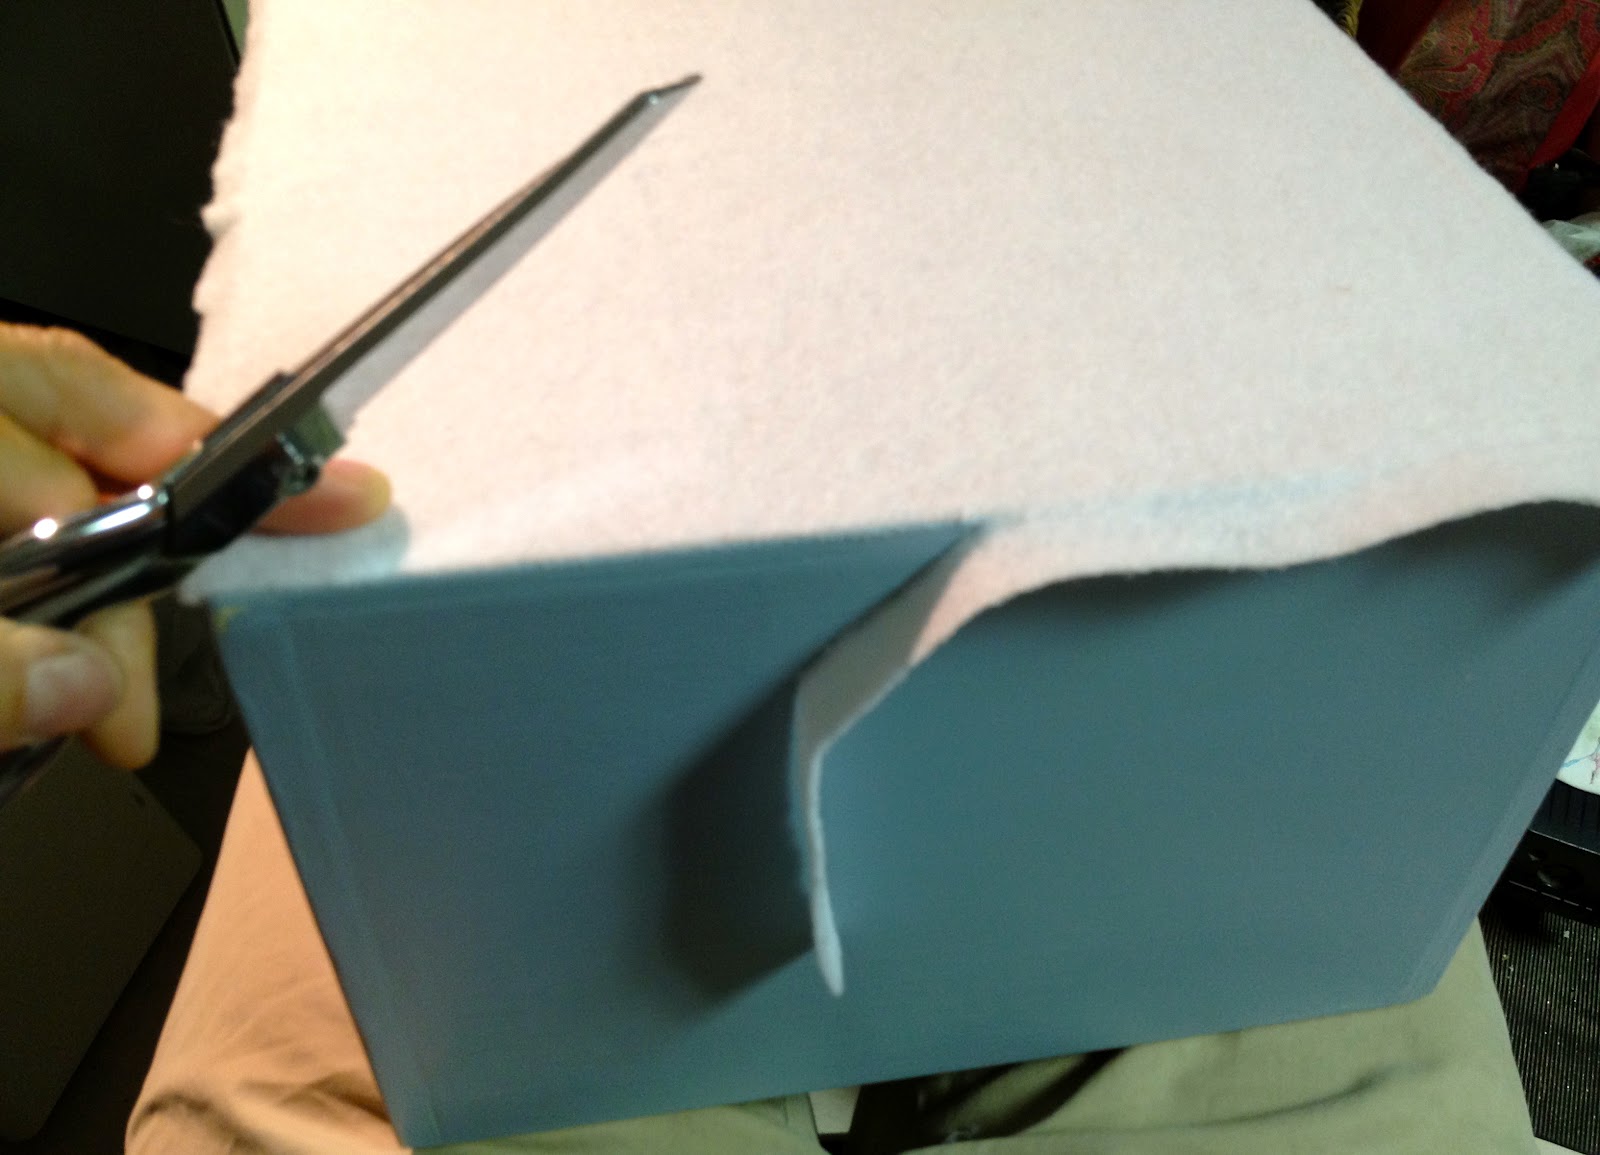
11. Trim edges with scissors:

Ready to use.

You may also like...

  • DIY Personalized Trug (the naked version)DIY Personalized Trug (the naked version)
  • DIY Charcuterie BoardDIY Charcuterie Board
  • One Board Challenge: BenchOne Board Challenge: Bench
  • DIY Caddy GiftDIY Caddy Gift
Share this post:

Filed Under: BUILD, DIY, HOME DECOR, ORGANIZATION, PAINT, SCRAP WOOD, STORAGE4 Comments

Reader Interactions

Comments

  1. Velud'arte says

    August 29, 2012 at 10:49 PM

    Wow, fantastic.
    I love that kind of arrangement.
    I appreciate so a house full of kids 🙂

    Reply
  2. Kelsey Poofy Cheeks says

    August 29, 2012 at 10:53 PM

    They turned out great and I love the pic with the kiddos standing in their own spots 😉

    Reply
  3. Homey Home Design says

    August 30, 2012 at 1:15 AM

    I LOVE these! Thanks for sharing how you put them together! I just may try these myself!

    Reply
  4. daiseyjayne says

    August 30, 2012 at 11:42 AM

    The kids look too cute and boxes are really sharp, and I have to tell you I'm so impressed that you know how to build all of your amazing projects yourself!

    Reply

Leave a Reply Cancel reply

Your email address will not be published. Required fields are marked *

Primary Sidebar

Hi! I’m Jaime

Jaime Costiglio

Hello!

Thank you for stopping by.
Join me for lots of DIY.

Read more

Get new posts via email

Handbuilt Holiday: Gift Project Plans

handbuilt holiday gift project plans

Collection of DIY gift project plans to build.

The Home Depot Tool Prospective

THD Prospective

Tools to consider for the DIYer.

Archives

The Home Depot Logo
Copyright © 2023 Jaime Costiglio · Custom site by Moonsteam Design

Privacy Policy