• Home
  • Blog
  • About
  • Contact
    • Disclosure
    • Privacy Policy
  • SHOP
  • Widget area for main menu

    • Email
    • Facebook
    • Instagram
    • Pinterest
    • Twitter
    • YouTube
  • Skip to primary navigation
  • Skip to main content
  • Skip to primary sidebar

Jaime Costiglio

build - paint - sew

  • BUILD
    • BEDS
    • BENCHES
    • DESKS
    • DRESSERS
    • GAMES & TOYS
    • SCRAP WOOD
    • SHELVES
    • STORAGE
    • TABLES
  • TOOLS
  • PAINT
    • CRAFTS
    • FURNITURE
    • HOME DECOR
  • SEW
    • GIFTS
    • HOME DECOR
    • POUCHES
  • HANDBUILT HOLIDAY
    • 2021
    • 2019
    • 2018
    • 2017
    • 2016
    • 2015
    • 2014
    • 2013
  • GIFTS
    • BABIES
    • KIDS
    • FOR HER
    • FOR HIM
    • TEACHERS
    • WEDDINGS
  • SEASONAL
    • 4TH OF JULY
    • FALL
    • HALLOWEEN
    • CHRISTMAS
    • SUMMER
    • SPRING
    • ST. PATRICK’S DAY
    • THANKSGIVING
    • VALENTINE’S DAY
    • WINTER
  • SALTBOX PROJECT
    • BATHROOMS
    • DINING ROOM
    • EXTERIOR
    • FAMILY ROOM
    • FOYER / MUDROOM
    • KIDS BEDROOMS
    • KITCHEN
    • LIVING ROOM
    • MASTER BEDROOM
    • PLAYROOM
  • SCROLL SAW

DIY Monogrammed Lumbar Pillow

April 5, 2013

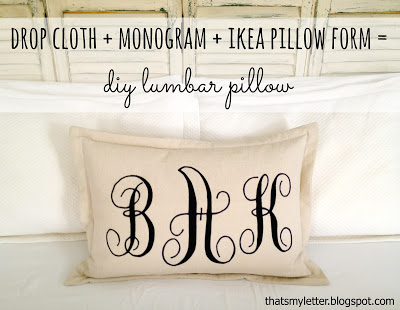
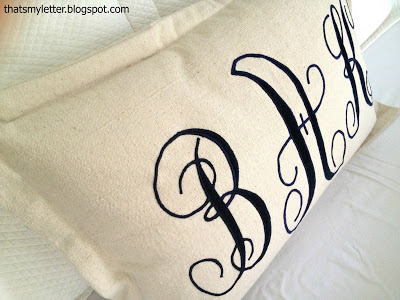
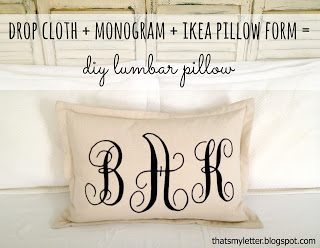
diy monogrammed lumbar pillow
Make a decorative lumbar pillow from drop cloth canvas, a printed monogram and an Ikea pillow form.

diy lumbar pillow

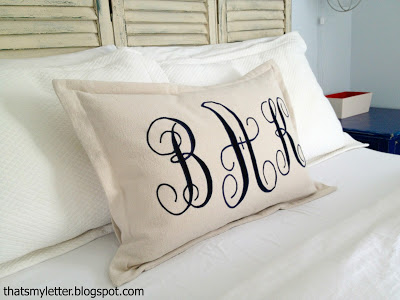
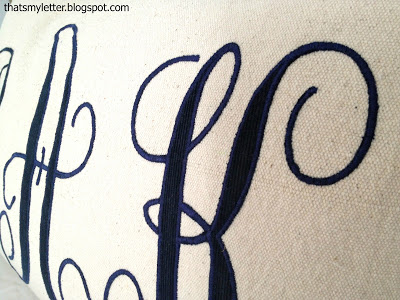
zip zag stitched monogram
The monogram is actually navy corduroy ironed in place with double sided fusible heat-n-bond and then sewn with a tight zig zag stitch.
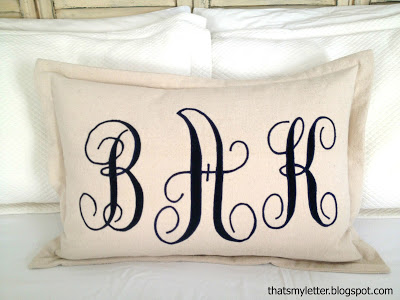
A gift for our neighbors who just moved back into their newly renovated home:
diy appliqued monogram

drop cloth lumbar pillow
Here’s how to make the monogrammed lumbar pillow:

1. Purchase one Ikea Fjadrar lumbar pillow insert $7.
This insert measures 16″ x 24″, if you are using something similar double check the measurements.
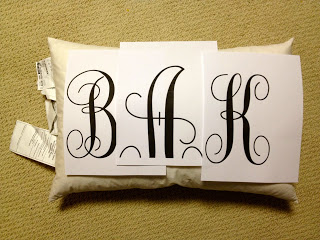
2. Print out monogram letters to fit.
I used monogram kk font at 600 & 800 point:
how to sew a monogrammed pillow
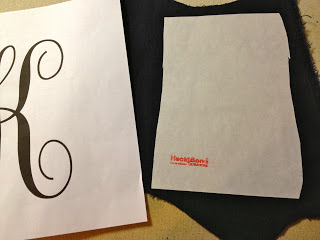
3. Prepare fabric by ironing double sided fusible interfacing (heat-n-bond) to wrong side of fabric:
how to make a monogram using fabric
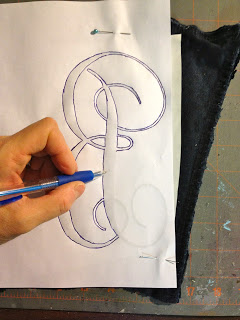
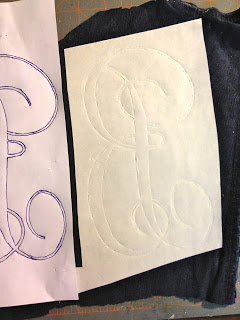
4. Place print out right side down on top of paper backing of interfacing and trace outline of letter with ballpoint pen, the pressure of the pen will indent the paper backing of the interfacing:

tracing the letter onto fabric

diy monogram on fabric
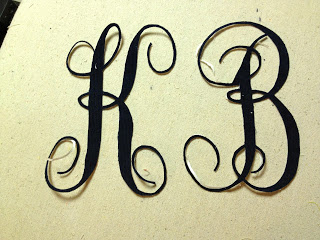
5. Cut out letter carefully leaving paper backing attached:

fabric letters cut out
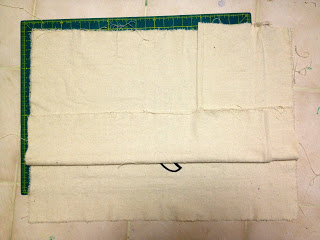
6. Cut drop cloth fabric pieces:
1 @ 20″ x 28″ (front)
2 @ 20″ x 20″ (backs)
This assumes 1/2″ seam allowances and envelope style closure.
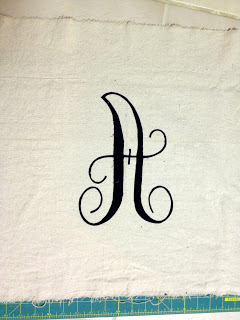
6. Center middle letter on front drop cloth fabric piece and iron in place:

fabric letter pinned onto drop cloth
7. Sew with tight zig zag stitch around entire letter.
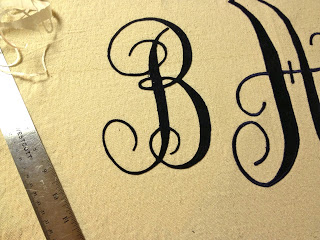
8. Repeat process with side letters first ironing in place then zig zag stitch:

fabric letters ironed onto drop cloth
9. To add envelope back first finish raw edges.
Place front piece right side up then overlap back pieces right sides down:

how to make a envelope pillow enclosure
10. Pin and sew around all four edges with 1/2″ seam allowance.
11. Turn right side out through envelope opening, press and pin around edges.
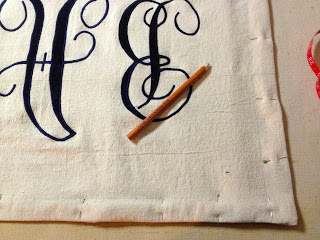
Mark 1 1/4″ from outer edge with soluble pencil to create flange:

how to make a pillow flange
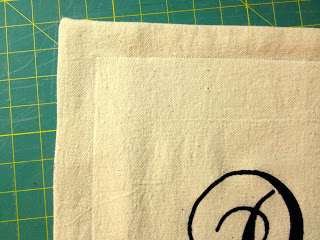
12. Sew on pencil line.

top stitch pillow flange
13. Insert pillow form.
ikea pillow form

You may also like...

  • DIY Simple Personalized PillowsDIY Simple Personalized Pillows
  • DIY Personalized Fabric BuntingDIY Personalized Fabric Bunting
  • Cross Stitch Monogram Ornament PlacecardCross Stitch Monogram Ornament Placecard
  • Wood & Leather Bed Free PlansWood & Leather Bed Free Plans
Share this post:

Filed Under: DIY, FOR HER, FOR HIM, GIFTS, GIFTS, HOME DECOR, HOME DECOR, KIDS, SEW, SEWING, WEDDINGS5 Comments

Reader Interactions

Comments

  1. DaiseyJayne.com says

    April 5, 2013 at 1:23 PM

    Great job, your work is always so well done. Your neighbors are so lucky 🙂

    Reply
  2. [email protected] says

    April 5, 2013 at 2:53 PM

    This looks so polished and beautiful!

    Reply
  3. VMG206 says

    April 7, 2013 at 2:57 PM

    I love it! You had me until "add zigzag stitch" – How do you get your machine to follow the letters??
    I'm visiting you today from Happy Nifty Thrifty. I hope you get a chance to stop by my blog and leave a comment and Link Up, too!
    ~ Megin of VMG206
    Medicine Cabinet Makeover

    Reply
  4. Kayla Janachovsky says

    April 9, 2013 at 3:43 PM

    This turned out so great! I'd love if you'd link up to The DIY'ers. http://homecomingmn.blogspot.com/2013/04/the-diyers-and-more-curtains.html

    Reply
  5. karen decorso says

    September 18, 2015 at 12:12 AM

    Just found your post on monogramming. Love the corduroy letters. One question…what did you cut the letters out with? Don't think I could get such a perfect finish with scissors. Thanks

    Reply

Leave a Reply Cancel reply

Your email address will not be published. Required fields are marked *

Primary Sidebar

Hi! I’m Jaime

Jaime Costiglio

Hello!

Thank you for stopping by.
Join me for lots of DIY.

Read more

Get new posts via email

Handbuilt Holiday: Gift Project Plans

handbuilt holiday gift project plans

Collection of DIY gift project plans to build.

The Home Depot Tool Prospective

THD Prospective

Tools to consider for the DIYer.

Archives

The Home Depot Logo
Copyright © 2023 Jaime Costiglio · Custom site by Moonsteam Design

Privacy Policy