• Home
  • Blog
  • About
  • Contact
    • Disclosure
    • Privacy Policy
  • SHOP
  • Widget area for main menu

    • Email
    • Facebook
    • Instagram
    • Pinterest
    • Twitter
    • YouTube
  • Skip to primary navigation
  • Skip to main content
  • Skip to primary sidebar

Jaime Costiglio

build - paint - sew

  • BUILD
    • BEDS
    • BENCHES
    • DESKS
    • DRESSERS
    • GAMES & TOYS
    • SCRAP WOOD
    • SHELVES
    • STORAGE
    • TABLES
  • TOOLS
  • PAINT
    • CRAFTS
    • FURNITURE
    • HOME DECOR
  • SEW
    • GIFTS
    • HOME DECOR
    • POUCHES
  • HANDBUILT HOLIDAY
    • 2021
    • 2019
    • 2018
    • 2017
    • 2016
    • 2015
    • 2014
    • 2013
  • GIFTS
    • BABIES
    • KIDS
    • FOR HER
    • FOR HIM
    • TEACHERS
    • WEDDINGS
  • SEASONAL
    • 4TH OF JULY
    • FALL
    • HALLOWEEN
    • CHRISTMAS
    • SUMMER
    • SPRING
    • ST. PATRICK’S DAY
    • THANKSGIVING
    • VALENTINE’S DAY
    • WINTER
  • SALTBOX PROJECT
    • BATHROOMS
    • DINING ROOM
    • EXTERIOR
    • FAMILY ROOM
    • FOYER / MUDROOM
    • KIDS BEDROOMS
    • KITCHEN
    • LIVING ROOM
    • MASTER BEDROOM
    • PLAYROOM
  • SCROLL SAW

DIY Plant Stand with Free Plans

August 11, 2017

diy plant stand


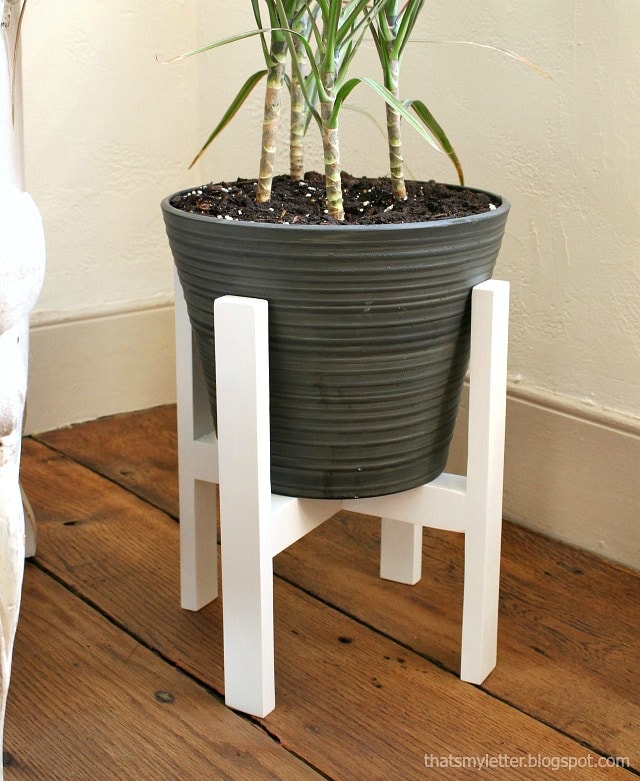
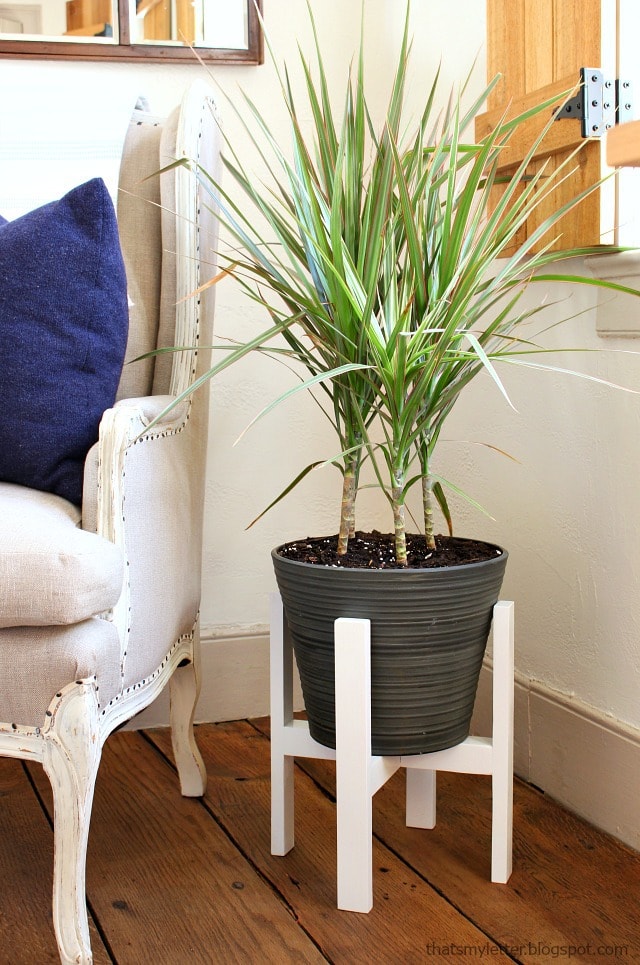
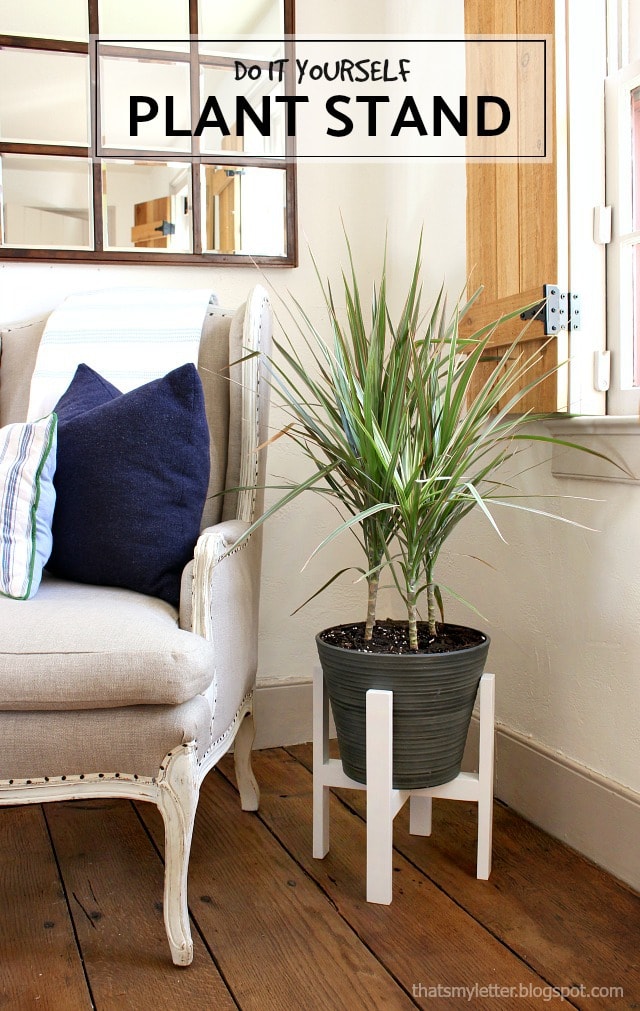
A little housewarming gift for my sister I whipped up this plant stand super fast and I’m sharing the tutorial so you can make one too!
For reference this pot is 12″ diameter at the upper most portion and 8″ diameter at the base.  The pot itself is 9 1/2″ tall so you can make adjustments as needed based on your pot size.
diy indoor plant stand
I finished this plant stand in gloss white which is a nice contrast against wood floors and grey planter.  You can finish however you like – stain, paint, maybe a fun color or dip the legs – the possibilities are endless.
painted plant stand
This is a really simple project that gives beautiful finishing touch to your houseplants and keeps the planter off the floor.
Check out my video tutorial below where I share the process start to finish:
empty plant stand
Below are a few real life process photos with notes as well as a link to printable plans.  Be sure to read through entirely before beginning so you understand the process.
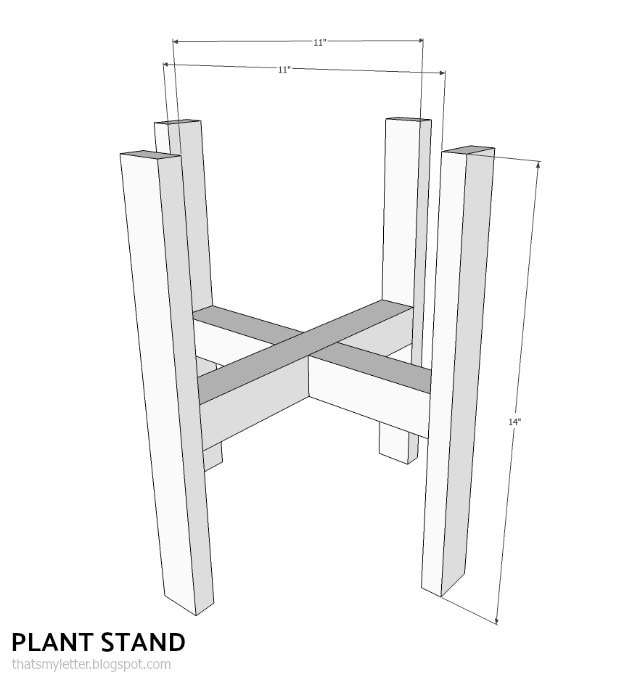
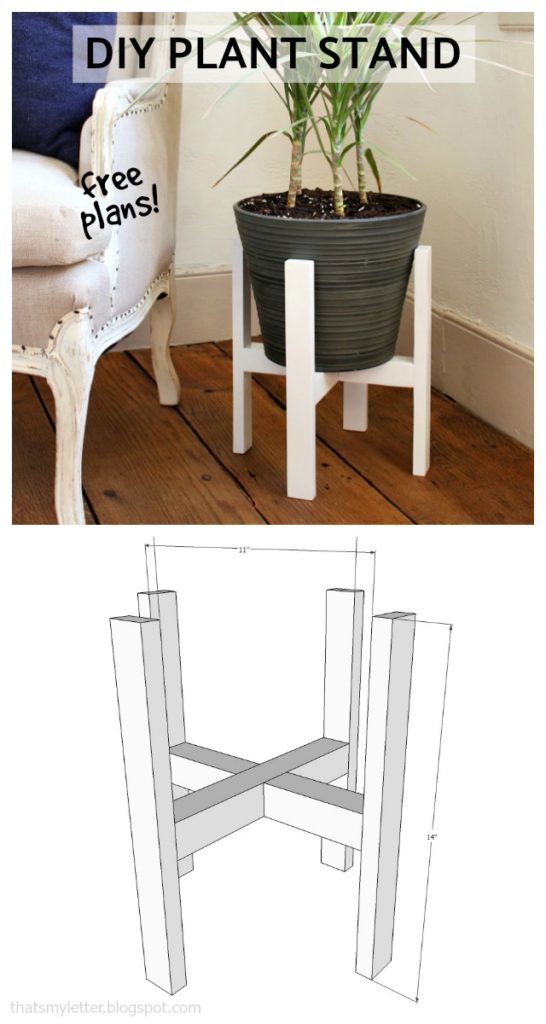
diy plant stand plans
Click here for printable PDF version of plans.
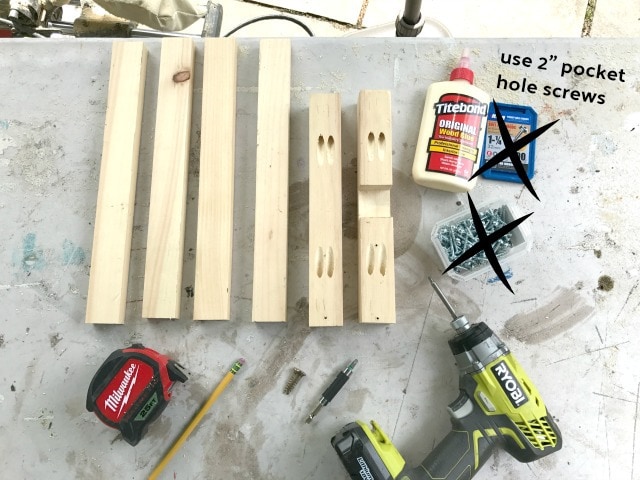
building a plant stand supplies
Once you have the pieces cut assembly is rather quick.


plant stand base
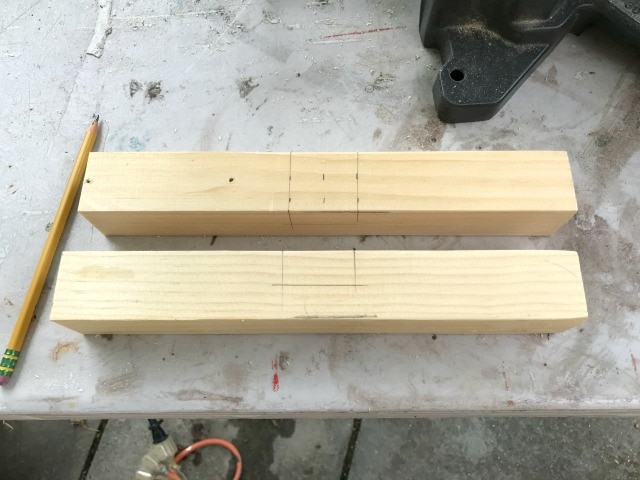
In Step 1 you need to notch the support pieces to create a strong and sturdy base.  Mark both pieces at center for a 1 1/2″ wide notch that is 3/4″ deep.


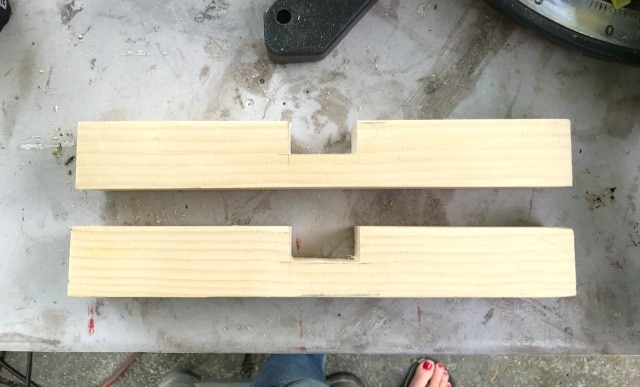
plant stand notched supports
Use a bandsaw or jigsaw to carefully cut out the notches.


diy plant stand support base
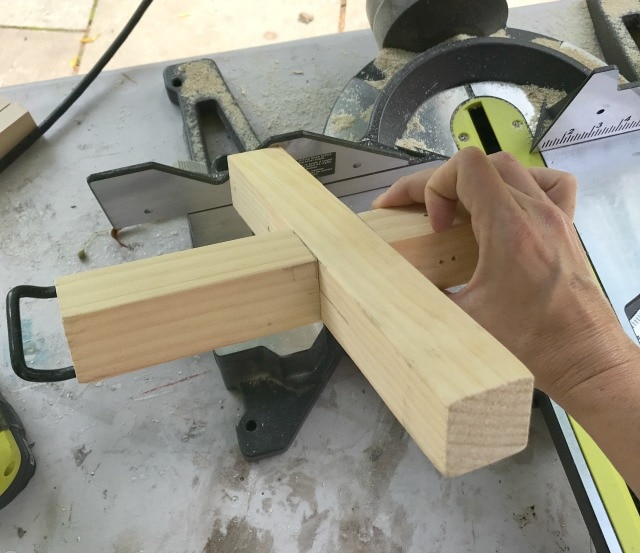
In Step 2 secure the support pieces together using wood glue and countersunk 1 1/4″ wood screws (on the underside).
For the complete step by step tutorial see my plans here.  Also the entire process is on video here.
Good luck building your plant stand!
Be sure to follow and tag me on social media if do build this, I love to see reader projects.
 
Instagram / Pinterest / Facebook / Twitter
diy plant stand free plans

You may also like...

  • DIY Star PlanterDIY Star Planter
  • DIY Outdoor PlanterDIY Outdoor Planter
  • DIY Cedar Scrap Wood PlanterDIY Cedar Scrap Wood Planter
  • DIY Ottoman Tray Parquet PatternDIY Ottoman Tray Parquet Pattern
Share this post:

Filed Under: BUILD, DIY, GIFTS, HOME DECOR, SCRAP WOOD, WEDDINGS6 Comments

Reader Interactions

Comments

  1. Cristina Garay says

    August 11, 2017 at 7:01 PM

    This is so pretty! Gotta make me a few with all those scrap pieces I have, and hey, plants look better on it! 🙂

    Reply
  2. Troy T says

    January 26, 2020 at 5:41 PM

    Great project! Am gonna make a couple this week. One thing I noticed though, If using 2″ inch pocket hole screws to attach 3/4 material (that is used for the feet), I believe the screws will go through. My kreg jig says to use 1 1/4.

    Reply
    • Jaime says

      January 27, 2020 at 6:13 AM

      Thanks Troy. I used 2″ pocket hole screws because you are connecting a 2×2 to a 1×2. I did try the shorter screws (as they are in the photo above) but because of the thickness of the 2×2 you need a longer screw.

      Reply

Leave a Reply Cancel reply

Your email address will not be published. Required fields are marked *

Primary Sidebar

Hi! I’m Jaime

Jaime Costiglio

Hello!

Thank you for stopping by.
Join me for lots of DIY.

Read more

Get new posts via email

Handbuilt Holiday: Gift Project Plans

handbuilt holiday gift project plans

Collection of DIY gift project plans to build.

The Home Depot Tool Prospective

THD Prospective

Tools to consider for the DIYer.

Archives

The Home Depot Logo
Copyright © 2023 Jaime Costiglio · Custom site by Moonsteam Design

Privacy Policy