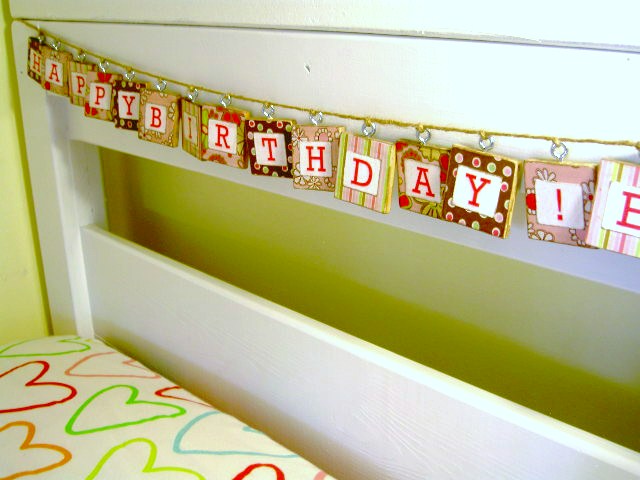
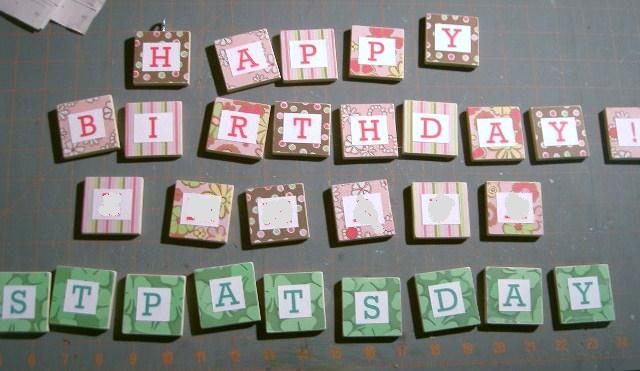
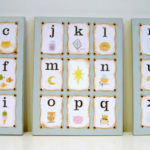
Memory match game turned into a birthday banner (and more!).


In our house when my kids are done with a toy that still has life the options are:
1. save for Lily
2. donate
2. donate
3. repurpose
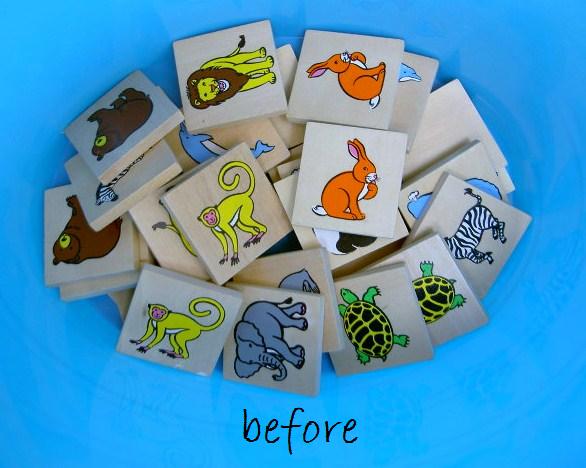
This memory match game got the repurpose option.
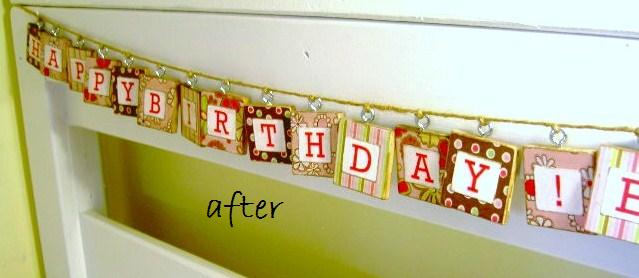
The dimuative little wooden square was just too cute to give away so I made girl #2 a birthday banner.
Here’s how I made the banner:
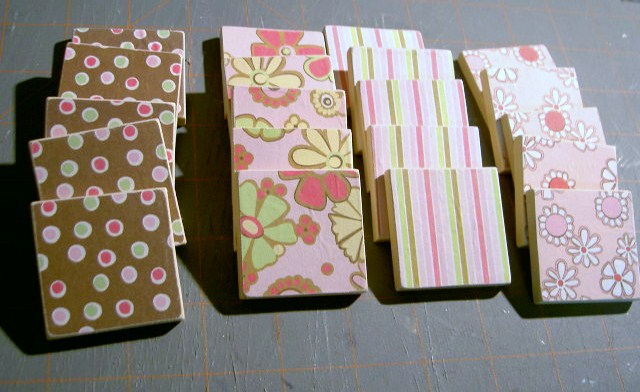
1. Lightly sand animal off the front and wipe with damp cloth:

2. Apply paper using mod podge, once dry sand off excess paper around edges:
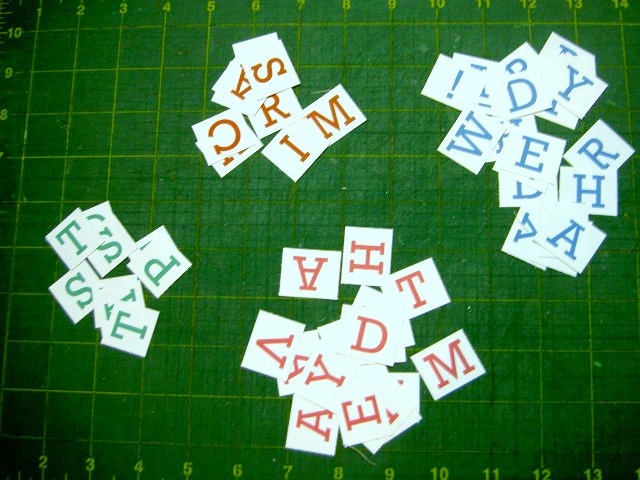
3. For the lettering I printed mine onto cardstock and cut out a square shape to mimic wood block:
(I’m sure those swanky machines have a bazillion options for vinyl letters which might be easier.)
(I’m sure those swanky machines have a bazillion options for vinyl letters which might be easier.)

4. Apply letter using mod podge and seal up paper:
(Repeat this process for other side!)
(Repeat this process for other side!)
* At this point I sanded again and wiped with stain for a rustic, worn look but you could stop here.
5. Pre-drill hole into center of top edge for screw eye hook:
(I used a 1/16″ bit.)
(I used a 1/16″ bit.)
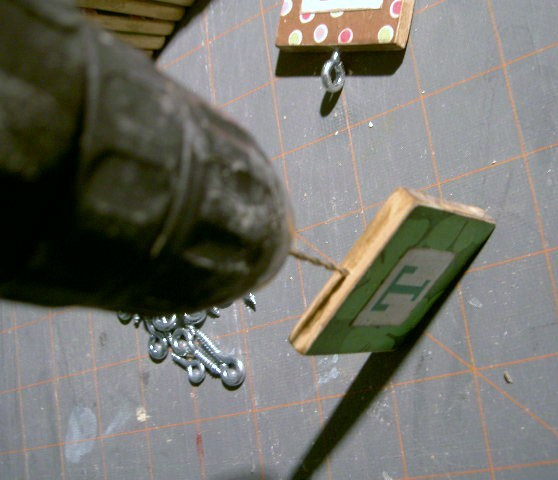

6. Screw in eye hook:

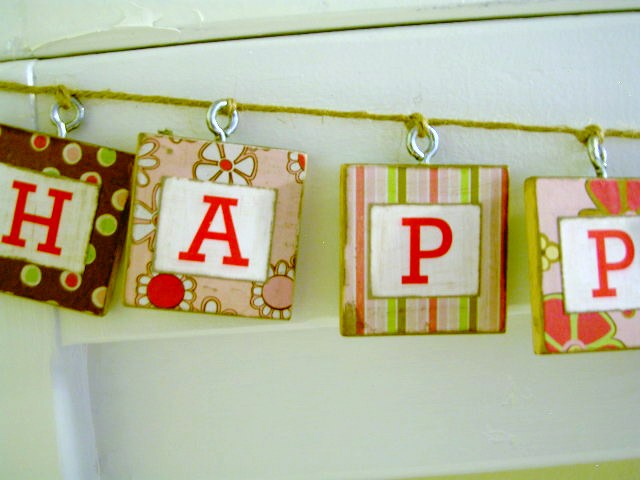
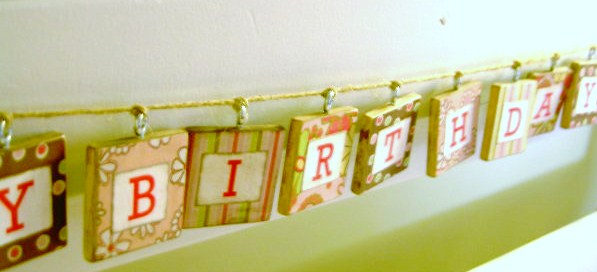
7. Thread onto string (I used jute rope) and hang:

And I can easily untie the rope to change out the name for girl #1 when it’s her birthday.
And the back side is boy colors for buddy boy’s birthday.
A little birthday decoration made from a memory match game.
The before and after:

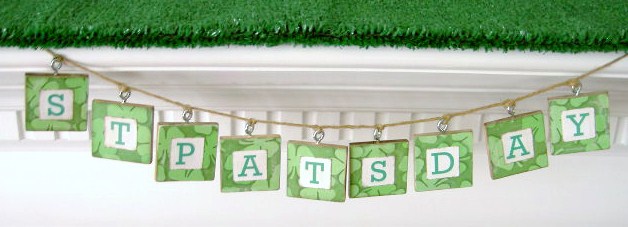
Of course I didn’t stop there.
With the extra blocks I made a banner for St. Pat’s:
(On the back is Christmas.)

And a monogram tag for some friends:

Be sure the think twice about your kids toys before you do away with them – all those little pieces can be repurposed into something great!
I’m linking up to:


Wonderful re-purposusing! Your banners are adorable!
What a wonderful idea. I simply love it!
You have a great blog and I wanted to share a little award with you. Come check it out at http://lessonsofanewlywed.blogspot.com/.
Hope you had a great weekend!
Just adorable! 🙂
This is GREAT!!! What a way to think outside of the box…while saving money! 🙂
Hi, just found you on MM at BNOTP. What a great idea!
Great idea! All that sanding makes me SHIVER, though! 🙂
Fabulous idea!
WOW! You are so creative….sometimes I am so amazed at what you can think up! I'm SO impressed with this one!!!
Hi! I'm your newest follower and came by way of Lessons of a Newlywed. I just love your banners!
Have a wonderful evening!
Aledia~
great idea! never thought of using old toys for repurposing! and they look so cute! thanks for sharing! just visiting from a to z
WOW! Who would have thought you could make something so cute out of old toys!? GREAT!
So cute and cheerful!
Love this, so adorable and clever! I'm your newest follower, I would love for you to stop by sometime, http://www.lovelaughteranddecor.blogspot.com
Warm Wishes,
Jodie
This is adorable! Love how you re-purposed! Oh how I wish I saved our blocks 🙁
Thank you for linking, have a fabulous week!
XO
Kristin
Well aren't you clever! This is such a fun tutorial. I bet your daughter felt very special seeing her name like that. What a fun mom you are. My children are out of the house now but I may just have to find some blocks at the thrift store or a yard sale to try this out.
Thanks for the cute tutorial.
I LOVE how these turned out!
Very Cute I love repurposing things!
Recycled art is the Best!
So cute! I would love it if you would share this upcycle over at The T-Shirt Diaries (http://tinyurl.com/upcycled35).
These are a adorable! What a great reuse. Just darling.
What a great way to repurpose! they came out so cute. I love typography so I think the letters look great!
Yanet of 3 SKBs
So genius – what a great repurpose! So creative! Your newest follower from TGC.
Smiles,
Melanie
http://reasonstoskipthehousework.blogspot.com
[email protected]
These are just precious! I love that you were able to reuse what you already had!
What a cute idea!