• Home
  • Blog
  • About
  • Contact
    • Disclosure
    • Privacy Policy
  • SHOP
  • Widget area for main menu

    • Email
    • Facebook
    • Instagram
    • Pinterest
    • Twitter
    • YouTube
  • Skip to primary navigation
  • Skip to main content
  • Skip to primary sidebar

Jaime Costiglio

build - paint - sew

  • BUILD
    • BEDS
    • BENCHES
    • DESKS
    • DRESSERS
    • GAMES & TOYS
    • SCRAP WOOD
    • SHELVES
    • STORAGE
    • TABLES
  • TOOLS
  • PAINT
    • CRAFTS
    • FURNITURE
    • HOME DECOR
  • SEW
    • GIFTS
    • HOME DECOR
    • POUCHES
  • HANDBUILT HOLIDAY
    • 2021
    • 2019
    • 2018
    • 2017
    • 2016
    • 2015
    • 2014
    • 2013
  • GIFTS
    • BABIES
    • KIDS
    • FOR HER
    • FOR HIM
    • TEACHERS
    • WEDDINGS
  • SEASONAL
    • 4TH OF JULY
    • FALL
    • HALLOWEEN
    • CHRISTMAS
    • SUMMER
    • SPRING
    • ST. PATRICK’S DAY
    • THANKSGIVING
    • VALENTINE’S DAY
    • WINTER
  • SALTBOX PROJECT
    • BATHROOMS
    • DINING ROOM
    • EXTERIOR
    • FAMILY ROOM
    • FOYER / MUDROOM
    • KIDS BEDROOMS
    • KITCHEN
    • LIVING ROOM
    • MASTER BEDROOM
    • PLAYROOM
  • SCROLL SAW

“M” is for Mushrooms

April 15, 2011

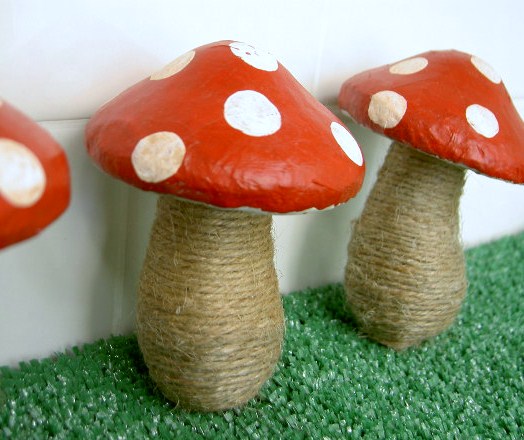
Jute covered mushrooms.

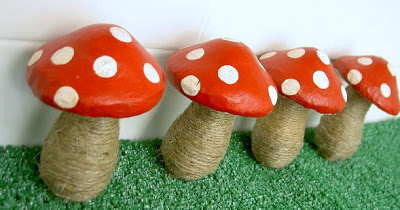
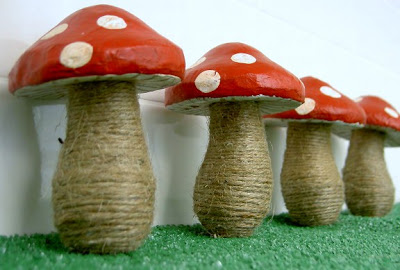
Yes I covered the mushroom stems in jute.

And to go along with the totally fake mushrooms is some totally fake grass!

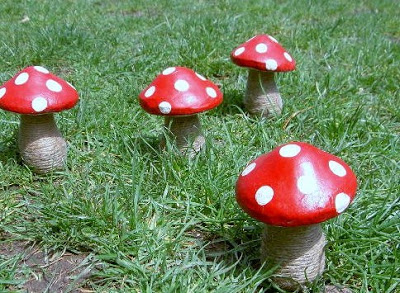
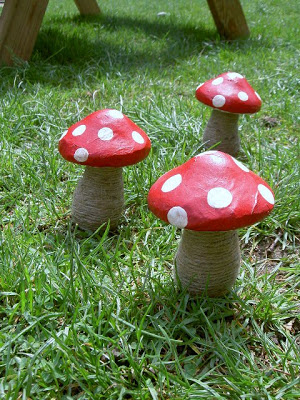
Or should we take it outside in the real grass?

Here’s how I made them:

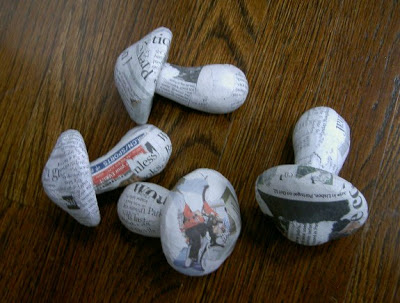
1. Start with paper mache mushrooms. (Michaels $1.50 each)

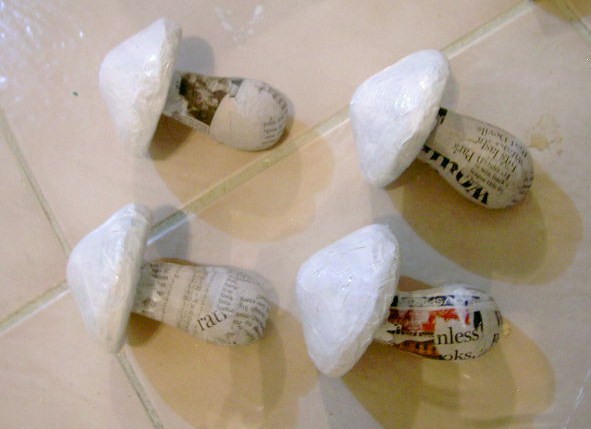
2. Prime the mushroom caps.

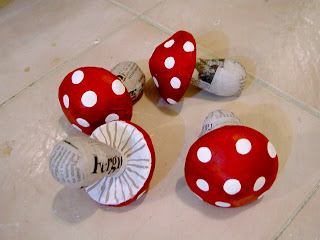
3. Paint caps red, leave underside white.
4. Paint beige ‘gills’ on underside.
5. Paint white spots on caps.

6. Stain entire mushroom cap, I used Minwax polyshade antique walnut.
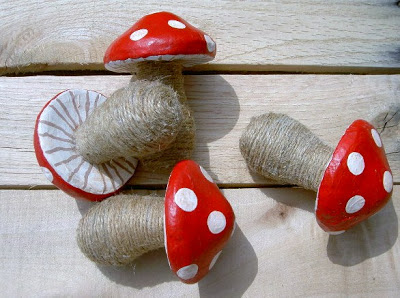
(It’s stain and poly in one but I don’t like it for furniture, very sticky to work with, but great for crafts.)

7. Wrap stem in jute, begin at base of cap, dab a little hot glue every so often.
I used the same method for the jute pears here.

Have fun and decorate with them.  They’d be perfect for a party.
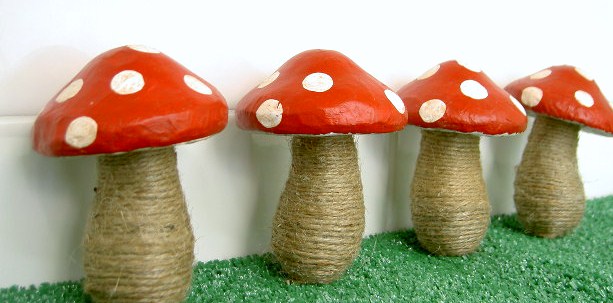
Inexpensive, fun and so darn cute.
I’m linking up to:

The Shabby Nest Chic on a Shoestring Decorating  The DIY Show Off Funky Junk's Saturday Nite Special   Photobucket  MakingThe Lettered Cottage http://linda-coastalcharm.blogspot.com/Photobucket  Transformation ThursdaySYS Thurs Elements Interiors

You may also like...

  • Thanksgiving Pie Coloring Free PrintableThanksgiving Pie Coloring Free Printable
  • “A” is for Alphabet“A” is for Alphabet
  • “M” is for Memory Match
  • Thanksgiving Mantel with Paper PoinsettiasThanksgiving Mantel with Paper Poinsettias
Share this post:

Filed Under: CRAFTS, CRAFTS, DIY, HOME DECOR, PAINT21 Comments

Reader Interactions

Comments

  1. Paula says

    April 15, 2011 at 12:29 AM

    These are so cute! Martha had some felted mushrooms on last month, but I have to say … yours are much cuter!

    Reply
  2. Tanya says

    April 15, 2011 at 4:15 AM

    So cute!!!

    Reply
  3. Sommer says

    April 15, 2011 at 10:43 PM

    Those are so cute! My son is having a Mario Bro's party this month and I have to find a way to incorporate these! You linked these up to the VIP party right? 😛 http://designergarden.blogspot.com/2011/04/vip-party-11.html

    Reply
  4. Mimi says

    April 16, 2011 at 12:34 AM

    Love love your jute mushrooms! They are adorable. Thank you so much for taking the time to share them. 🙂

    Reply
  5. angie @ the cellar door stories says

    April 16, 2011 at 1:26 AM

    these are the cutest things EVER!!!! love them!

    Reply
  6. Laurie@The Baking Bookworm says

    April 16, 2011 at 2:46 AM

    Very cute jute! Now all you need are some Smurfs living in them 😉

    Reply
  7. Alexis says

    April 16, 2011 at 5:10 AM

    Love them!

    Reply
  8. Jill says

    April 16, 2011 at 8:44 AM

    absolutely precious!

    Reply
  9. Amber of Hawthorn and Holly says

    April 16, 2011 at 3:16 PM

    Those are too freaking cute! I'm going to have to run by my neighborhood Michaels and see if they carry those cute little things!

    Reply
  10. Kelly says

    April 16, 2011 at 4:17 PM

    I love these for spring! adorable!

    Reply
  11. Amanda says

    April 18, 2011 at 11:51 AM

    These are so cute and fun!

    Reply
  12. my noodle caboodle says

    April 18, 2011 at 2:44 PM

    As a child in the seventies, I remember family kitchens featuring owls & mushrooms. BUT, I never saw mushrooms as adorable as these! Funny thing how what's old is new again! I also really love your recurring theme, using a letter to feature a project! I hope you won't mind if I use that on my blog sometime in the future. And also, a big thanks for sharing the tutorial….

    mynoodlecaboodle.blogspot.com

    Reply
  13. Grace @ Sense and Simplicity says

    April 18, 2011 at 9:42 PM

    Those are adorable. I don't know why, but I really do have a thing for mushrooms.

    Reply
  14. Jenn Erickson says

    April 19, 2011 at 8:17 AM

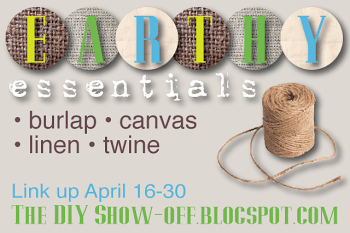
    Absolutely my favorite craft linked up for the "Earthy Essentials"!!! I saw those mushrooms at Michael's and just knew there was some magic to be made with them. Your creations are fantastic!

    New follower,
    Jenn/Rook No. 17

    Reply
  15. Amber Victoria's Cottage says

    April 20, 2011 at 3:10 AM

    What a cute idea! Red is one of my favorite colors and the polka dots just make them even cuter!.

    Reply
  16. cmoh says

    April 28, 2011 at 5:16 PM

    What a fun project, thanks for the tutorial. They add such a bright whimsical feel to your garden, wonderful!

    Reply
  17. Fishtail Cottage says

    April 30, 2011 at 6:37 PM

    Sweet & fun garden decor! Thanks so much for linking up to Cottage Flora Thursday's xoox, tracie

    Reply
  18. SJ @ Homemaker On A Dime says

    May 2, 2011 at 3:30 PM

    Hi, Jaime! These mushrooms are so pretty! Can you please join us at the Creative Bloggers' Party & Hop? The link is at http://www.homemakeronadime.com/2011/05/creative-bloggers-party-hop-050111.html.

    Reply
  19. Lauren @ My Wonderfully Made says

    May 4, 2011 at 2:52 PM

    These are stinkin' adorable!! The possible uses for these are limitless — thanks for posting these cuties!

    Reply
  20. Mel the Crafty Scientist says

    May 19, 2013 at 11:23 PM

    Love your blog and this project – so fun and unique! I also included this project in my roundup of jute craft projects here. Feel free to check it out if you want and hope you like it! : )

    -Mel the Crafty Scientist

    Reply

Leave a Reply Cancel reply

Your email address will not be published. Required fields are marked *

Primary Sidebar

Hi! I’m Jaime

Jaime Costiglio

Hello!

Thank you for stopping by.
Join me for lots of DIY.

Read more

Get new posts via email

Handbuilt Holiday: Gift Project Plans

handbuilt holiday gift project plans

Collection of DIY gift project plans to build.

The Home Depot Tool Prospective

THD Prospective

Tools to consider for the DIYer.

Archives

The Home Depot Logo
Copyright © 2023 Jaime Costiglio · Custom site by Moonsteam Design

Privacy Policy