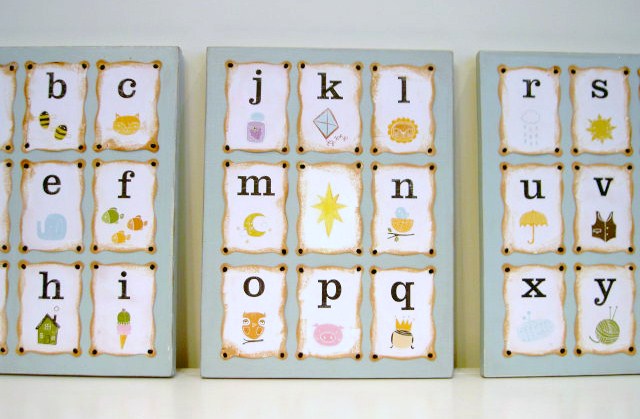
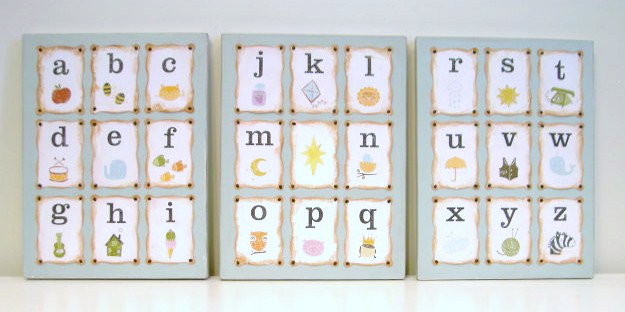
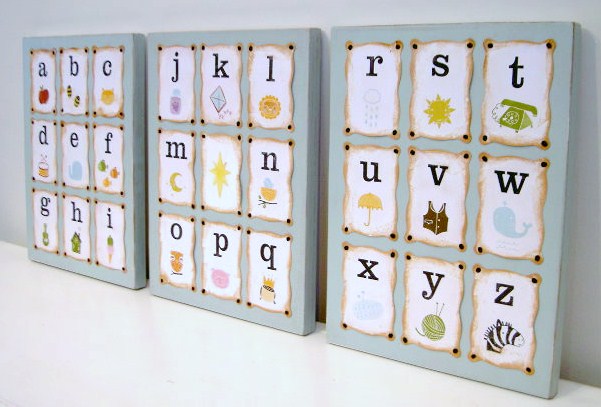
My knock off alphabet art:
This is a baby gift for a couple who is having their first baby.
I was inspired by Restoration Hardware’s Vintage Alphabet Art:

image from Restoration Hardware
Their version retails for $319 plus shipping.
(Plus it only comes in pink.)
(Plus it only comes in pink.)
My version is slightly smaller (9.5″w x 12.5″h) versus their (16″w x 20″h).
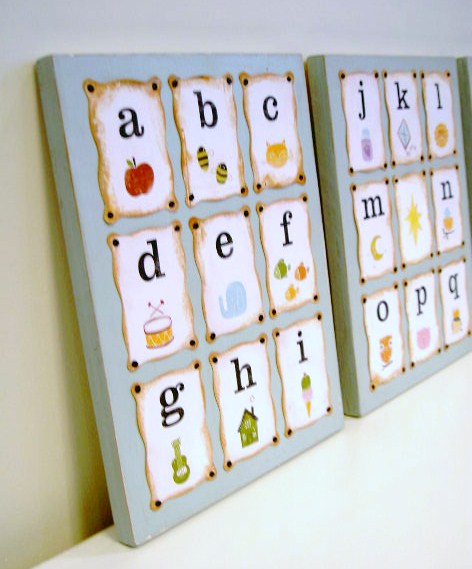
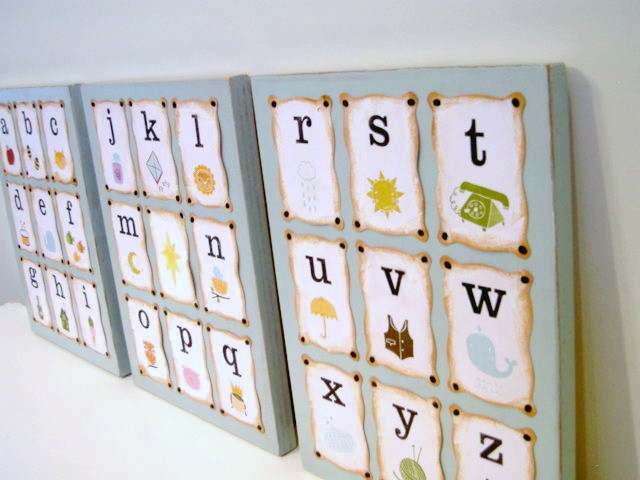
And their version is printed canvas, mine is wood and paper.
To see this project done in other colors check my post here.
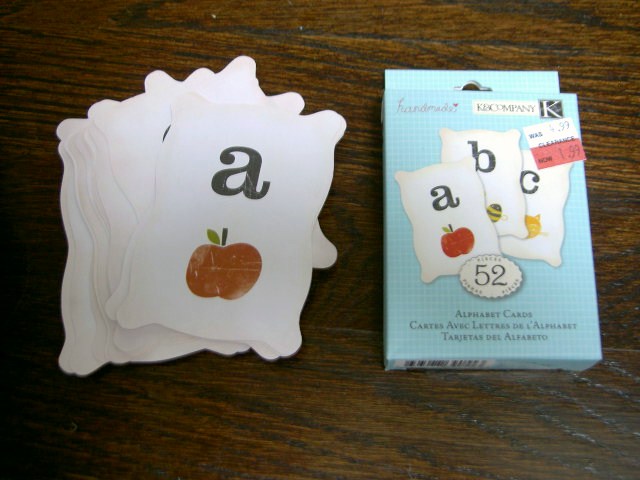
I spent $1.99 on alphabet cards plus $.99 on sawtooth hangers.
I had the wood scraps, paint, stain and carpet tacks.
Total cost = $3. Yes that’s a whooper of savings.
Here’s how I made the alphabet artwork:
1. Purchased alphabet cards.
(Found mine at Michaels way back.)
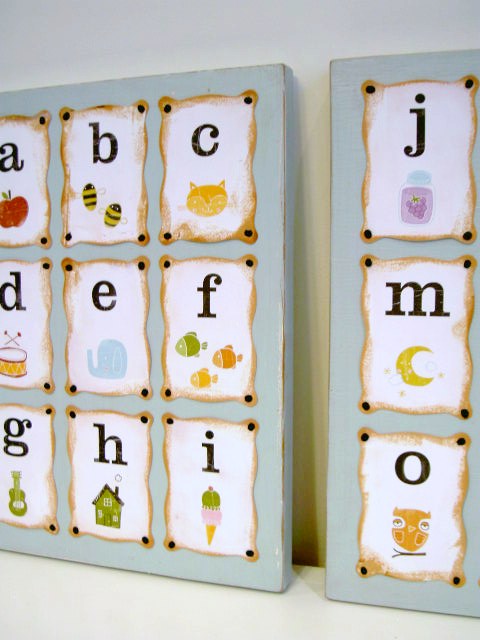
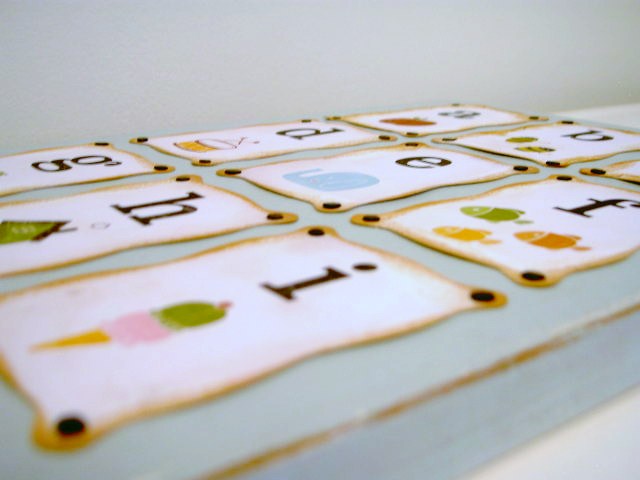
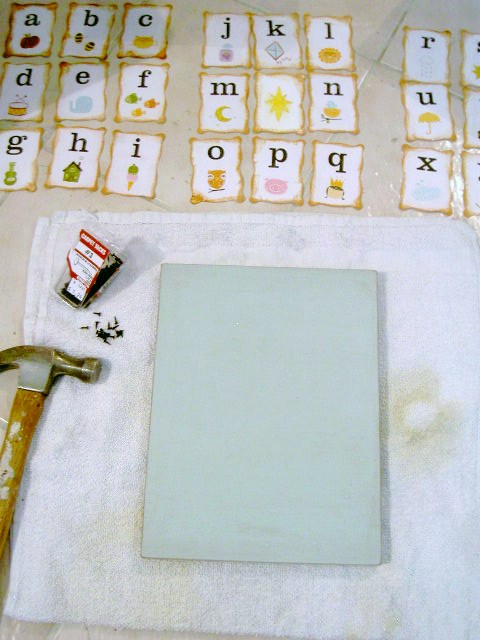
2. Distressed edges of cards using brown stamp ink:

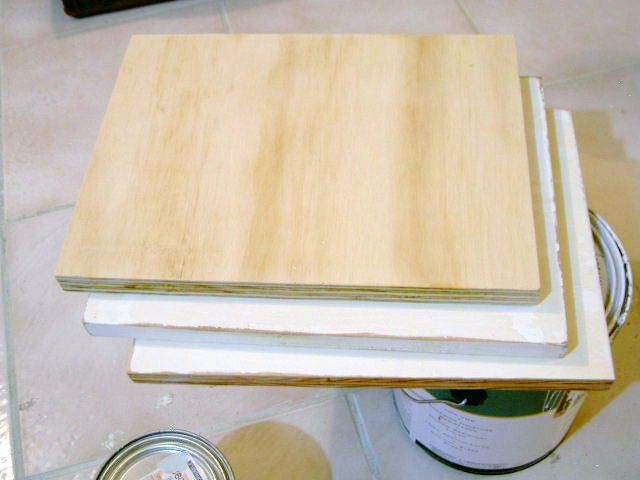
3. Layout cards and cut wood to size. I used 3/4″ plywood scraps cut to 9.5″w x 12.5″h.
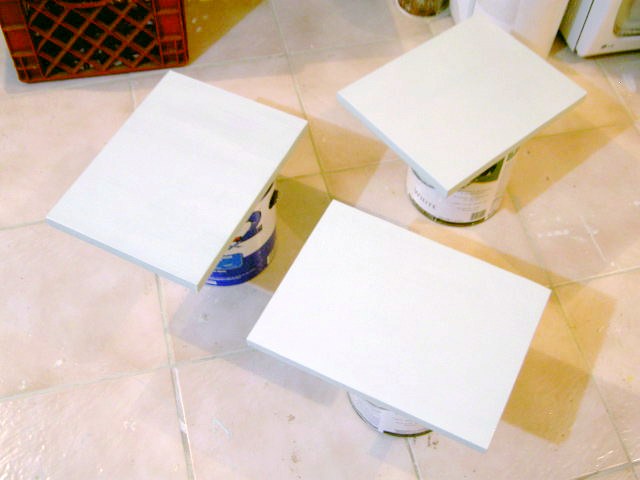
4. Paint front and sides of wood pieces, two coats.
I used Martha Stewart rainwater.
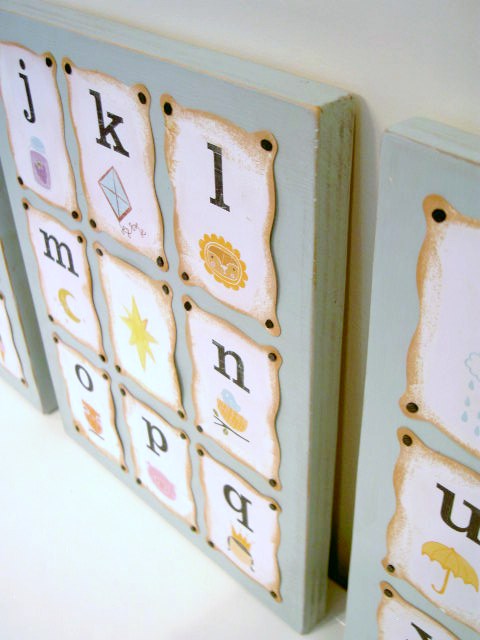
5. Sand edges to distress.
Apply Minwax cherry stain.
6. Line up cards and nail into wood using #3 black carpet tacks:

7. Add sawtooth hanger to back of each panel.

As always thanks to the catalogs for great inspiration.
And now our friends will have some nice artwork for their first born’s room.
I’m linking up to:


http://www.homestoriesatoz.com/
http://www.theshabbychiccottage.net/
The 36th Avenue.
http://frenchcountrycottage.blogspot.com/
http://chiconashoestringdecorating.blogspot.com/
http://www.somewhatsimple.com/
http://shabbynest.blogspot.com/
http://www.remodelaholic.com/
http://justagirlblog.com/
Weekly Challenge @ The CSI Project
http://www.theshabbychiccottage.net/
The 36th Avenue.
http://frenchcountrycottage.blogspot.com/
http://chiconashoestringdecorating.blogspot.com/
http://www.somewhatsimple.com/
http://shabbynest.blogspot.com/
http://www.remodelaholic.com/
http://justagirlblog.com/
Weekly Challenge @ The CSI Project


Your artwork is fabulous!! So cute! I'm sure your friends will love it. The tiny cost is amazing!
$319 for RH's version? Crazy! Your's is way cuter! 🙂
this is an awesome project!! I was tempted by the RH one (well, not for that price) and I love yours even more than theirs! Great job!
Wow! This is fabulous. I am inspired now as I work on my little boy's room and his playroom, too!
So cute! I think yours looks better than the RH version! And way cheaper too.
jaime, that came out soooo cute! love the color you chose- soft and pretty!! what a great baby gift!
Yours is cuter! Way cuter. Amazing baby gift.
This is awesome!! Great job!! Did you think about modge podging over it so it would be shiny? Not sure if that would be good or not. I love what you did. I totally want to copy 🙂
Yours are sooooo much nicer than the expensive ones!!!
Blessings,
Haven
Oh cute! Martha Stewart sells some really cute alphabet letters.
These are gorgeous! I like your version much, much better than the original! Totaling pinning this 🙂
I love this! It took me a minute to figure out how you got 27 cards from the 26 letters of the alphabet! Great project, thanks for sharing!
SO beautiful. i like yours better! lovely job as always. thank you for the share and the inspiration.
I agree with everyone else, yours is cuter and much more sophisticated looking. I am addicted to pinterest, (curse the day I got the invite!) and so I pinned your project 🙂 You are so very creative.
You are so creative! Love this idea.
These are adorable! And do I dare say that I like yours better than the $319 ones! Very cute!
SO adorable. Great job.
Tina
http://www.sweetfloweret.com
Sooooo cute! I'd love for you to share it at my link party… Adorable!
Great idea! I really love this. Coming over from TT&J. Thanks for sharing!
I love this. I think I will be heading to Micheal's tomorrow to get those cards. I featured it on my blog tonight.
SUPER cute!!
I absolutely and wholly love this! I will be making a pink version for my girls room! thank-you!
I am a preschool teacher and we are moving into a new building this coming school year. I really wanted to have some pretty art on the wall to make it more "home-y" but everything I see to buy is extrememly expensive. Thanks for sharing this- I will be making a set for my classroom! I will let you know when it's on my blog!
This is really cool! Love it!
Come see me at http://www.willcookforsmiles.com/
Amazing! Love your stuff and your blog! Keep it coming!
Andrea
http://www.lifelovelarson.blogspot.com
Wow – seriously, I like your version better! And only $3?!? That rocks! Nice work! 🙂
i like yours better! very cute and such a great personal handmade gift!
What a great idea for a classroom! I am visiting from Tatertots and Jello and I would love if you would link this up this weekend to my Delicately Constructed Fridays linky party!!
Have a great weekend!
Michelle
http://www.delicateconstruction.blogspot.com
I saw this linked up at Tatertots and Jello and should have known it was yours! What an adorable project! I love it (much, much, MUCH more than the original, too) . . . great work!
Seriously? Your version is WAY cuter! When I was first looking at the pics I thought the one you made was the "original"!!
Alright, this is just ridiculously cute! I like your version WAY better than the pricey original! Great work, I'd love for you to stop by my blog some time, http://www.icantstopcrafting.blogspot.com
Yours is waaay cuter than the real thing! Love it!
Hadar
Miss Kindergarten
This is ADORABLE!! What a great gift idea. Absolutely love it 🙂
GREAT tutorial!! Love the look!! Thanks for sharing!
We host a link party called “Help a Momma Out” on our blog every Tuesday! This would be an awesome link up! Please feel free to add it! We appreciate it! Have a great day!
Kristine
http://www.jandmseyecandy.blogspot.com
I LOVE how these turned out! You're a great for making these for your friend. I would LOVE a gift like that at a baby shower!
yours is so much prettier than the restoration hardware one! beautiful! saw your project on under the table and dreaming 🙂
this is awesome! I will probably be copying one day 🙂 You need to put this up on http://knockoffdecor.com/.
Love this! I agree; yours is cuter! Had to "pin" this one!
This is so stinkin' cute! I'm completely inspired, can't wait to try it in my little guys room.
We are your newest follower. Hope you too will follow us.
http://www.3krazychics.blogspot.com
this is stunning. I need to keep my eye out for some alphabet cards.
megan
craftycpa.blogspot.com
What a lovely gift! This is just wonderful and I'm sure will be a keepsake for that family…how beautiful!
I absolutely adore this! I love your version WAY more than than the inspired version! What a perfect gift!
This is such an amazing gift for your friends to celebrate their first born.
Your version looks much better than the original, love the distressing.
The recipient is going to love this! It is adorable.
Wow! What a fabulous idea for a nursery! My son & his wife are expecting their first child AND the mom is a teacher so I must make these for them!! Great, great idea & thanks for sharing! PS…I found you at I Heart Naptime……
What a great idea for a gift or for your own newborn room! Totally pinned this and shared! your newest follower from TT&J, too! Thanks for sharing!
Just wanted to let you know I posted these on my site today! Thanks!
that's a great gift!
These are so lovely! I like them better than Restoration Hardware's! Great job!!
Oh my heck these are adorable and look amazing. Great job. I found your project from I heart nap time. I pinned this too 🙂 Come and say hi
A mommy's life…with a touch of YELLOW
tyandwhitneyulrich.blogspot.com
Wow, I am such a sucker for all things ABC. And this project is DARLING!! Well done!
I am visiting from A to Z. These are adorable! What a great baby gift! Everyone is right, yours are way cuter than the RH ones and I love that they are boy-friendly as well.
This is great!! I actually like your version better!!
So stinkin' Cute!
came from TT&J (I think). Love this! Totally looks better than the inspiration too! And cheap woooo!
Wow!! So easy and looks SO good! I prefer yours to Restoration Hardware's version too- love it!! Thanks for inspiration and idea!
this is awesome!!! i would totally buy this! : )
this is such a great project! i love using flashcards for other things too! very well executed!! so darling! it'd be fabulous if you'd link it up to my tip-toe thru tuesday party!
http://crayonfreckles.blogspot.com/2011/06/tip-toe-thru-tuesday-5.html
This is awesome, I'm in love!
brilliant! love it!!!
Cute! I never in a million years would have thought. And I have several of these sets leftover from when I taught kindergarten! Love it!
Jen
Great project! 🙂 I've featured this post on Craft Gossip here:
http://homeandgarden.craftgossip.com/alphabet-wall-art/
If you would like a "featured by" button, you can grab one here:
http://homeandgarden.craftgossip.com/grab-a-craft-gossip-button/
Adorable! I'm pinning this for future re-creation. Thanks for sharing 🙂
-MJ @ MD School Mrs
What a great knock-off! I like how you also distressed the cards. It adds a nice touch. Very pretty!
I have these same cards and cannot figure out what to do with them!! This is a great idea!!
I love yours–what a lovely gift!
I LOVE your artwork! Seriously…cuter than the more expensive one!
Very cute! Love a good Restoration Hardware DIY- they are so overpriced! Great find on those alphabet cards, too!
What a great project! I like yours better than the inspiration pieces AND who can beat that cost?! Thanks for sharing!
Love it! Outshines the commercial version by far!
Amazing!!! I love it!!
I LOVE, LOVE, LOVE this! I'd really love to have you post this on my linky party!!! The party is open for a few more days.
becca-homeiswheremystorybegins.blogspot.com
Becca
http://through-my-is.blogspot.com/2011/07/vintage-alphabet-wall-hanging-tutorial.html
Fabulous!! Yours is infinitely better than theirs! My kids are older and I still want to make this project! Definitely a new follower and now I"m off to check out the rest of your blog!! Great job!
I love this! I was somewhat surprised when I saw the original shown, because the colors are so muted and yours pop. I think both are great, but I happen to be partial to yours… (no brown nosing involved here either! 🙂 ) I have a package, not the same exact kind, but also the scrapping variety that I bought recently, and was wondering how I'd go about using them- nay, even wondering whether I should have bought them after all. Now I know exactly what I want to do. Thanks for sharing your fun idea 🙂
Darling idea! Yours looks the best! You have a great eye! I am going to try this idea out. I found the ABC cards on ebay! $2. Thank you so much for sharing.
Happy Day! Enjoy!!
Very cute! And what an excellent gift.
Oh my… I am so in love with this! I'm pretty sure I'll have to try my hand at making some for my daughters room! I made other wall art for her room, but this is so much better!! Love it!
So amazing! Love, Love, Love it! You did a fabulous job! Wow. I want one!
If you google "K&SCompany cards" you can find those exact cards online. 🙂 I'm going to try and make these for our own nursery. Great job! Very artistic.
darling…i love this!!! : )
I just came across your page and LOVE it. I had found some adorable alphabet cards recently but couldn't figure out how to use them…your piece is exactly what I was thinking of but couldn't put "on paper". Thank you so much!!
So cute! This is such an awesome project! I think yours looks way better than the RH version! Excellent job!
Thank you!!! U bought these same cards forever ago and have been trying to find something to do with them in my baby boys room. I am so excited to get this up and in his room. I have done everything except attach the cards to the board.
My question is, how did you make the sun on the middle board (between m and n)?
Also, what does the cherry minwax add to it? I haven't done that yet? Thanks again!
Camille
This is Camille again. TO be more specific, how did you make a blank card to get the sun on?
I adore this project! Plus, I like it better than RH. It seems smart to spent little $ for a baby when they outgrow their decor so fast. I love the curvy outline of the letters, too.
Um…kind of wishing you knew ME when I was having MY baby!! These are GORGEOUS, and I am definitely inspired!
this looks better than the original!
This is on my to-do list. You were featured http://decoratingcents.blogspot.com/2011/12/trends-knock-offs.html. Come by and grab a button if you'd like.
Love that idea. I have some eboo alphabet cards that I was trying to figure out what to do with and I am totally stealing that idea, with some modifications! Thanks 🙂
This is great! I like your version so much better! I love the little carpet tacks.
Just found this while browsing around for a gift idea… and I have to say your version is so very much cuter than the original!! I mean, WAAAAAAY cuter! 🙂