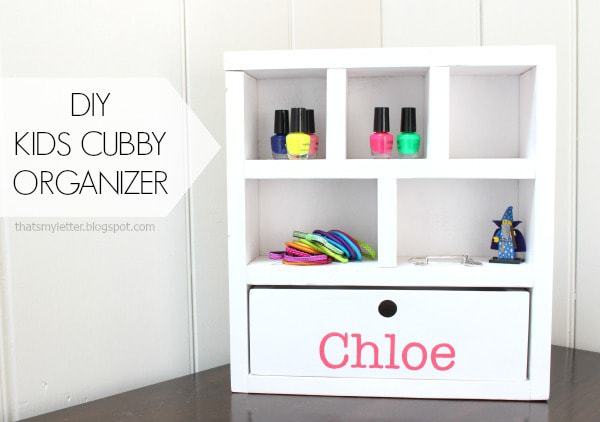
We have seven birthday parties next week during the last week of school. Yes seven. Instead of running to the store to buy more plastic toys wrapped in plastic I pillaged my scrap wood pile and built a kids cubby organizer.
This is a one board project meaning you could build this organizer from one (1×4) eight foot board which costs about $5. Or you could use scrap wood and then it’s a free project.
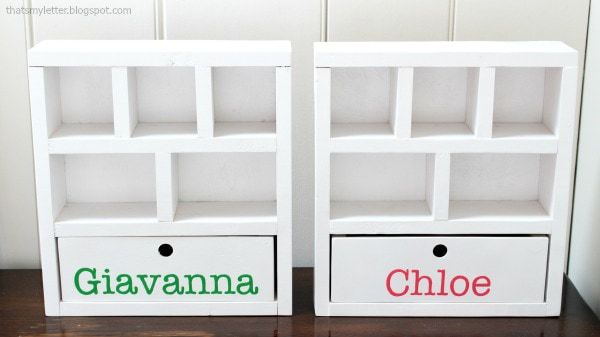
Two down, five to go!
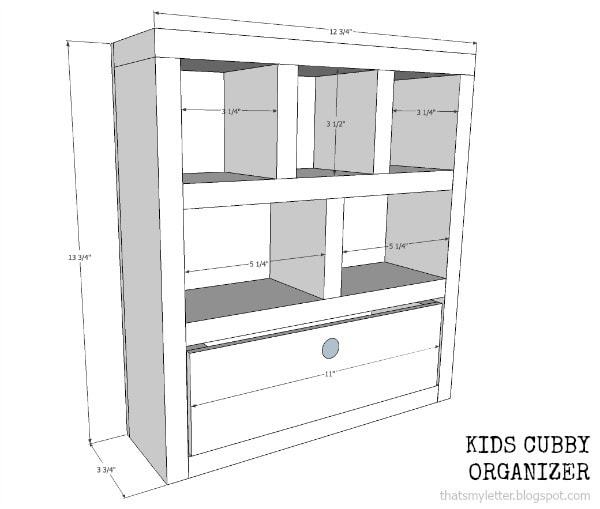
I’m sharing the free plans down below including materials, cut list and step by step instructions.
The cubby shelves make a great spot for kids knick knacks.
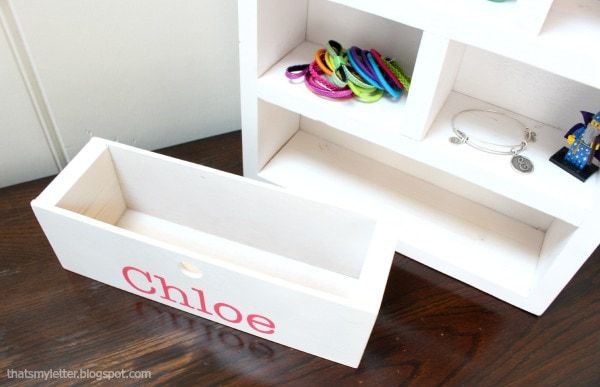
And the drawer is good and sizable as well.
I painted on names to personalize these gifts. (See my tutorial here.)
Materials:
1- 1x4x8 pine board
¼” ply scraps
wood glue
1 ¼” finish nails
¾” finish nails
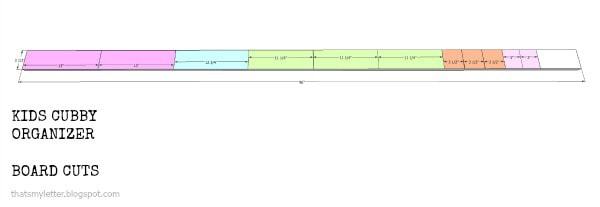
Cut List:
2 – 1×4 @ 13” (sides)
1 – 1×4 @ 12 ¾” (top)
3 – 1×4 @ 11 ¼” (shelves &
base)
base)
3 – 1×4 @ 3 1/2” (dividers)
2 – 1×4 @ 3” (drawer sides)
2 – ¼” ply @ 3 ½” x 11” (front
& back)
& back)
1 – ¼” ply @ 3” x 9 ½” (drawer
base)
base)
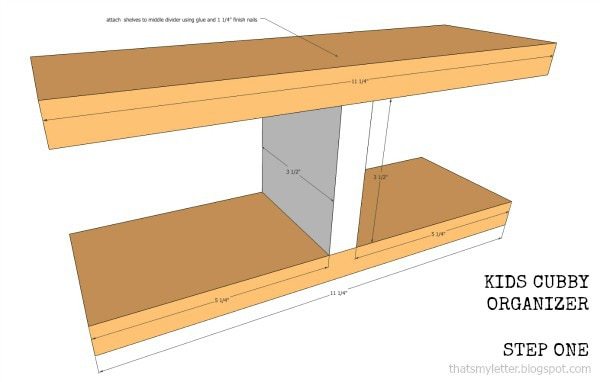
Step 1: Attach middle divider to
shelves using glue and 1 ¼” finish nails.
shelves using glue and 1 ¼” finish nails.
Step 2: Attach top dividers to shelf
using glue and 1 /4” finish nails.
using glue and 1 /4” finish nails.
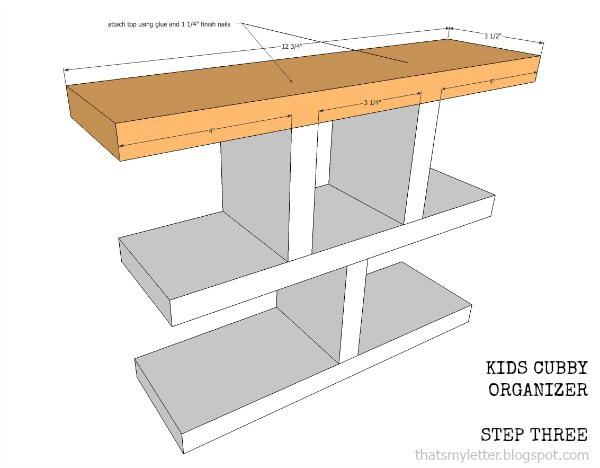
Step 3: Attach top to top dividers
using glue and 1 /4” finish nails.
using glue and 1 /4” finish nails.
Step 4: Attach sides to shelves and
top using glue and 1 ¼” finish nails.
top using glue and 1 ¼” finish nails.
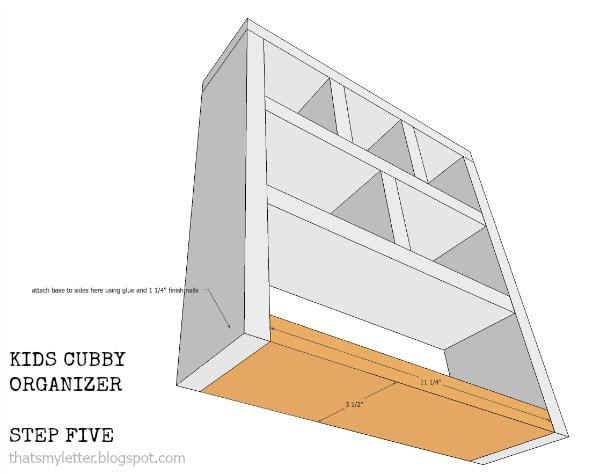
Step 5: Attach base to sides using
glue and 1 ¼” finish nails.
glue and 1 ¼” finish nails.
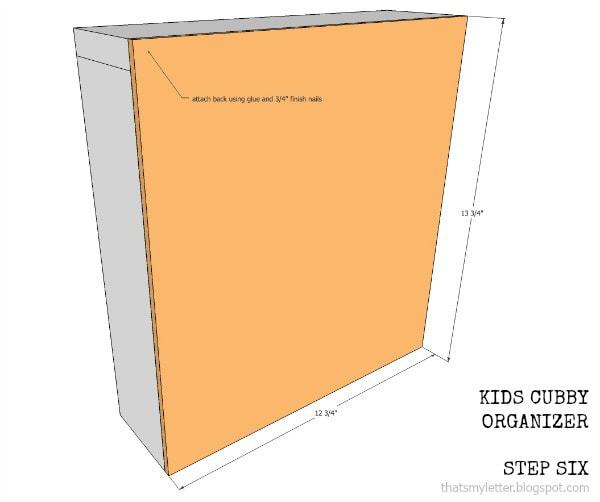
Step 6: Attach back using glue and ¾”
finish nails.
finish nails.
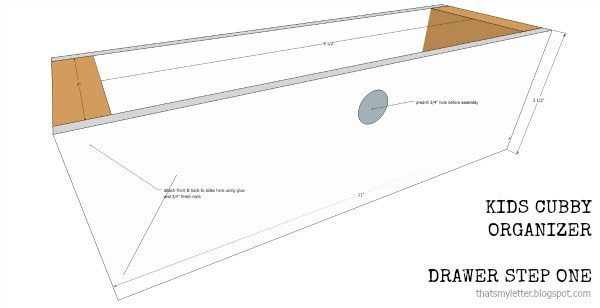
Step 7: Construct drawer body. Predrill center hole using ¾” spade bit. Attach front and back to sides using glue and ¾”
finish nails.
finish nails.
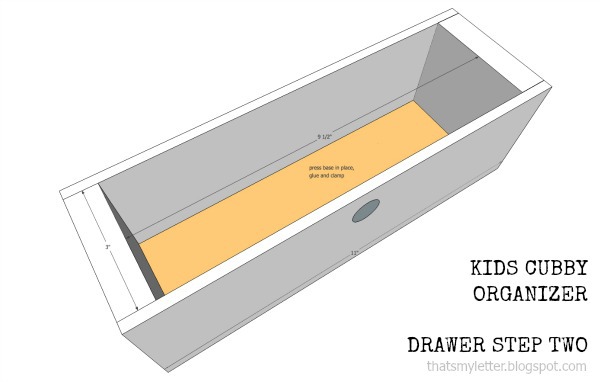
Step 8: Insert base into drawer, glue
and clamp until dry.
and clamp until dry.





Lucky kiddos! I would prefer this gift over anything store-bought.
Awesome!! Thanks for sharing and for the plans!