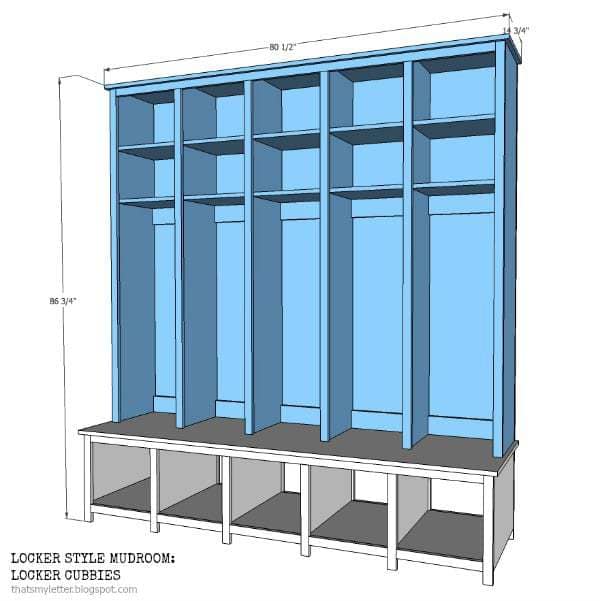
Free plans today for this large five cubby locker style mudroom. I built this piece back in July 2012 and posted it here but I’ve had so many requests to create proper plans that I finally decided to do it.
Build these locker style mudroom shoe cubbies for your space. With an organized system all the shoes, jackets and things have a place!
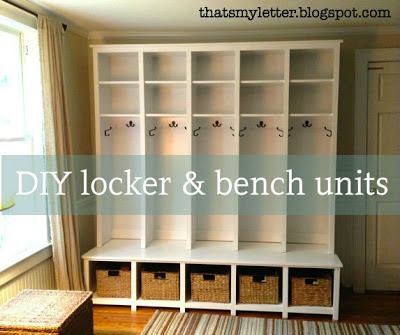
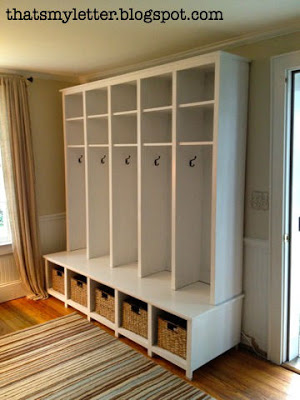
Yikes that’s an old cringe worthy picture but still a great project so I’m reposting. This is my friend’s house and she has four kids and no mudroom so we created an organized entry space with this extremely user friendly locker cubby system.
Shoe Cubbies and Locker Cubbies
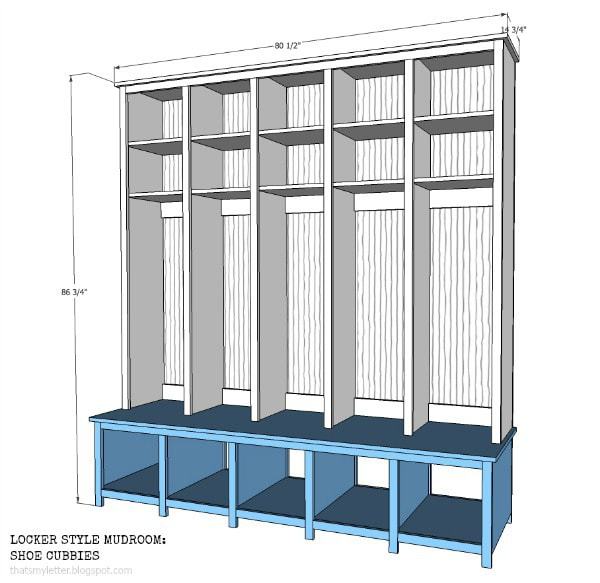
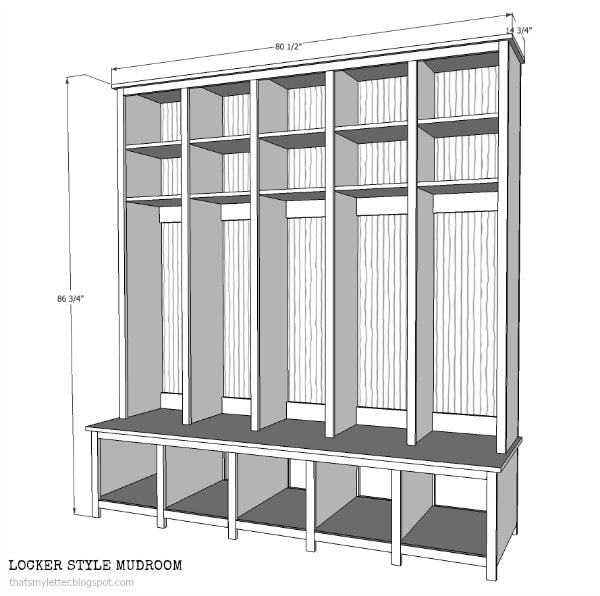
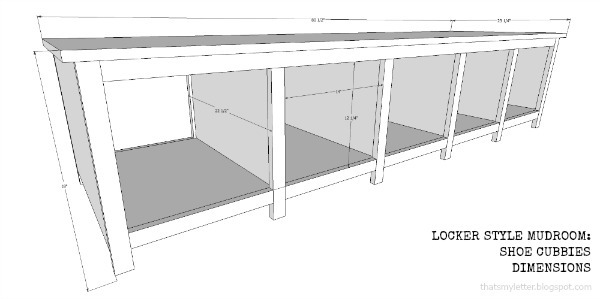
This build is actually two pieces: shoe cubbies on the bottom which also serves as a bench and locker style cubbies up top with two open shelves for storage. This post includes the plans for the shoe cubby bench portion only.
Below are the steps to building a locker style mudroom shoe cubby bench. Definitely read through entirely before beginning and please remember to use all safety precautions when operating power tools!
* Fits basket maximum dimensions: 13 ½”w x 22”l x 12”h
Materials:
- 2 – ¾” plywood sheets
- 6 – 1x2x8 boards
- 1¼” pocket hole screws
- wood glue
- 1¼” finish nails
Cut List:
- 1 – ¾” plywood @ 80 ½”l x 23¼”w (top)
- 1 – ¾” plywood @ 77 ½” l x 21”w (base)
- 2 – ¾” plywood @ 15 ¼” x 21”w (sides)
- 4 – ¾” plywood @ 13 ¾” x 21”w (dividers)
- 2 – 1×2 @ 76” (top trim)
- 4 – 1×2 @ 17 ¼” (corner legs)
- 8 – 1×2 @ 15 ¾” (interior legs)
- 10 – 1×2 @ 14” (base trim)
I suggest purchasing your baskets first before making any cuts. Be sure your baskets will fit the dimensions or adjust then bench to fit your baskets, that’s the beauty of DIY!
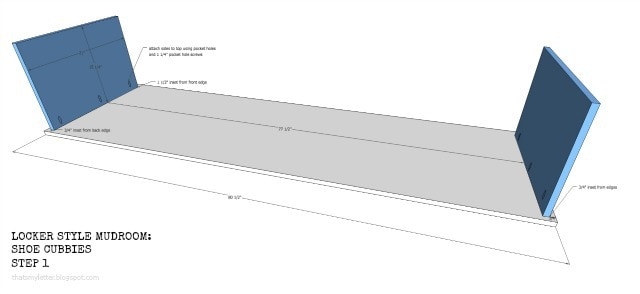
Step 1: Attach sides to top using pocket holes. Use wood glue and 1 ¼” pocket hole screws. Keep ¾” inset from sides edges, 3/4″ inset from back edge and 1 ½” inset from front edge.
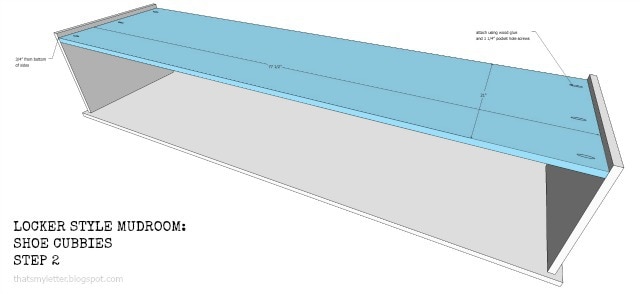
Step 2: Attach base to sides using pocket holes. Use wood glue and 1 ¼” pocket hole screws.
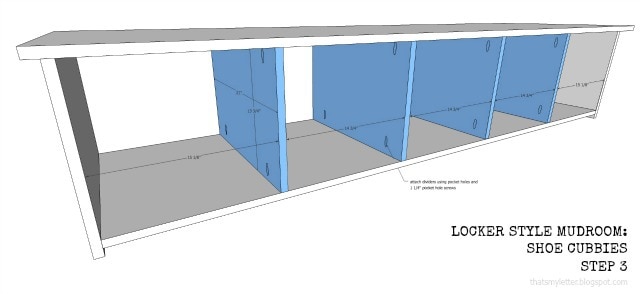
Step 3: Attach dividers to frame. Use wood glue and 1¼” pocket hole screws.
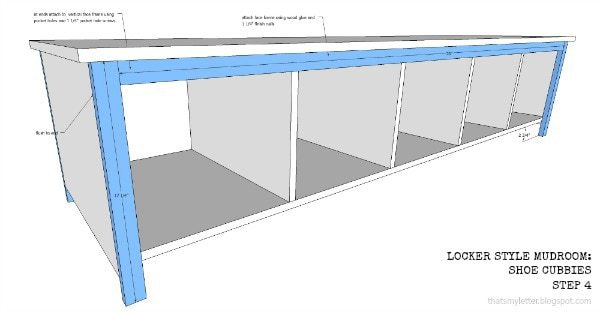
Step 4: Attach corner legs and top face frame. Use pocket holes and 1 ¼” pocket hole screws to secure top face frame to legs first then attach all pieces to unit using wood glue and 1 ¼” finish nails.
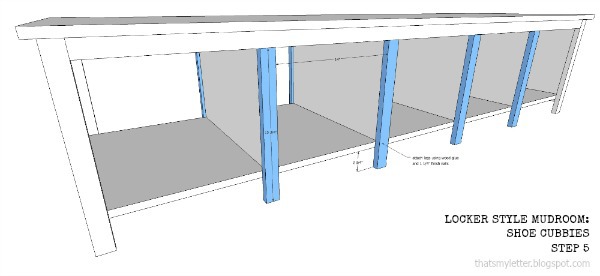
Step 5: Attach interior legs to frame centering on dividers. Use wood glue and 1 ¼” finish nails.
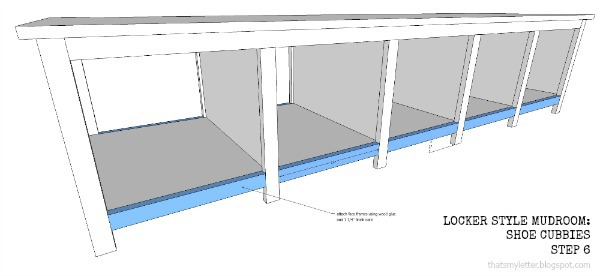
Step 6: Attach base trim to shelves using wood glue and 1 ¼” finish nails.
Finish as desired.
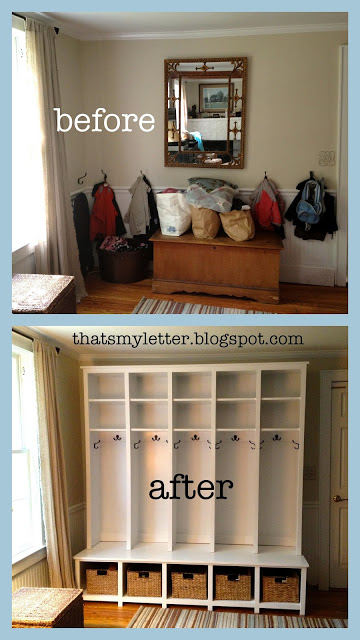
Below is the before and after of my friend’s entry space. You can see what a difference this locker style mudroom makes in terms of organized space!
SHOP THIS PROJECT:


So nice of you to make these plans! I built this last year with the original hand drawn plans on your site. Ours looks great, but these new plans and wood list will be a great timesaver for others! So glad I found your site, thank you for doing what you do!
Thanks for the plans! There seem to be 2 small (but important!) mistakes in the write up – first, shouldn't the bottom board be 77.5" instead of 78.5? If you have a 80.5" top panel, minus 3/4"+3/4" side gap, minus 3/4"+3/4" thickness of the outer sides = 80.5"-3" = 77.5". I assembled the top and the sides last night and confirmed that the inner dimension is 77.5". Second, the PDF says in Step one that the back edge inset is 1/4", but the webpage says 3/4" inset. Any way you can increase the font size in the images too so we can read the annotations?
Otherwise, great plans – it's coming together really nicely and I'm excited to finish and paint it!
Hi Jesse, yet another question for you! 🙂
Was wondering if this unit, once the legs are attached is strong enough for an adult to sit on or if that was not really the intention for this piece?
Mike yes an adult could definitely sit on the bench. See more pics in the original post here where there's 4 kids standing on the bench http://thatsmyletter.blogspot.com/2012/07/l-is-for-lockers.html
Good luck with your build.
Thank you Jesse. You are correct (my error in the sketch). I have corrected the sketch and cut list and have also updated the plans. So wonderful to have readers who not only use the plans but double check for me, thank you kindly.
And another question for you, Jesse lol! I'm not sure if this was in your plans or not, but what are your suggestions for securing the top part to the bench, or did you not bother doing this? My assumption was that you used pocket holes, but figured I'd check first to see if there was a better/different way of doing this.
@Mike I attached the lockers to the bench using L brackets at the interior corners and mending plates at back. Hope that helps.
@Mike – sorry for the delay! I thought and thought about how to secure the 2 pieces together… I considered pocket hole screws, finishing nails from the bottom, etc etc etc. My friend finally convinced me that since the bottom was bolted to the wall, and the top was bolted to the wall, that caulk and paint should be more than enough. And so far it has been – there's no shifting, wiggling, etc. It's totally 100% secure.
The final product! I added charging ports in each cubby too for the eventual phones, iPads, etc
http://imgur.com/a/nYmbp
I am looking to make something like this. It has all the feature I want, but I need a smaller version for my space. Could this be altered to a 3 cubbie/locker unit instead of 5?
Definitely. Basically chop off 2 of the cubbies, I would set your overall width based on your specific space and go backwards from there adjusting the cuts.
So,… I’m a fan. These are really well thought out. It inspired me to design and build my own in my own limited space, I hope they turn out as well as yours
Where did you find such big baskets?
Hi Julie, the baskets were from HomeGoods years ago.