
Make your own jewelry stand using my plans below.

And if you think you’re seeing the same project again you would be correct. I have previously shared the jewelry stand here however this new post includes proper plans.

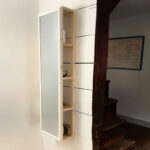
The previous version was pink but this time I used turquoise for the accent color:

The base makes a great landing spot for all those small accessories: hair clips, earrings, lip balms, etc.


The clear beads on the ends of the hanging bars make a nice finishing touch. I found these clear faceted beads at Michaels and the top clear knob is from Home Depot.

How to build a jewelry stand:
Please use all necessary safety precautions when using power tools.
Materials:
36” – 1 ½” x ¼” flat moulding
1 – ½” plywood @ 8 ½” x 7 ½”
1 – 1” dowel
1 – ½” dowel
wood glue
2” wood screw
1 ¼” finish nails
Cut List:
2 – 1 ½” moulding @ 8”l (box sides)
2 – 1 ½” moulding @ 6 ½”l (box sides)
1 – ½” plywood @ 8 ½” x 7 ½” (base)
1 – 1” dowel @ 13” (center post)
2 – 1 /2” dowels @ 7 ½”l (hanging bars)

Step 1: Glue and clamp box sides
together.
together.


Step 2: Glue and clamp base onto box
leaving ¼” around edge.
leaving ¼” around edge.

Step 3: Drill 1” hole in center of
base about 1/4” deep. Glue and insert
center post then secure with 2” wood screw countersunk from underside.
base about 1/4” deep. Glue and insert
center post then secure with 2” wood screw countersunk from underside.

Step 4: Drill ½” holes for hanging
bars and insert dowels. Use a finish
nail into center post to secure hanging bars.
bars and insert dowels. Use a finish
nail into center post to secure hanging bars.

Prime and paint as desired.

I covered the interior with tape and sprayed primer and semi gloss white. Pull off the tape and then paint the interior turquoise.

For the name print out the desired size. Line up print out at center and trace letters using heavy pressure with a ballpoint pen. The pen leaves an indent in the wood. Paint on and inside the indent.

To add clear beads on ends drill a small hole at center of hanging bar.

Use a white finish nail and glue then hammer the bead in place.

This makes a great gift for any lady.


Muy bonito y practico para tener todo a mano pero con encanto. Muchas gracias por el pap.
Besos
http://madeinamano.blogspot.com.es/
Great project, Jaime! It would be perfect for my daughter's room, but as of right now, you've given a good idea for another project 😉 Thanks!