An armchair makeover.


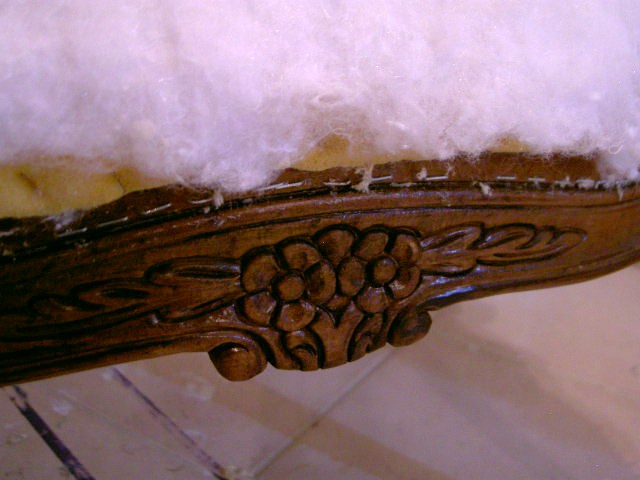
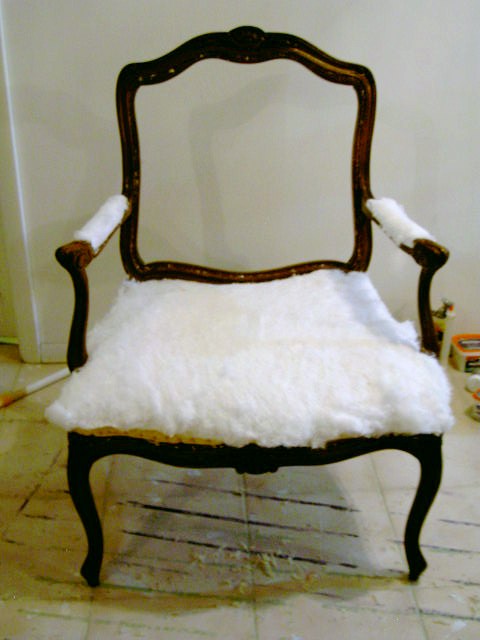
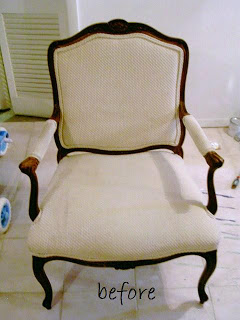
Curious about the before shot?
This little lady just needed some love.


I scored this gem for $20. It was in great condition, the fabric was a bit worn but otherwise almost perfect.
(This is the Fiorita chair by Thomasville, I did some research.)

(This is the Fiorita chair by Thomasville, I did some research.)

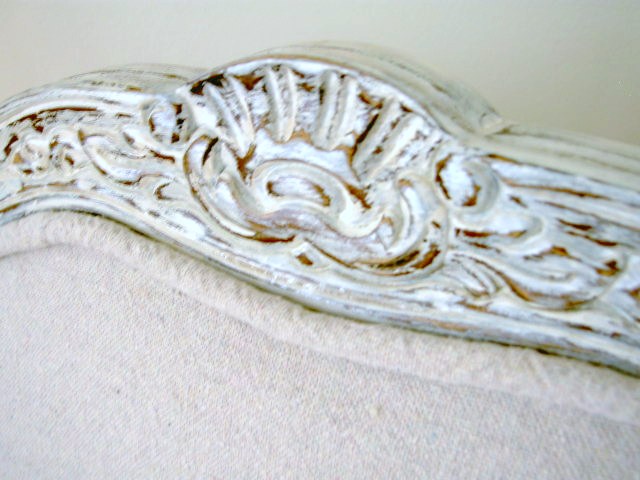
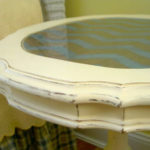
The details are so pretty but we can hardly see them.

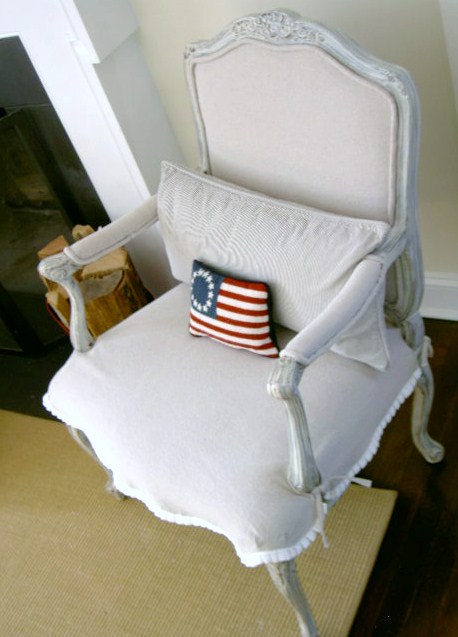
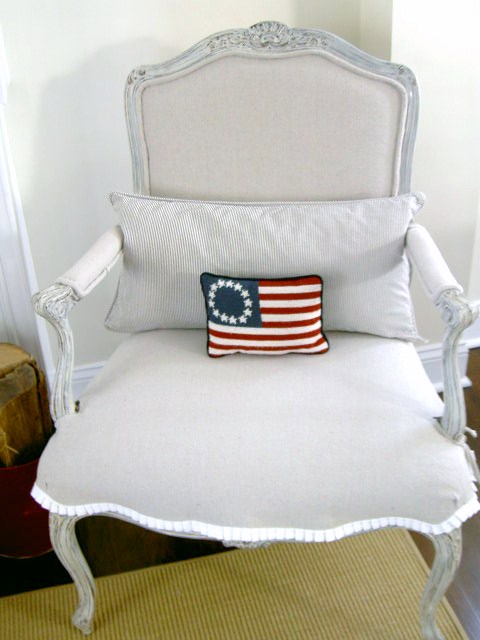
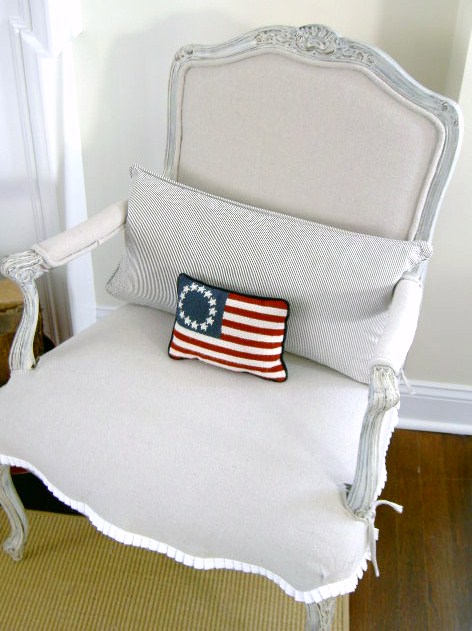
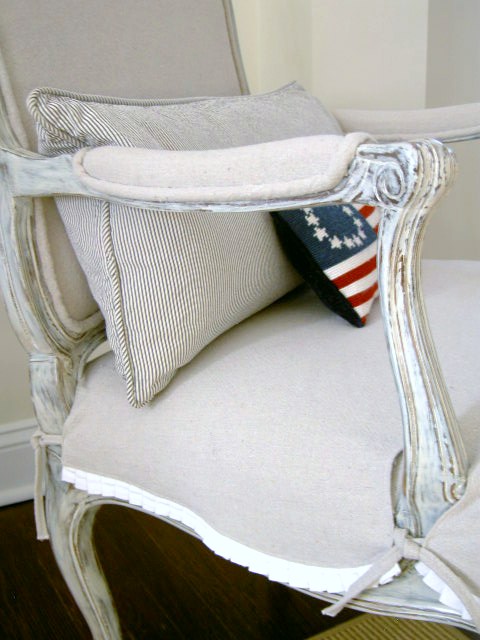
But I fixed her all up and now she’s gorgeous.


Here’s how I did it:
For the frame:
1. Remove upholstery and staples. Sand wood with 120 grit.
2. Apply one coat BM buxton blue.

3. Apply one coat Behr off white.

4. Distress with 220 grit sandpaper.
5. Stain with Minwax special walnut.
5. Stain with Minwax special walnut.
6. Seal with one coat clear satin poly.
For the upholstery:
1. Using drop cloths, staple back piece in first, then filler, then front piece.
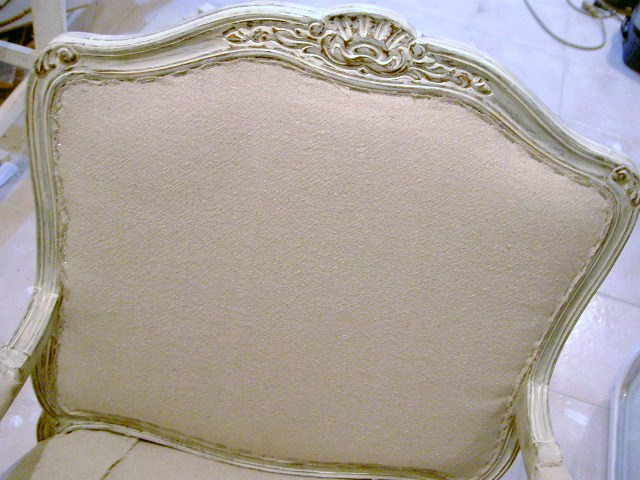
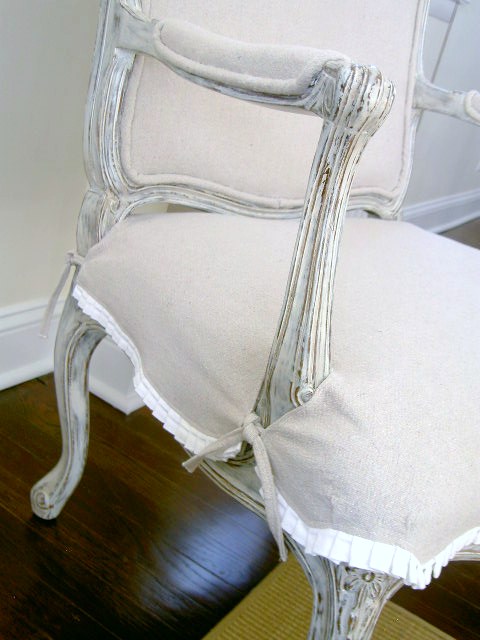
2. Glue trim on to hide staples.
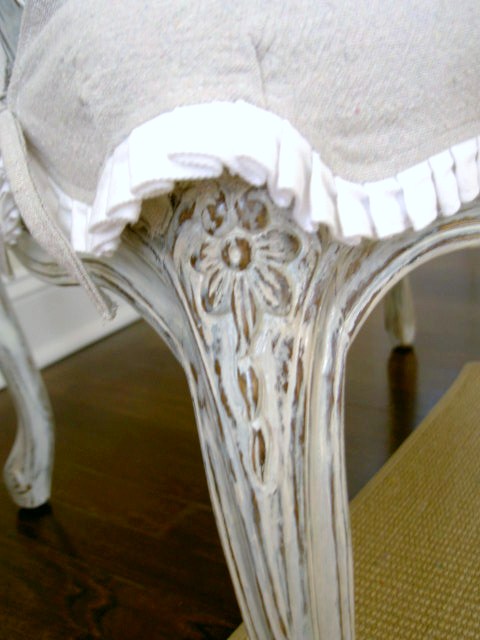
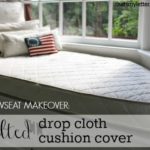
3. Staple on seat piece. (You could stop here and apply trim for a finished look but I opted to make a removable slipcover for easy washing.)
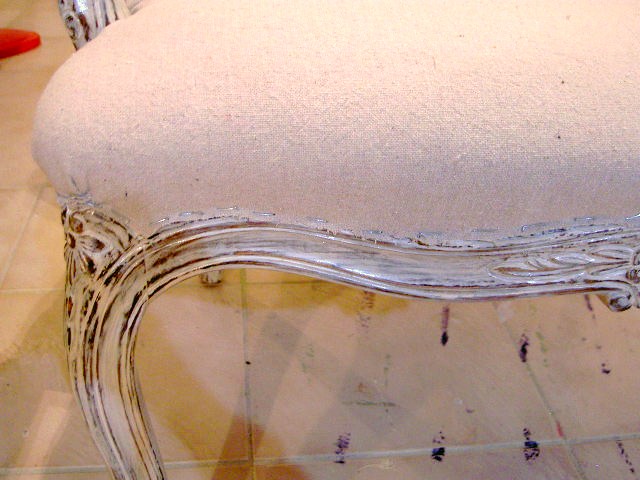
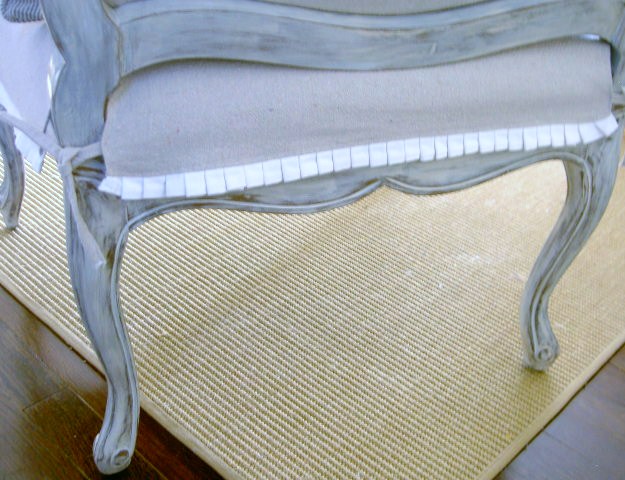
4. Make slipcover using seat as template, add pleated trim and ties.

Now she’s ready for the runway!
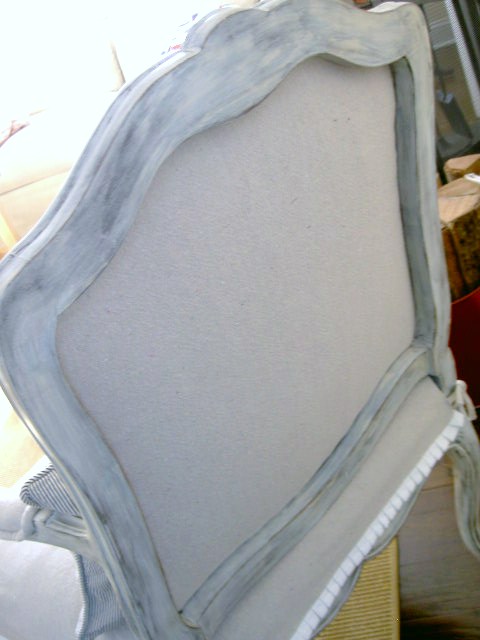
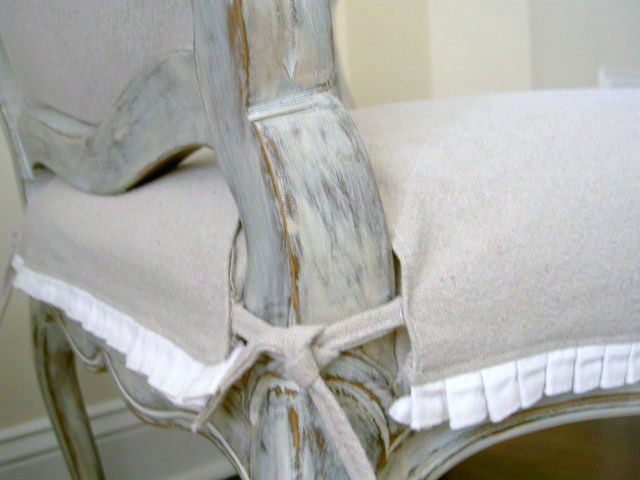
Back details:
Front ties:
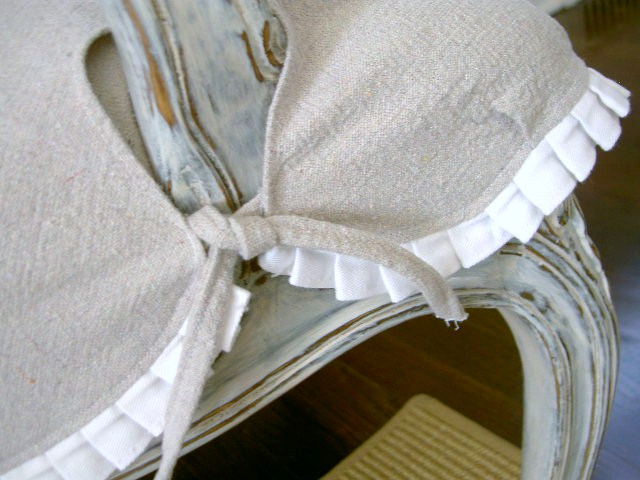
Back ties:
Cost breakdown:
chair $20
drop cloth $10 (only used 3/4)
Total = $30
I already had all the other supplies, trim fabric, staples, glue, paint.
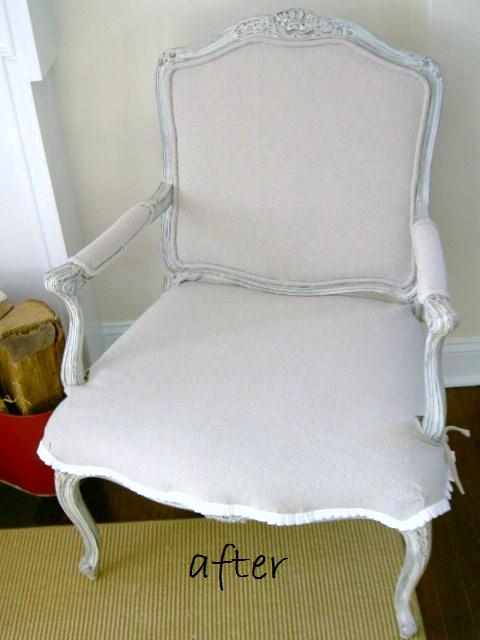
She’s so pretty and feminine now.
I’m linking up to:


Gorgeous! The chair looks amazing, what a great find for $20!
Wow ~ you do great work! And you make it look so easy, which it is not, unless you have a skilled hand! Now where did you find that chair for 20 bucks?
:)Heidi
Wow! Of all the projects I have seen since I started following your blog, this is my favorite so far. It is beautiful.
Angie
Linen & Verbena
I can't beleive yow fast you got this done! Way to go…it's beautiful!
Jaime, it's gorgeous. I redid a chair almost exactly like that last year, and we love it. Your's is amazing. Here's the link to mine if you want to see it.
http://thelifeofloulou.blogspot.com/2010/09/may-just-be-my-favorite-yet.html
She is so gorgeous!!! I can't beleive a chair that pretty was only $30, wow! I love the ruffle detail. You are amazing! Is there anything that you can't do?
Wow- gorgeous!!! I love the distressed look.
You did a great job Jaime! It looks awesome. Love the little slipcover.
Kim:)
WOW! I can see the details on the wood…love it…Congrats,..saw your project made the DIY club top Ten!!!!! YEAH!
Love your ch air!! It is just beautiful! I had found a chair similar to this a few weeks and am kicking myself for not getting it.
Absolutely gorgeous! You did an amazing job. I really love the small ruffle along the bottom.
She's absolutely gorgeous!! I have a similar chair that I reupholstered and this is the look I was thinking of originally- it might be getting a re-do again! lol!! Thanks for the inspiration! 🙂
Wow! Beautiful chair. You've done a wonderful job!
[email protected]
So lucky…what a great find. You really did a great job on the transformation. I have been a follower for a while. I would love for you to come follow me back. Thanks.
Wow, you make it look so easy…but this is something I have never attempted! Your chair came out lovely!
FAN-TAB-U-LOUS!!
Your chair was an absolute steal! And turned out wonderfully! Great job! I also want to thank you so much for your clear instructions. I'm about to cover two chairs in a similar fashion and I really appreciate the help. Vanna
"L" is for Love this!! Gorgeous chair!
Where do you find the time for all you do?? Compared to you, I'm a couch potato 🙂
So cute I love it! I need to find a chair like that to make over, they look like so much fun!
Meg
Love the lines of this chair! The slipcover just makes it! You did a great makeover on her.
Take care!
So pretty! I love the pleat trim. The whole thing is fabulous!
wow! that is stunning! i love the finish on the wooden features, and the slipcover is amazing!
Totally perfect. Wow ~ I'm super impressed!!! 🙂
What a beautiful chair! Fabulous!
This is fabulousness!!
This turned out beautifully! I can't believe you scored it for $20!
Jaime, you are so talented! Everything you do has gorgeous results. I love this too. Do you ever rest?! 🙂
Thanks for sharing in the DIY Project Parade. 😉
Roeshel
Beautiful! I love the slipcovered seat!
Great job! I love, love the pleating on the skirt, so gorgeous.
Found you on Coastal Charm 🙂
Shelley
http://www.westermanfam.blogspot.com
Very pretty! I have a craigslist chair that I'm in the process of redoing sort of like that one. I hope mine looks half as good as yours!
Definitely a beautiful job!
Stunning! May I send over my chairs that need to be done?
SUPER job. I've been looking for a chair to do a very similar makeover, so basically I'm totally jealous!
I have had 2 chairs similiar to this and I have been putting off redoing them for 5 years. Thanks for the tutorial it inspired me to get busy!
You did a wonderful job! The chair has such great lines and curves.
Your chair is stunning! I love the finish you gave it and the pleated, ruffle trim is darling!
I am your newest follower 🙂
Amanda
I found you on The Shabby Chic Cottage. Great redo. I love the slip with the white pleated ruffle. I may have to copy that. 😀
And, I think I'm becoming a follower and adding you to my Google Reader list!
-Paulette
Ooooo. I like! 🙂
STUNNING!! Love the pleated trim!
Beautiful! I love the paint treatment and the pleated ruffle!
Wow, what a transformation! Looks great now!
I am so jealous! You did a remarkable job transforming that french salon chair. Mine, not so much. I just posted about it too, but it was so hard for me to upholster the seat part especially where the seat and the arms meet. Any tips?
Happy Feathered Nest Friday!
-marie
So glad you linked this up to the party- I love this chair and love how it turned out and yes… I am thinking my chair might soon be getting a makeover!! Thanks for sharing it at FNF! 🙂
Very pretty! I love the ruffle details. And the treatment on the wood is phenomenal! Very Miss Mustard Seedish of ya! 😉
STUNNING!
I love it!!! It came out beautiful!!!
I love this chair. The little ruffled slip cover is so cute. You did a great job with the paint treatment.
STUNNING!!!! The lines and carvings and gorgeous…and the little ruffle is so sweet! 🙂
Terrific job on the chair. I want to reupholster a similar chair I have sitting at home. I have to invest in a fabric staple gun, any recommendations?
I love your chair. I have a pair like it but I was unsure how to do the seat, but I like your way best. The little ruffle is my favorite.
This looks adorable & professional.
Warmly, Michelle
BEAUTIFUL! I love the look of redone chairs like that. You did a fantastic job!
Oooh link this too! I LOVE THIS CHAIR. It's freaking GORGEOUS!
Wowee! She is some beauty! Great job!
Amazing. Absolutely amazing. And great simple instructions for us wannabe copycats. Thank you! Love it.
That is absolutely beautiful! I love using drop cloths, your chair went from blah to gorgeous with a bit of utilitarian fabric and a great deal of talent! xoxo
hiya jamie , W is for wow , you did a fab job onthis chair and your tut is very detailed and helpful
tfs
xmaggiex
You have some awesome talent. Love your chair.
That's amazing! So classy and beautiful. Where on earth do you find a chair like that for $20?!! Lucky thing 🙂
This makeover is AMAZING! I love how it looks! You are seriously good!
I wonder if you would be interested in writing a special guest post on Remodelaholic about the project! Let me know, I will send you the details.
Thanks,
Cassity
Another masterpiece! So impressed, Jaime 🙂
Visiting from FFF. Love how you enhanced the furniture detail using paint. Cute slipcover too!
Amazing. I love, love it. Great job!
Wow you are talented!
Simply Creations Link Party
Even though there are so many compliments on your beautiful chair, I had to tell you myself how I adore it. It is so striking and well made. I am having a chair done like this for a friend, and I hope they do as good of a job as you did!
wow you did a fantastic job – it is really beautiful and finished perfectly 🙂
Tina
what a great job. where do you buy your drop cloths? yours look less "slubby " then the ones i have found. also, your welting looks single, hlw did you finish it off so there were no seams showing?
You make it look so easy! I LOVE how this turned out. It will definitely make me look twice next time I see a chair like this at a yard sale!
Btw, Great name 🙂
Beautiful work, I like the drop cloth combined with the crisp white pleated trim , I have several chairs to fix alot of work but worth it when you see the final results.
Thank you Patty, I agree wholeheartedly – it’s a lot of work but oh so rewarding and worth the effort. Good luck with your projects!