• Home
  • Blog
  • About
  • Contact
    • Disclosure
    • Privacy Policy
  • SHOP
  • Widget area for main menu

    • Email
    • Facebook
    • Instagram
    • Pinterest
    • Twitter
    • YouTube
  • Skip to primary navigation
  • Skip to main content
  • Skip to primary sidebar

Jaime Costiglio

build - paint - sew

  • BUILD
    • BEDS
    • BENCHES
    • DESKS
    • DRESSERS
    • GAMES & TOYS
    • SCRAP WOOD
    • SHELVES
    • STORAGE
    • TABLES
  • TOOLS
  • PAINT
    • CRAFTS
    • FURNITURE
    • HOME DECOR
  • SEW
    • GIFTS
    • HOME DECOR
    • POUCHES
  • HANDBUILT HOLIDAY
    • 2021
    • 2019
    • 2018
    • 2017
    • 2016
    • 2015
    • 2014
    • 2013
  • GIFTS
    • BABIES
    • KIDS
    • FOR HER
    • FOR HIM
    • TEACHERS
    • WEDDINGS
  • SEASONAL
    • 4TH OF JULY
    • FALL
    • HALLOWEEN
    • CHRISTMAS
    • SUMMER
    • SPRING
    • ST. PATRICK’S DAY
    • THANKSGIVING
    • VALENTINE’S DAY
    • WINTER
  • SALTBOX PROJECT
    • BATHROOMS
    • DINING ROOM
    • EXTERIOR
    • FAMILY ROOM
    • FOYER / MUDROOM
    • KIDS BEDROOMS
    • KITCHEN
    • LIVING ROOM
    • MASTER BEDROOM
    • PLAYROOM
  • SCROLL SAW

DIY Geometric Table Runner

December 16, 2014

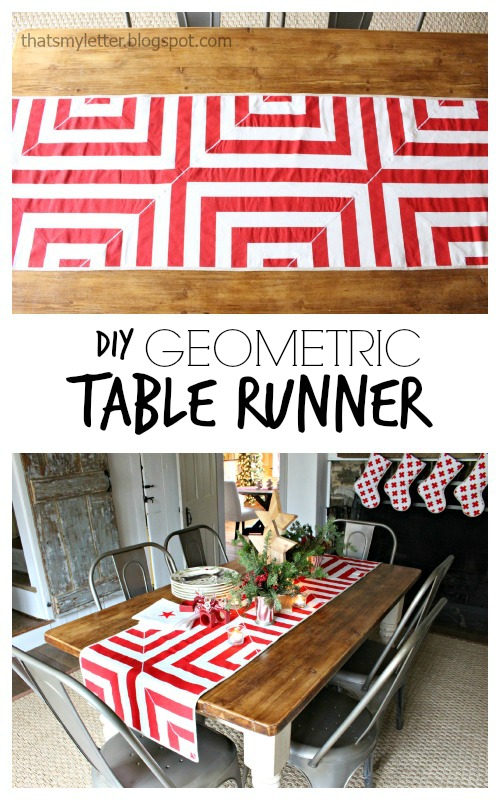
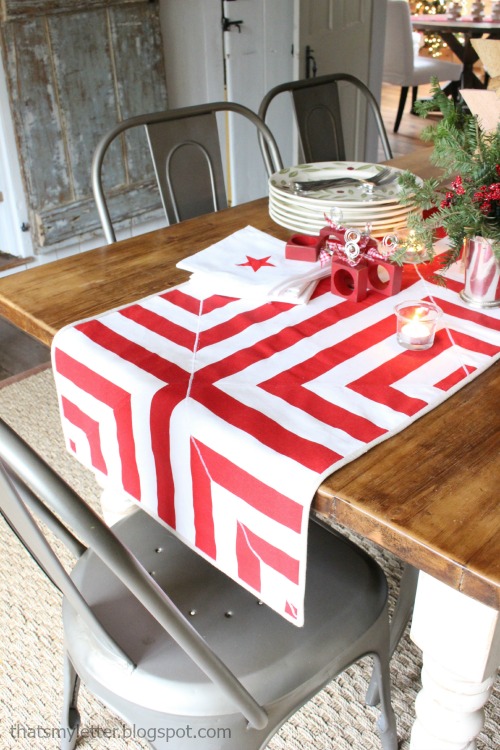
Sew: diy geometric table runner
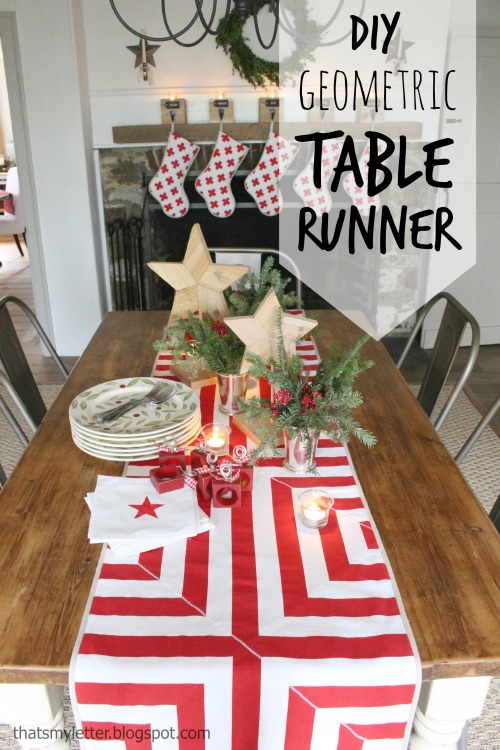
Using red and white striped fabric cut at a 45 degree angle I made this geometric table runner.
left image source

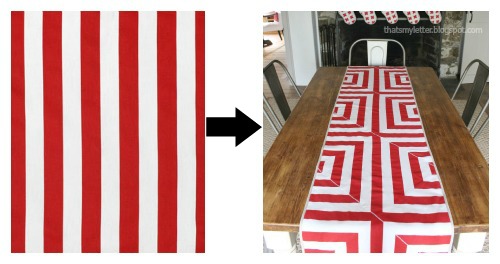
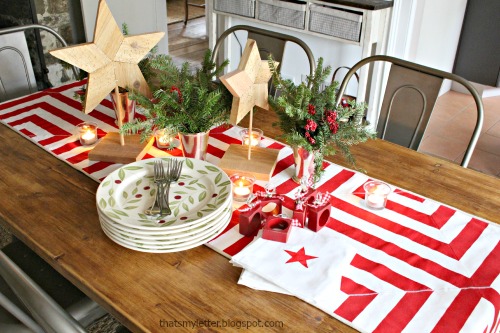
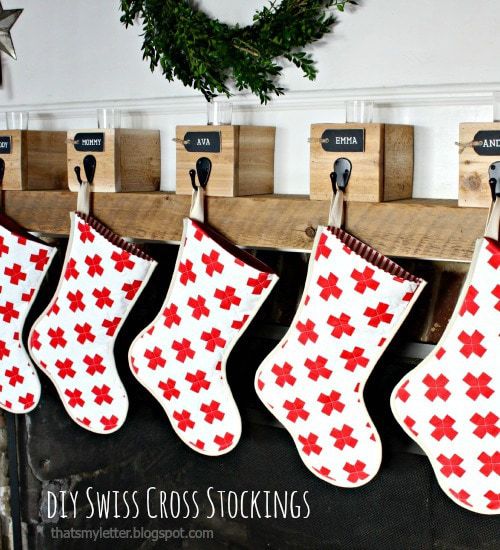
The stripes line up to make giant red crosses which coordinates with the swiss cross stockings.

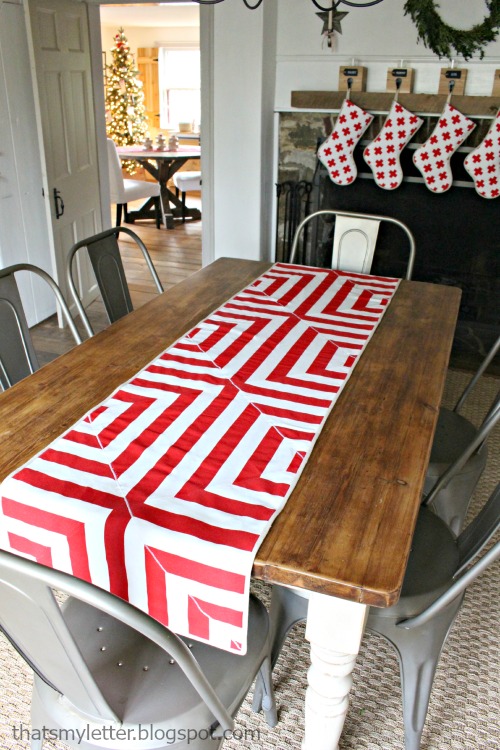
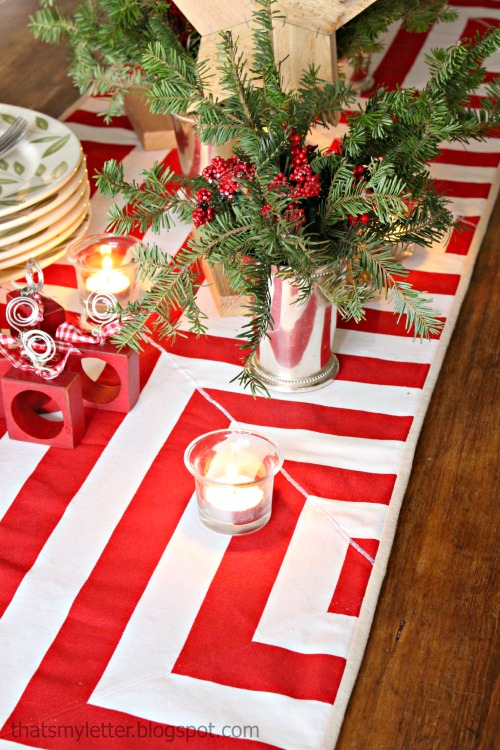
I bound the edge with natural linen.
How to make a geometric table runner:

Use a striped fabric such as Premier Prints Canopy in Lipstick from Online Fabric Store.
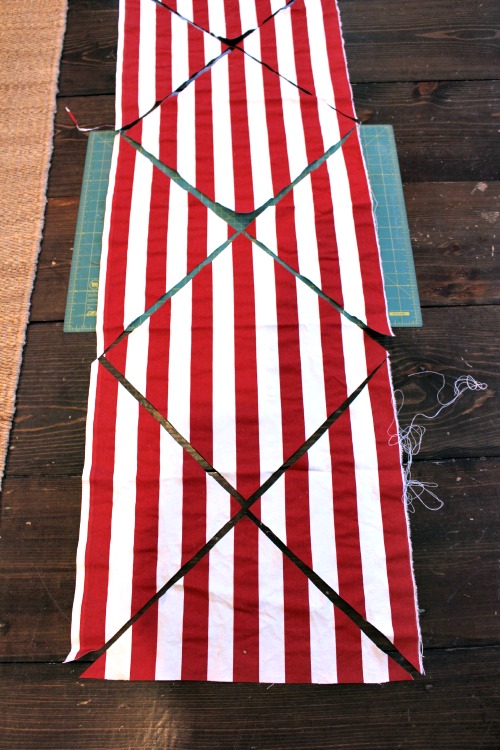
Step 1: Decide the width of your runner based on the stripes running vertically.  From there make 45 degree cuts using a clear quilting ruler and rotary cutter.

Step 2: Remove the side triangles but save one to use as a pattern for the next step.

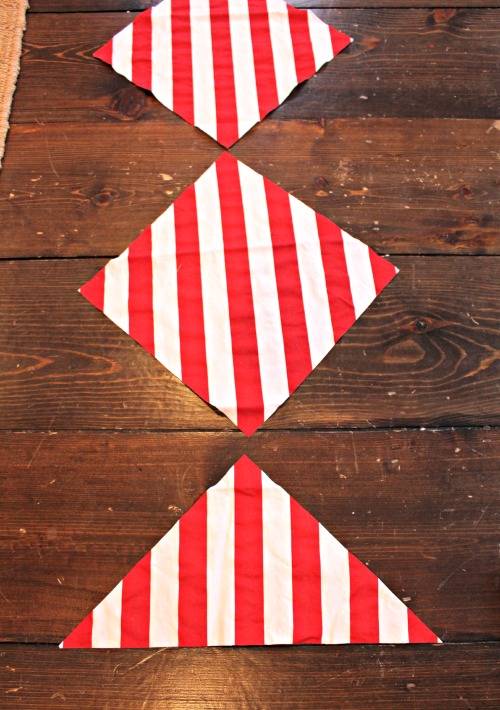
Step 3:  Using one of the removed triangles as a pattern cut new side triangles with the stripes on the horizontal.

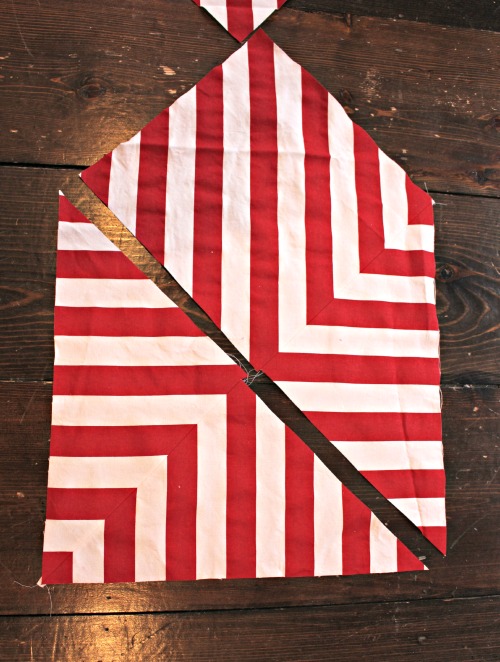
Step 4: Sew together two of the small seams making triangular pieces.

Step 5: Continue sewing only as pictured above.  (If you want to sew the other pieces together traditionally you’ll have to allow for more seam when cutting because of the stripes.)  Place all pieces on top of muslin backing.

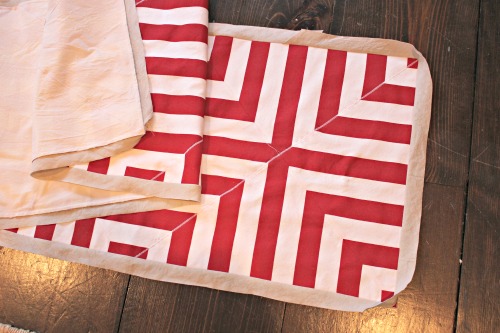
Step 6:  Carefully overlap triangular pieces making stripes line up, pin in place and zig zag stitch from top.  Trim edges.  Cut linen bias binding stripes at 1 1/2″ wide and sew around edge.  Press open then fold to back twice and pin.  Stitch in ditch from front to create binding.

You may also like...

  • DIY Bunny Place CardsDIY Bunny Place Cards
  • DIY Wood Gobble PlacematsDIY Wood Gobble Placemats
  • “C” is for Copper & Wood Candle Holders“C” is for Copper & Wood Candle Holders
  • “G” is for Giant Cross Stitch“G” is for Giant Cross Stitch
Share this post:

Filed Under: CHRISTMAS, DIY, HOME DECOR, HOME DECOR, SEASONAL, SEW, SEWING4 Comments

Reader Interactions

Comments

  1. Charlotte Smith says

    December 16, 2014 at 2:44 PM

    I "almost" think I could do this… there were a few fancy sewing terms that I'd have to google… but straight lines are about my max! So clever! As always. 🙂

    Reply
  2. Angie Danel says

    December 16, 2014 at 3:20 PM

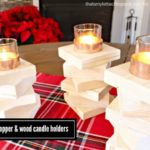
    Can you tell us how to make the star "stands" that are part of your centerpiece?

    Reply
  3. Escargopotte bordados says

    December 16, 2014 at 4:12 PM

    super joli

    Reply
  4. Kim @ NewlyWoodwards says

    December 17, 2014 at 11:57 PM

    Ooooo….. I love how you designed this. So smart to use striped fabric.

    Pinning!

    Reply

Leave a Reply Cancel reply

Your email address will not be published. Required fields are marked *

Primary Sidebar

Hi! I’m Jaime

Jaime Costiglio

Hello!

Thank you for stopping by.
Join me for lots of DIY.

Read more

Get new posts via email

Handbuilt Holiday: Gift Project Plans

handbuilt holiday gift project plans

Collection of DIY gift project plans to build.

The Home Depot Tool Prospective

THD Prospective

Tools to consider for the DIYer.

Archives

The Home Depot Logo
Copyright © 2023 Jaime Costiglio · Custom site by Moonsteam Design

Privacy Policy