• Home
  • Blog
  • About
  • Contact
    • Disclosure
    • Privacy Policy
  • SHOP
  • Widget area for main menu

    • Email
    • Facebook
    • Instagram
    • Pinterest
    • Twitter
    • YouTube
  • Skip to primary navigation
  • Skip to main content
  • Skip to primary sidebar

Jaime Costiglio

build - paint - sew

  • BUILD
    • BEDS
    • BENCHES
    • DESKS
    • DRESSERS
    • GAMES & TOYS
    • SCRAP WOOD
    • SHELVES
    • STORAGE
    • TABLES
  • TOOLS
  • PAINT
    • CRAFTS
    • FURNITURE
    • HOME DECOR
  • SEW
    • GIFTS
    • HOME DECOR
    • POUCHES
  • HANDBUILT HOLIDAY
    • 2021
    • 2019
    • 2018
    • 2017
    • 2016
    • 2015
    • 2014
    • 2013
  • GIFTS
    • BABIES
    • KIDS
    • FOR HER
    • FOR HIM
    • TEACHERS
    • WEDDINGS
  • SEASONAL
    • 4TH OF JULY
    • FALL
    • HALLOWEEN
    • CHRISTMAS
    • SUMMER
    • SPRING
    • ST. PATRICK’S DAY
    • THANKSGIVING
    • VALENTINE’S DAY
    • WINTER
  • SALTBOX PROJECT
    • BATHROOMS
    • DINING ROOM
    • EXTERIOR
    • FAMILY ROOM
    • FOYER / MUDROOM
    • KIDS BEDROOMS
    • KITCHEN
    • LIVING ROOM
    • MASTER BEDROOM
    • PLAYROOM
  • SCROLL SAW

“F” is for Fabric Garland

November 23, 2012

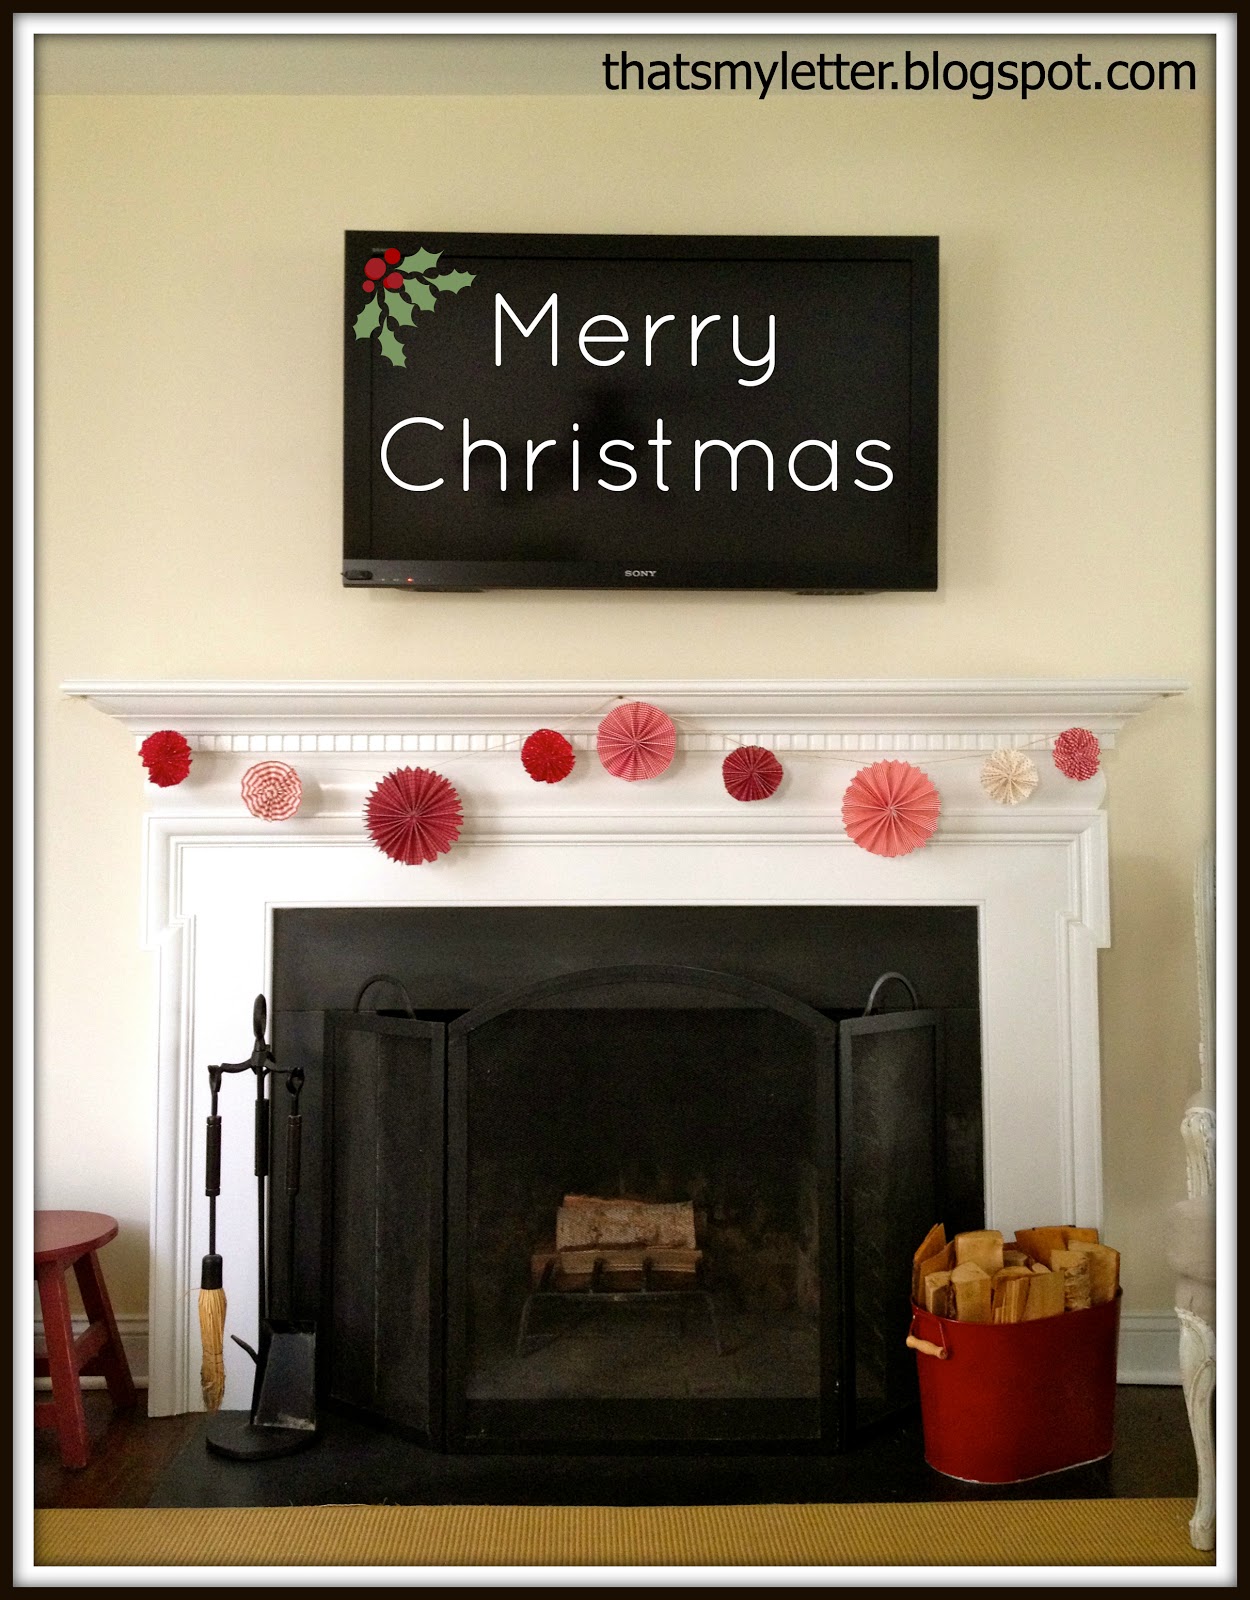
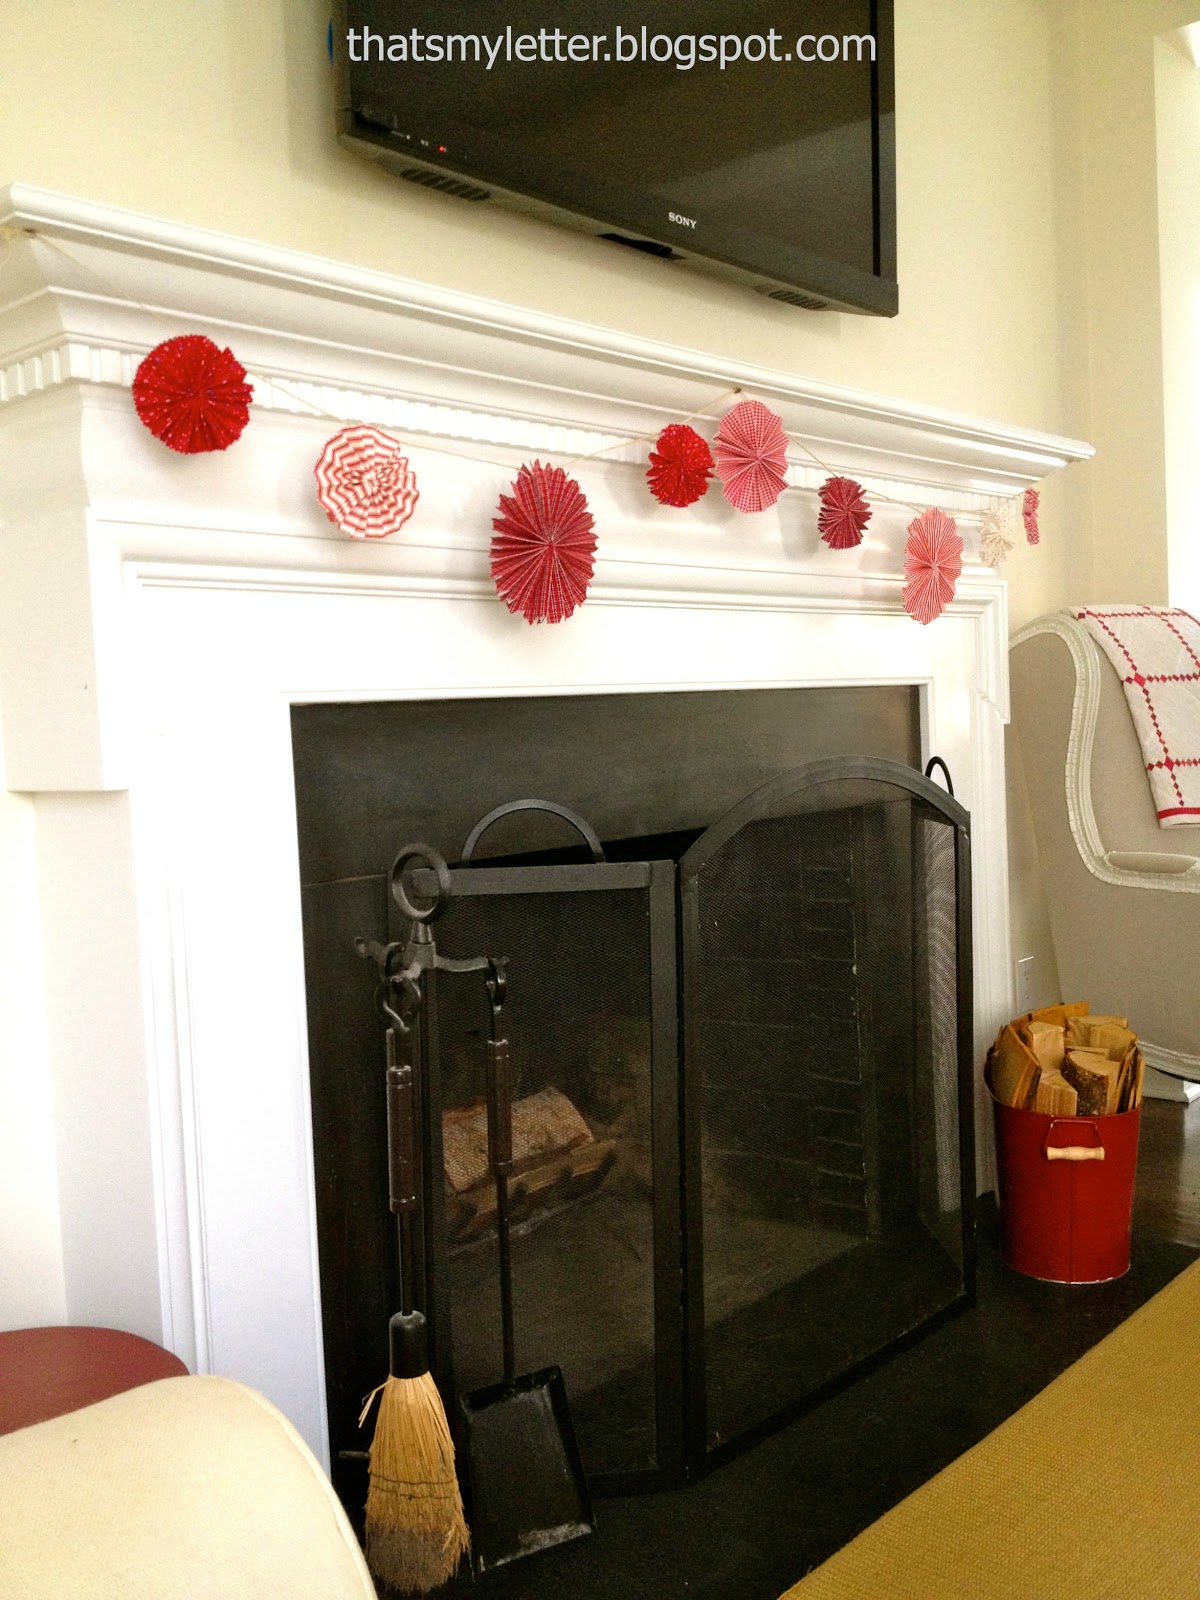
Craft: Christmas rosette fabric garland

Easy, fast and simple fabric rosettes strung onto twine to make a Christmas garland:

I used all red and white fabrics to keep it uniform:

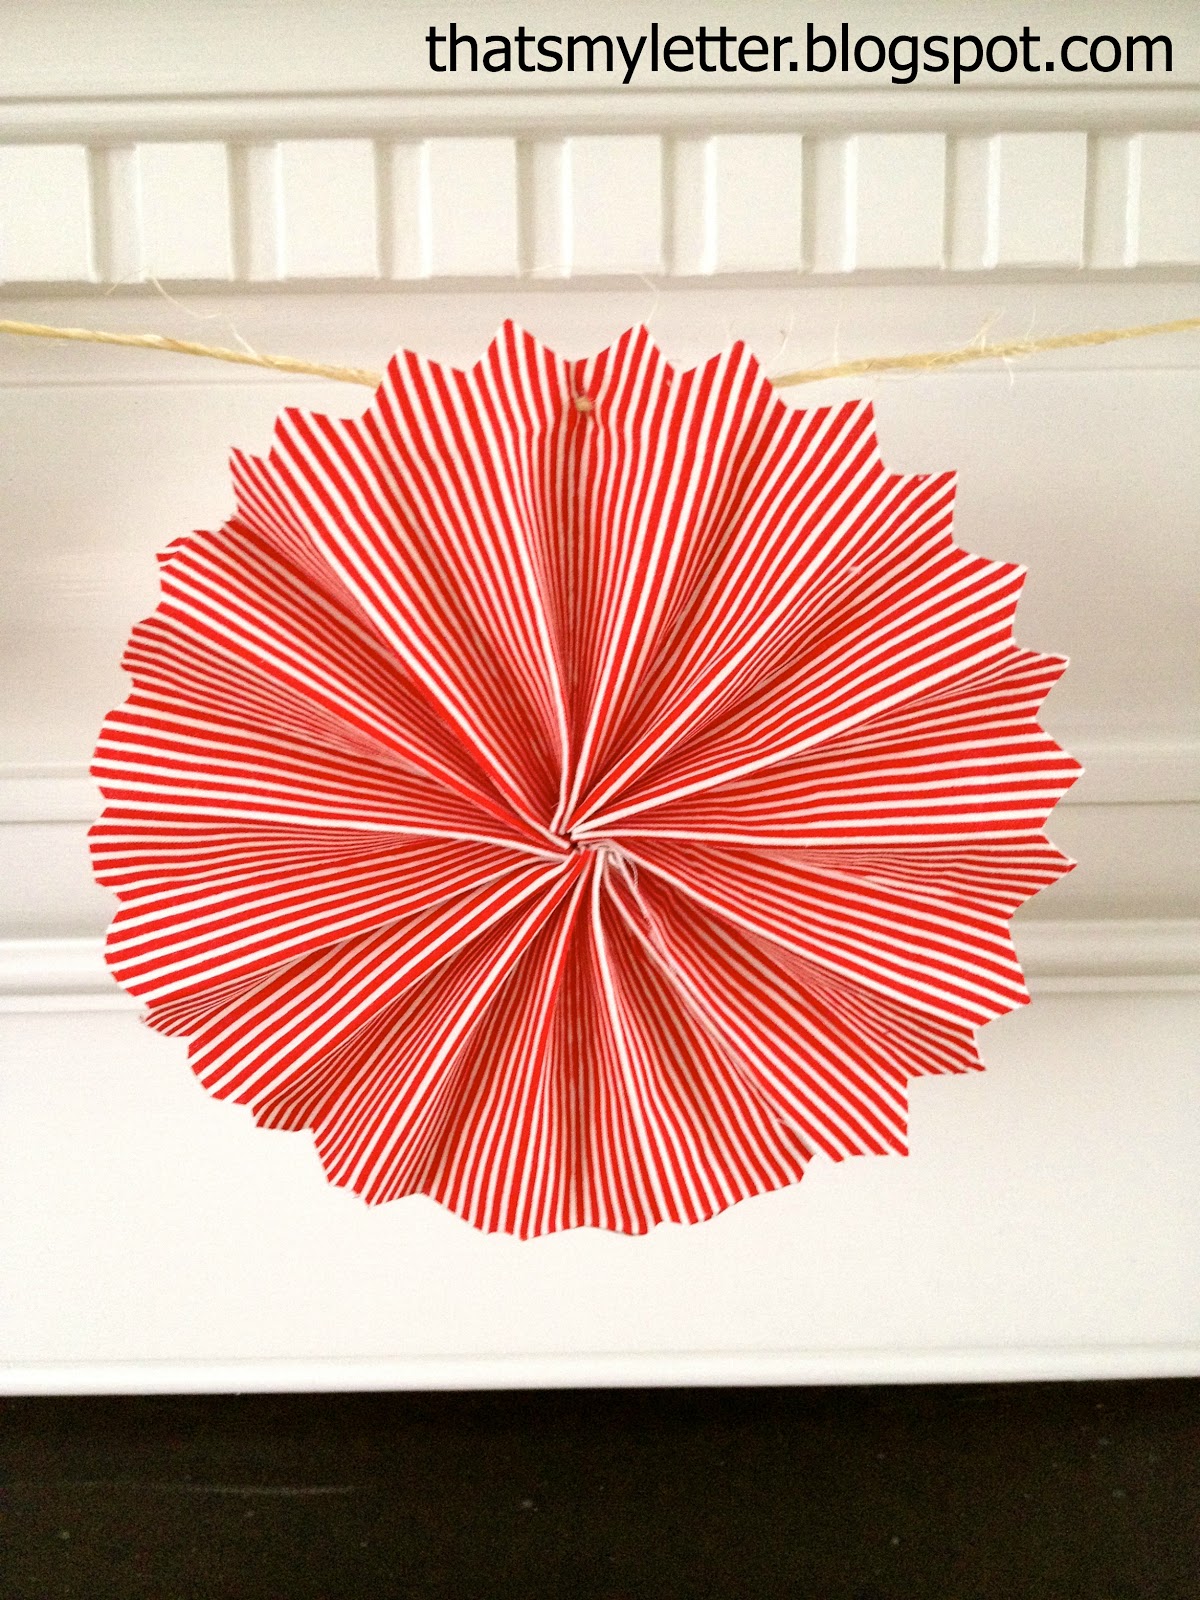
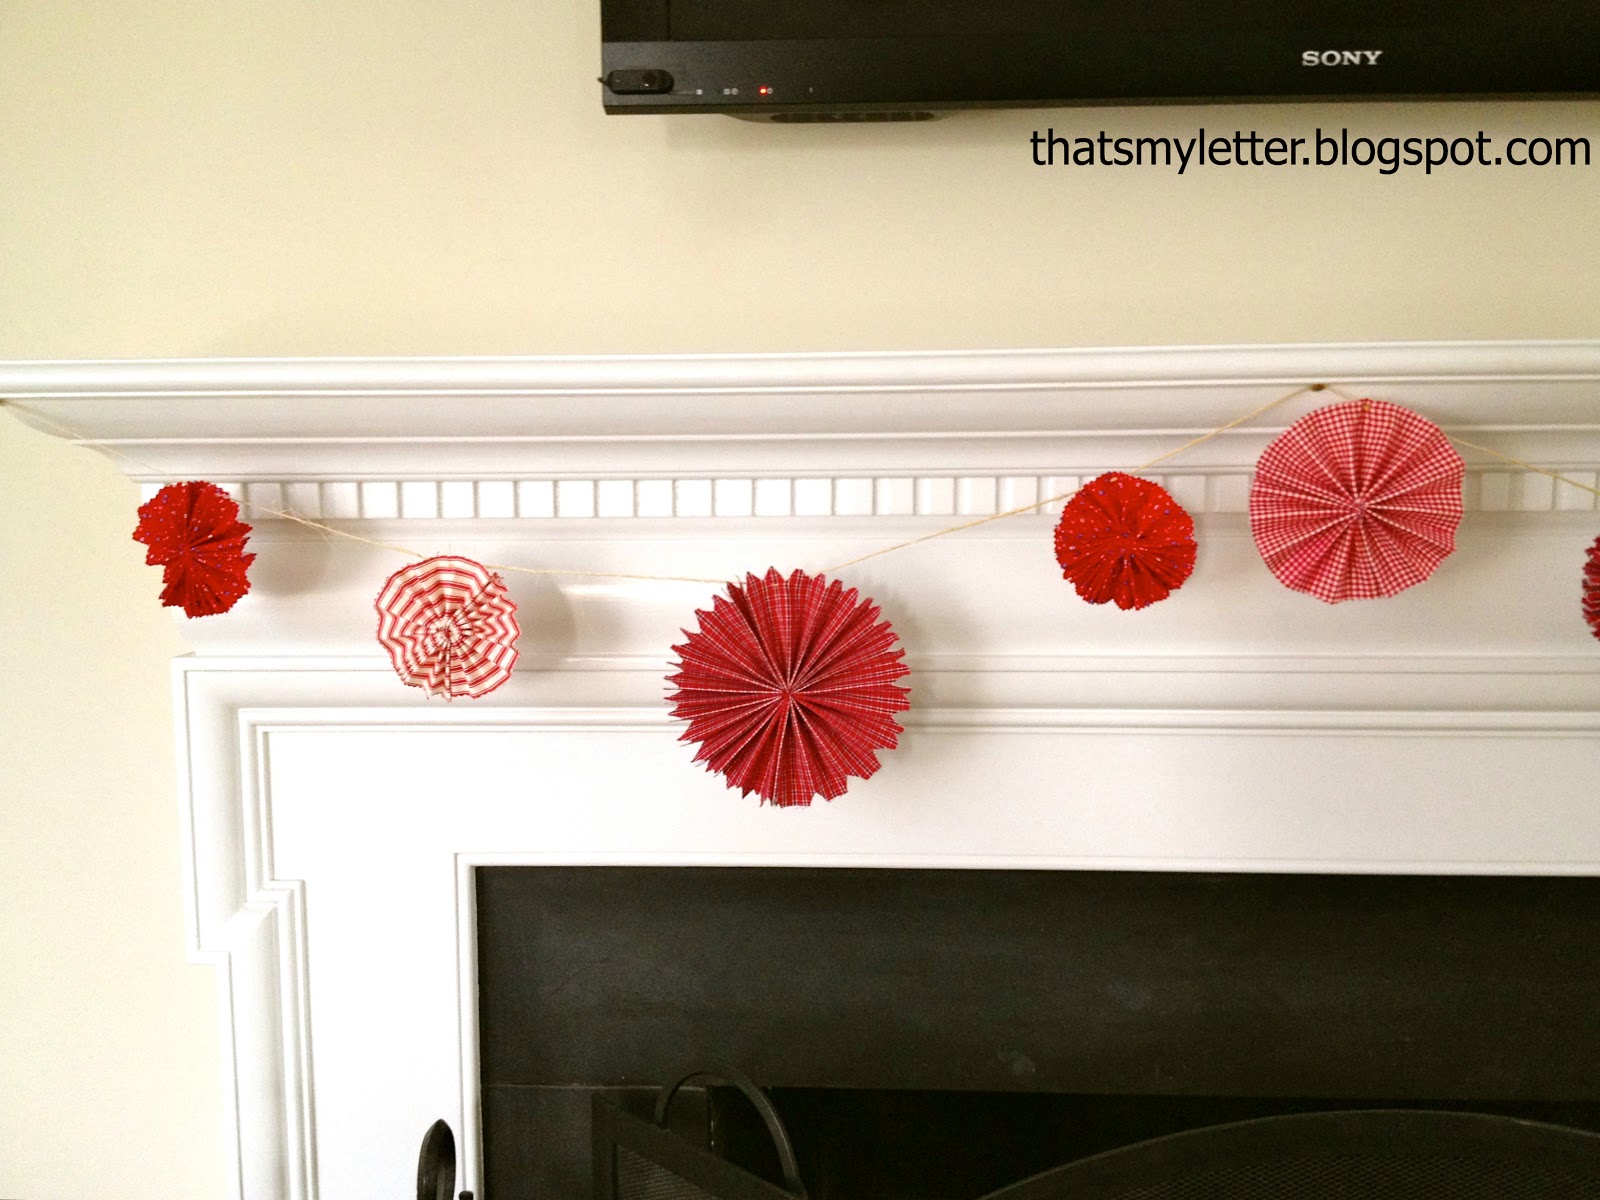
The rosettes are all different sizes and some have pointy edges, some I used pinking shears and others are simply a plain straight edge:
A great Christmas beginning, still plenty of time to add greenery and stockings:
Here’s how I made the fabric garland:

1. Cut a 3″ x 36″ strip of fabric and apply med. weight fusible interfacing to wrong side:

2. Begin folding strip from short end back and forth, accordion style:

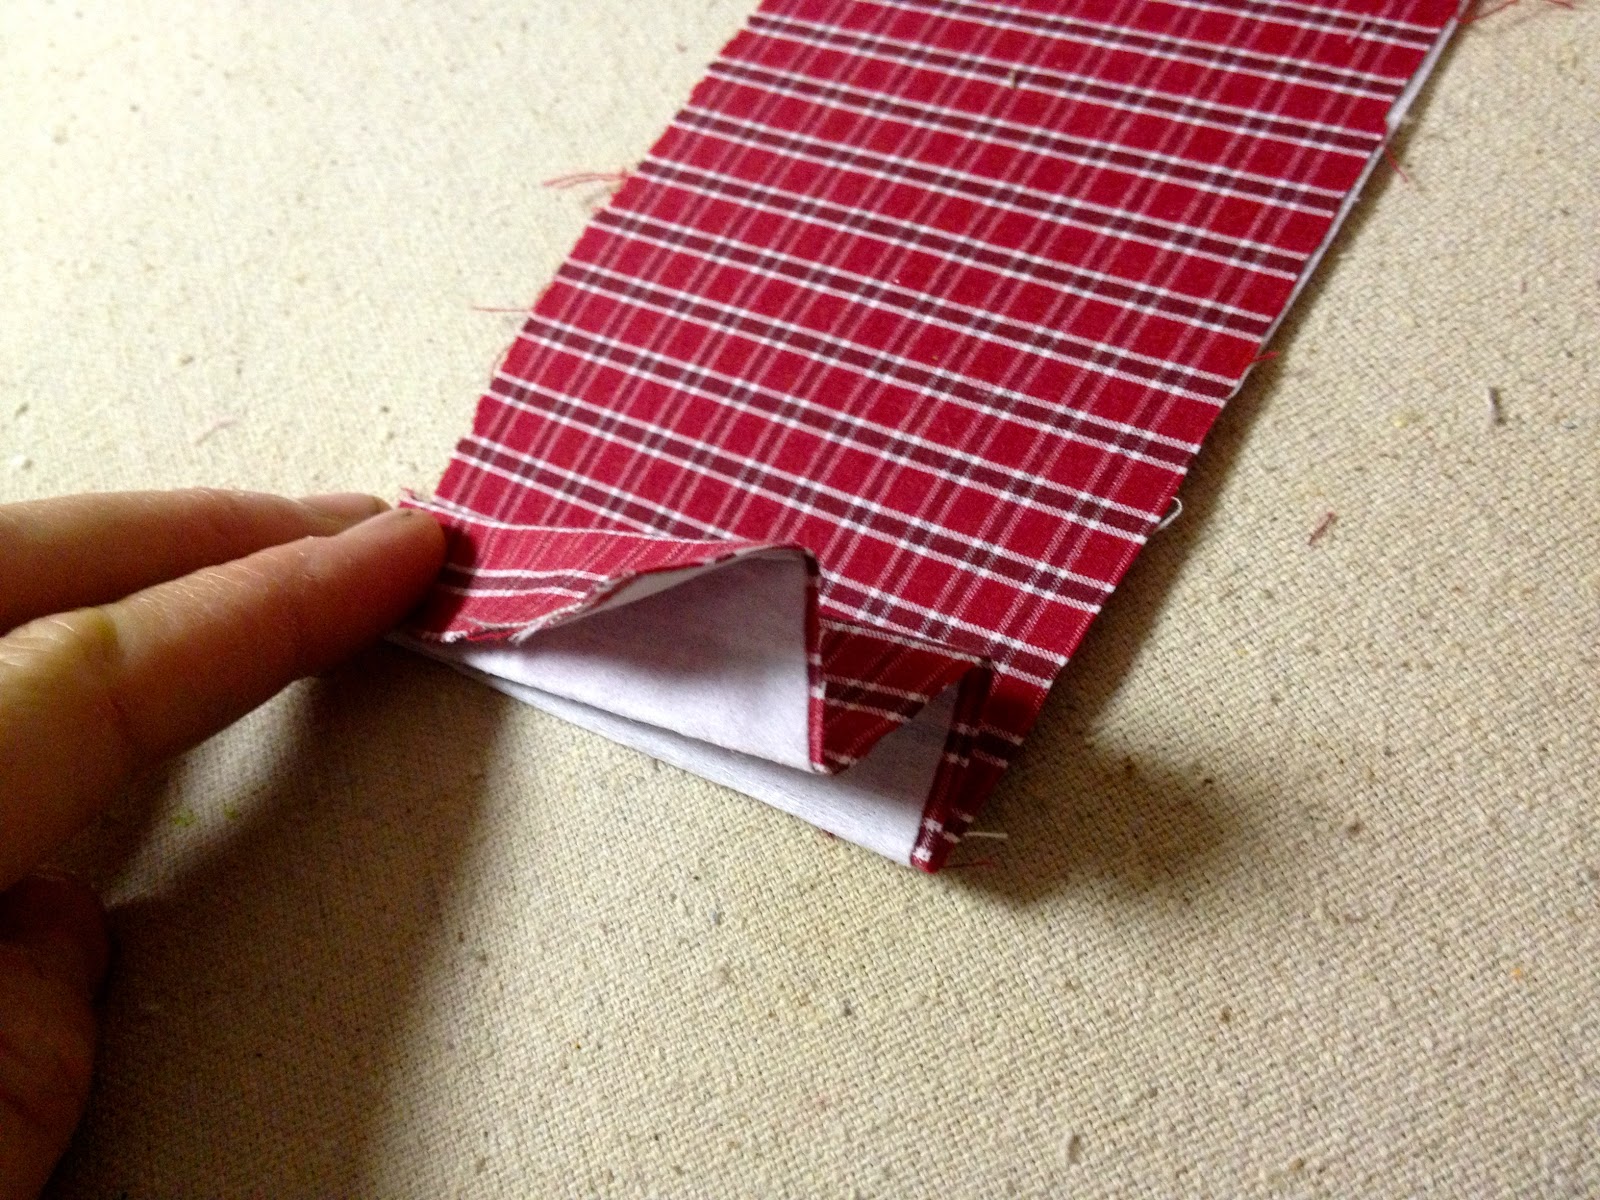
3. Once the entire strip is folded cut the ends to a point:
(or skip this step and finish as per step 7)

4. Run a needle with carpet / quilting thread through the opposite end which will become the center:

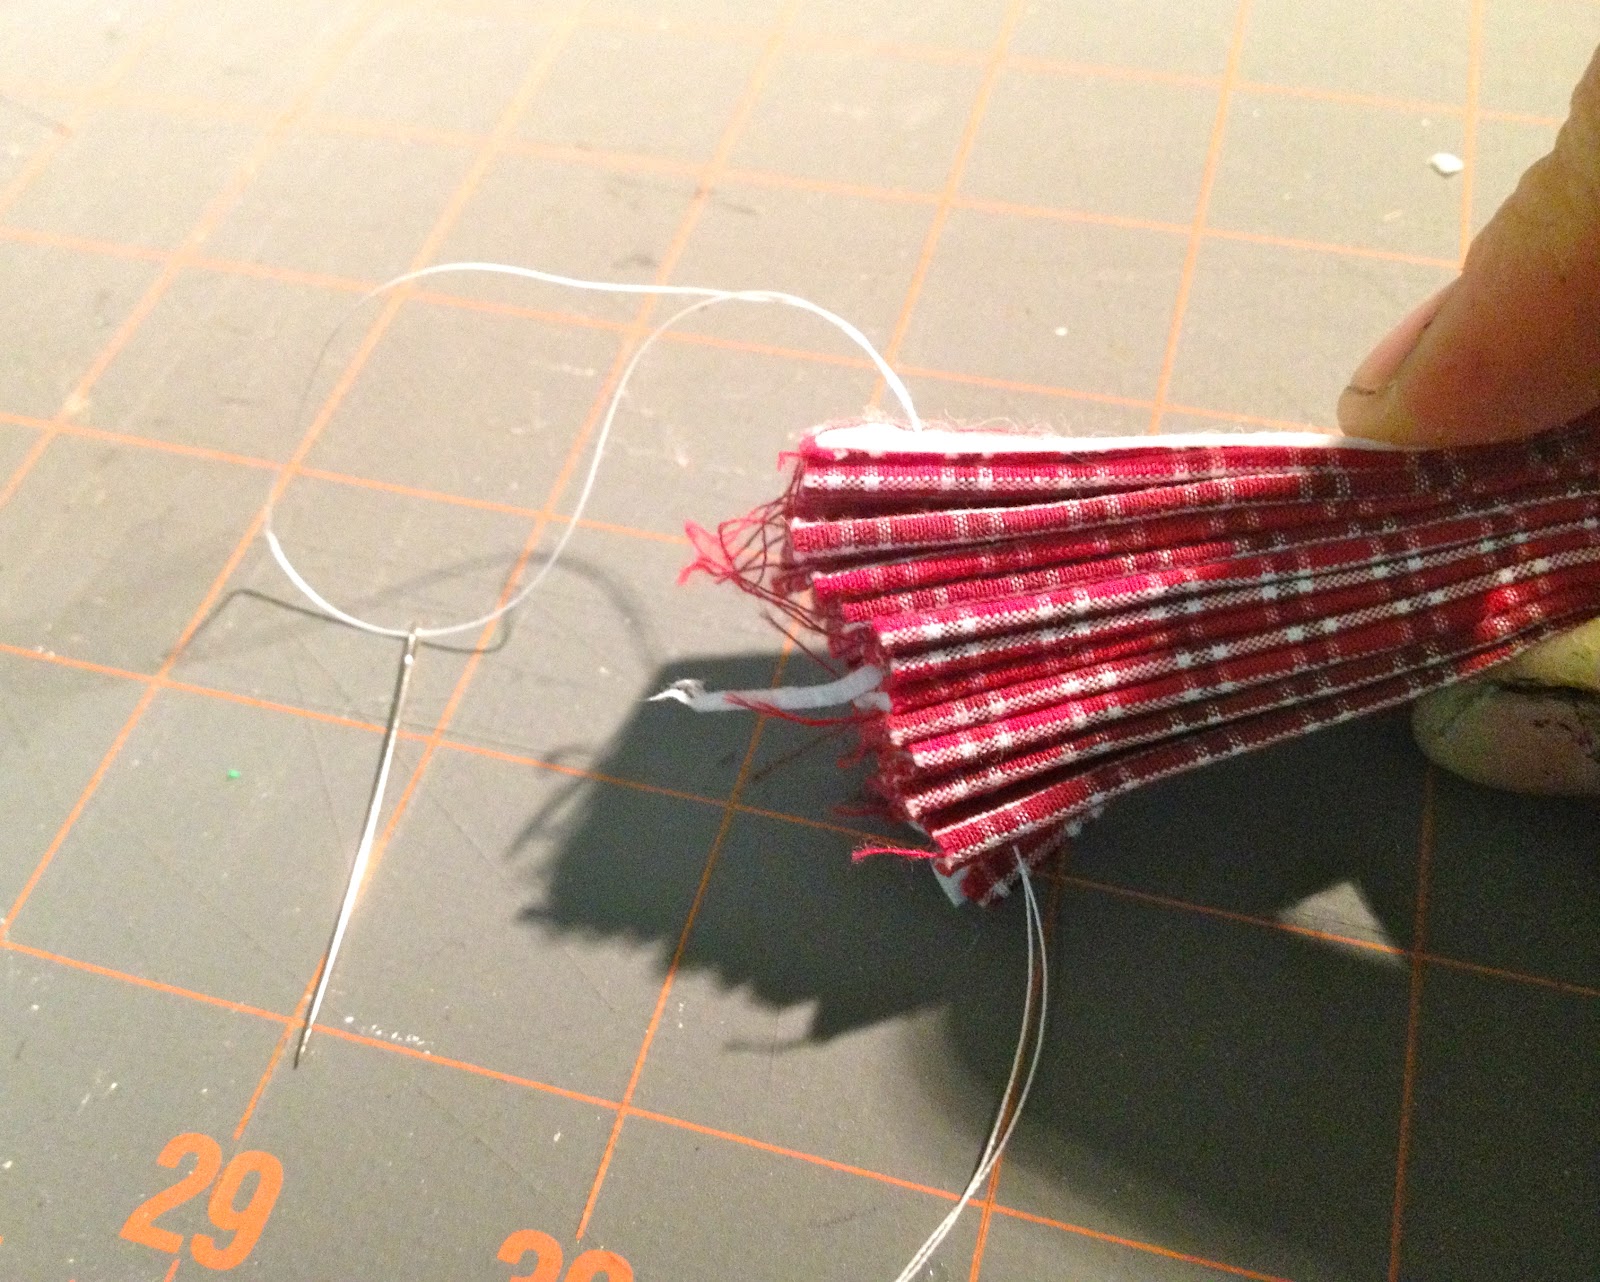
5. Tie the thread in a secure knot:

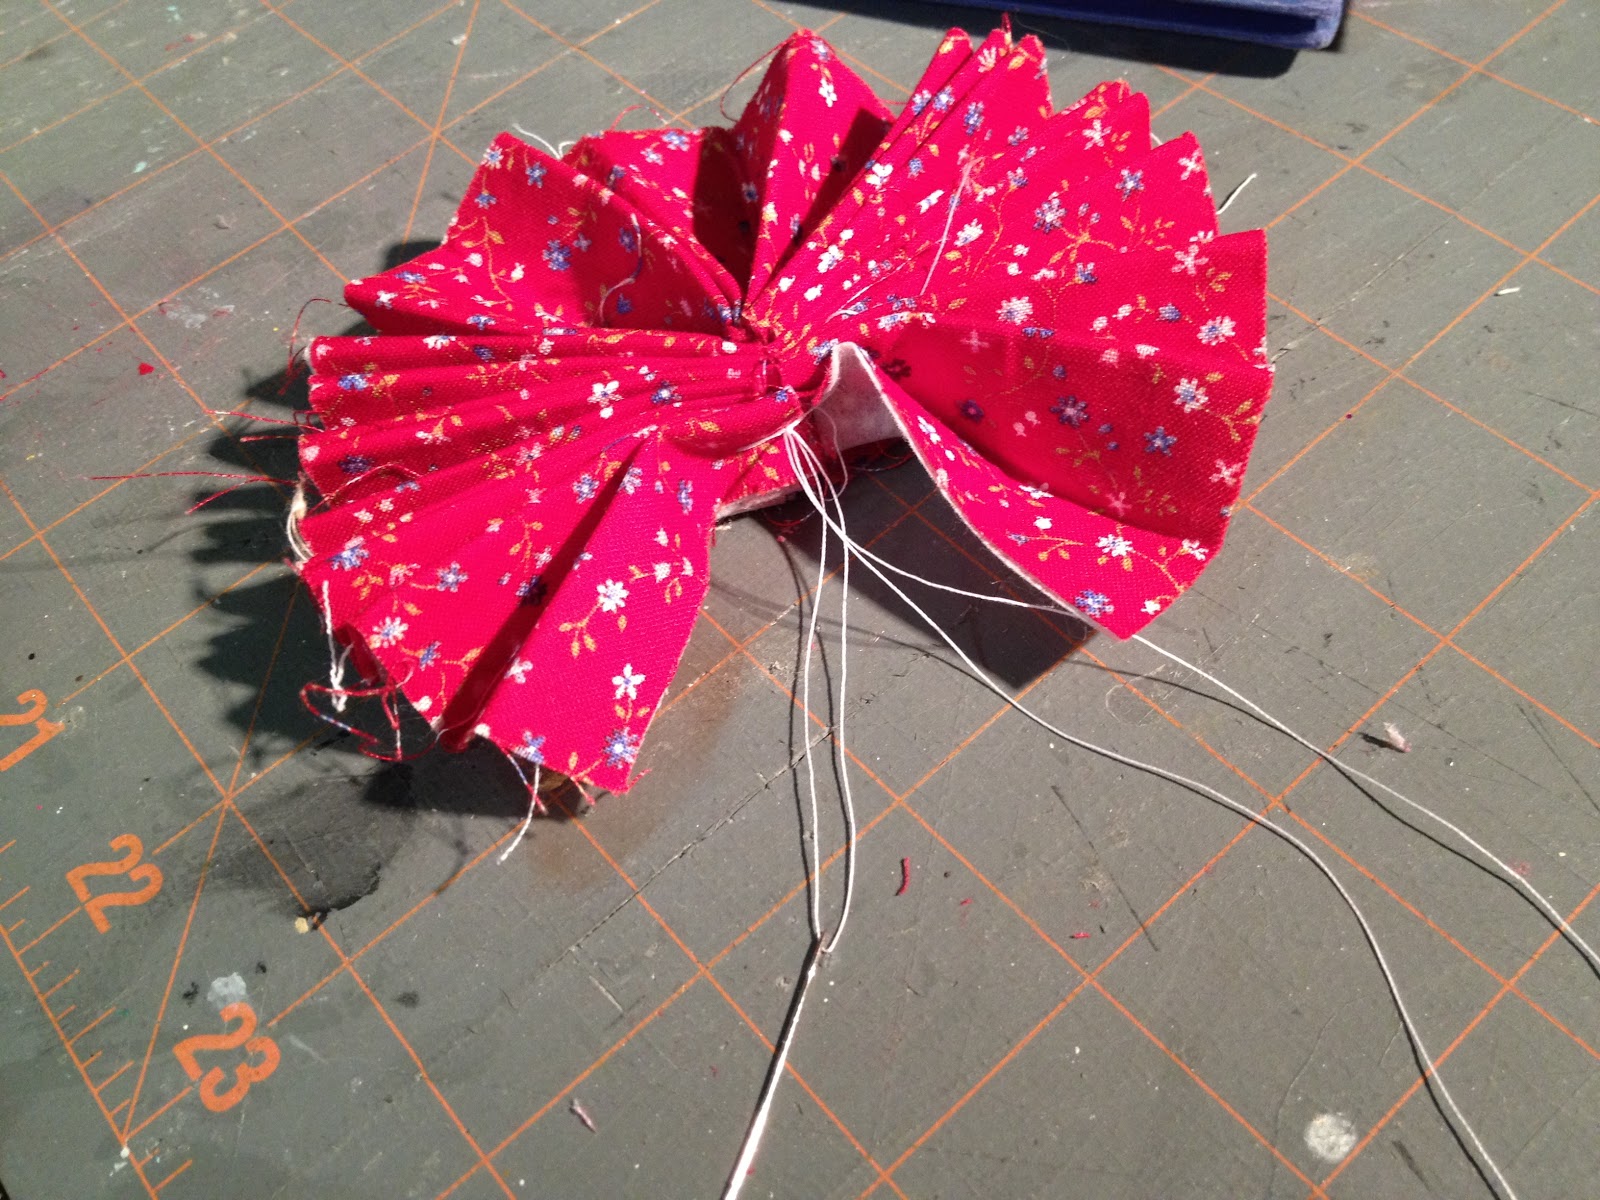
6. Apply heat-n-bond double sided adhesive to one open edge:
7. Then pull off paper and iron other side closed.
Finish edges with pinking shears:

8. Lay out rosettes and thread knitting needle with twine attaching rosettes as you go:

I’m linking up to:
Christmas Crafts @ Shanty 2 Chic
Christmas Craft Party @ Nesting Place
SAS @ Funky Junk
Nifty Thrifty Sunday @ Nifty Thrifty Things
DIY Fall Festival @ The DIY Showoff
Tutorials & Tips Tuesday @ Home Stories A to Z
Strut Your Stuff @ Somewhat Simple
Share Awesomeness Thur @ The 36th Avenue
Pretty Things Thursday @ Scissors & Spatulas
Flaunt it Friday @ Chic on a Shoestring
Frugal Friday @ The Shabby Nest
SAS @ Just a Girl
Remodelaholics Anonymous @ Remodelaholic
inspiration board @ Carolyns Homework
Sunday Showcase Party @ Under the Table & Dreaming
Weekend Bloggy Reading @ Serenity Now

You may also like...

  • Cross Stitch Monogram Ornament PlacecardCross Stitch Monogram Ornament Placecard
  • Wood & Leather Bed Free PlansWood & Leather Bed Free Plans
  • DIY Bunny Place CardsDIY Bunny Place Cards
  • DIY USA Map Wall HangingDIY USA Map Wall Hanging
Share this post:

Filed Under: CHRISTMAS, CRAFTS, DIY, HOME DECOR, SEASONAL, WINTER5 Comments

Reader Interactions

Comments

  1. Tina from A Few Pretty Things says

    November 24, 2012 at 2:53 PM

    What a cute garland!

    Reply
  2. Jeanette says

    November 25, 2012 at 4:00 AM

    So very pretty! I've seen lots of paper rosettes like these but none out of fabric.

    Reply
  3. daiseyjayne.com says

    November 26, 2012 at 1:28 PM

    Love this garland! Thanks for the tutorial, I have lots of holiday fabrics and some interfacing, off I go!

    Reply
  4. Kathryn Ferguson Griffin says

    November 27, 2012 at 5:29 AM

    These are so pretty and elegant! Love the fabric choices. Thank you for sharing. Would love it if you would share this at my Make it Pretty Monday party at The Dedicated House. http://thededicatedhouse.blogspot.com/2012/11/make-it-pretty-monday-week-25.html Hope to see you at the bash! Toodles, Kathryn @TheDedicatedHouse

    Reply
  5. Jess @ Spool and Spoon says

    December 9, 2012 at 6:02 AM

    I've never seen this done with fabric and I love it! We covered a wall in paper rosettes for a backdrop and I wish I would have seen this first because I'd have a lot more of a selection with fabric. Great job! Thanks so much for sharing — definitely following now!

    Reply

Leave a Reply Cancel reply

Your email address will not be published. Required fields are marked *

Primary Sidebar

Hi! I’m Jaime

Jaime Costiglio

Hello!

Thank you for stopping by.
Join me for lots of DIY.

Read more

Get new posts via email

Handbuilt Holiday: Gift Project Plans

handbuilt holiday gift project plans

Collection of DIY gift project plans to build.

The Home Depot Tool Prospective

THD Prospective

Tools to consider for the DIYer.

Archives

The Home Depot Logo
Copyright © 2023 Jaime Costiglio · Custom site by Moonsteam Design

Privacy Policy