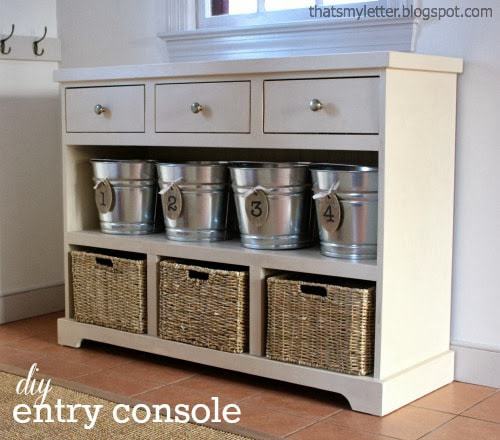
Hello friends. Today I’m sharing a new build for our mudroom with the help of my friend Ana White. Sure she has a newborn baby boy just 4 weeks old at home but that didn’t stop her from making build plans for this beautiful console.
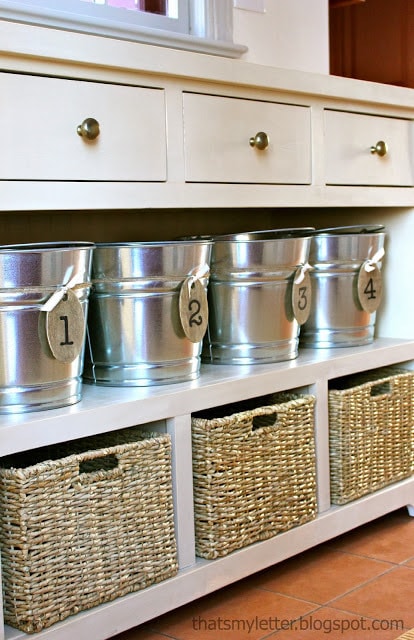
This console has it all: drawers, open shelving, baskets and bins.
And yes you can build this thanks to Ana’s plans here but first check out my building tips and informaiton below before beginning your piece.
Personally I want concealed storage that’s easily accessible for my 3 kids but still neat looking and segregated, so each child has their own designated basket and bin.
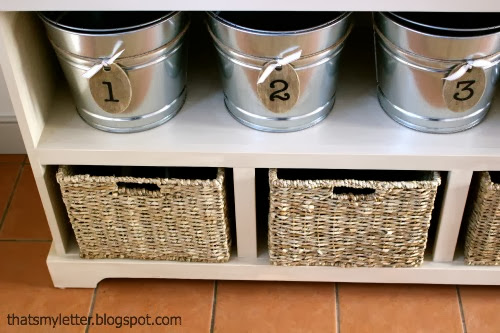
Three kids means three baskets, one for each.
The baskets are from Michaels and I purchased them BEFORE I built the console – an absolute must if you want to make the most of your custom build!
*This post contains affiliate links.
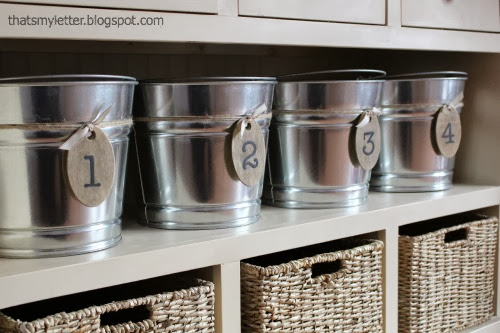
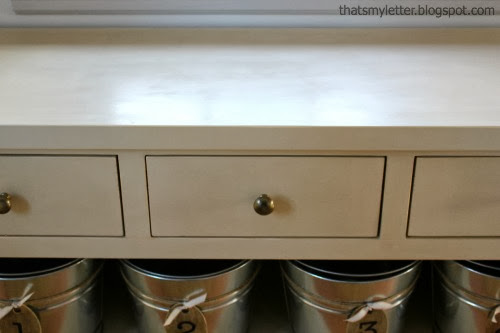
Each child also has a galvanized metal bucket for gloves, hats and smaller items.
My 3 kids often refer to ‘birth order’ so I numbered the buckets, click here to see the full tutorial on how to make the numbered wood tags.
Bucket #4 is for Mom & Dad 🙂
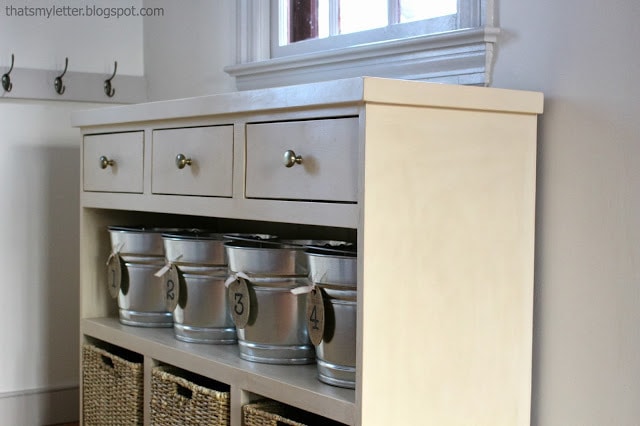
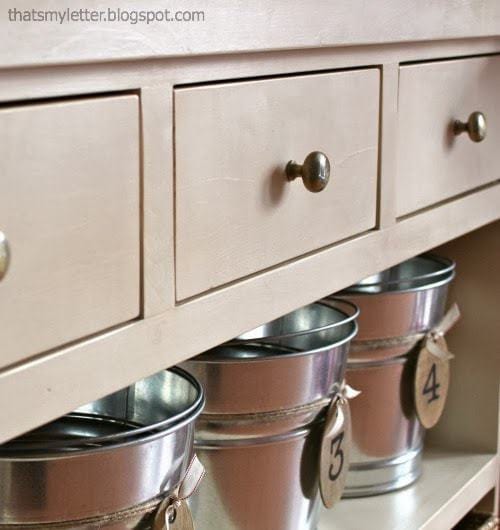
And there’s also 3 drawers!
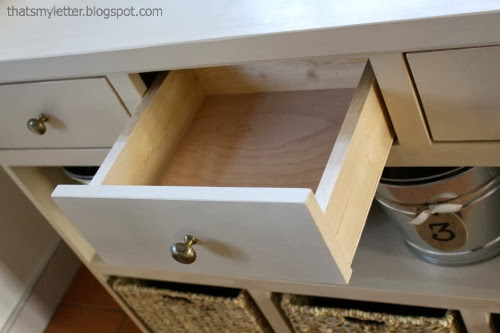
Ana designed these drawers to use a center mount drawer glide, it’s hidden under the drawer so you don’t see any clunky hardware and I guarantee it’s a cinch to install!
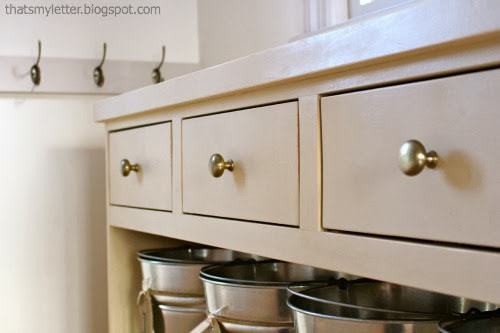
For the hardware I used D. Lawless solid brass classic knobs.
The knobs are weighty and I love the warmth of the brass against the shiny steel buckets.
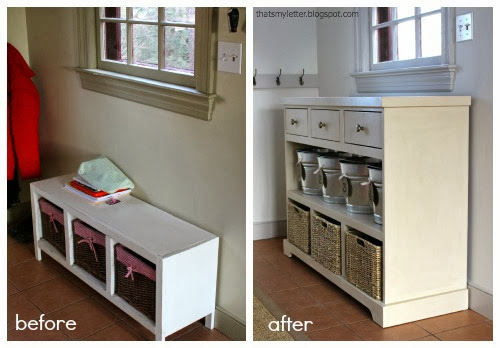
A quick before and after of the space:
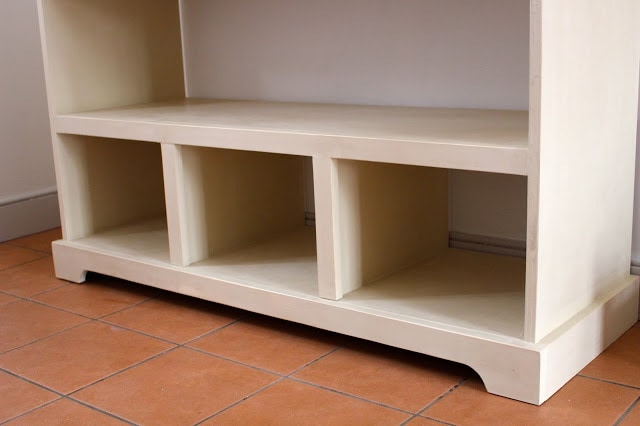
We moved into our new old home 8 months ago and at the time placed the 3 cube bench (officially my 2nd Ana White build ever!) at the back door.
Yes it works great and has storage but I needed more.
Something bigger and taller.
So I’m replacing my 2nd ever Ana White build done in 2010 with my too-many-to-count new Ana White piece.
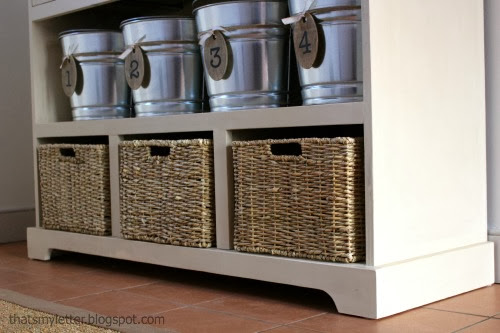
I added the basket dividers to provide support for the shelf (although not necessary) and to the keep the baskets in their proper spots:
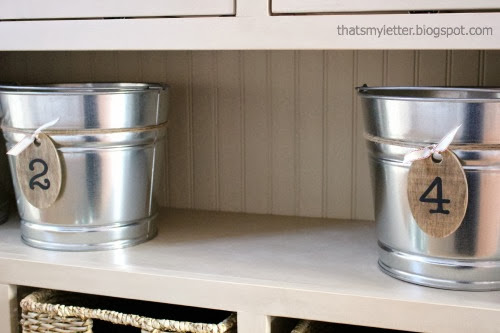
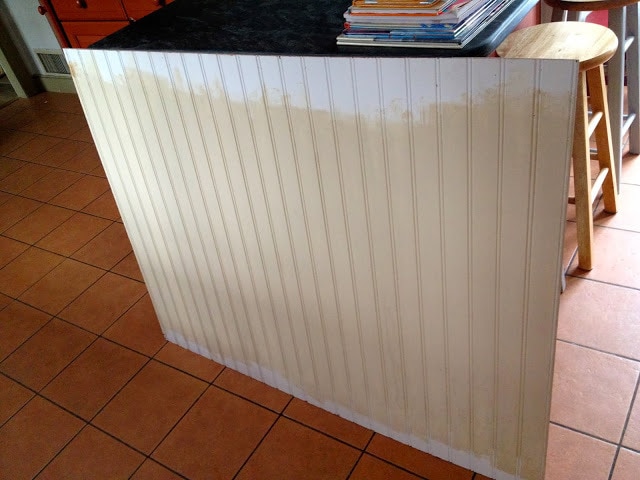
The backing is beadboard (because that’s what I had on hand), you can barely see it behind the buckets:
The finish is Annie Sloan chalk paint in Old Ochre with clear wax:
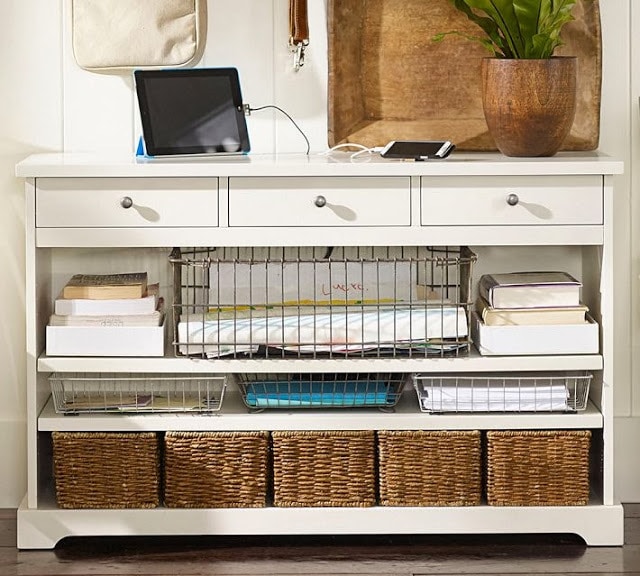
This build was inspired by the Pottery Barn Samantha console:
The inspiration version is 30″ high but I asked Ana to make the plans for a 36″ counter height console to get the most bang for our buck in the space we had.
Of course you can diy this console for much less than the retail price and finish it to your liking thanks to Ana’s plans here.
Supplies cost:
Lumber $130
(3) baskets $36
Total $243
How to build an entry console:
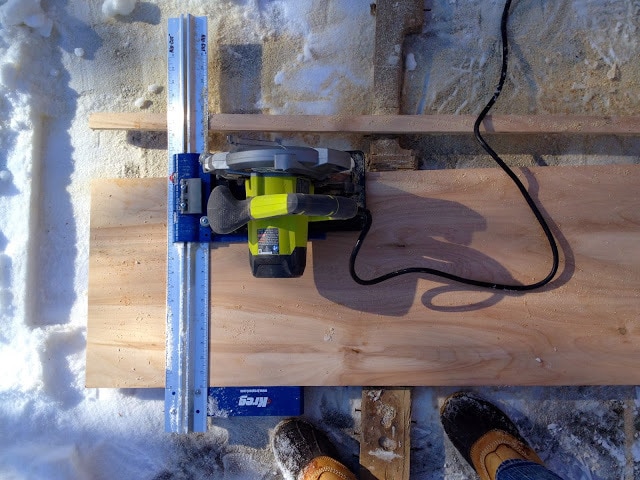
1. Cut your lumber according to Ana’s plans.
I used my Kreg rip cut on the plywood:
2. Drill your pocket holes using a Kreg jig:
This tool is invaluable and really worth every penny if you plan to build your own furniture.
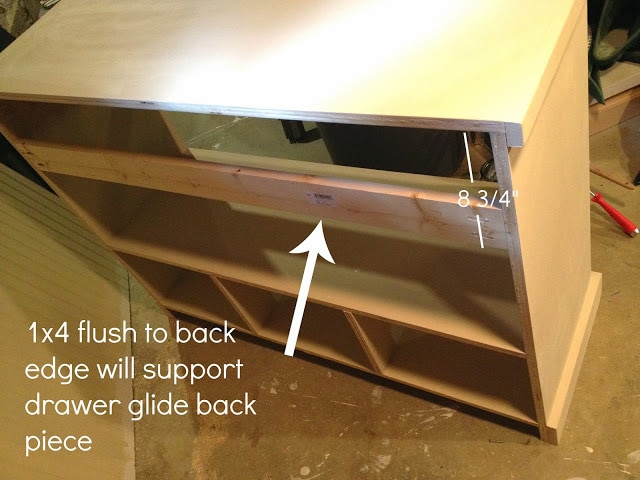
3. Follow Ana’s plans and construct the carcass.
I used a 1×4 on the back for support and to have enough space to attach the drawer glide back support piece later:
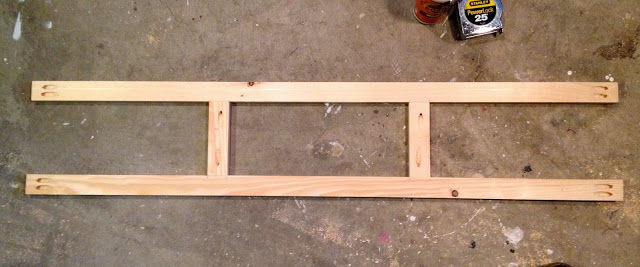
4. Build the face frame for the drawers:
 |
| Add caption |
5. Attach the face frame, consider adding glue and 2″ finish nails up through the middle of the face frame into the plywood top then clamp for a tight seam:
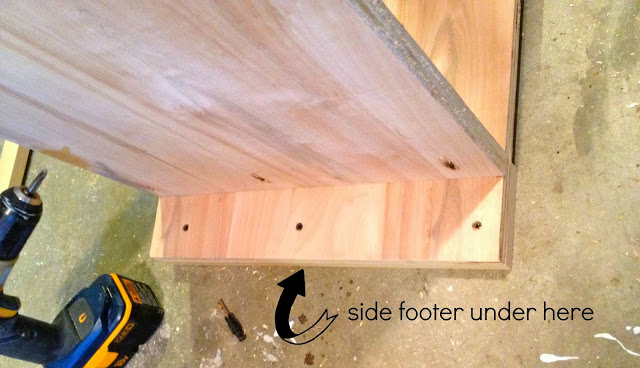
5. Attach the side footers, I countersunk screws from the back into the sides:
6. To cut out curve of front footer I used a roll of tape as a guide:
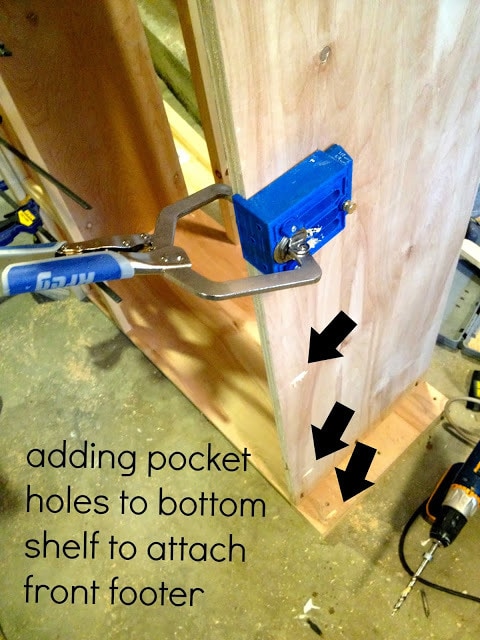
7. I forgot to predrill the pocket holes on the underside of the bottom shelf for attaching the front footer.
No problem! I used my Kreg portable base and clamp to make the pocket holes on the carcass:
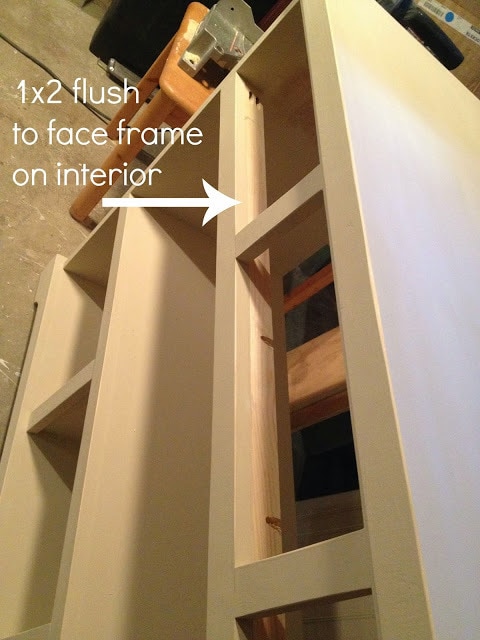
8. Attach a 1×2 to the interior of the drawer face frame, flush to the bottom opening.
This is necessary for installing the drawer glides.
9. Build the drawers.
Again make all the pocket holes with your Kreg jig:
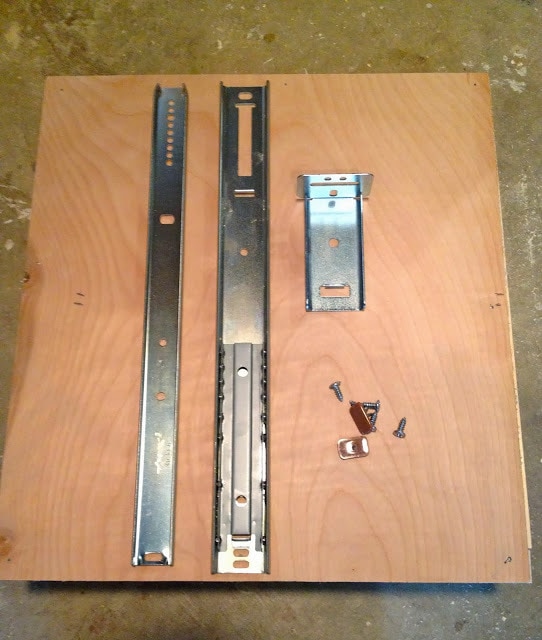
10. Ana’s plans call for this center mount drawer glide.
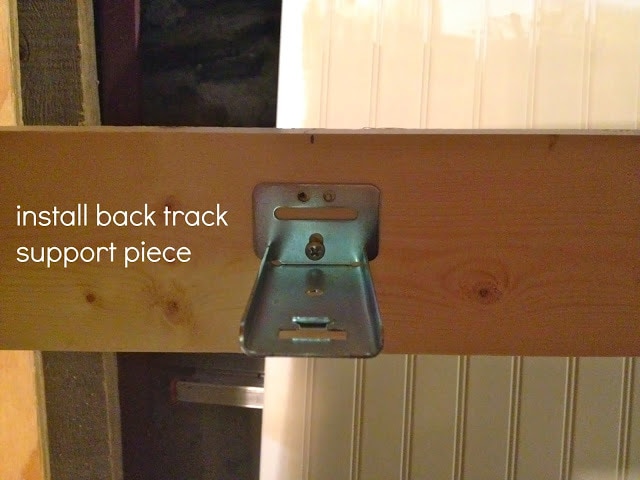
It comes with a drawer member, cabinet member and cabinet back support piece:
11. Install the drawer member onto the drawer bottom at center and flush to the front edge:
12. Determine the middle of the drawer position, mark the 1×4 at back and install the cabinet back support at the correct height:
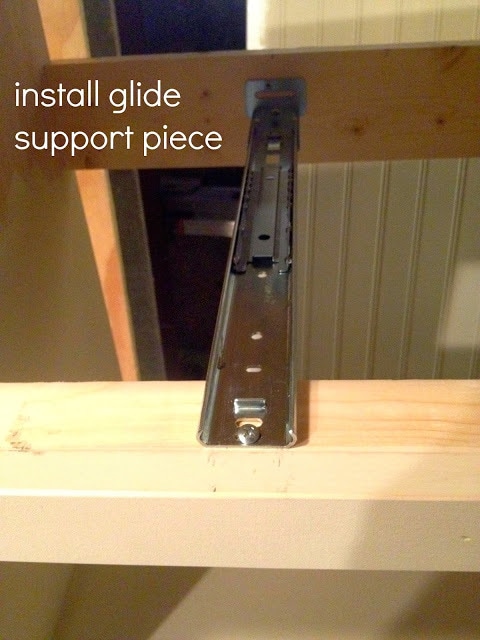
13. Attach the cabinet member glide support piece to the back support and install at front on the 1×2:
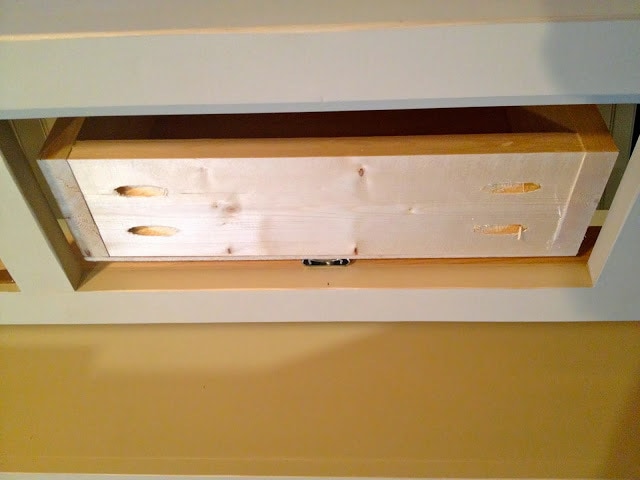
14. Now insert drawer box onto the glide:
Your drawer needs to be flush and even across the front.
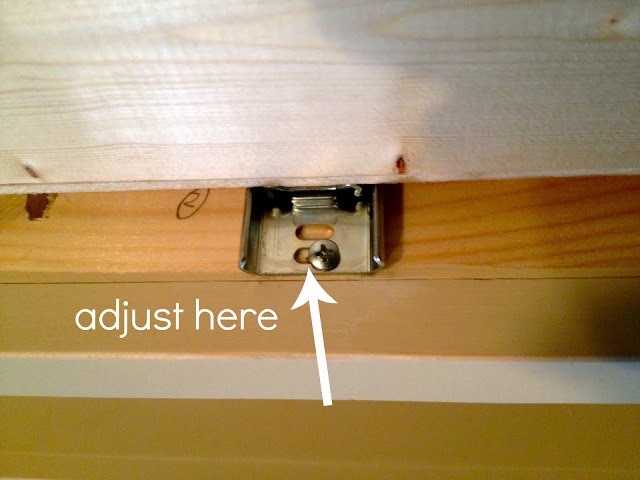
You can adjust the cabinet member slightly for a perfect fit.
15. Position the drawer face with an even 1/8″ all around, mark corners on interior with pencil then remove the entire drawer to attach the face with glue and countersunk screws from the interior:
16. Shelves.
I choose one fixed shelf with 2 dividers.
Prepurchase your baskets and determine the height of the shelf.
Height of shelf – 3/4″ = height of divider. The divider width is equal to your shelf width.
Position the dividers equidistant, attach from underside (predrill, glue and countersink 2″ wood screws) then secure the shelf and finally use finish nails down through the shelf into the dividers for stability.
Lastly add the 1×2 face frame pieces.
The measurement should be height of shelf – 1 1/2″ = vertical face frame
Glue and finish nail into position.
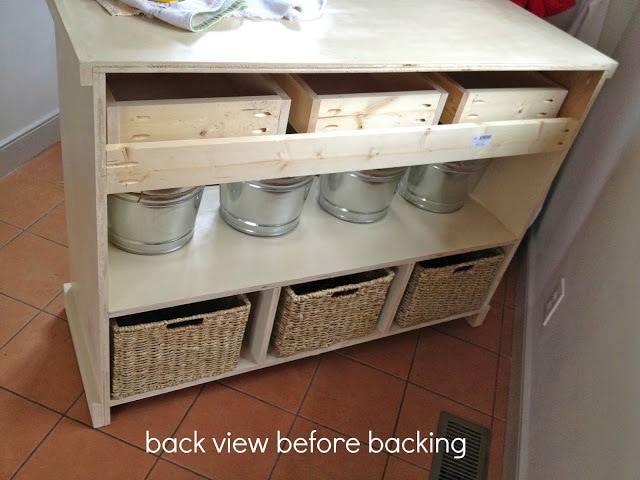
17. Now add the backing material:
It’s best to keep the backing off if possible until the very end, it makes painting and finish work much easier.
Thank you Ana, you always come through for the diy builder.
SHOP THIS POST:
Disclaimer: I was provided product and / or compensation from D.Lawless Hardware for this project post. All thoughts, opinions and creative ideas are my own.








This is a beautiful piece, Jaime! Love it.
I agree it looks just beautiful!! I haven't seen many people use AS chalk paint on new wood pieces like yours. What did you think? Did you prime the wood first?
that is amazing! it is such a perfect entry piece!
Wow Jamie! That is gorgeous!!!
Susan
I was surprised to see you went with Annie Sloan! I'm familiar with your many pieces but haven't always read what you used to finish them, but this is the first time I remember seeing reference to ASCP on your blog. I just bought my very first quart yesterday and both waxes and brush, so I'm hoping for amazing things. For a quart that costs that much, it requires me to choose colors very carefully! So I was just curious, was this one coat or two over the raw wood? I presume you skipped the primer? Curious about your feelings using ASCP and latex. I'm a milk paint fan too.
Yea, I am sure you got to step 7 (realizing you had forgot to pre-drill on the bottom) and originally thought "no problem" My thought would have been, "SERIOUSLY"
?!! I hate it when I do that!
This is an amazing piece good job.
nice job!!!
Hi Jamie…… Haven't commented in a long time but felt I had to when I followed this post from the knock-off decor site!! This is fabulous!!!! It looks to be straight off the pages of a Pottery Barn or Restoration Hdwe. catalog, just brilliant.
The tutorial, as usual, is extremely easy to follow and presents the info in an easy to follow, useable format. You're so good at this! I've bookmarked this project and although I might not use it as an entryway piece I do want to make use of it as a media cabinet for our guest room at the beach cottage.
Thank you so much for sharing this, you and Anna have come up with some awesome plans recently!
I'll be sure to send photos when I get it built but it may be a while, I'm working on replacing all the cabinet doors in my kitchen right now. Sooo many doors, never thought I had enough cabinets but beginning to think I have too many!! hugs, t
Love it! Now I want to build one too 😉
OK, how have I not seen your blog before? I have been building furniture from plans I drew up myself since probably before Ana was born, but when I discovered Knock-off Wood, which was what her old blog was called, I was excited. (I'm currently building a queen size Farmhouse bed, finished with homemade chalk paint in MS Bedford Gray & clear wax). Anyway, before I get side-tracked by your great projects, I just wanted to say, you are hard-core, girl! Love the shot of you using the Kreg rip cut saw guide IN THE SNOW. I have needed to make a few final cuts to finish up my bed, but I have wimped out because its too cold in my garage! OK. I'm shamed into action. Thanks for the much needed kick in the pants. I'm off to see your stuff!
Hi Jamie! I love this console and would like to make it. However, I measured my space and at 4 foot, one end would be at the end of the wall. (The front door swings in towards the console wall.) Do you think that would look okay or should I tailor the console to a small size? Thanks for yours and everyone else's in advance!…..Ruth
I have picked this out several times! I didn't realize it was one of yours. Love it!
Hi Jamie! Good Work.
I am thinking about adapting this for a changing table for my son due in November. Quick question on finishing: Did you use edge banding on the exposed plywood as Ana White's plans indicate? If so, is this paintable?
I have just attached 1×1 trim in the past but this takes longer and with the due date approaching I was thinking banding might be a better option. Thoughts?
Jamie this is absolutely stunning. I love your twist on Ana's original plans this is definitely on my honeydo list.
This is just what I need for my living room. Its beautiful. I have convinced my hubby to build it for me. Can you tell me where you got your baskets from?
Thanks Joanna, the baskets are from Michaels. Good luck with your console build!
What type of wood did you use for the build?
Hi Andrew, for this console I used basic birch plywood and select pine boards straight from Home Depot.
Do you suppose it would be possible to make this double-sided, so that the storage would be accessible from both sides, or would the lack of a back de-stabilize it too much? I’m trying to create a faux foyer, and this would be a nice option for breaking up the space, just not sure whether I’m asking too much of the wood. I’m willing to use somewhat wider boards for the facing (which would then be duplicated on the backside), but I’m kind of a newbie and not confident in my mind’s eye yet.
Hi Kellie, Yes you could definitely make this double sided. Depending on how wide you go would affect the drawer depths if you plan on having drawers on both sides. It’s plenty stable and quite a solid cabinet. If you want added strength (since you’ll be missing the backing to hold it square) I would consider adding a center support divider in the middle shelf. Good luck!