
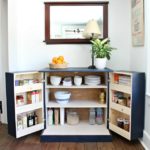
January is definitely the month when getting organized is at the top of everyone’s to-do list. As part of the Build It blog hop, I’ve joined up with eight other DIY bloggers to bring you 9 organization projects you can build.

Below are the projects from each DIY blogger:
Jaime at That’s My Letter (you’re here)
I’m sharing how to add drawer dividers to a pull out cabinet drawer which are sized just right for water bottles but you could easily adjust them to fit your needs.

We had been living with this water bottle mess for over two years now and I decided it was time to tackle this spot. It was like a house of cards and you had to carefully pick out a water bottle without disturbing any others in the pile or it would all come spilling out onto the floor.

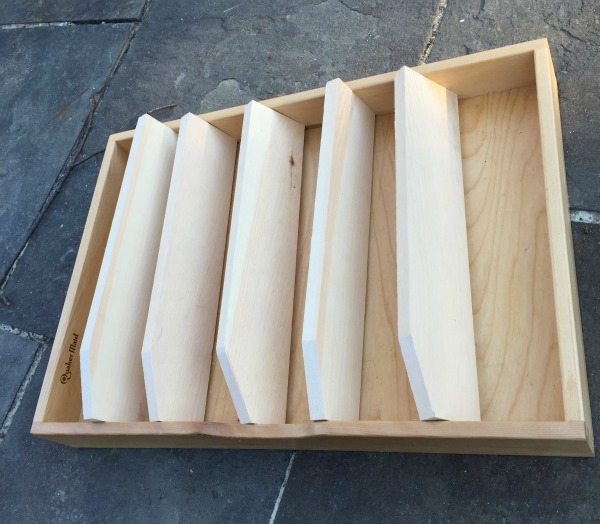
After a little switcheroo whereby I moved the tupperware to the bottom drawer I realized I had enough clearance in the top drawer to allow the water bottles to stand up! Genius I tell you. Now that I had them standing I needed a way to keep them from all falling over on each other every time you pull out the drawer. My solution was to add dividers, like lanes, that keep the water bottles lined up and provide support so they won’t tip over.

Game changer.
To make the dividers I used a 1×4 pine board cut to size, some wood glue and a nail gun.

And now my cabinet drawer is functional and organized! And it’s not completely permanent, should I ever decide to change the drawer back I could easily remove the dividers but I don’t see that happening anytime soon!

Below are the dimensions and cuts I used on the dividers for this drawer. Be sure to measure your drawer first as all cabinets vary in size. Read through all steps below before beginning.

Cut the dividers to the interior length of the drawer.

The dividers are tapered at front to match up with the drawer front, you can use a jig saw or miter saw to make the taper. Above are dimensions for the side dividers.

The center divider has a slightly deeper taper to meet up with the cut out pull portion of the drawer. Again measure your drawer and adjust the dimensions accordingly.
Once all dividers are cut be sure to do a test fit then sand well and be sure to seal with clear satin polyureathane, two coats sanding in between. This will protect the wood from water damage and finger prints.
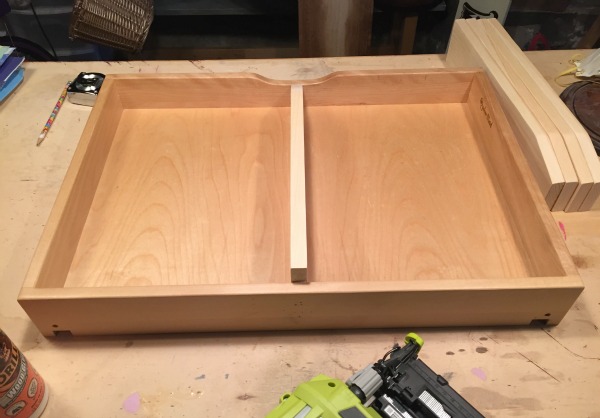
Being by installing the center divider first using wood glue and 1 1/4″ finish nails. Then work your way out to the side dividers, see my sketch below for spacing.

My dividers have about 3 3/8″ between each lane although some water bottles are thicker than others. Just be sure you have equal spacing and enough spacing to fit your water bottles.

Thank you for stopping by to see my organization challenge build.
To see previous challenge projects from this build group check out the Repurpose It Challenge:

And the One Board Challenge here:

I’m linking up to:


Well this is pretty much brilliant! I really really really needed this when I had roommates 🙂
Jaime, I think EVERYONE needs this in their lives! Bravo!
How in the world can something so simplistic in nature become so massive? This improvement needs to hop on into my cluttery kitchen pronto! Seriously amazing quality build, Jaime!
I must applaud this awesome build too, cause it is genius! I have a drawer with the exact same problem, except ours keep falling in the back and then we can't close the drawer! I seriously love this!!
Part of my kitchen upgrades: add drawers like yours to my lower cabinets. Thanks for the idea on what to do once I need to organize them further!
I don't think I have that many bottles in my home but I would imagine that this would be a great storage solution for cups and other pieces of equipment in the kitchen too!
Great article! Loved it! Appreciate the patience in framing such determined content. Thanks for the time and effort 🙂 towelroot