• Home
  • Blog
  • About
  • Contact
    • Disclosure
    • Privacy Policy
  • SHOP
  • Widget area for main menu

    • Email
    • Facebook
    • Instagram
    • Pinterest
    • Twitter
    • YouTube
  • Skip to primary navigation
  • Skip to main content
  • Skip to primary sidebar

Jaime Costiglio

build - paint - sew

  • BUILD
    • BEDS
    • BENCHES
    • DESKS
    • DRESSERS
    • GAMES & TOYS
    • SCRAP WOOD
    • SHELVES
    • STORAGE
    • TABLES
  • TOOLS
  • PAINT
    • CRAFTS
    • FURNITURE
    • HOME DECOR
  • SEW
    • GIFTS
    • HOME DECOR
    • POUCHES
  • HANDBUILT HOLIDAY
    • 2021
    • 2019
    • 2018
    • 2017
    • 2016
    • 2015
    • 2014
    • 2013
  • GIFTS
    • BABIES
    • KIDS
    • FOR HER
    • FOR HIM
    • TEACHERS
    • WEDDINGS
  • SEASONAL
    • 4TH OF JULY
    • FALL
    • HALLOWEEN
    • CHRISTMAS
    • SUMMER
    • SPRING
    • ST. PATRICK’S DAY
    • THANKSGIVING
    • VALENTINE’S DAY
    • WINTER
  • SALTBOX PROJECT
    • BATHROOMS
    • DINING ROOM
    • EXTERIOR
    • FAMILY ROOM
    • FOYER / MUDROOM
    • KIDS BEDROOMS
    • KITCHEN
    • LIVING ROOM
    • MASTER BEDROOM
    • PLAYROOM
  • SCROLL SAW

DIY Modern Tree with Ornaments

November 24, 2015

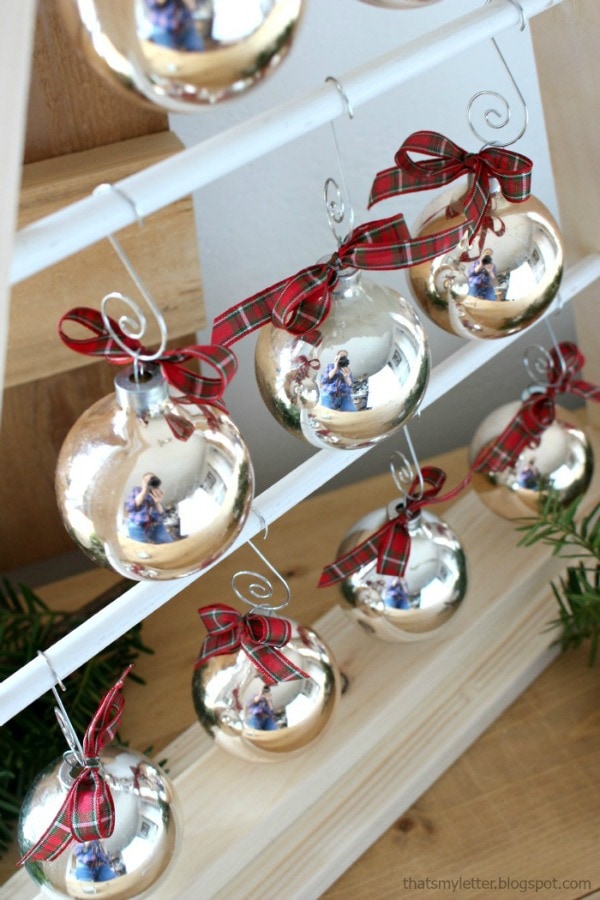
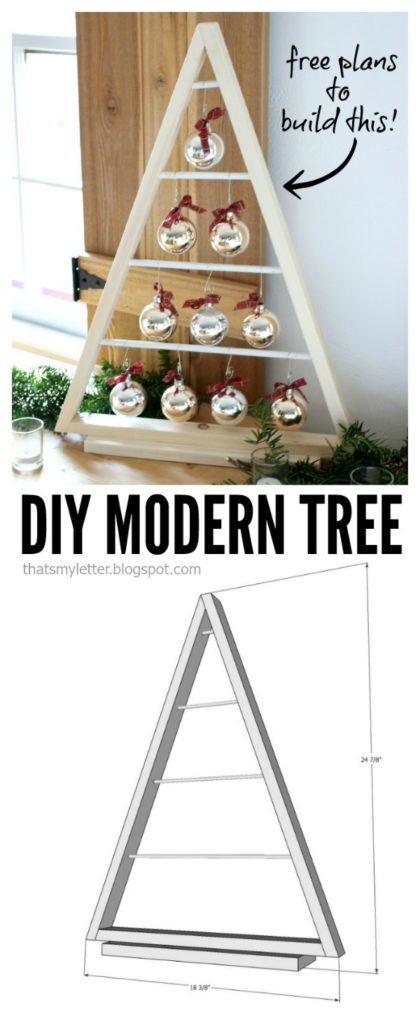
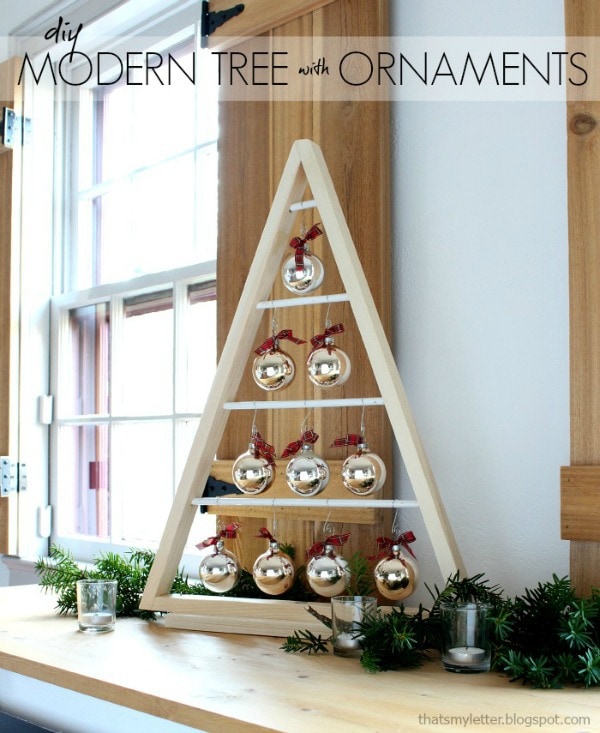
The holiday decorating is in full swing friends and today I’m sharing a modern tree.  This triangle shape makes a great tree alternative if you’re tight on space or just want a little something for the counter.

diy wood tree with ornaments

A DIY tutorial to make a modern tree for hanging ornaments. Build a tabletop size modern tree and hang your favorite ornaments.

I’ve joined in as part of A Handmade Holiday series over at Classy Clutter.  All month long Mallory and Savannah have been posting amazing decorating ideas, be sure to check out all the holiday tutorials!
A Handmade Holiday series 2015
This modern tree is a basic build that does involve some beveled cuts so you will need a miter saw.  As always be careful with power tools and follow all safety precautions.
wood tree shape with hanging ornaments

Tutorial

Below you will find the step by step instructions including cut lists.  Be sure to stop over at Classy Clutter for more finished product photos and lots more project ideas.
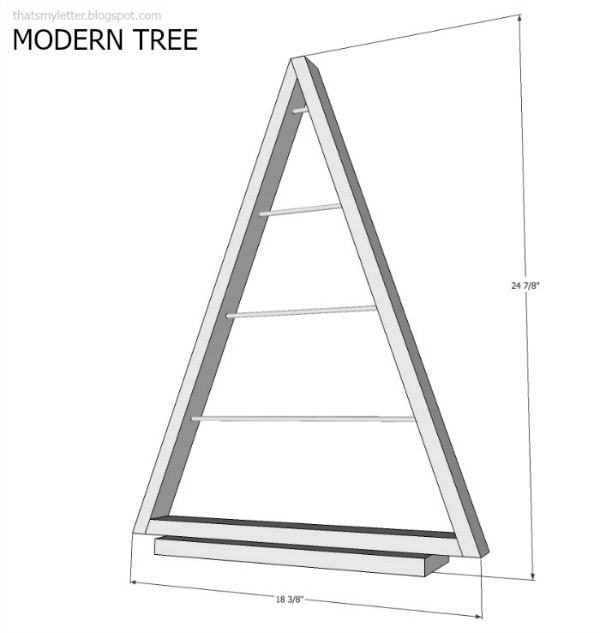
modern tree dimensions
Click here for printable PDF version of the plans.

Supplies:                                                          

  • 1 – 1x2x6 pine board
  • 1 – 1×4 scrap wood @ 14”l
  • ¼” wood dowel @ 48″
  • 1 ¼” finish nails
  • 1 ¼” wood screws
  • wood glue
tabletop tree base

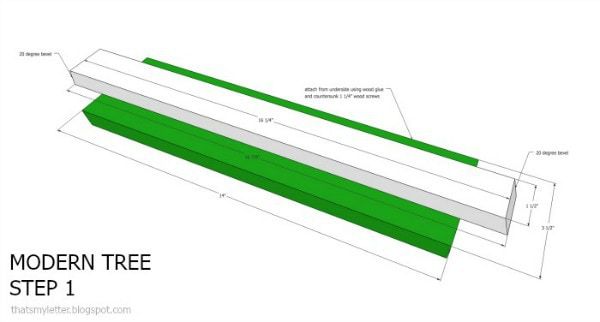
Step 1:

Attach the base to the underside of the bottom tree piece using wood glue and countersunk 1 ¼” wood screws.

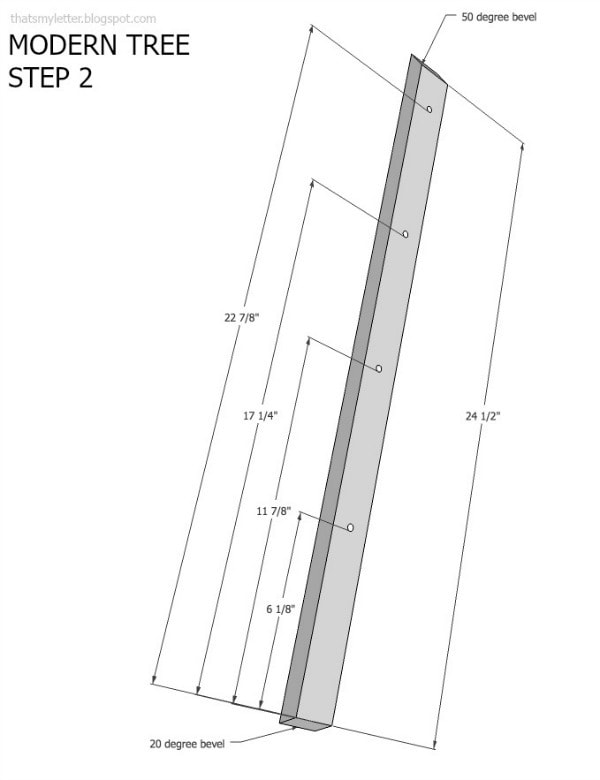
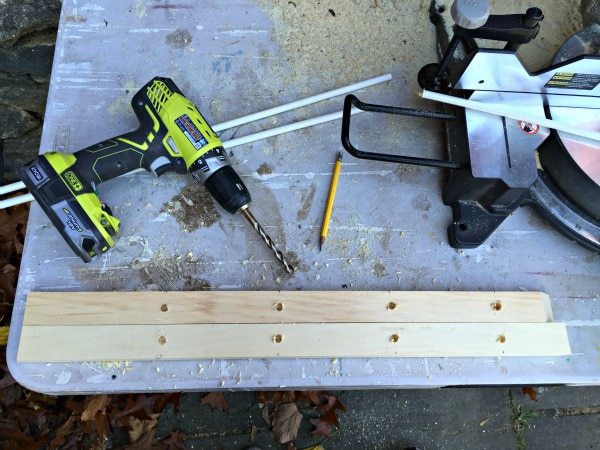
step 2 marked holes for dowels
 
predrill holes for dowels
In Step 2 you will predrill holes for the dowels at equally marked intervals.  Place both sides of the tree next to each other to be sure holes match up.
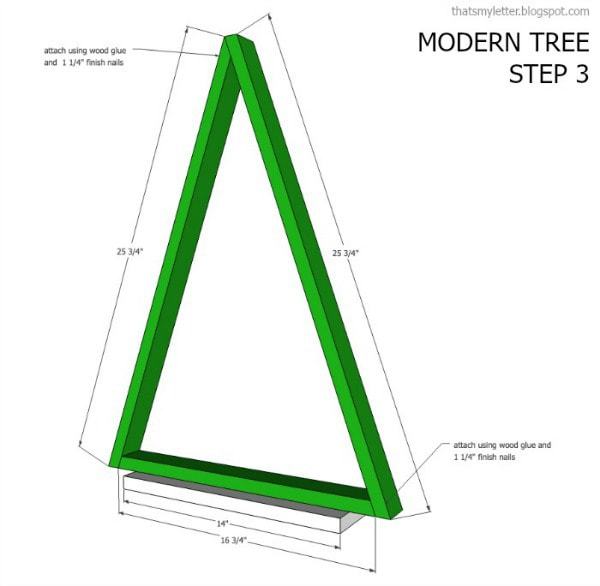
modern tree step 3

Step 3:

Construct the tree using wood glue and 1 ¼” finish nails.**Consider inserting dowels before assembling sides. Use clamps to keep the shape secure until glue dries.
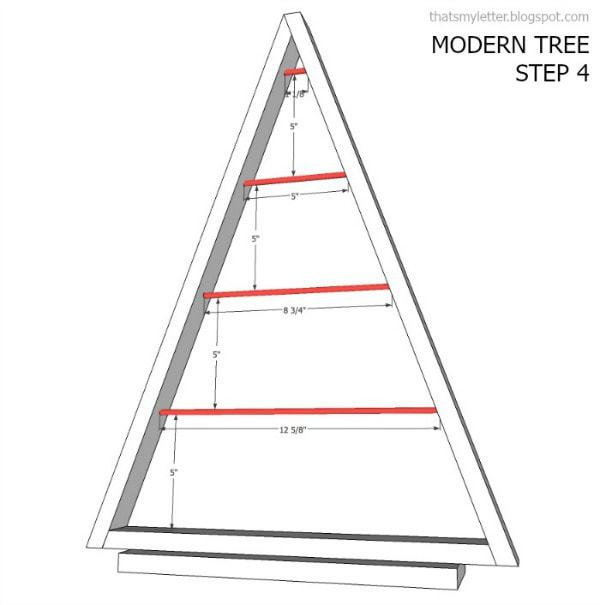
modern tree step 4
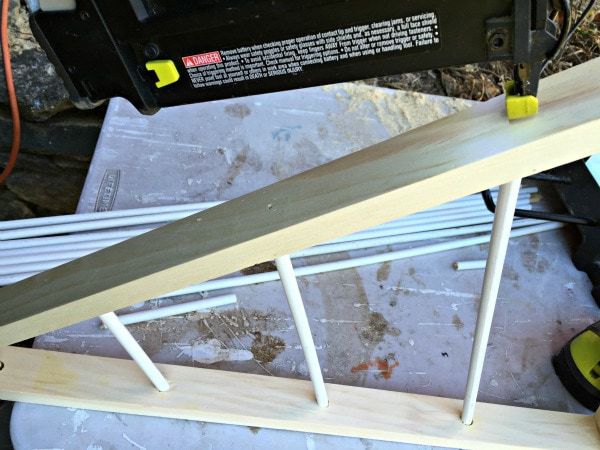
secure dowels with nail gun
Secure the dowels to keep from spinning using a 1 1/4″ finish nail from the exterior.  Fill any nail holes with wood putty and sand smooth.  Then add your ornaments!

Thanks for joining me for this modern tree project.  Please leave any questions in the comments below and be sure to follow me on social media for sneak peeks, tools and project inspiration:
Instagram / Pinterest / Facebook / Youtube / Twitter

diy modern tree free plans

You may also like...

  • Cross Stitch Monogram Ornament PlacecardCross Stitch Monogram Ornament Placecard
  • DIY Tree Card HolderDIY Tree Card Holder
  • DIY Letters to Santa MailboxDIY Letters to Santa Mailbox
  • DIY Painted Pipe Base Wood DeskDIY Painted Pipe Base Wood Desk
Share this post:

Filed Under: CHRISTMAS, CRAFTS, DIY, HOME DECOR, SEASONAL5 Comments

Reader Interactions

Comments

  1. Lorenza says

    November 24, 2015 at 7:59 PM

    Very beautiful!

    Reply
  2. Kim @ NewlyWoodwards says

    December 1, 2015 at 6:01 PM

    Jaime – this is perfection! It would truly be perfect in our barn if I can get my act together and try it. Thanks for sharing!

    Reply
  3. Gene Schmidt says

    April 19, 2019 at 3:15 PM

    If you only drill 1/2 way through sides, you wouldn’t see the dowel ends. Would make a nicer look on sides. This is a really beautiful project here. One question is, where did you get the hangers?

    Reply
    • Iris says

      November 16, 2019 at 10:45 AM

      You can buy them at Pottery Barn

      Reply

Leave a Reply Cancel reply

Your email address will not be published. Required fields are marked *

Primary Sidebar

Hi! I’m Jaime

Jaime Costiglio

Hello!

Thank you for stopping by.
Join me for lots of DIY.

Read more

Get new posts via email

Handbuilt Holiday: Gift Project Plans

handbuilt holiday gift project plans

Collection of DIY gift project plans to build.

The Home Depot Tool Prospective

THD Prospective

Tools to consider for the DIYer.

Archives

The Home Depot Logo
Copyright © 2023 Jaime Costiglio · Custom site by Moonsteam Design

Privacy Policy