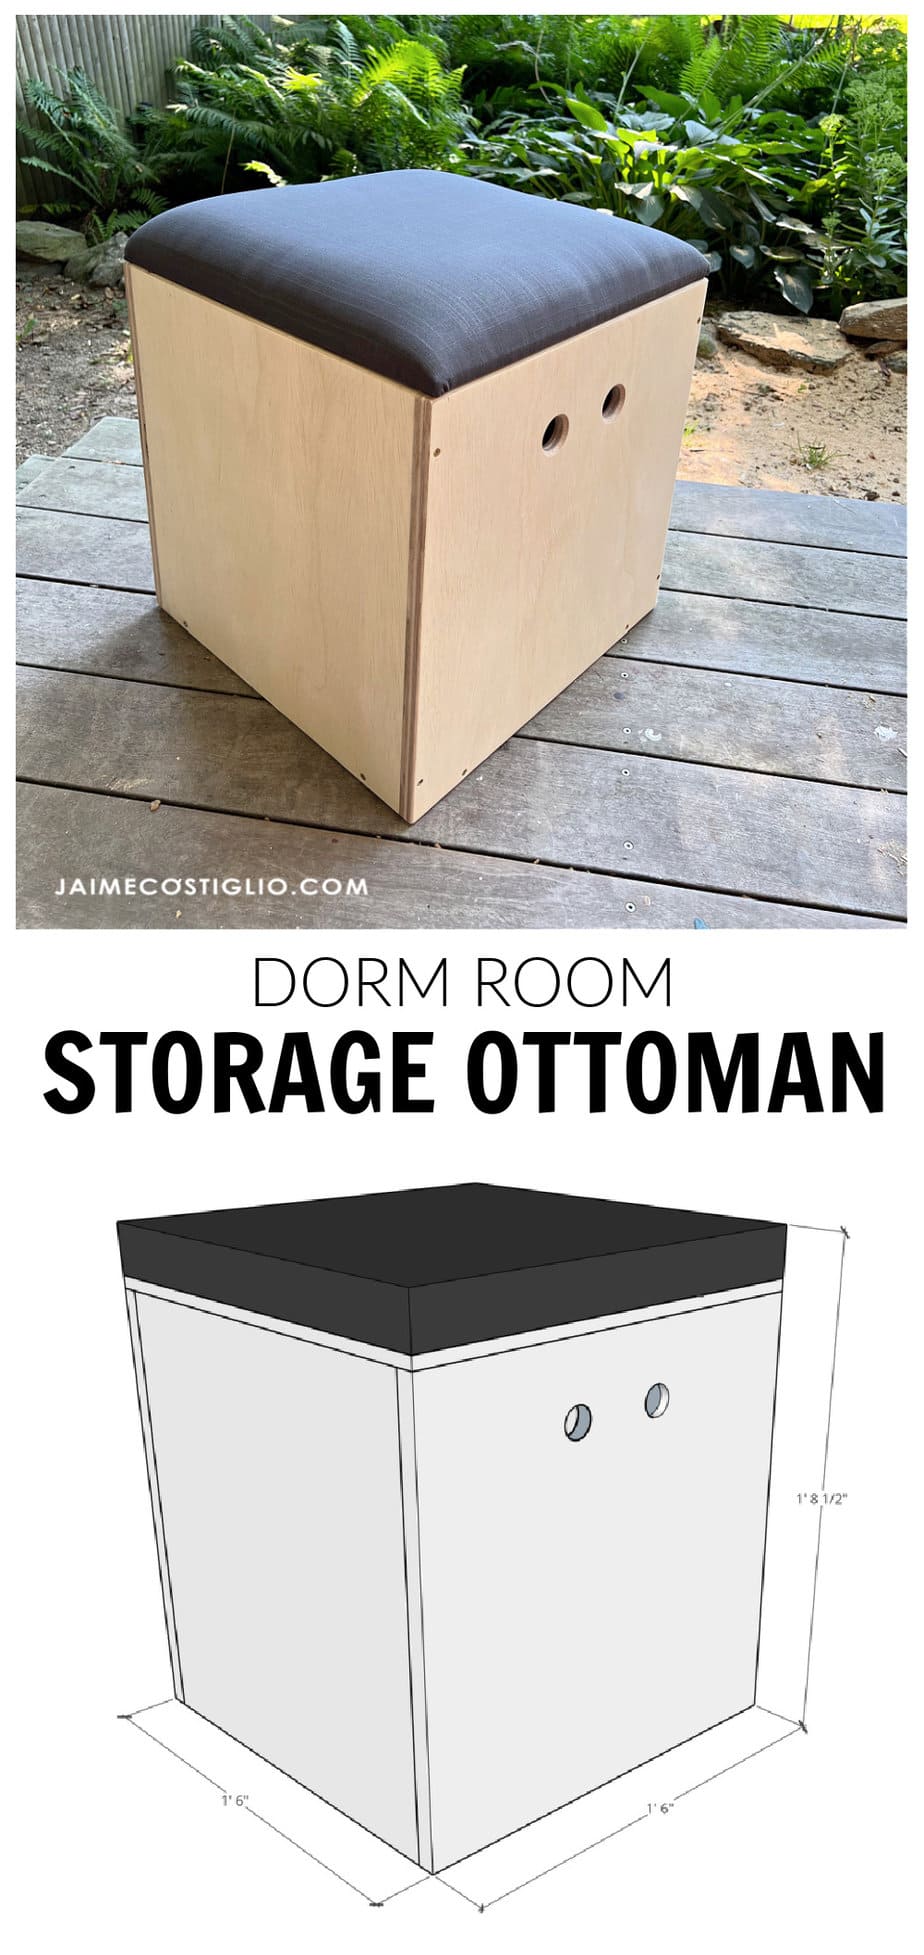
Every new college student needs this dorm room storage ottoman. It’s a perfect, simple build that has so much functionality. Let me show you how to make it down below.

A DIY tutorial to build a dorm room storage ottoman. Make this simple cube with tons of hidden storage perfect for college dorm life.
Do you have a college bound teenager in your life? Or maybe a playroom that needs hidden storage and extra seating? This storage ottoman is a great solution that’s quick and easy to build. Just look at all that storage space inside!

Storage Ottoman:
- tons of hidden storage
- extra seat
- step stool into lofted beds

Although we’re using this ottoman in my daughters dorm room this would be useful in many spaces:
- kids play room area
- apartment living room
- bedroom
- office space

Click here for printable PDF plans.
Tools:
- table saw (or miter saw)
- measuring tape
- 1 1/4″ forstner bit
- drill
- 2″ spax screws
- 1 1/4″ spax screws
- wood glue
- staple gun
- staples
- 2″ foam
- batting
- plastic feet
Be sure to read down below for building process tips and photos. Get the plans to make this ottoman here.

Finger Holds:
Before you begin assembling the ottoman you’ll want to drill a couple holes for the finger holds. This makes it easier to carry and move about plus they are flush with the plywood versus adding a handle or hardware. Above I’m using a 1 1/4″ forstner bit which makes a much cleaner cut than a spade bit.

Foam Seat Cushion:
For the ottoman top I used 2″ foam I had on hand. This makes a nice cushiony seat. You can cut it to size using a straight edge and a sharp utility knife.

Seat Cushion Layers:
To make the cushion top lay down your fabric first (right side down) then batting then foam then plywood. The batting is essential to soften the sharp edge of the foam and make that professional looking cushion top.

To secure the cushion layers to the plywood I used a pneumatic staple gun. Start in the middle of one side and then go to the opposing side working around the edges always from the middle out towards the corners. Trim off any excess fabric and batting and then attach the center plywood inset piece to hide the raw edges and make a secure fit into the ottoman box portion.

Lastly I added plastic feet to the underside so the plywood doesn’t get snagged on any carpet or rug. The feet also lift the ottoman off the floor ever so slightly for a finished look.
Thanks for joining me for this dorm room storage ottoman project. Please leave any questions in the comments below and be sure to follow me on social media for sneak peeks, tools and project inspiration:


Leave a Reply