
It’s Friday and time for another Handbuilt Holiday project! Today Ana White and I are sharing a gift you can build that’s truly useful and beautiful at the same time, a changing screen with mirrors.

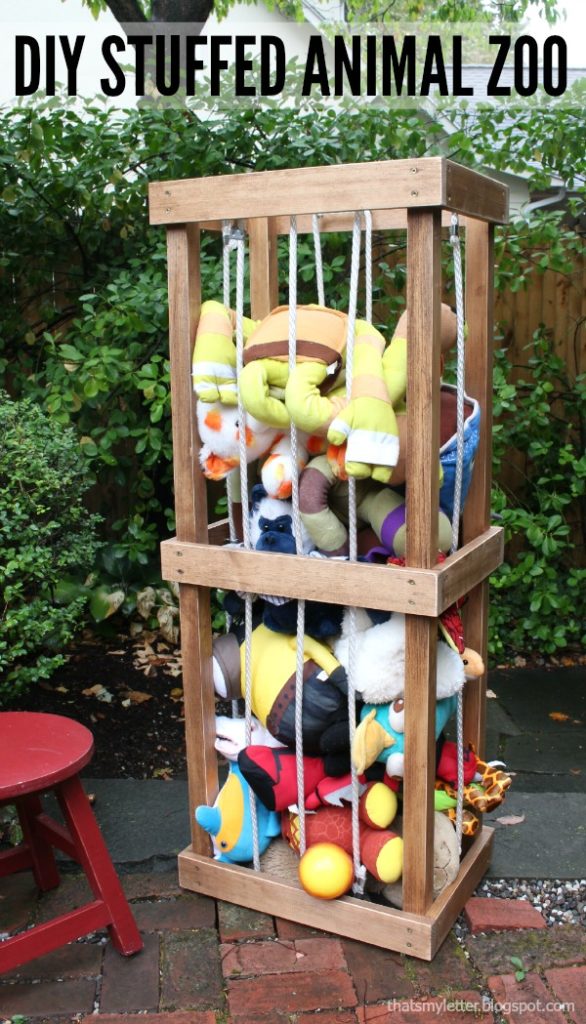
The changing screen is the second build for this year’s Handbuilt Holiday series, last week we shared the stuffed animal zoo project here:
And surprise!
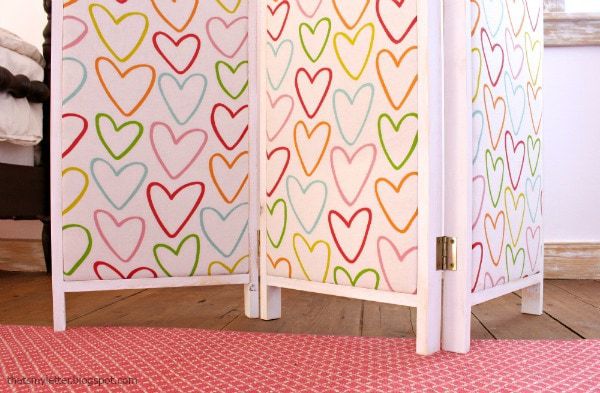
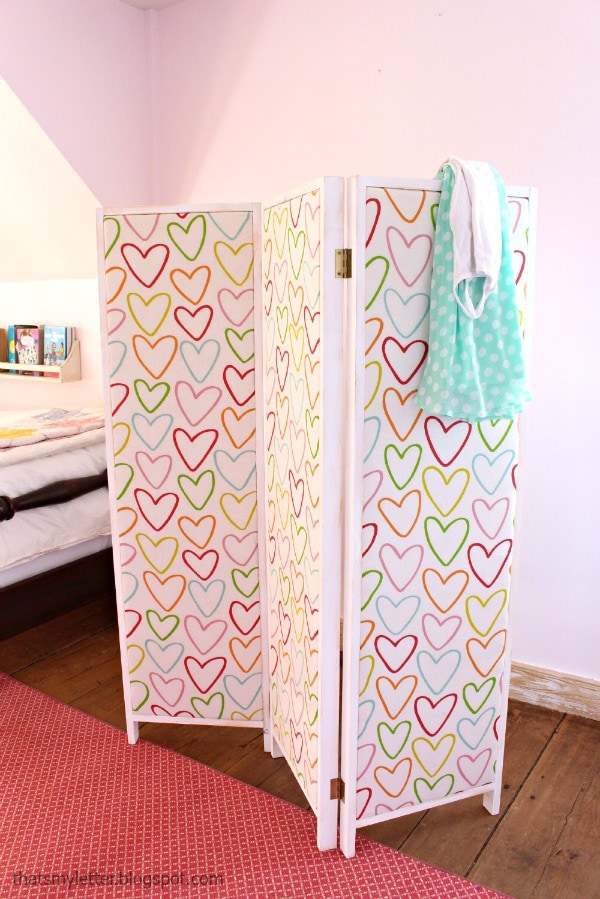
This changing screen has mirrors on the backside, a bonus feature than anyone is sure to love!

Ana has the plans here. It’s truly a fairly simple build and you can easily customize to fit your mirrors.
We were inspired by Land of Nod’s changing screen:
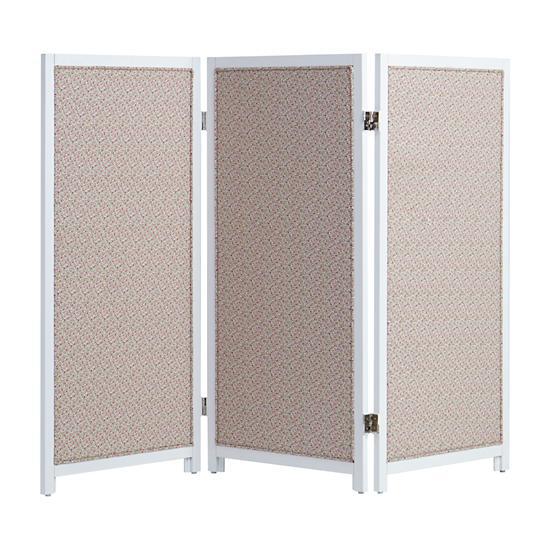
Their version costs $179 plus shipping – yikes!! You can build your own version with your own fabric of choice for about $65. And that’s why we DIY folks.
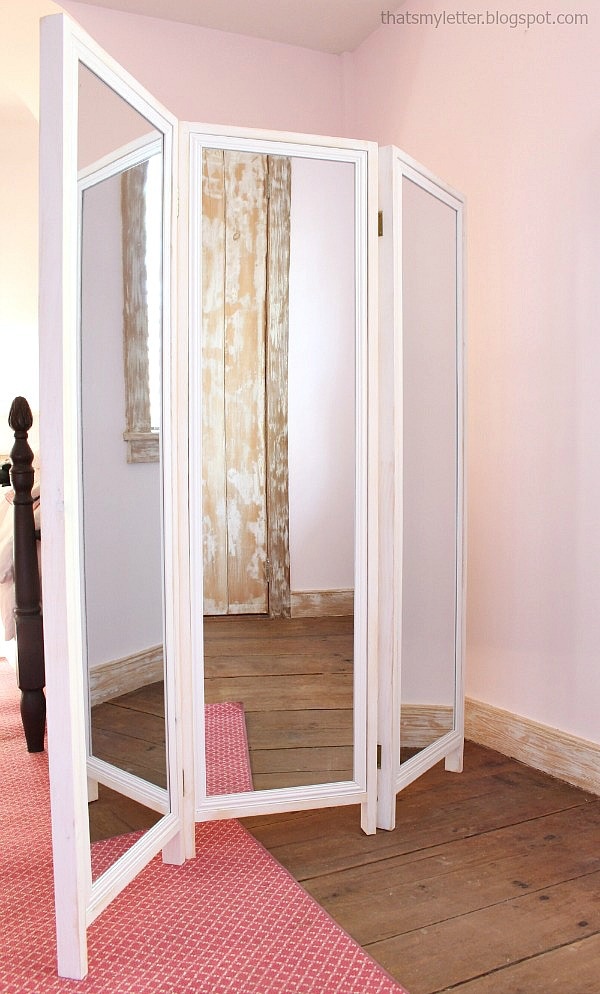
Hello so many mirrors! (That picture was extremely hard to get without getting myself in it!)
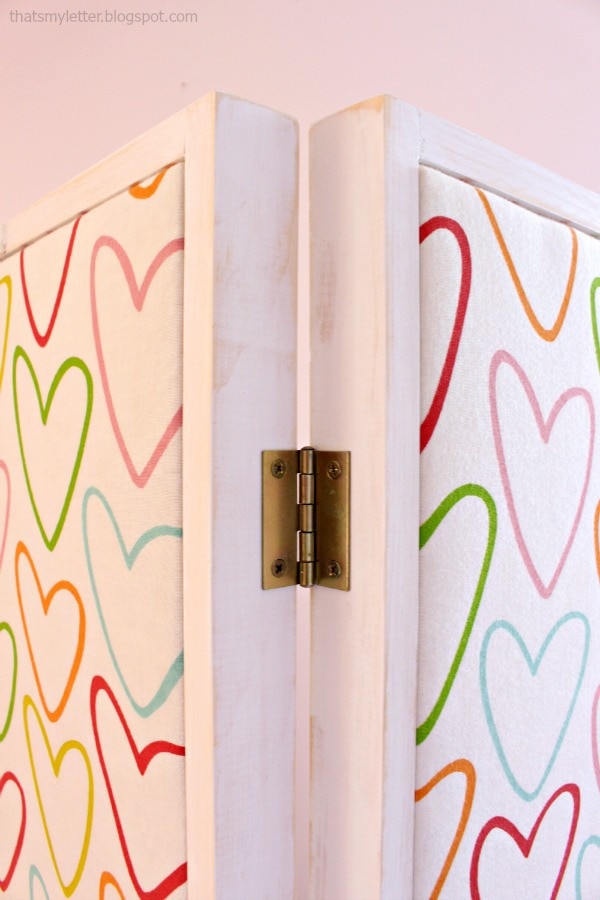
The only thing that would make this changing screen better would be double hinges. I used regular hinges because they are off-the-shelf and readily available. Unfortunately double hinges aren’t available at my local hardware stores but if you’re thinking about making this changing screen I highly suggest considering double hinges like this:
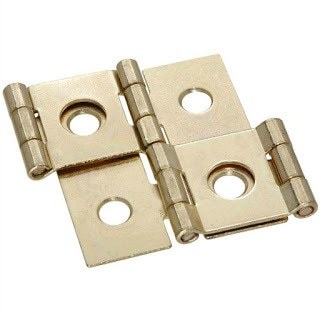
Double hinges will give your changing screen tons of flexibility allowing the panels to swing in both directions but obviously they’re not a necessity, just a bonus.

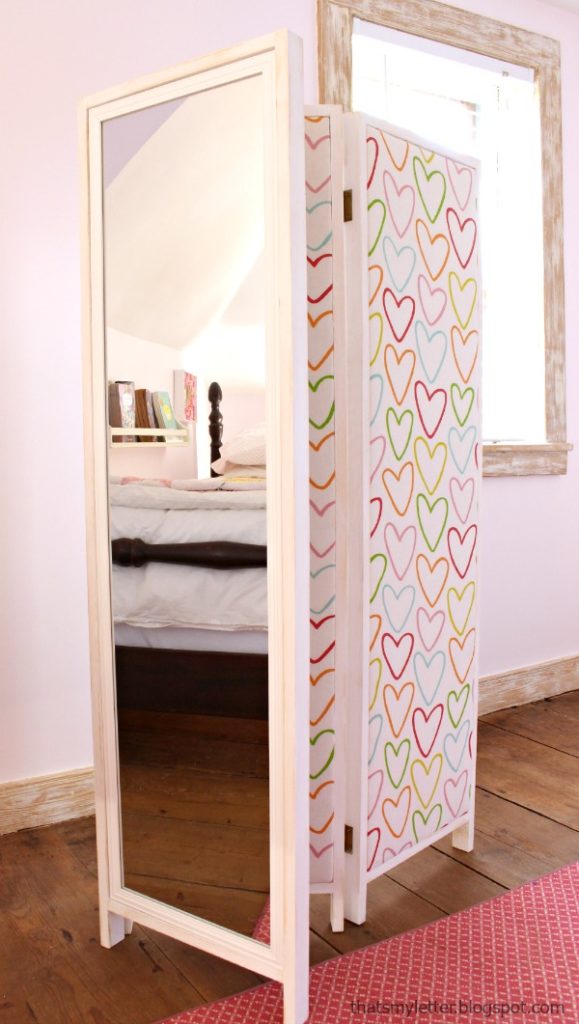
I used a thin cotton fabric with hearts (an old Ikea duvet cover) but you could use nearly any fabric. Take into consideration your fabrics’ thickness when building the inner frame to allow for any extra bulk.
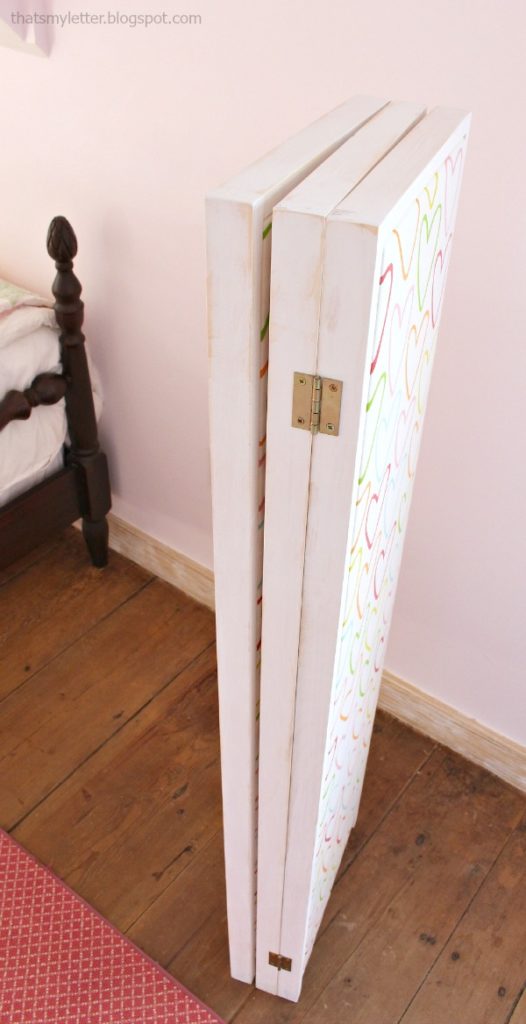
The changing screen also folds up to easily move, make room for play space or relocate:
My girls are in heaven with their new changing screen. It makes an ideal gift especially for shared bedroom situations when you want a little privacy!
How to build a changing screen with mirrors:
Follow Ana’s plans here and refer to my steps below for additional building details.
Ana’s plans call for all 1×2 boards but you will see 1×3 boards in my build, I like to use what I have on hand so as not to waste scraps that’s all.
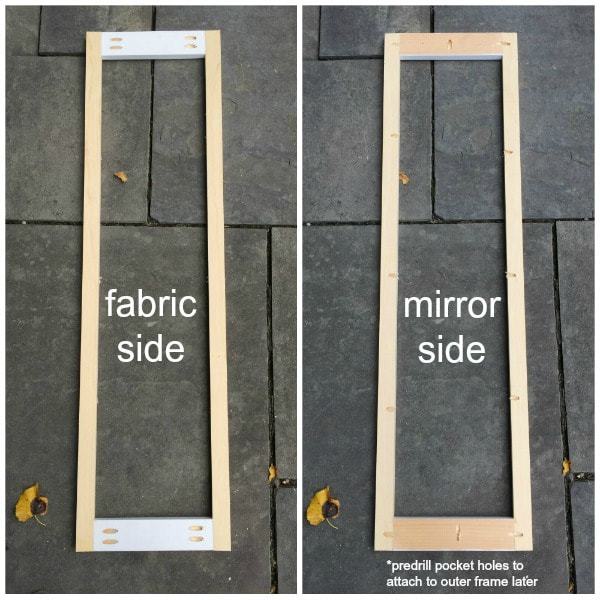
Inner frames: Above the inner frames are assembled using pocket holes on the fabric side. On the opposite side (mirror side) predrill pocket holes to attach the inner frame to the outer frame later.
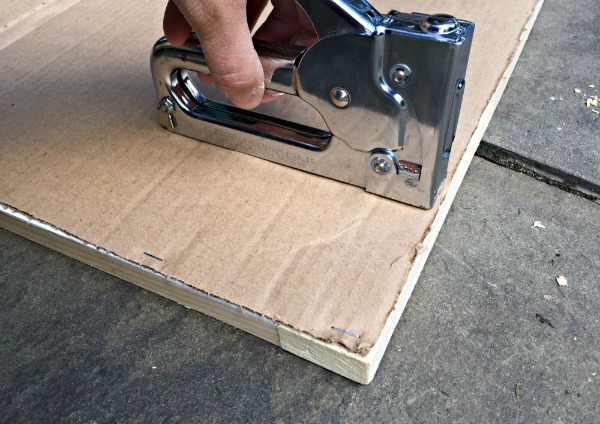
Secure cardboard using a staple gun to the inner frame to provide a stable backing for the fabric and batting.
**Optional: I used 1/4″ plywood backing versus the cardboard. It’s not necessary but I had it on hand and felt like it would add stability to the mirrors.
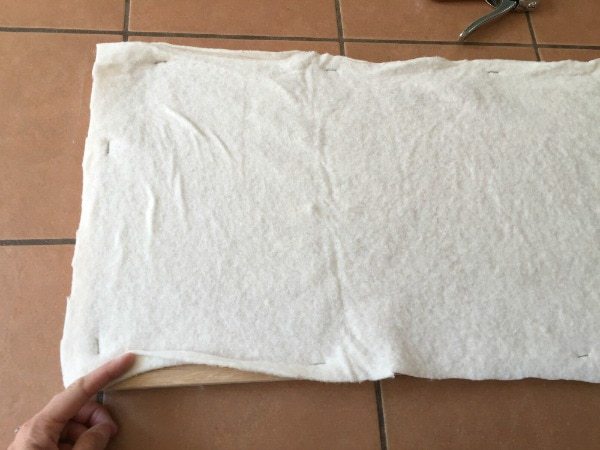
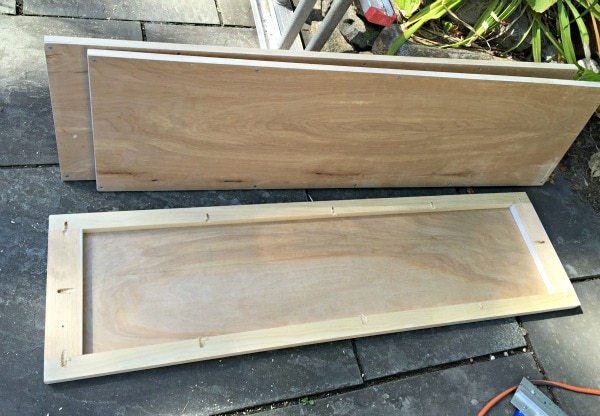
Staple batting to the inner frame allowing for a small overhang.

Place fabric right side down then inner frame with batting already in place. Pull fabric up and onto frame then staple in place.
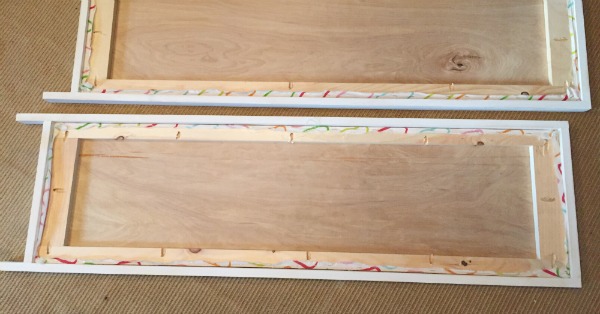
Attach inner frame to outer frame keeping it flush to the front (good side) which leaves space for the mirror. I used pocket holes and the screws went easily through my fabric but you could also use a nailer from the outside.
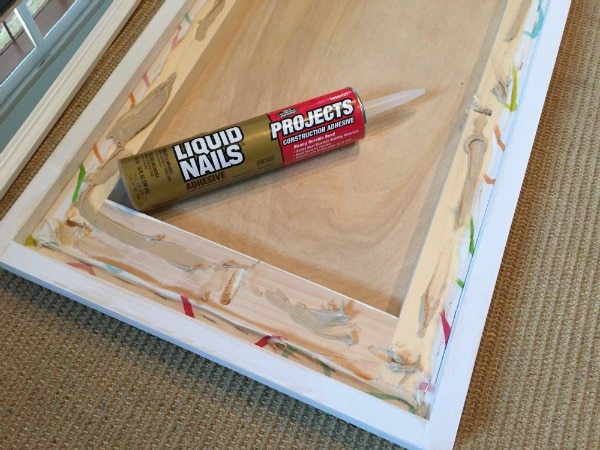
Apply construction adhesive to the inner frame.
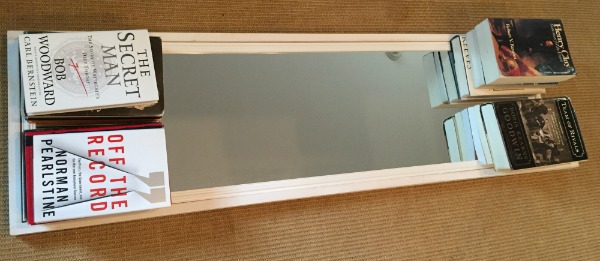
Lay mirror in place and weigh down with heavy books while adhesive dries.
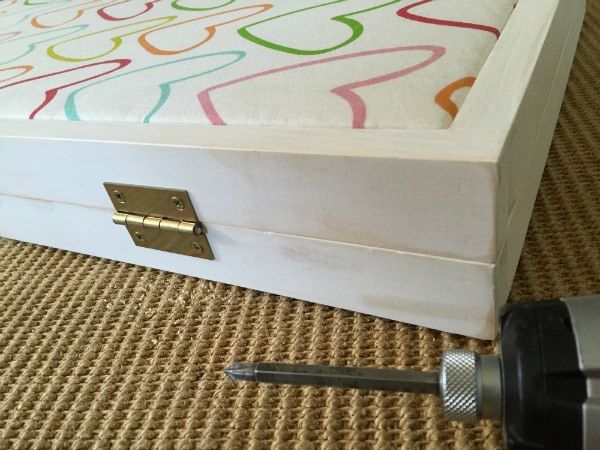
Attach hinges keeping like sides together.
Find all of the Handbuilt Holiday projects from the previous two years here:
I’m linking up to:

This is awesome!! I love room dividers! How creative to use mirrors to make one!!
amali
This is darn cute. Trying out with funky prints will be interesting. Kids will love it totally.